Jira and Confluence are powerful Atlassian tools that simplify project management and boost collaboration. Confluence helps teams collect, organize, and share knowledge effectively, while Jira streamlines communication through clear, trackable tickets. Together, they create harmony between documentation and teamwork. In this guide, you’ll learn how to access Confluence and Jira for free and start improving your project efficiency right away.
Access Confluence and Jira!
With step-by-step instructions, you get the opportunity to have full access to both systems. Especially if you can otherwise only access them at work, having your own access gives you the opportunity to explore everything yourself. If you are just learning how to use Jira and Confluence, you have your own instance. If you work independently, you can use the free access to create a personal space in which you work.
Permanently free
With the free access, Atlassian offers you full access to most of the functions. Many software packages only allow limited use. Atlassian takes a different approach with Jira and Confluence. The paid version has a lot on top. The free version offers a wide range of tools, especially if you use the software alone.
Registration
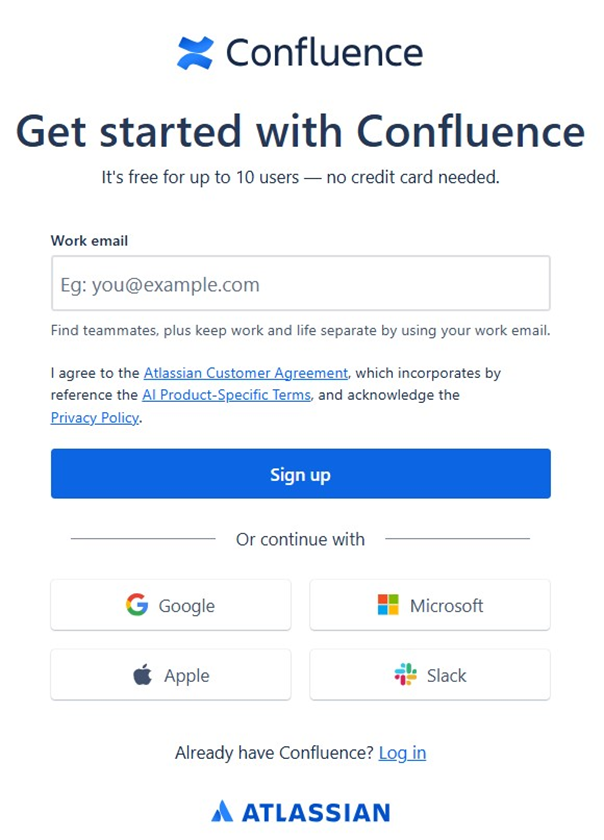
Go to atlassian.com (opens in a new tab) and click on the ‘Get it free’, ‘Get Confluence free” or ‘Get started’ button:
In the next step, you can choose how you want to register. You can choose to log in with your email address or via different accounts. The possible accounts are:
- Google,
- Microsoft,
- Apple or
- Slack.
If you are logged in with one of these accounts, you can simply register with it.
In the next step, you will receive an email with which you can confirm your access.
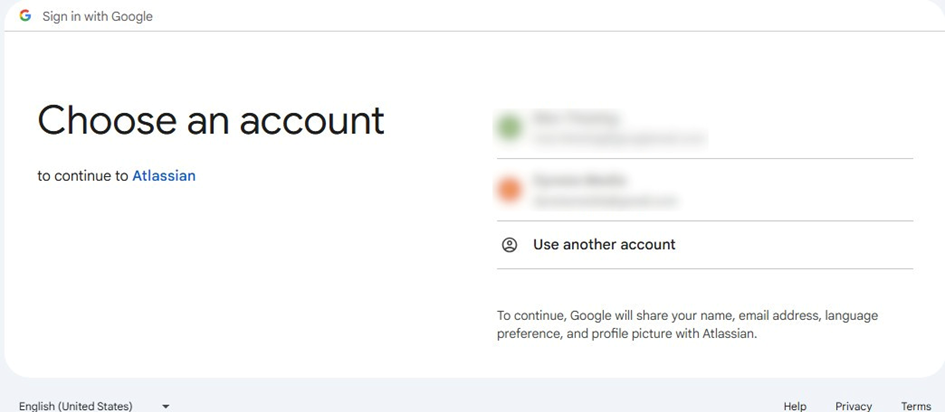
Access with Google
To show an example, registration with Google looks like this. You select one or more accounts:
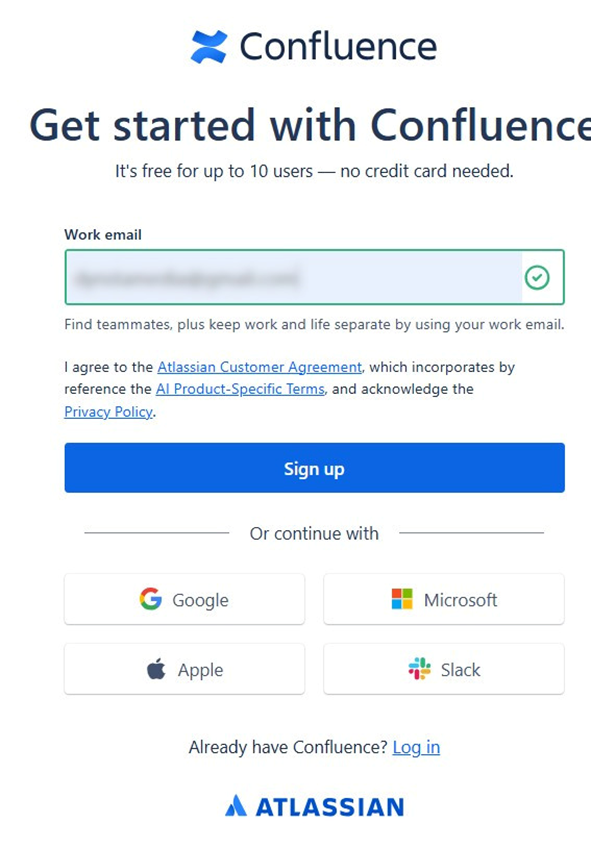
Access with email address
To access with the email address, you simply must enter the desired email address and click on ‘Sign up’:
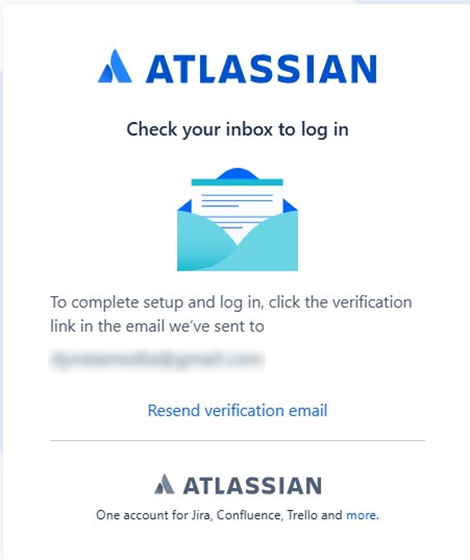
In the next step, you will receive an access code for your email address:
The email will then look like this:
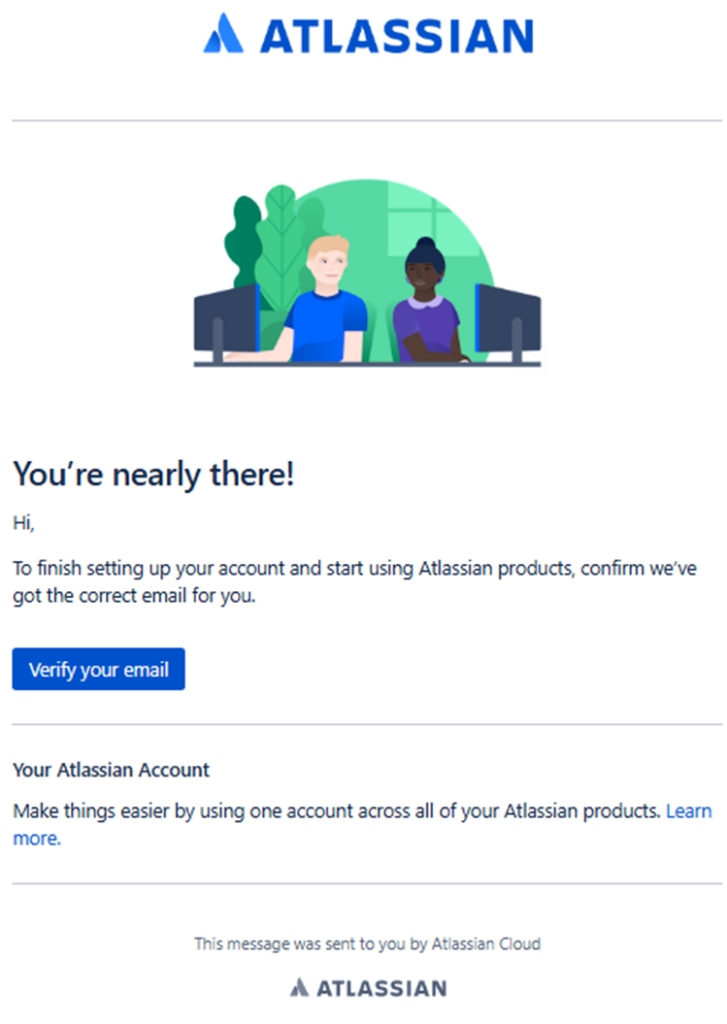
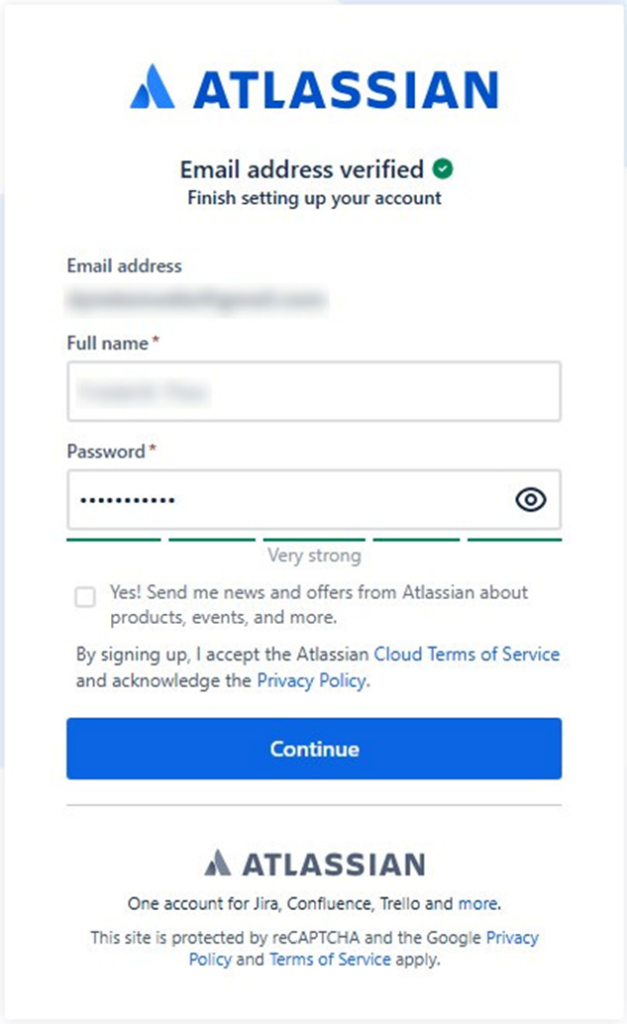
If you click on ‘Verify your email’, in the next step you must enter your name and a password:
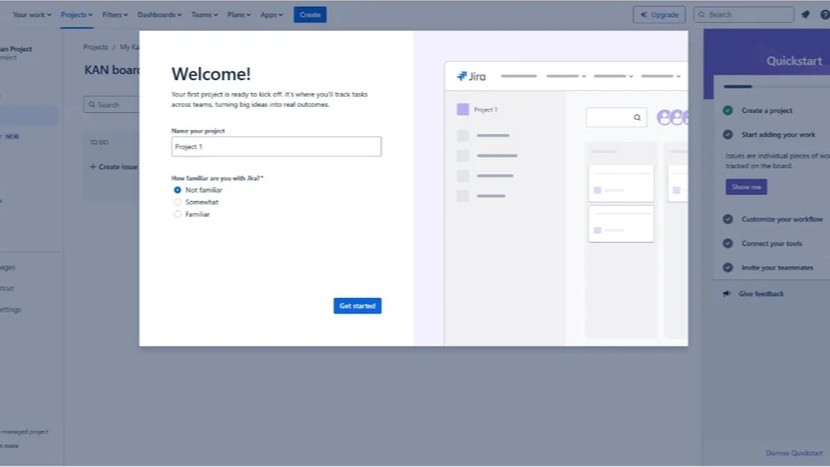
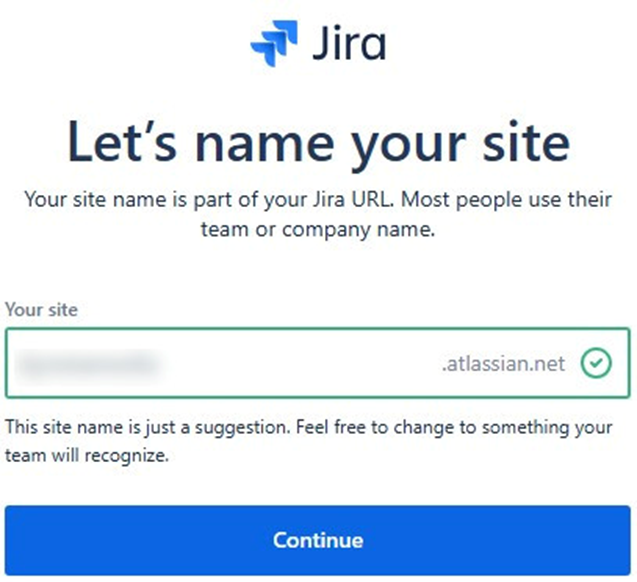
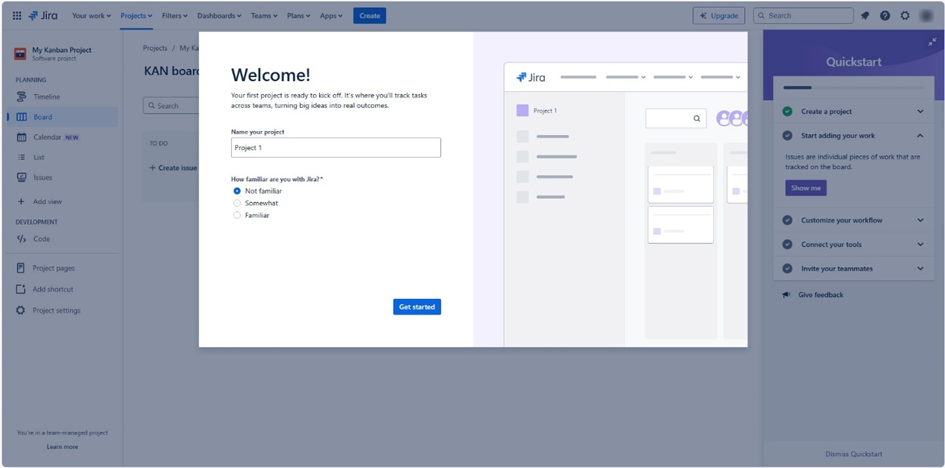
In the last step, you can name your first project and indicate how much experience you already have:
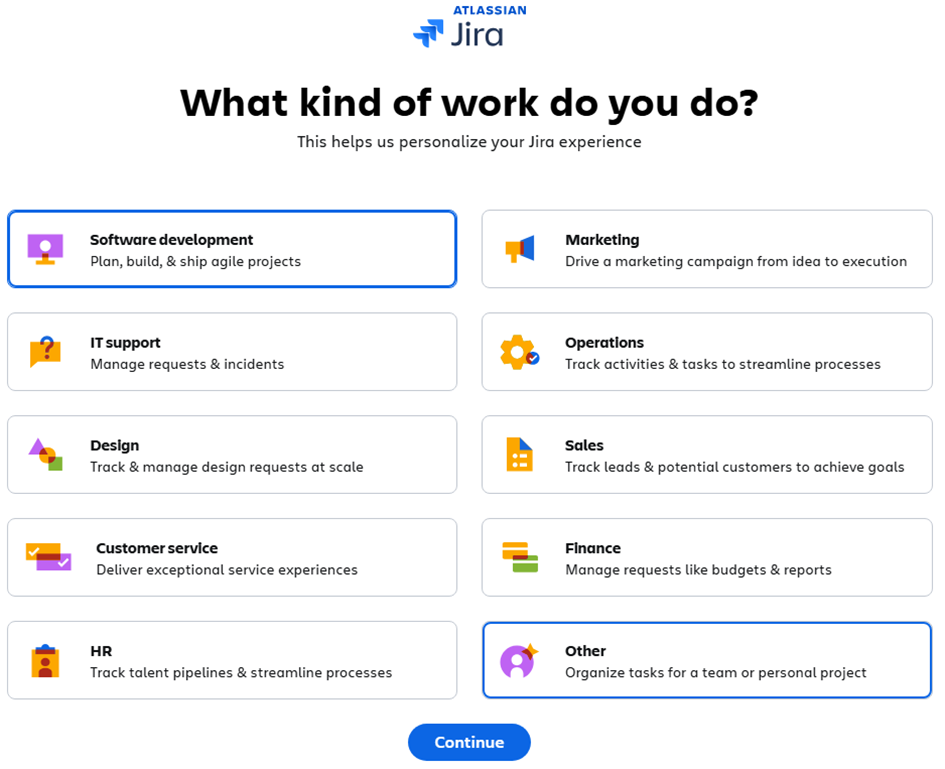
Next, you choose what you want to use Confluence and Jira for. Choose what suits you best. In this example, I chose ‚Software development‘:
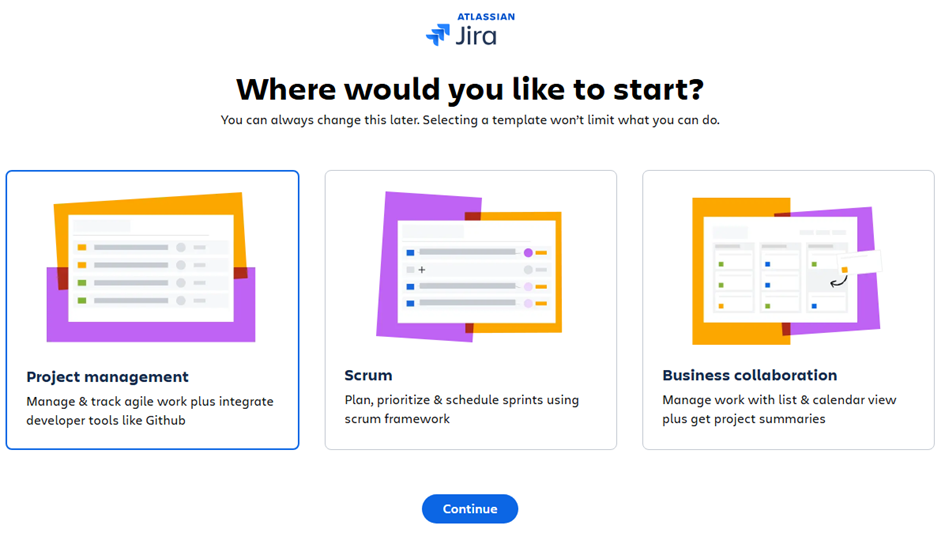
Next, you choose what you want to start with. No matter what you choose, all functions remain open and available:
In the last step, you can name your first project and indicate how much experience you already have:
You now have full access to Jira and Confluence:

Conclusion
From here on, you can realize your potential in Confluence and Jira. Confluence and Jira enable you to carry out your projects efficiently and successfully. Have fun!
What’s Next?!
If learning how to access Confluence and Jira inspired you to explore their potential, don’t stop here. In my next article, Comparison of Confluence & Jira: A Comprehensive Guide, I take a closer look at how both tools complement each other while serving distinct purposes. Discover their strengths, differences, and best use cases to decide how to integrate them effectively for smoother collaboration and greater project success.