
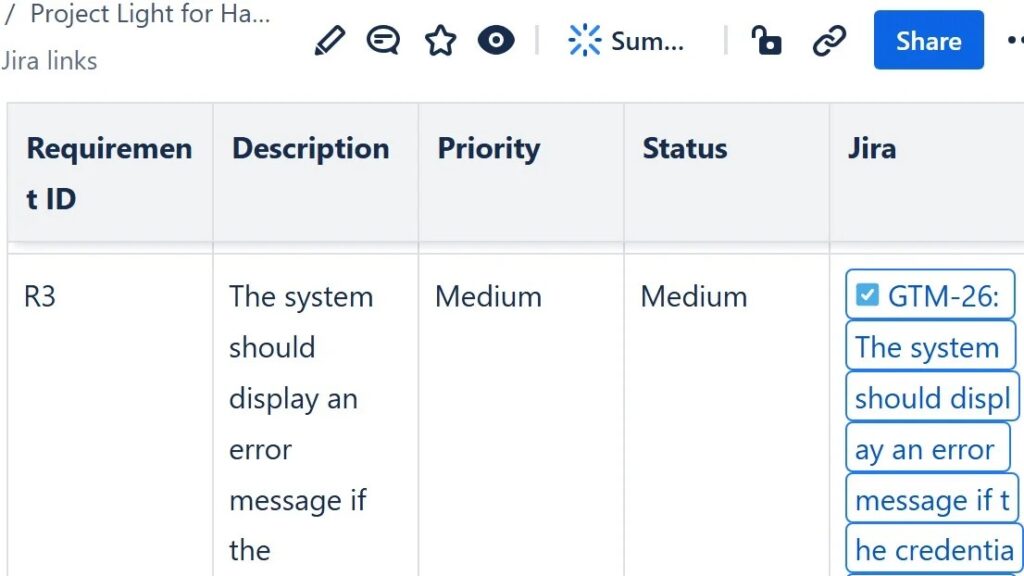
When I create Jira issue in a Confluence page, I connect documentation with real task management. I can turn ideas, notes, decisions, and meeting outcomes into trackable work items. As a result, my team stays aligned and follow-up tasks do not get lost. In this guide, I show you the simple steps to create Jira issues directly from Confluence.
What is Confluence?
Confluence is like a digital workspace where ideas come to life and teamwork finds structure. It’s more than just a documentation tool—it’s the meeting point for knowledge, collaboration, and creativity. Imagine a place where every project note, decision, and plan connects seamlessly. That’s Confluence. It transforms scattered information into organized insight, helping teams think together, build together, and move forward with clarity and confidence.
Step 1: Link Jira and Confluence
Firstly, ensure Jira and Confluence are linked. This integration is essential. Without it, you can’t create Jira issues from Confluence. Navigate to the admin settings in both Jira and Confluence. Connect the two platforms using the application links feature. This step is crucial.
Step 2: Create or Edit a Confluence Page
Secondly, go to the Confluence page where you want to add the Jira issue. If you don’t have one yet, create a new page (in our article “How to create a Confluence page” we show you how to create a Confluence page). For our example, we use an existing Confluence page and click on “edit”. Then we navigate to the point where we want to create and integrate the Jira issue.

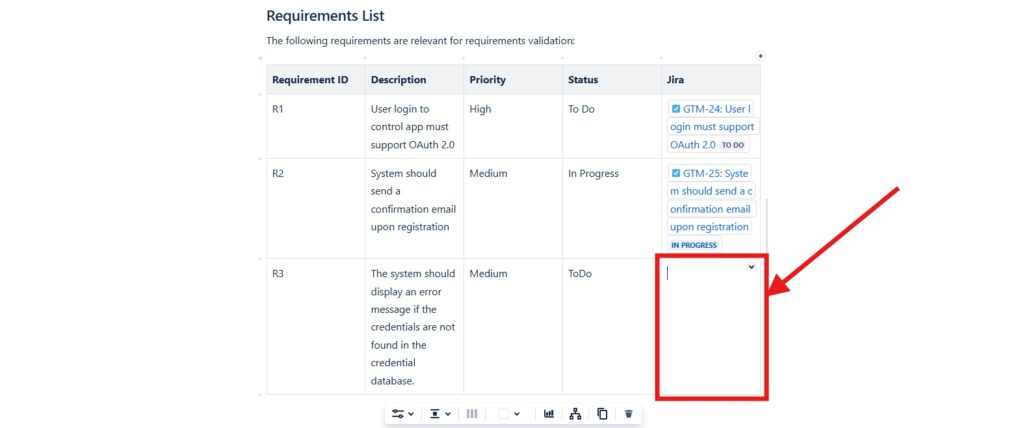
Step 3: Use the Jira Issue/Filter Macro
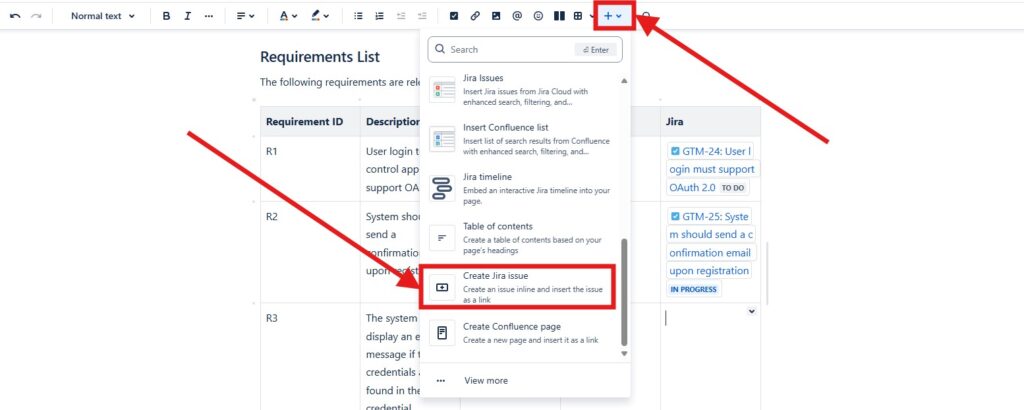
Next, use the Jira Issue/Filter macro. This macro allows you to create and display Jira issues. Click on the “+” icon in the toolbar. Then, click on “Create a Jira issue”.
Step 4:
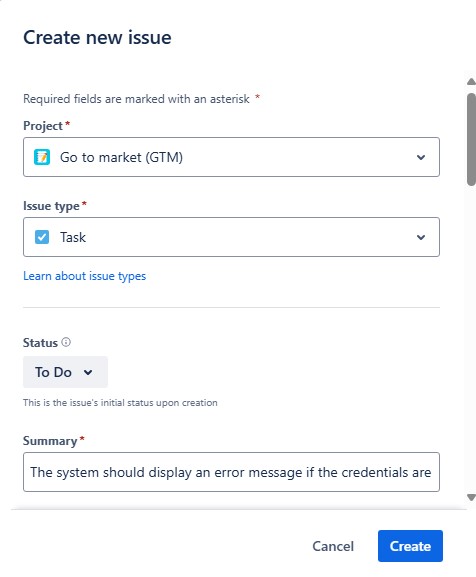
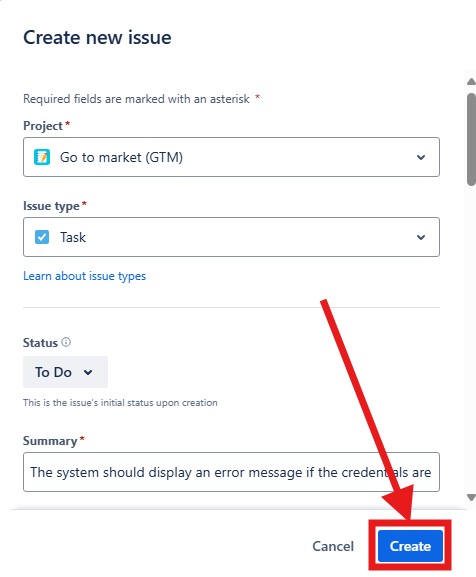
A dialog box will appear. Here you can enter the details of your new Jira issue. For the details of a Jira Issue, see our detailed introduction to the topic: “How to Create a Jira Issue: A Step-by-Step Guide“.
Step 5: Create the issue
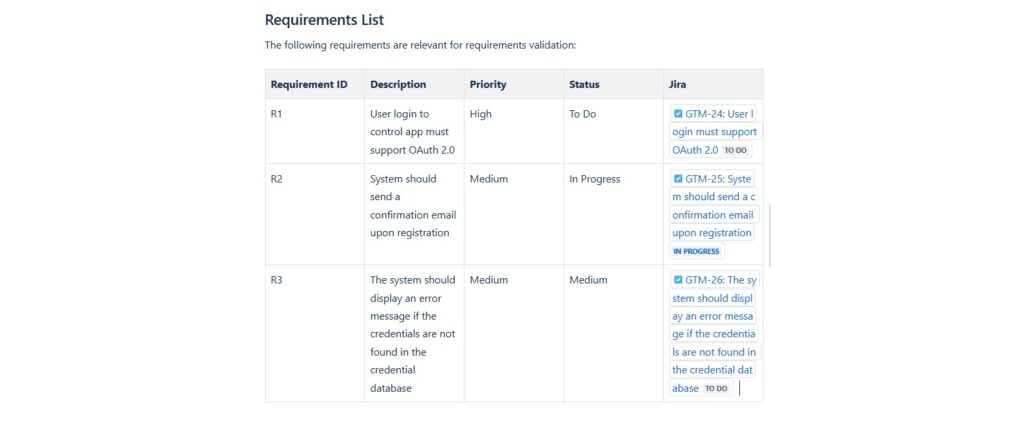
Click “Create” to complete the issue creation process and view the result. You are still in Confluence editor mode.
Step 6: Save Your Page
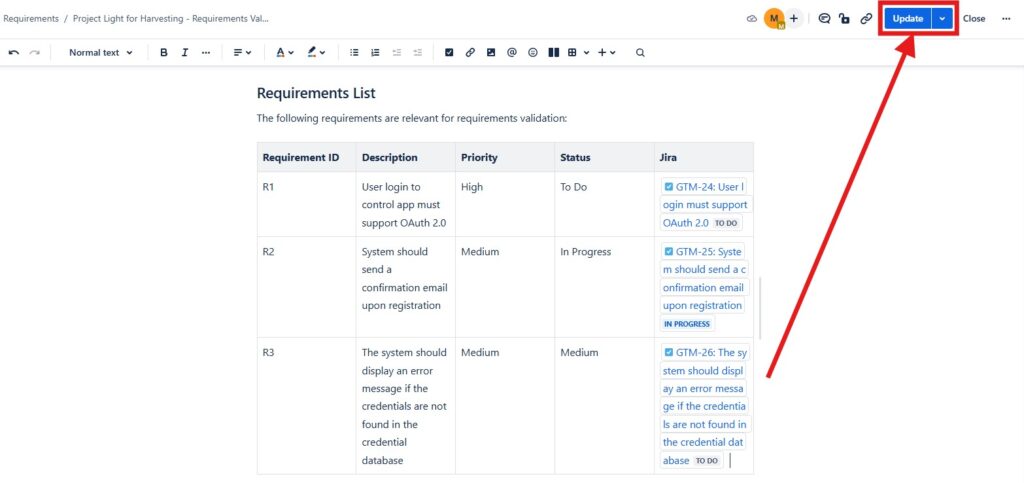
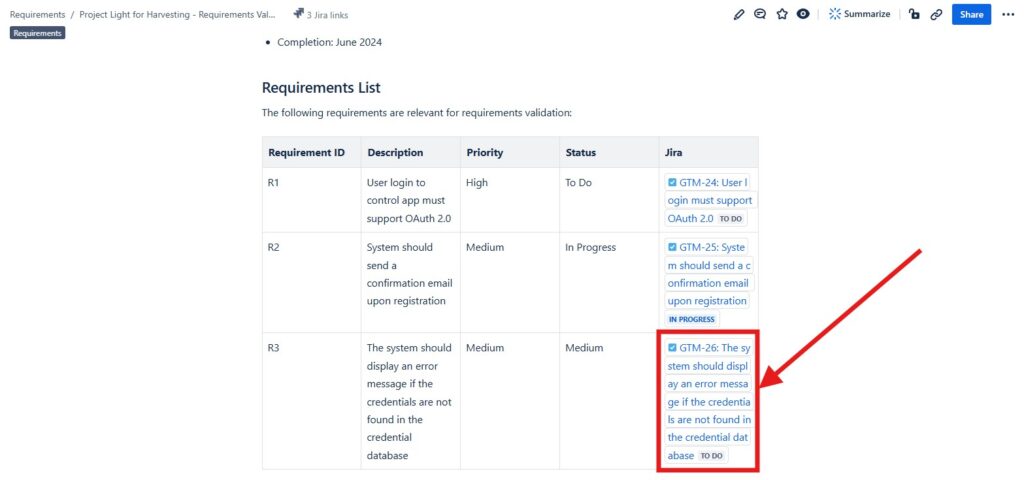
Finally, save your Confluence page. Click the “Update” button at the Top. Your page now includes a link to the Jira issue. Team members can view and interact with the issue directly from Confluence.
Illustrations to Enhance Understanding
- Linking Jira and Confluence: A screenshot showing the application links setup in Jira and Confluence.
- Creating a Confluence Page: An image of the “Create” button in Confluence.
- Using the Jira Issue/Filter Macro: A graphic illustrating the “+” icon and the “Jira Issue/Filter” option.
- Creating a New Jira Issue: A screenshot of the “Create New Issue” form.
- Inserting the Jira Issue: An image showing the insertion of the issue into the Confluence page.
- Publishing the Page: A graphic highlighting the “Publish” button.
Conclusion
To summarize, creating a Jira issue in a Confluence page is straightforward. By linking Jira and Confluence, using the Jira Issue/Filter macro, and inserting the issue, you can seamlessly integrate your project management tools. Thus, improving efficiency and collaboration within your team.
Creating Jira issues in Confluence simplifies tracking tasks and issues. This integrated approach is powerful. Try it out and experience the benefits yourself.
What’s Next?!
Now that you know how to create a Jira issue in a Confluence page, you can connect documentation with trackable work. This helps you turn notes, decisions, and follow-up tasks into clear Jira issues. However, before teams can use both tools well, they first need simple access.
In the next article, I’ll show you How to Access Confluence and Jira for Free. You’ll learn how to start with both Atlassian tools without a paid setup. Click the next article to begin your Confluence and Jira workflow from the very first step.
Explore Requirements Engineering Tools That Work Together
Requirements engineering becomes easier when I use tools that connect visual thinking, documentation, task tracking, and process modeling. In my main article on Requirements Engineering Tools, I explain how draw.io, Confluence, Jira, and Camunda support this workflow. Draw.io helps me create clear diagrams. Confluence helps me organize knowledge. Jira helps me manage tasks and issues. Camunda helps me model business processes. Click through to the full article and learn how these tools help you build clearer requirements and stronger project results.
| Read more about Confluence and How to |
|---|
| Use shortcuts in Confluence Assign a task in Confluence Create a Confluence space from a template Delete a Page in Confluence Create a Confluence page |