Jira can become hard to manage when projects grow. That is why I use jira query language to search and filter issues with more precision. In this guide, I explain how JQL works, why it saves time, and how it helps me find tasks, bugs, stories, and project details faster. As a result, you can improve visibility and manage Jira work with more control.
What is Jira?
Jira is a powerful project management and issue-tracking platform developed by Atlassian, widely used in requirements engineering and IT business analysis. It helps teams capture, structure, and manage requirements efficiently throughout the project lifecycle. Business analysts can document user stories, define acceptance criteria, and link them directly to development and testing tasks. This traceability ensures alignment between business goals and technical implementation, fostering collaboration and transparency across all stakeholders.
What is JIRA Query Language?
Firstly, JIRA Query Language is a powerful tool that allows you to create custom queries to find and filter issues in JIRA. Unlike simple search functions, JQL provides a flexible way to specify criteria and get precise results. In other words, it’s like having a supercharged search engine for your JIRA issues.
Why Use JQL?
JQL is undoubtedly essential for anyone who wants to maximize their productivity in JIRA. Hence, whether you’re a project manager, developer, ortester, JQL helps you find exactly what you’re looking for. Additionally, it saves time and reduces frustration by providing targeted search results.
Basic idea
In general JQL queries have two tasks:
- firstly, they allow you to select a subset of issues and
- secondly, to order the results resulting from the query.
Access
In order to start you can access the most effective search bar for the Jira Query Language by clicking on the search bar in the top right corner. Then press the “Enter” key on your keyboard (without typing anything beforehand).
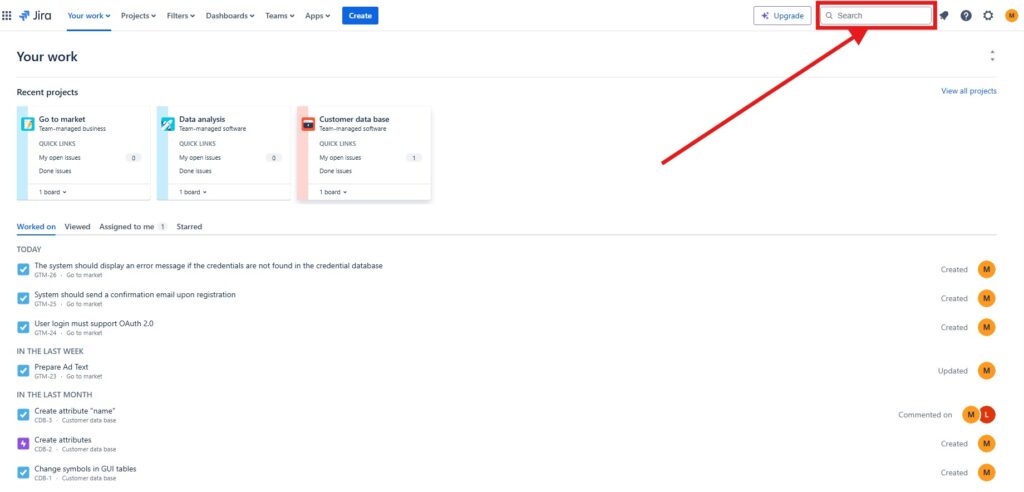
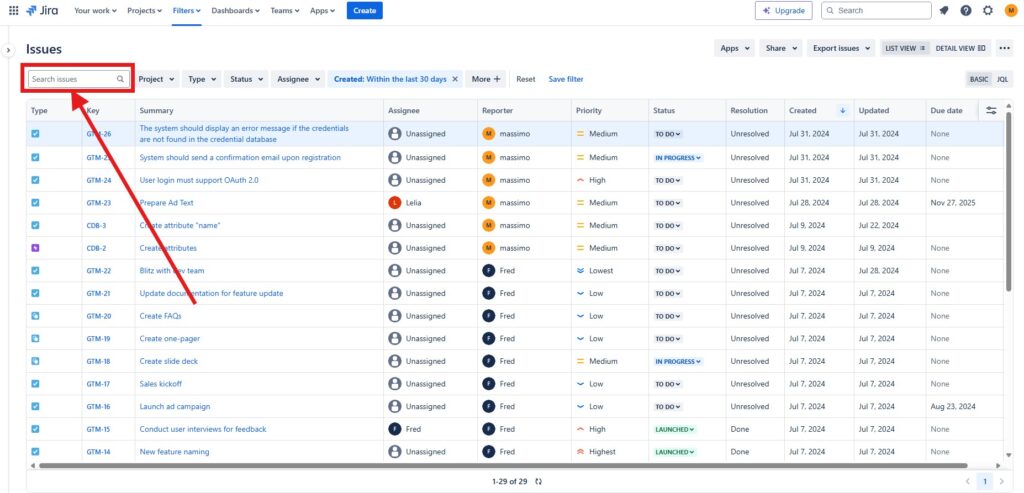
You will then be taken to the actual search page and can use the search bar in the middle left.
Basic JQL Syntax
Let’s start with the basics. JQL queries are structured as field, operator, and value. Here’s a simple example:
project = "My Project"In this example:
- project is the field.
- = is the operator.
- “My Project” is the value.
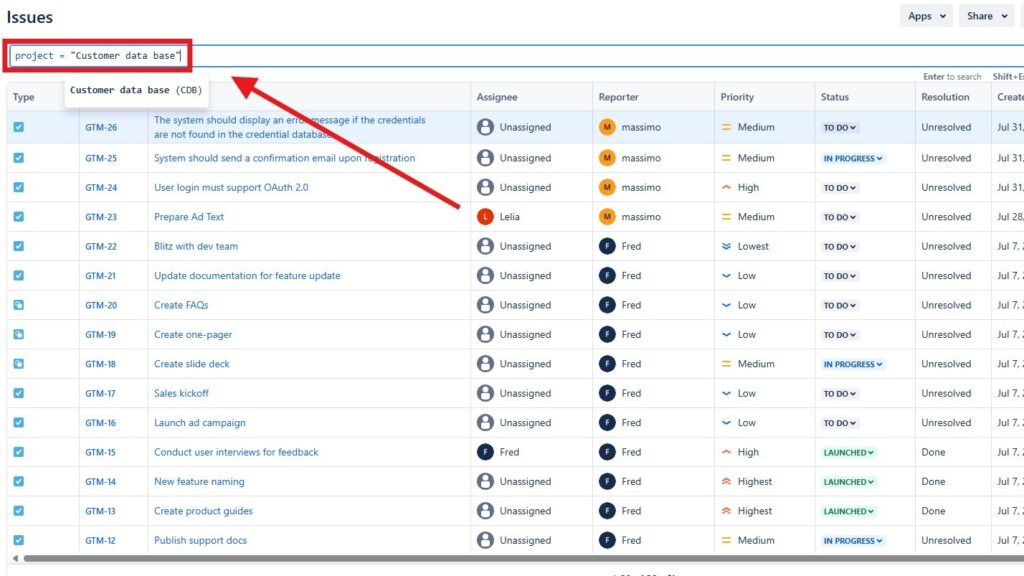
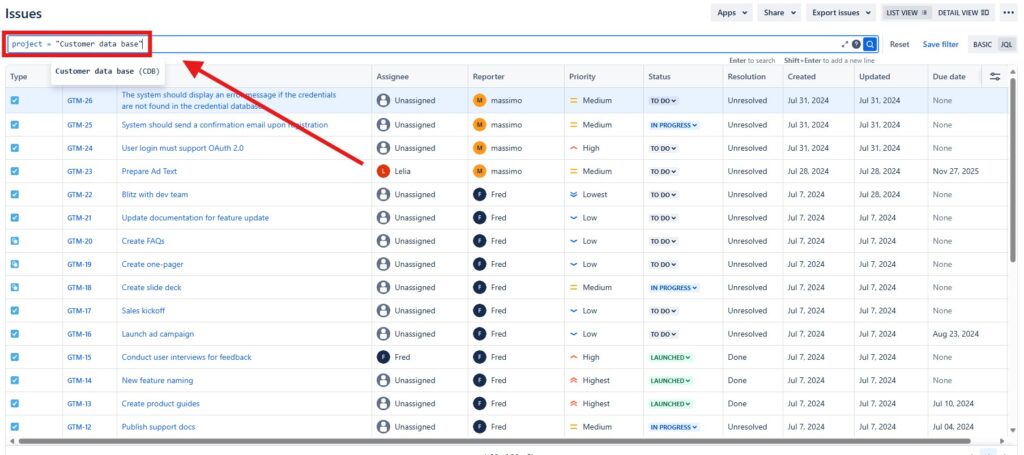
To make it concrete for you, I am looking for all issues of our project “Customer Data Base”:
Moreover, you can combine multiple conditions using AND, OR, and NOT. For instance:
project = "My Project" AND status = "To Do"I will make it concrete again for our project “Customer Data Base”:

Using Operators
Next, let’s talk about operators. JQL supports a variety of more operators, such as:
- = (equals)
- != (does not equal)
- > (greater than)
- < (less than)
- IN (in a list)
- NOT IN (not in a list)
Consider this example:
project = "MY Project" AND assignee = currentUser()
Here, the query finds all issues of the project assigned to me.
Practical Examples
To illustrate, here are a few practical JQL queries you might use:
- Finding issues by type:
issuetype = Bug- Finding issues created in the last 7 days:
created >= -7d- Finding unresolved issues assigned to me:
assignee = currentUser() AND resolution = Unresolved- Finding issues in a specific sprint:
sprint = 5Visualizing JQL Queries
Furthermore, visual aids can help us understand and utilize JQL better. Imagine a dashboard with various widgets:
- Pie Chart: Shows the distribution of issue types in a project.
- Bar Graph: Displays the number of issues per assignee.
- Line Graph: Tracks the number of issues created over time.
Each widget can be powered by a JQL query, providing real-time insights and trends.
Conclusion
In conclusion, JIRA Query Language is a game-changer for managing issues in JIRA. It empowers you to find exactly what you need with precision and ease. Whether you’re tracking progress, managing workload, or monitoring project health, JQL is your go-to tool.
So, take some time to play around with JQL. Experiment with different queries and see how they can improve your JIRA experience. Once you get the hang of it, you’ll wonder how you ever managed without it.
Happy querying!
What’s Next?!
Now that I understand how Jira Query Language helps me search issues more precisely, I can continue in two useful directions. Therefore, I recommend two next steps: How to Create a New View in a Jira Project and Why Should I Use Jira?.
In How to Create a New View in a Jira Project, I show how Jira views help me organize project information more clearly. You will learn how tailored views make tasks, issues, and workflows easier to scan, filter, and manage. As a result, you can turn search results and project data into a more focused workspace.
In Why Should I Use Jira?, I step back and explain the bigger value of Jira. You will see how Jira supports planning, collaboration, task tracking, transparency, and project control. This article helps you understand why Jira has become such an important tool for modern teams.
Click one of the next articles to either improve your Jira workspace or explore why Jira can strengthen your project management approach.
Requirements Engineering Tools: Make Complex Work Easier to Manage
Requirements engineering becomes more reliable when I use tools that support clear thinking and practical execution. Therefore, I use draw.io to visualize ideas, Confluence to document knowledge, Jira to manage project work, and Camunda to model processes. Together, these tools help me connect requirements, decisions, tasks, and workflows in one structured way.
In the main article on Requirements Engineering Tools, I show how draw.io, Confluence, Jira, and Camunda support better communication, stronger collaboration, and clearer delivery. Click through to explore how the right tool setup can improve your requirements engineering work.