
Custom views help me manage Jira work with more focus. In this guide, I show how to Create view in a jira project and tailor the workspace to your team’s needs. You will learn how views organize tasks, issues, and workflows. As a result, you can reduce distractions, track progress faster, and work with more clarity.
What is Jira
Jira is a robust project management and issue-tracking platform developed by Atlassian, widely used across software development, IT, and business domains. In requirements engineering, Jira plays a vital role in organizing, tracking, and validating requirements throughout the project lifecycle. It allows teams to document user stories, manage a Change Request, and ensure traceability from initial requirements to implementation. By providing full transparency, Jira helps stakeholders stay aligned and informed at every stage.
For IT business analysts, Jira is an indispensable tool for bridging the gap between business needs and technical execution. It enables analysts to capture requirements clearly, break them down into actionable tasks, and monitor their progress through visual boards and reports. Integrated with tools like Confluence, Jira supports detailed documentation, collaboration, and workflow automation. This makes it ideal for managing complex projects, ensuring clarity, and maintaining accountability within cross-functional teams.
Why Customize Views?
Custom views in Jira save time. They provide clarity and enhance productivity. With a custom view, you can see exactly what you need without distractions.
Step-by-Step Guide
Step 1: Access Your Project
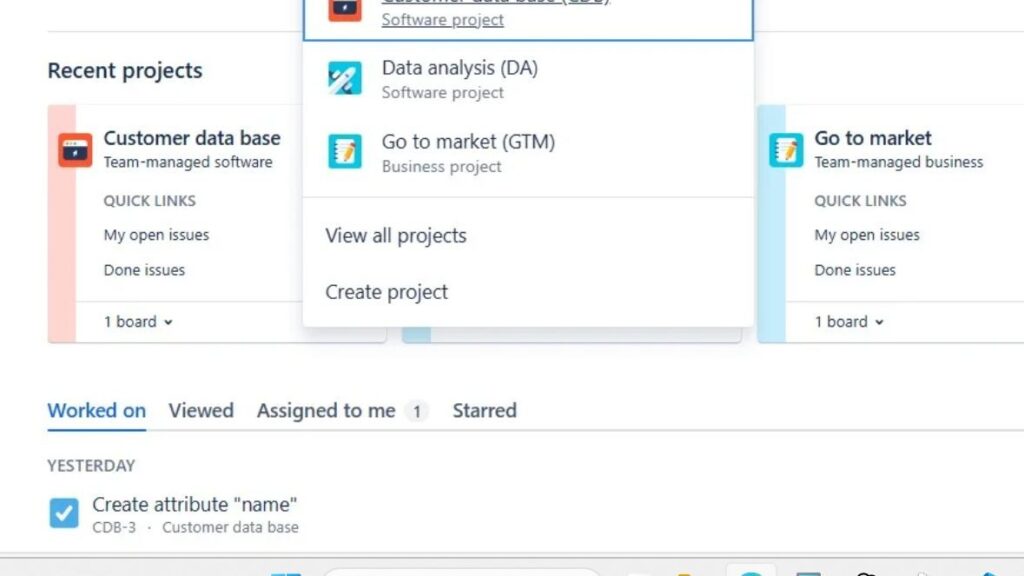
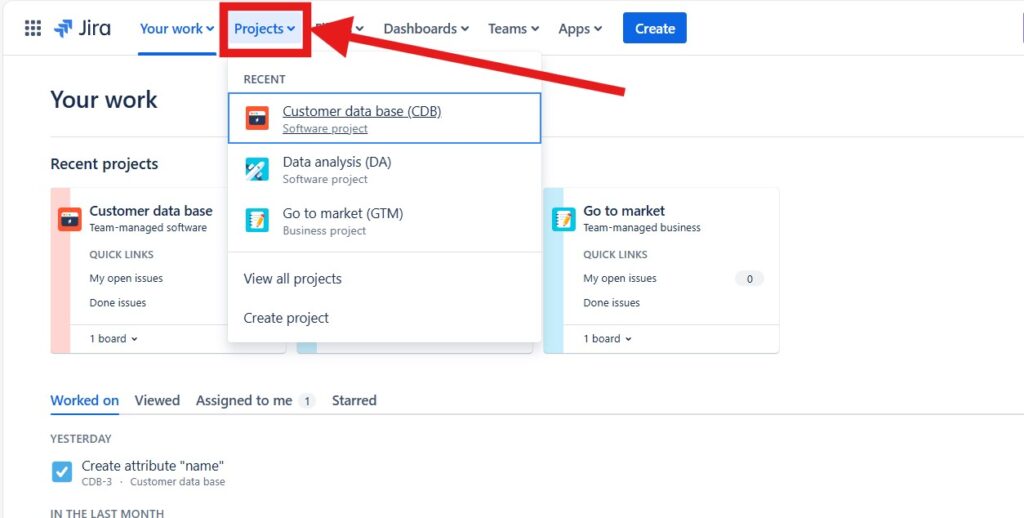
First, I open Jira and navigate to my project. This is your starting point.
Step 2: Add view
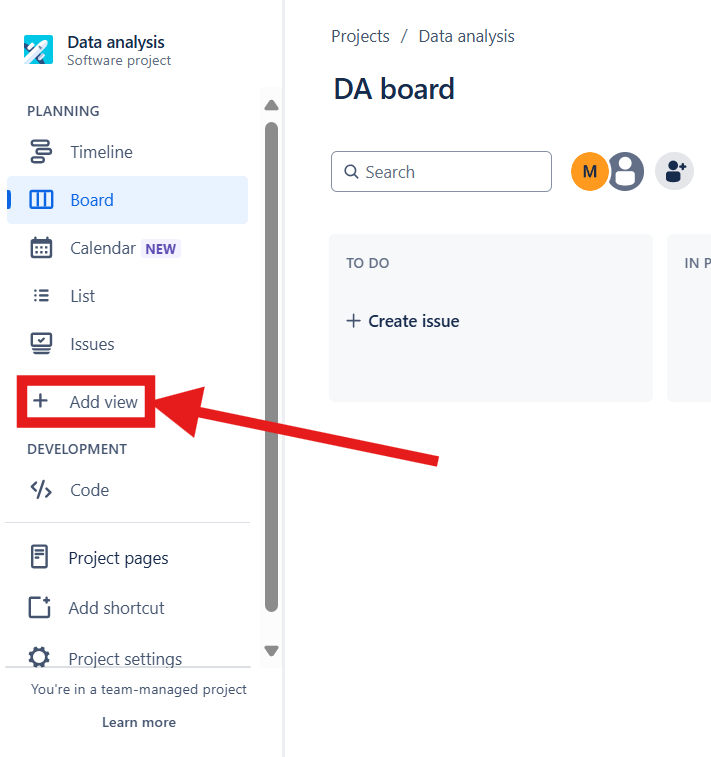
On the left side of the “Planning” menu, I click “Add New”.
Step 3: Use the quick selection
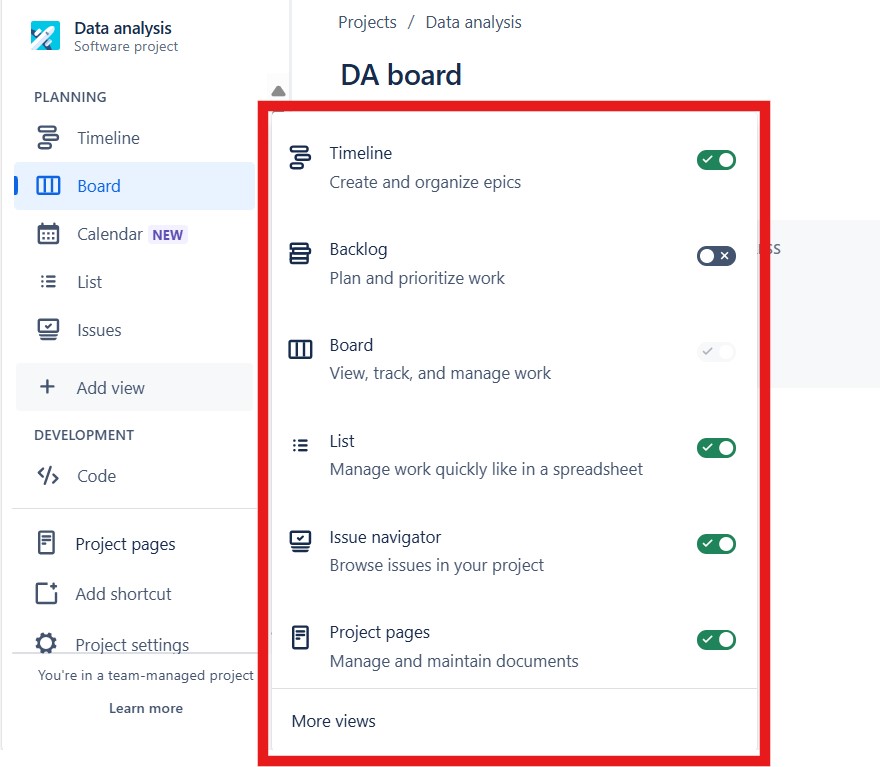
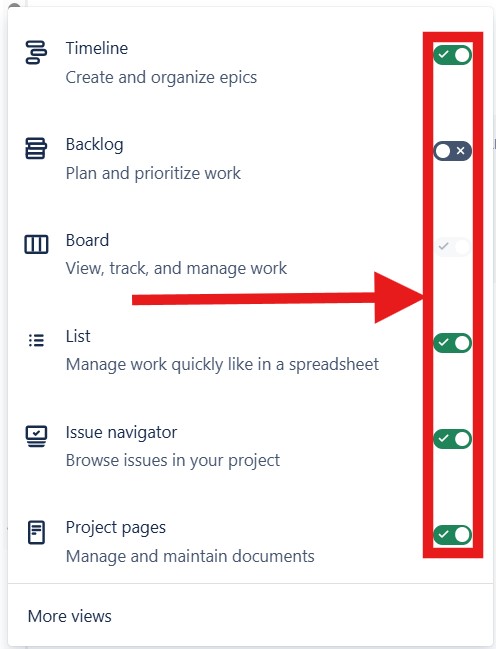
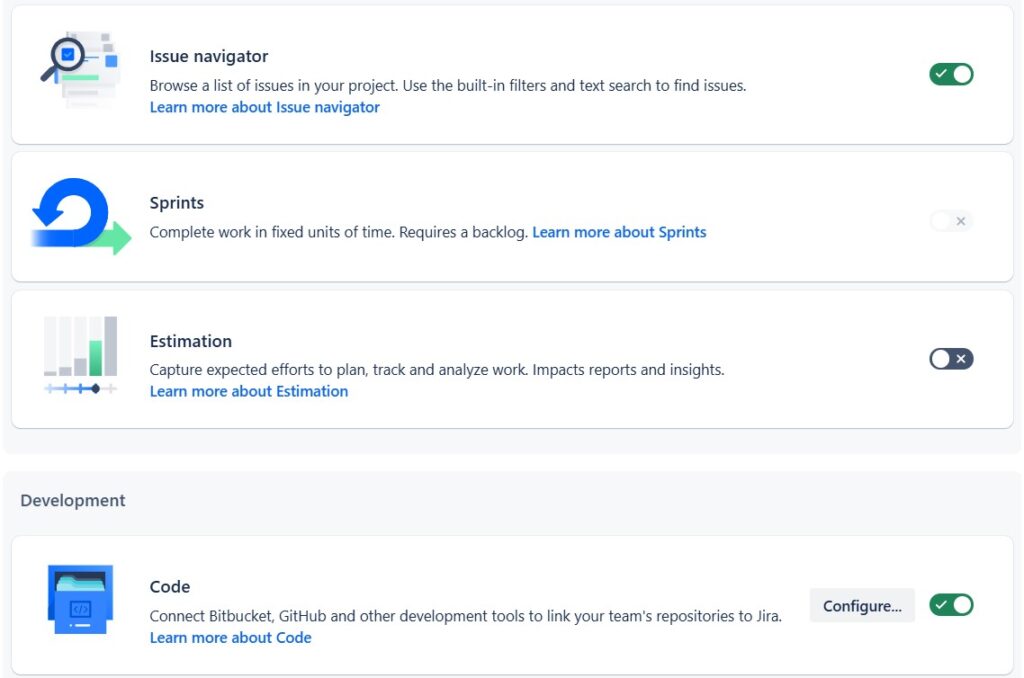
I can now choose common views directly from a quick selection. The switches on the right side allow me to turn my views on or off.
Step 4: Explore “More Views”
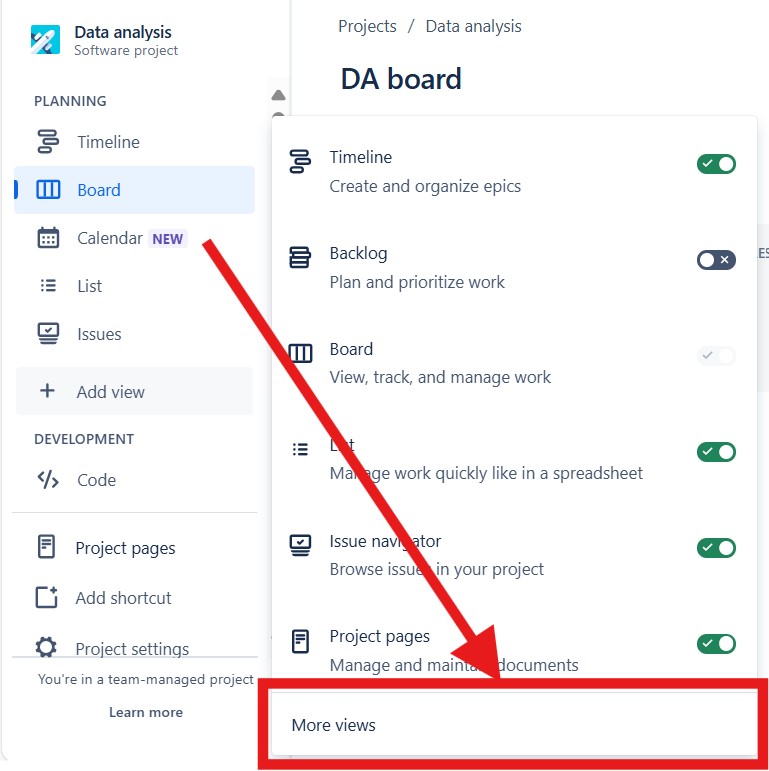
We won’t click directly on any of the quick selection options. Instead, we’ll click on “More Views.” This will take me to more options.
Step 5: Explore the features
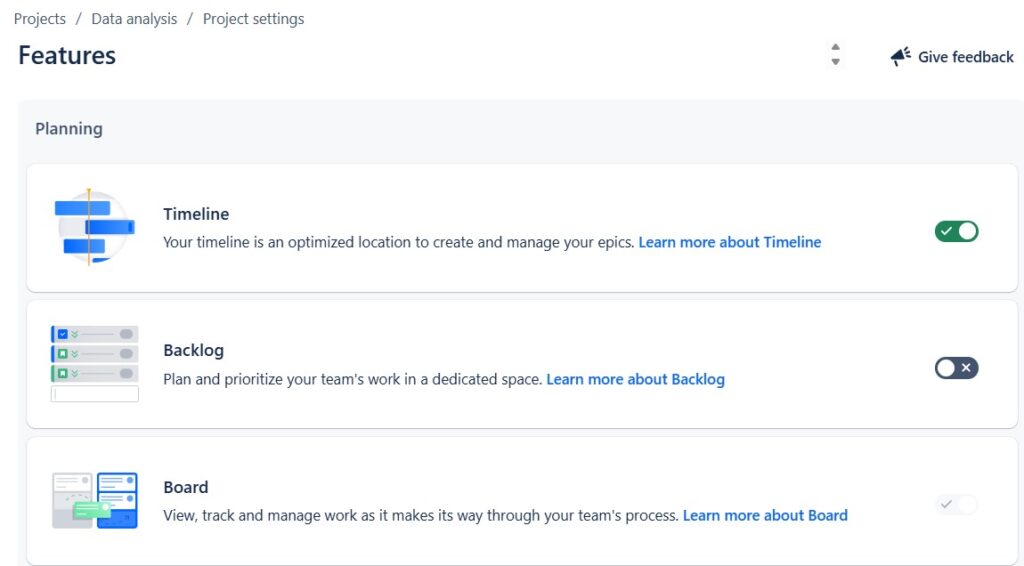
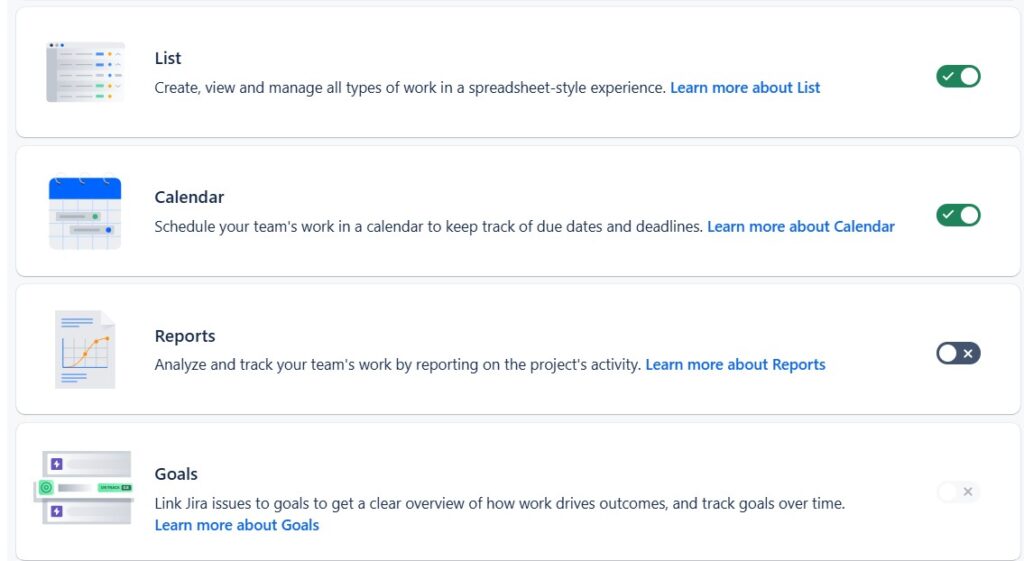
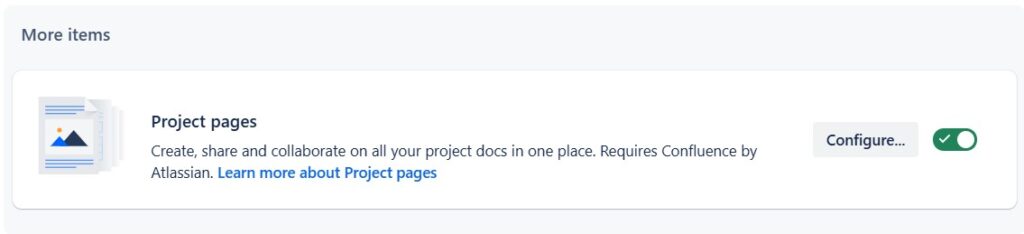
Now I can choose from a wide range of options. Here you can see the wide variety of possibilities that Jira gives me.
Step 6: Choose your features
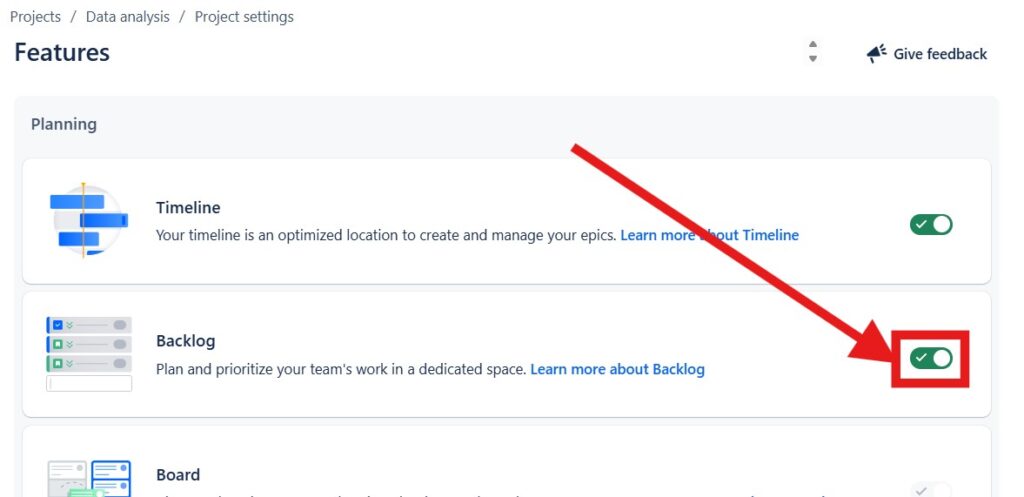
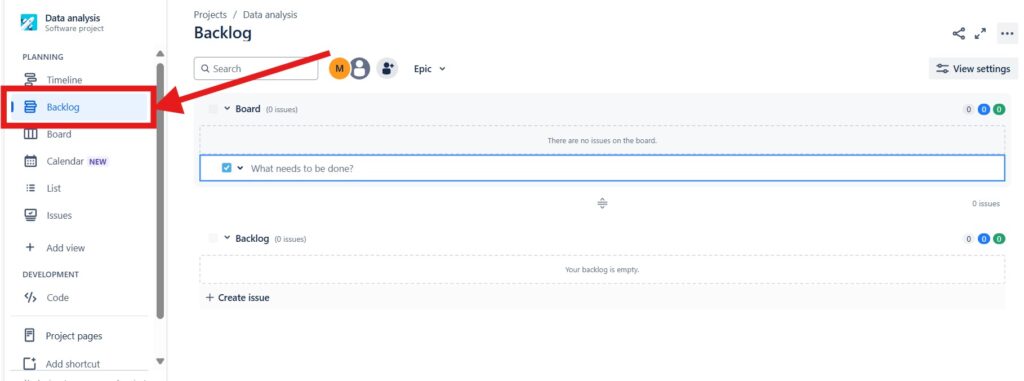
On the right side I can select which features I want to integrate into my view. For now I choose “Backlog”.
Step 7: Save and View Your New Board
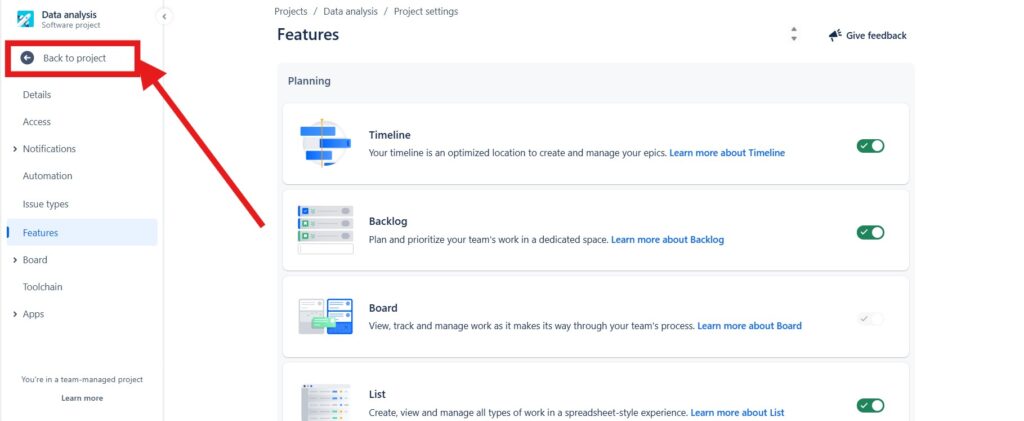
You save by switching the slider from the previous step. If you click on “Back to Project” you will now see “Backlog” in your views menu.
Tips for Effective Views
- Keep it Simple: Don’t overcomplicate your filters.
- Focus on Key Metrics: Use views to track important metrics.
- Regular Updates: Review and update your views regularly.
Conclusion
Custom views in Jira are a game-changer. They help me and you stay organized and efficient. Follow these steps to create a new view in your Jira project. Enjoy a more streamlined workflow today!
Feel free to use these steps and tips. Customize your views to match your workflow. Happy project managing!
What’s Next?!
Now that I know how to create a new view in a Jira project, I want to narrow my focus even more. Therefore, the next step is How to Create a Filter in Jira: A Quick Guide.
In that article, I explain how Jira filters help me find the right issues faster. You will learn how filters turn large issue lists into clear, useful search results. In addition, you will see how filters support better tracking, reporting, and daily project control.
Click the next article to learn how to create a filter in Jira and make your project work easier to manage.
Requirements Engineering Tools: Bring Structure into Complex Work
Requirements engineering becomes clearer when I use tools that support each important activity. Therefore, I use draw.io to visualize ideas, Confluence to document knowledge, Jira to manage tasks, and Camunda to model processes. Together, these tools help me connect requirements, decisions, workflows, and delivery in one practical toolchain. In the main article on Requirements Engineering Tools, I show how draw.io, Confluence, Jira, and Camunda improve communication, organization, traceability, and project control. Click through to explore how the right tools can make your requirements engineering work more effective.