Jira filters help me focus on the issues that matter most. They reduce noise and make project work easier to manage. In this guide, I show how to create a filter in jira step by step. You will learn how filters help you find tasks, track progress, and create clearer views. As a result, you can work faster and manage your Jira projects with more control.
What is Jira?
Jira is a leading project management tool developed by Atlassian, designed to help IT teams plan, track, and deliver projects efficiently. It provides a structured framework for managing tasks, bugs, and feature requests throughout the development lifecycle. In IT project management, Jira enables transparency, accountability, and collaboration by allowing teams to monitor progress in real time. With customizable workflows, boards, and reports, it ensures that every project stays organized, on schedule, and aligned with business goals.
Step 1: Access the Filters Menu
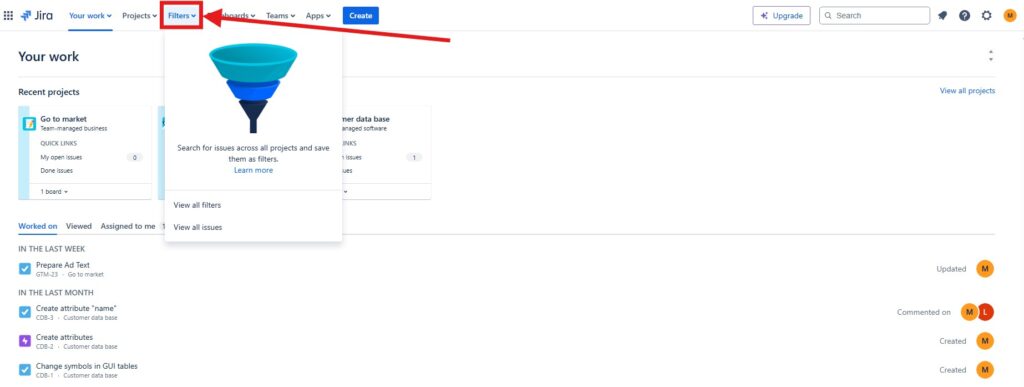
Firstly, log into your Jira account. Once you’re in, look at the top navigation bar. You’ll see an option labeled “Filters.” After that click on it. This is where all the magic begins.
Step 2: Start a New Search
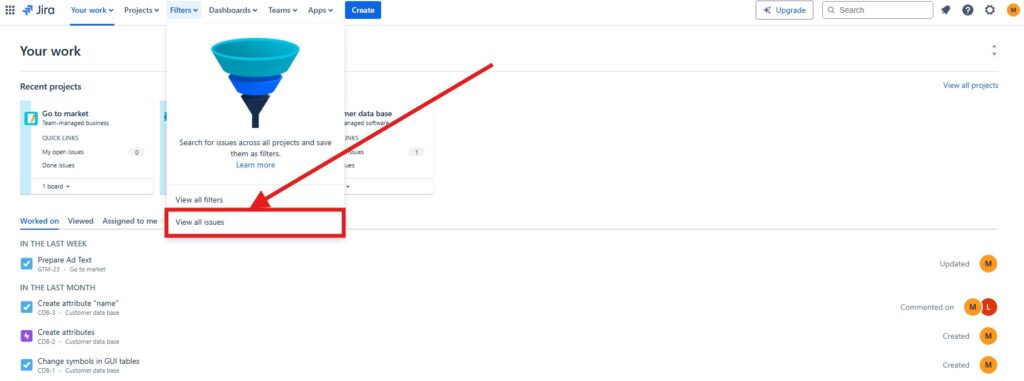
Thereafter, select “View all issues” from the dropdown menu. This will take you to a new page. Here, you can start building your filter. You can either use the basic search or switch to JQL (Jira Query Language) for more complex queries. Personally, I find JQL very powerful once you get the hang of it.
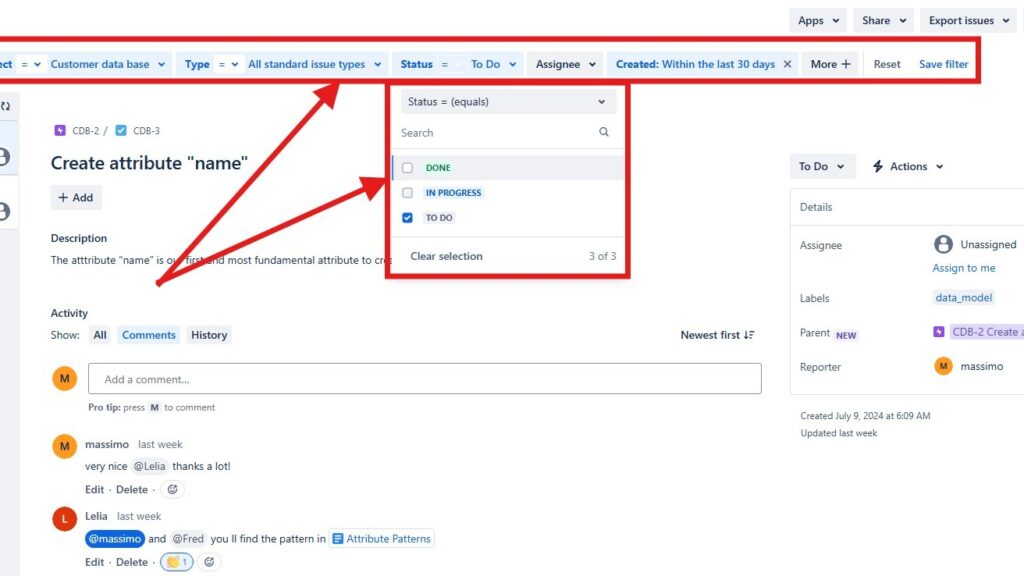
Step 3: Define Your Criteria
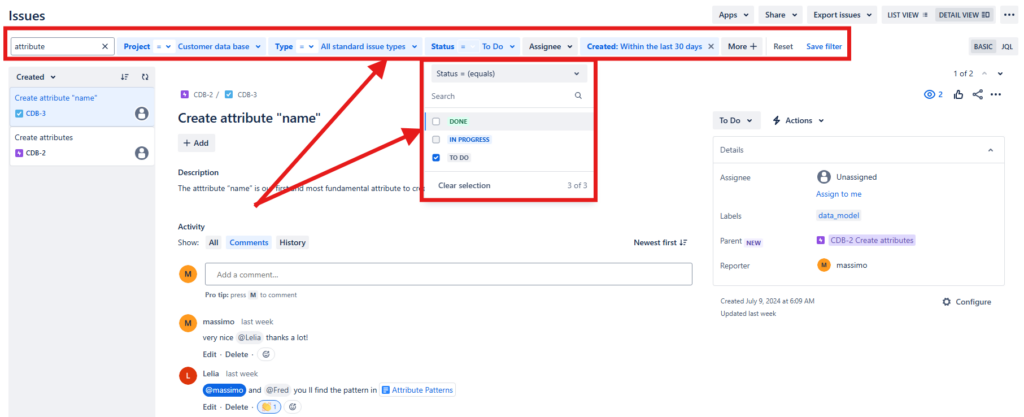
Thirdly, it’s time to define what you want to filter. Maybe you’re looking for issues assigned to you. Or perhaps you want to see all issues in a specific project. Use the dropdowns and text fields to set your criteria. To put it another way, if you’re using JQL, type your query in the search box.
Step 4: Save Your Filter
Happy with the results? Great! In that case look for the “Save filter” button at the top right of the screen. Click it.
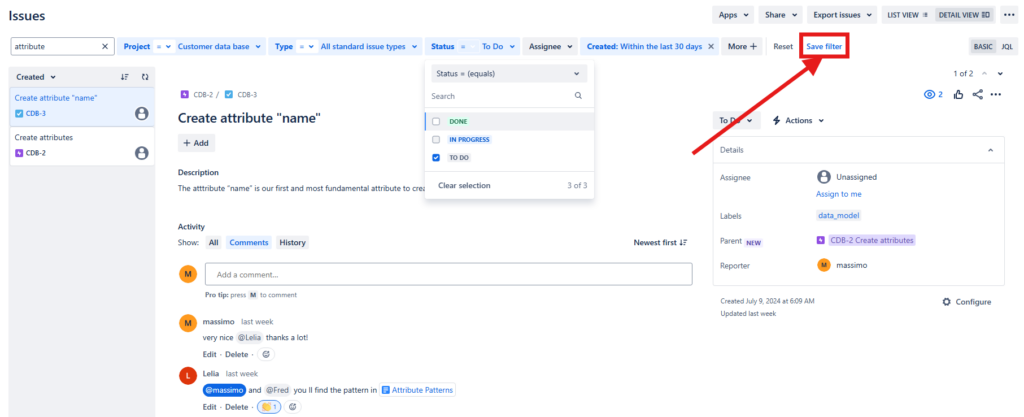
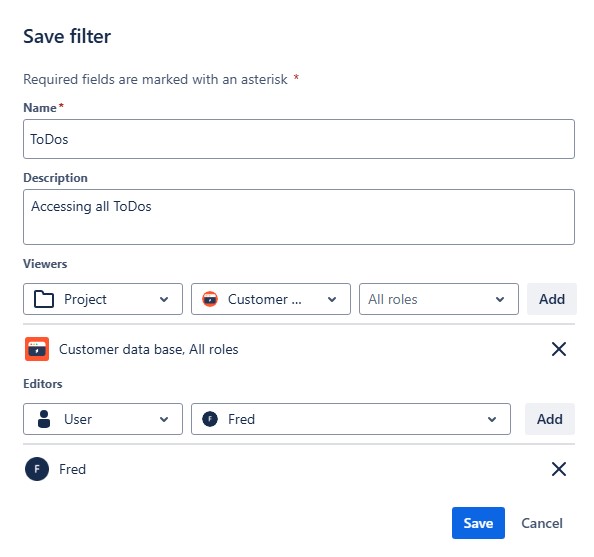
Step 5: Fill in description and details
A dialog box will appear asking you to name your filter. Choose a name that makes sense to you. You can also add further information. Click “Save” to save it.
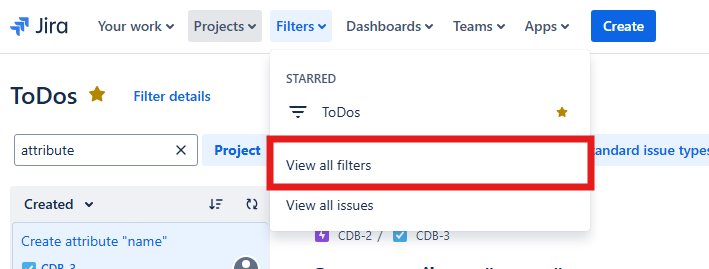
Step 6: Manage Your Filters
Eventually you can access your saved filters anytime. Therefore, go back to the “Filters” menu and select “View all filters.” Here, you’ll see a list of all your saved filters. You can edit, share, or delete them as needed.

Bonus Tips
- Share with Your Team: If you think your filter could help others, share it. Thus, go to your saved filters, click on the filter you want to share, and select “Edit.” Then, you’ll see an option to share it with specific users or groups.
- Use Filters for Dashboards: Filters are great for dashboards. For this purpose you can add your filter results to a Jira dashboard gadget. Consequently, you get real-time updates on issues that matter to you.
In conclusion, creating filters in Jira is straightforward and incredibly useful. Whether you’re managing a massive project or just keeping track of your tasks, filters can save you time and stress. So, go ahead and create your first filter. You’ll wonder how you ever managed without it.
What’s Next?!
Now that I know how to create a filter in Jira, I want to understand the search language behind more powerful filters. Therefore, the next step is Introduction to JIRA Query Language (JQL).
In that article, I explain how JQL helps me search Jira issues with more precision. You will learn how queries make it easier to find tasks by status, assignee, priority, project, or date. In addition, you will see how JQL supports better reporting, clearer views, and stronger project control.
Click the next article to discover how JQL helps you search, filter, and manage Jira issues with more confidence.
Requirements Engineering Tools: Work Smarter from Diagram to Delivery
Requirements engineering becomes easier when I connect visual thinking, documentation, task management, and process modeling. Therefore, I use draw.io to create clear diagrams, Confluence to organize requirements knowledge, Jira to manage project work, and Camunda to model business processes. Together, these tools help me turn ideas into structured requirements, traceable decisions, and manageable workflows.
In the main article on Requirements Engineering Tools, I show how this toolset supports better communication, clearer analysis, and stronger delivery. Click through to learn how draw.io, Confluence, Jira, and Camunda can improve your requirements engineering workflow.