
Learning how to create a Confluence page is easy, but a few tips make the process smoother. I use Confluence to document projects, coordinate teams, and structure knowledge clearly. Therefore, a good page needs more than text. It needs purpose, order, and readability. In this guide, I show you how to create useful pages and improve collaboration.
What is Confluence?
Confluence is an online collaboration and documentation tool that helps teams work together efficiently. It provides a shared space where users can create, edit, and organize content in real time. Teams use it to document processes, capture ideas, and manage projects without losing track of information. By combining structure with flexibility, Confluence turns scattered knowledge into organized pages, making teamwork more transparent, connected, and productive.
What Is a Confluence Page?
I use a Confluence page to document and share information within a space. For example, I can create requirements, meeting notes, project documentation, decisions, instructions, or other team knowledge.
A useful Confluence page gives information a clear purpose, structure, and location.
Therefore, I choose the appropriate space before I create the page.
Here you can find out more about Confluence Spaces.
Step 1: Navigate to the Space
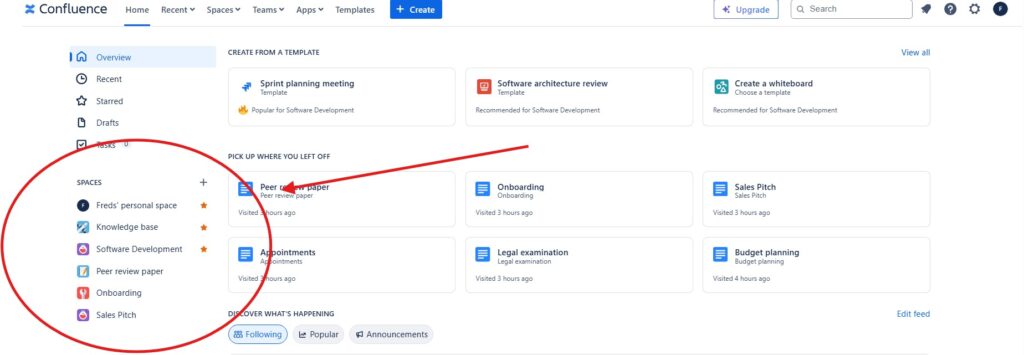
First, I open the Confluence space in which I want to create the page.
The space determines the broader context of the page. Therefore, I choose a location that matches the team, project, or subject of the content.
Step 2: Create a New Page
Next, I select Create at the top of Confluence. Then I choose Page.
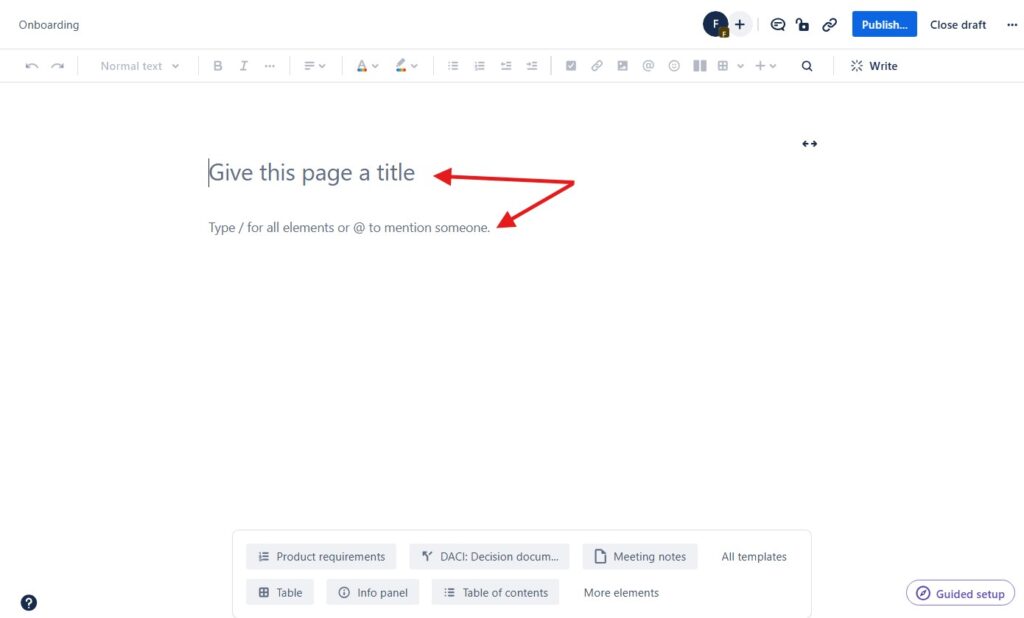
Confluence opens a new draft in the editor.
I create the page inside the space where the information logically belongs.

Step 3: Add a Clear Title
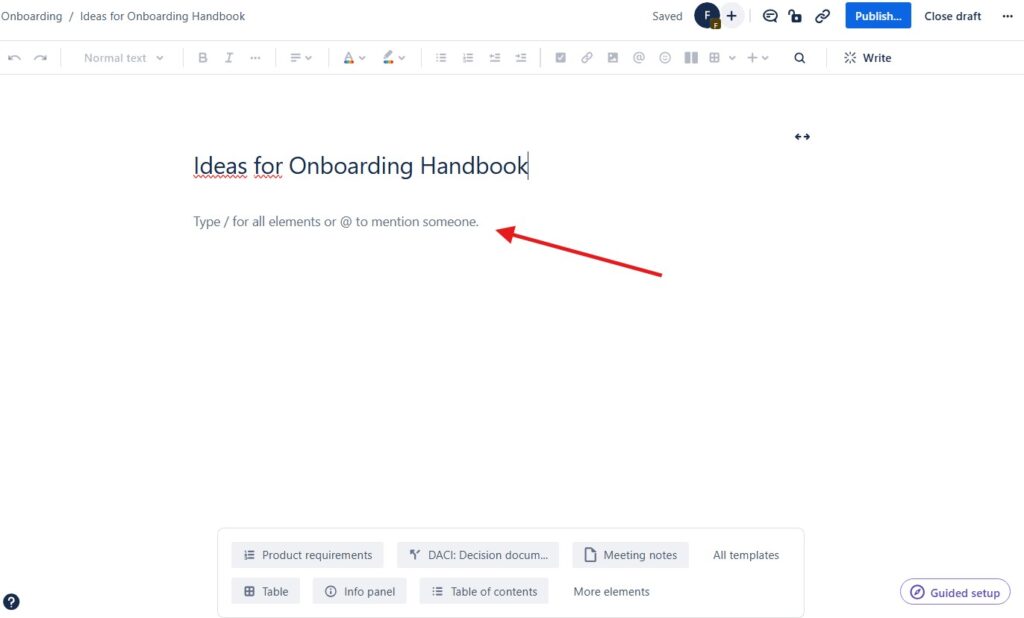
Now I enter the page title.
I keep the title concise and descriptive. As a result, other users can understand the purpose of the page before they open it.
For example, I prefer a specific title such as “Ideas for Onboarding Handbook” instead of a generic title such as “Notes.”

Step 4: Add the Content
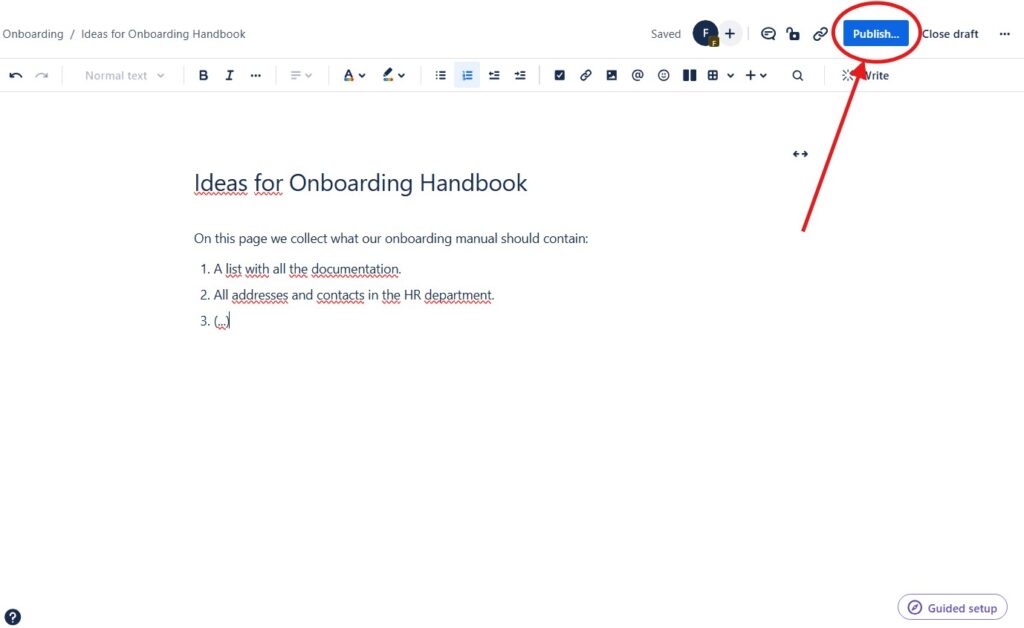
Next, I write and structure the page content.
I use headings, lists, links, tables, images, or other elements when they improve understanding. However, I keep the structure as simple as the subject allows.
Confluence saves the draft while I work. When the content is ready, I select Publish.
Clear structure makes a Confluence page easier to read, maintain, and reuse.
Step 5: Choose the Location and Publish
Before Confluence publishes the page, I check its location.
This step matters because the page hierarchy affects how easily other users can find and understand the content.

Step 6: View the Published Page
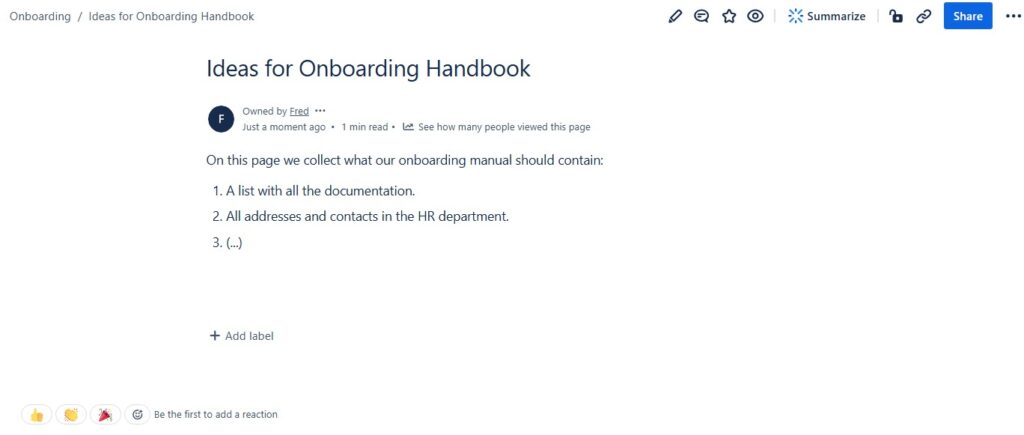
Finally, Confluence shows the published page.
I review the result and check whether the title, content, and structure appear as intended. If I find something that needs improvement, I can edit the page again.
Publishing makes the page part of the shared knowledge structure of the Confluence space.
Keep the Page Useful
Creating the page is only the beginning.
I update important pages when information changes. In addition, I use meaningful links and labels where they improve navigation and search. For sensitive information, I also consider whether access restrictions are necessary.
Therefore, I treat Confluence pages as maintained knowledge rather than static documents.
Conclusion
To create a Confluence page, I choose the correct space, create a page, add a clear title and content, confirm its location, and publish it.
A good Confluence page combines useful information with a clear structure and a logical place in the space.
Following this simple process helps me create documentation that other people can find, understand, and maintain.
What’s Next?!
Now that you know how to create a Confluence page, it is also important to manage pages properly. Not every page stays useful forever. Sometimes I need to remove outdated, duplicated, or incorrect content to keep the space clean.
In the next article, I’ll show you How to Delete a Page in Confluence: A Step-by-Step Guide. You’ll learn how to delete pages carefully, avoid confusion, and keep your Confluence space organized. Click the next article to manage your Confluence content with more confidence.
Make Requirements Engineering Easier with the Right Tools
Requirements engineering works better when I connect ideas, documentation, tasks, and processes. In my main article on Requirements Engineering Tools, I explain how draw.io, Confluence, Jira, and Camunda support this work. Draw.io helps me visualize requirements and models. Confluence helps me document and share knowledge. Jira helps me track tasks and issues. Camunda helps me understand workflows and processes. Click through to the full article and learn how these tools help you build clearer requirements.