
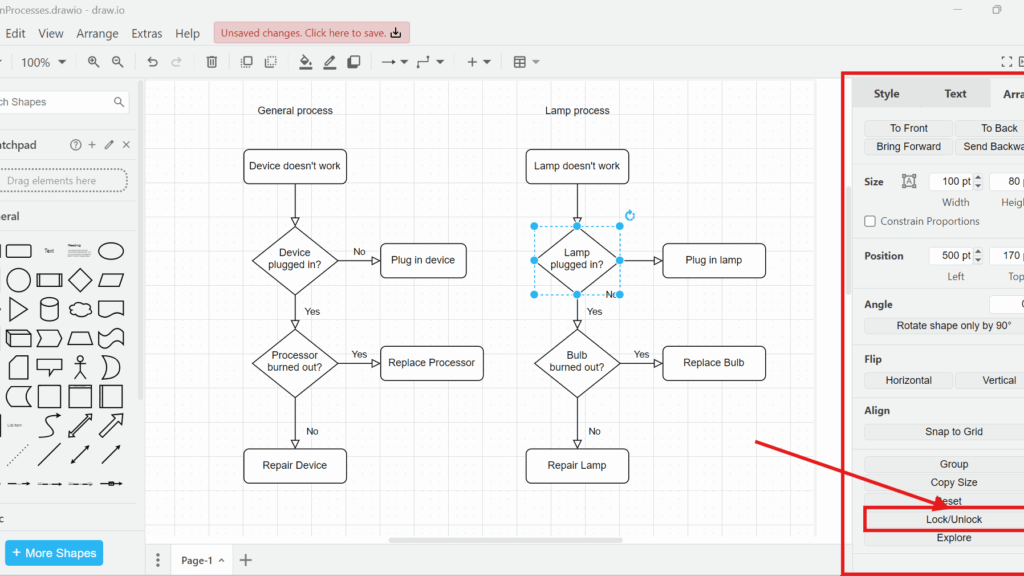
Some diagram elements should stay fixed while I edit others. That is why I use the Lock Unlock options in draw.io. They help me protect shapes, prevent accidental changes, and unlock objects when I need to edit them again. In this guide, I show how these options work and why they make diagram editing safer and easier.
What Does Locking an Object Do?
I use locking when part of my draw.io diagram is already complete. For example, I may want to adjust one process while keeping surrounding elements unchanged.
A locked object stays protected from normal editing until I unlock it again.
This reduces accidental movement, resizing, or formatting changes. Therefore, locking becomes especially useful when I work with larger diagrams or carefully aligned layouts.
Before I lock anything, I select the object that I want to protect.

Lock an Object Through the Edit Menu
After selecting the object, I can lock it directly from the main menu. I open Edit and choose Lock/Unlock.
Alternatively, I can use Ctrl+L. The same command also unlocks the object later.
The Lock/Unlock command works as a toggle: I use it once to lock an object and again to unlock it.

Lock an Object From the Arrange Panel
I can also lock the selected object from the right sidebar. First, I open the Arrange tab. Then, I scroll to the Lock/Unlock command and select it.
This method produces the same result as the Edit menu. However, I find it convenient when I already use the Arrange panel for positioning and alignment.
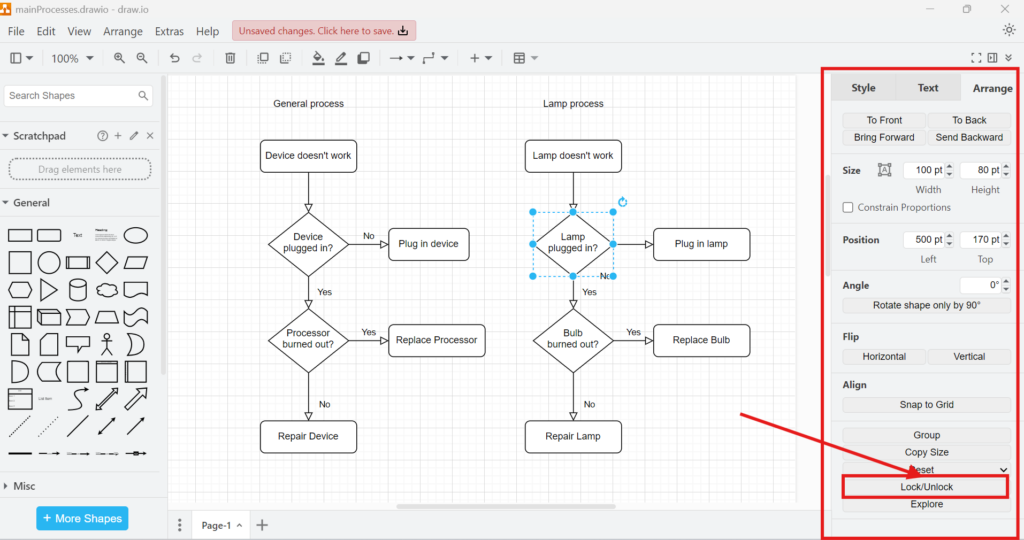
How I Recognize a Locked Object
After I lock the object, draw.io changes how I can interact with it. In the interface shown here, the selected locked object has a red selection outline. In addition, the normal editing controls disappear from the sidebar, leaving the option to unlock it.
This visual feedback helps me confirm that the object is protected before I continue editing the rest of the diagram.

How I Unlock an Object
When I need to change a locked element again, I select it and use the same Lock/Unlock command.
I can open Edit and choose Lock/Unlock, use Ctrl+L, or select Lock/Unlock from the Arrange panel. Afterward, I can move, resize, format, and edit the object normally again.
When I Use Locking
I mainly lock objects when I have finished part of a diagram but still need to work around it. For example, I may lock an established process structure before adding annotations or adjusting another section.
This simple step becomes more valuable as a diagram grows.
By locking finished elements, I protect the structure of my diagram while keeping unfinished areas flexible.
Therefore, I treat Lock/Unlock as a small but practical part of my draw.io workflow rather than as a feature I use only for complex diagrams.
What’s Next?
Now that I know how to use the Lock Unlock options in draw.io, I can protect important diagram elements more easily. However, I also need a fast way to update text across my diagram. In the next article, I’ll explain How to Find and Replace in draw.io. You’ll learn how to search for labels, replace terms, and keep your diagram content consistent. Click below to continue and edit your draw.io diagrams even faster.
Bring More Structure into Requirements Engineering
Requirements engineering becomes easier when I use tools that support clear thinking and practical collaboration. Therefore, I use draw.io to visualize ideas, Confluence to document knowledge, Jira to manage requirements-related work, and Camunda to model business processes. Each tool helps me handle complexity in a different way. As a result, I can connect diagrams, decisions, tasks, and workflows more clearly. In the main article on Requirements Engineering Tools, I show how these tools work together and support a stronger requirements engineering workflow.