Sometimes I need a tangible version of my diagram. I may want to share it in a meeting, pin it on a wall, or keep a hard copy. Therefore, I need to know how to print a draw.io diagram. In this guide, I explain the process step by step and share simple tips for a clean print result.
What is Draw.io?
Draw.io is a free, web-based diagramming tool. It allows you to create flowcharts, network diagrams, organizational charts, and more. I’ve used it for everything from brainstorming workflows to mapping IT infrastructure. Its simplicity and versatility make it a favorite among professionals and hobbyists alike. Plus, it integrates seamlessly with tools like Google Drive, OneDrive, and more. So, whether you’re documenting processes or designing visuals, draw.io has you covered.
Why Print a Draw.io Diagram?
Sometimes, a digital diagram just won’t cut it. Printing a draw.io diagram is handy in various scenarios. For instance:
Team Meetings: Sharing a physical diagram keeps everyone focused.
Workshops: Having diagrams on hand helps participants interact with the content.
Documentation: Including a printed version ensures critical workflows are always accessible.
I remember a project where my team struggled with digital-only diagrams during a brainstorming session. Printing the diagram turned the tide. Everyone could annotate and contribute, which saved hours of rework.
Step-by-Step Guide: How to Print a Draw.io Diagram
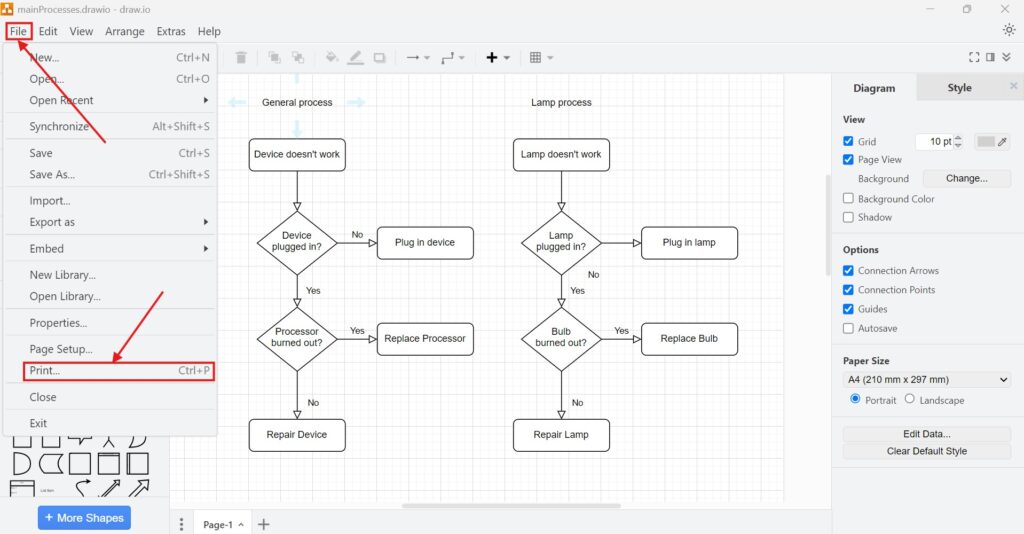
1. Step: Navigate to “Page Setup”
First, open your draw.io file. Then, go to the File menu and select Page Setup. If you’re a shortcut enthusiast like me, you can also press Ctrl+P to jump straight to the print options. This step ensures you’re in the right place to configure your print settings.
2. Step: Configure Your Print Settings
Once you’re in the Page Setup menu, you can customize how your diagram will appear. These settings control how your draw.io diagram appears on paper or in a PDF. Here are the options you’ll encounter:
- Selection Only: Print just the selected portion of the diagram.
- Page View: Print the current visible section.
- Crop: Adjust the diagram’s size to remove unnecessary white space.
- Fit to Sheets: Define how many sheets wide and tall the diagram should span.
- Border Width: Set the margins around your diagram.
- Zoom: Scale the diagram to your desired size.
- Grid: Include gridlines for alignment purposes.
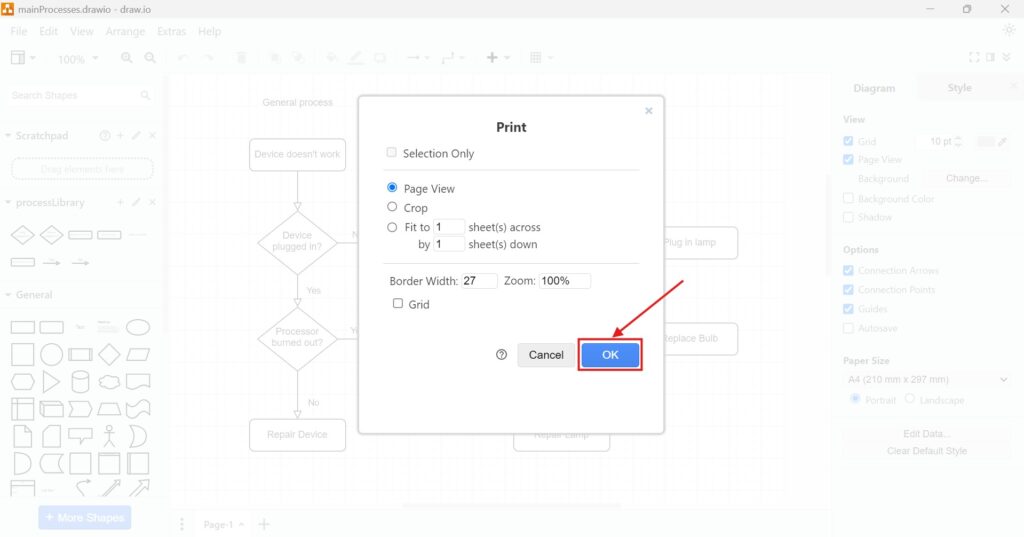
For example, if you’re printing an organizational chart to fit on a single A4 sheet, you’d adjust the “Fit to Sheets” and “Zoom” settings accordingly. Once you’ve configured everything, click OK to save your preferences.
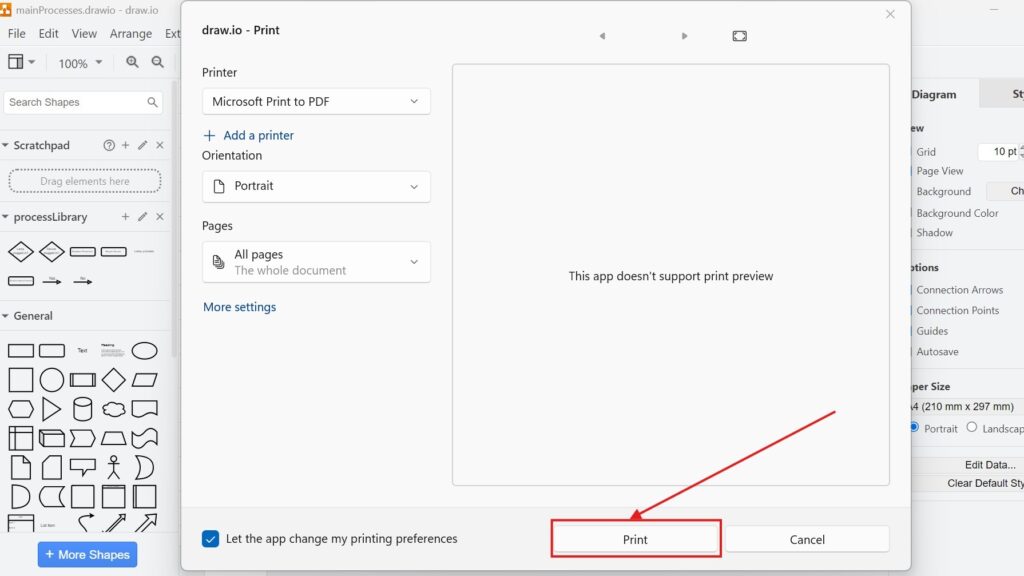
3. Step: Print Through Your System
Now that your diagram is ready, it’s time to print. Use your system’s print function to complete the task. Whether you’re printing directly to paper or saving it as a PDF, this step ensures your diagram is physically or digitally accessible.
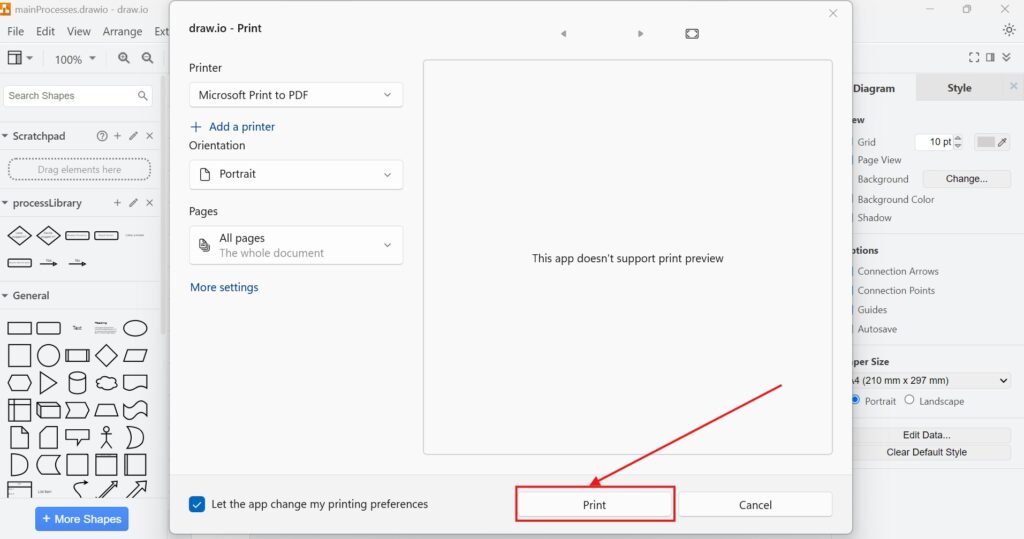
4. Step: Preview Your Output
Some systems don’t provide a direct print preview within draw.io. If that’s the case, I recommend creating a PDF printout first. This way, you can verify the layout before committing to paper. For instance, I often generate a PDF to confirm that all elements are aligned and visible.
Final Thoughts
Printing a draw.io diagram might seem straightforward, but these steps help ensure professional results every time. Whether you’re leading a meeting or documenting processes, having a printed diagram can make a significant difference. Remember to configure your print settings carefully and always preview the output for the best results.
Now, you know how to print a draw.io diagram with ease. Why not try it for your next project? It’s a simple step that can elevate your presentations and collaborations to the next level.
What’s Next?
Now that I know how to print a draw.io diagram, I can finish my work in the editor more safely. Printing helps me share a tangible version, but closing the diagram correctly helps me protect my work and keep my workspace clean. In the next article, I’ll explain How to Close a Draw.io Diagram. You’ll learn what to check before closing, how to avoid losing changes, and how to end your diagram session with confidence. Click below to continue and close your draw.io diagram the right way.
Use Tools That Support Clear Requirements Work
Requirements engineering becomes easier when I use tools that support visual thinking, documentation, coordination, and process modeling. Therefore, I use draw.io to create diagrams, Confluence to organize knowledge, Jira to manage requirements-related work, and Camunda to model business processes. Each tool helps me handle a different part of the workflow. As a result, I can connect ideas, decisions, tasks, and processes more clearly. In the main article on Requirements Engineering Tools, I show how these tools work together and support stronger requirements work from start to finish.
| Read mora about draw.io |
|---|
| Import PNG Export JPEG Export WebP Export SVG Export |