
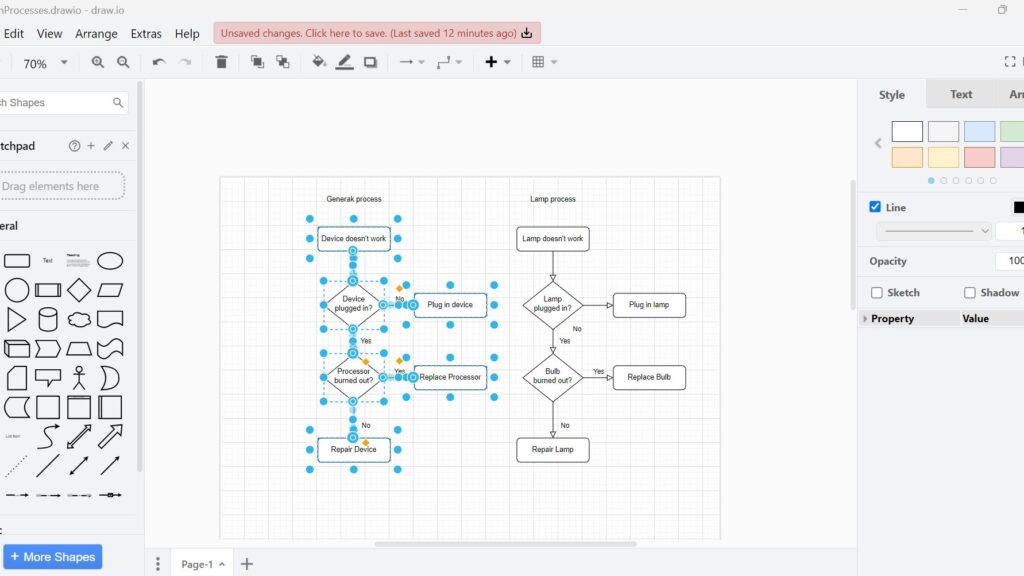
When I first used draw.io, the many options felt overwhelming. However, importing diagrams soon became simple. In this guide, I explain how to import into Draw.io in a clear and practical way. You’ll learn which files you can import, how the process works, and how importing helps you reuse existing diagram content faster.
Prefer watching instead of reading? Here is the quick video walkthrough:
What is draw.io?
draw.io is a powerful diagramming tool. It’s user-friendly and versatile. You can create flowcharts, UML diagrams, network designs, and more. I love that it integrates seamlessly with cloud storage services like Google Drive and OneDrive. Plus, it’s free! Whether you’re a beginner or an expert, draw.io has you covered. For me, it’s the go-to solution for all diagramming needs.
What Does Importing into draw.io Mean?
Importing adds content from another file to the diagram that I currently have open. Therefore, I can combine existing material with my current work.
Importing differs from simply opening a diagram because I add its content to an existing drawing. draw.io places imported diagram content on the drawing canvas so I can reposition and edit it.
Which Formats Can I Import?
draw.io supports several diagram and image formats. These include draw.io files, XML, Gliffy, Lucidchart, and Microsoft Visio VSDX files. In addition, I can import PNG, SVG, and JPEG images.
I choose an import format according to the source of the existing content.
However, imported image files behave differently from native diagram elements. For example, I cannot edit individual components inside a normal JPEG image.
How to Import a Diagram into draw.io
Step 1: Open draw.io
I open draw.io and then open the diagram that should receive the imported content. Therefore, I already have my target drawing available before I start the import.
I use importing when I want to add another diagram to my current diagram.

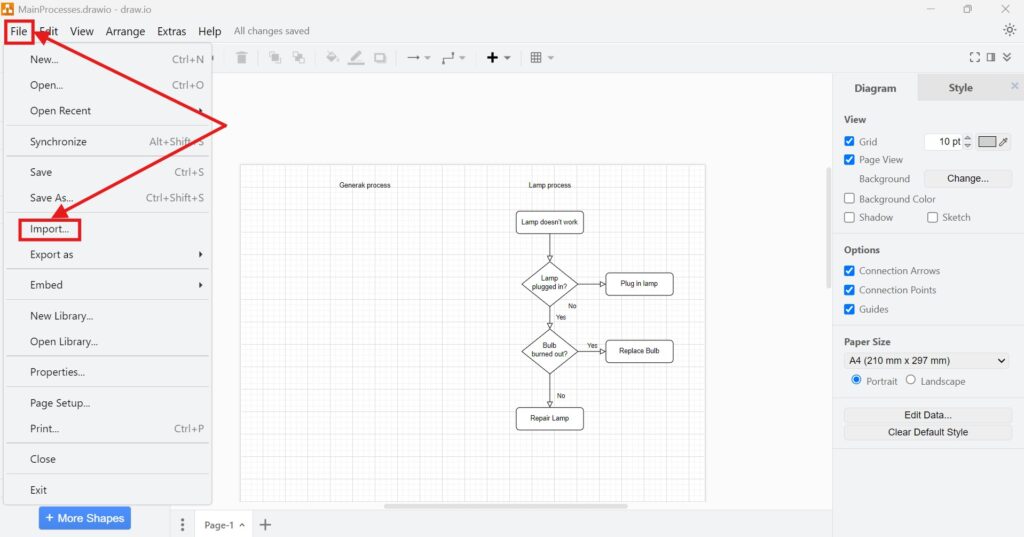
Step 2: Navigate to File > Import From
I open the File menu. Then, I select Import From.
This command starts the import process. Next, draw.io lets me choose where the source file is located.
Step 3: Select the File Location
I choose the location that contains my source file. Then, I continue to the file selection.
draw.io can work with files from local and supported cloud storage locations. The available choices can depend on my draw.io environment.
At this stage, I select where the source file comes from, not where I want to place it.
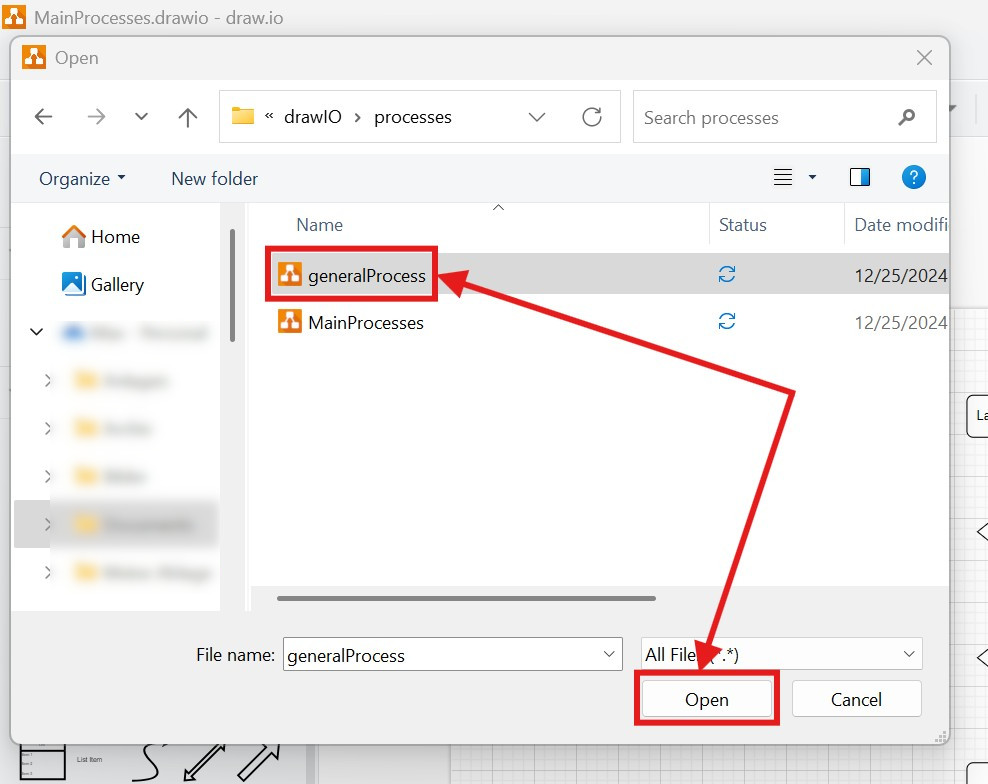
Step 4: Pick Your File
I select the file that contains the content I want to import. Then, I confirm my selection.
For diagram imports, draw.io currently supports formats including draw.io, XML, Gliffy, Lucidchart, and VSDX.
The imported file becomes part of my current drawing rather than replacing its existing content.
Step 5: Place the Diagram
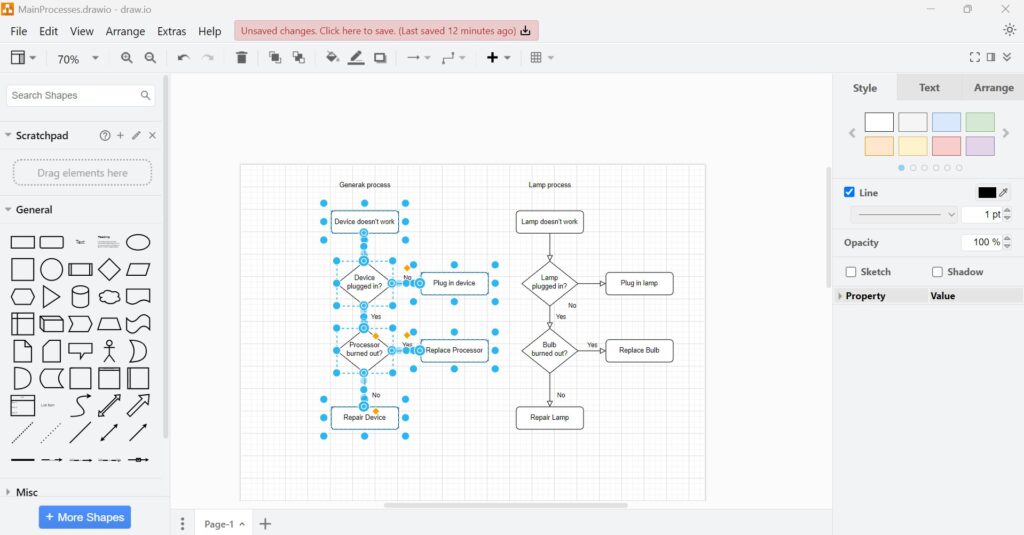
draw.io adds the imported diagram to the upper-left area of the drawing canvas. It also selects the imported content automatically. Therefore, I can immediately drag it to the required position.
I move the imported elements to their final location. Then, I can continue editing and integrating them into my diagram.
After the import, I treat the imported diagram content as part of my current modeling work.
Importing by Drag and Drop
I can also import diagram files by dragging them directly onto an existing drawing canvas. This provides a useful alternative to the File menu.
However, I need to understand one important difference. If I drop a file onto a completely blank diagram, draw.io may open it instead. It does not necessarily add the content to the blank drawing.
Therefore, I use File > Import From when I want a clear and controlled import workflow.
When I Use the Import Function
I use importing when existing diagram content already contains structures that I need. For example, I may want to combine related models in one drawing.
Importing also helps when I move diagrams from another supported modeling tool into draw.io. However, different file formats can represent diagram features differently. For example, draw.io notes possible differences when importing VSDX diagrams.
I always review imported content before I continue working with it.
Final Thoughts
Importing helps me reuse existing diagram content instead of rebuilding it manually. First, I open my target diagram. Then, I select File > Import From and choose my source file.
Finally, draw.io adds the imported content to my canvas so I can reposition it. How to import into draw.io therefore comes down to selecting a source file and integrating its content into my current diagram.
What’s Next?
Now that I know how to import into Draw.io, I can prepare my diagram page more clearly. Imported content often needs the right page size, layout, and orientation. In the next article, I’ll explain How to Change the Draw.io Page Setup. You’ll learn how page setup affects your diagram and how it helps you create cleaner results. Click below to continue and improve your draw.io page setup step by step.
Connect Diagrams, Documentation, Tasks, and Processes
Requirements engineering becomes stronger when I use tools that support the full workflow. Therefore, I use draw.io to visualize ideas, Confluence to document knowledge, Jira to manage work, and Camunda to model business processes. Each tool adds a different kind of structure. As a result, I can explain requirements more clearly, connect decisions with tasks, and show processes in a visual way. In the main article on Requirements Engineering Tools, I show how these tools work together and help me create better requirements from start to finish.