Page setup shapes how a diagram looks and works. In this guide, I explain how to change the draw.io page setup step by step. You’ll learn how to adjust paper size, orientation, grid size, and background. As a result, you can create cleaner diagrams, improve readability, and prepare professional visuals for clients, workshops, or documentation.
What is draw.io?
draw.io is a versatile diagramming tool. It’s perfect for creating flowcharts, organizational charts, mind maps, and more. I love how user-friendly it is. You can access it online or offline, and it integrates seamlessly with platforms like Google Drive and GitHub. It offers countless options for customizing diagrams, making it ideal for both personal and professional use.
Why Change Page Setup of draw.io Files?
Customizing the page setup helps me improve readability, alignment, and presentation. I use page setup when a diagram needs a better page size, a clearer orientation, or a more useful grid. For example, a landscape layout works well for wide flowcharts. However, a portrait layout can work better for organizational charts or vertical process flows.
The page setup affects the complete diagram page. It does not only change one selected shape. Therefore, I use this setting when I want to control the whole visual frame of my diagram.
A tailored background can also improve the visual impression. However, I use strong colors carefully. A bright background can make a diagram harder to read if the shapes do not stand out enough.
Steps to Change the draw.io Page Setup
Step 1: Open the Page Setup Menu
First, I open the diagram in draw.io. Then I click File in the top menu. After that, I select Page Setup.
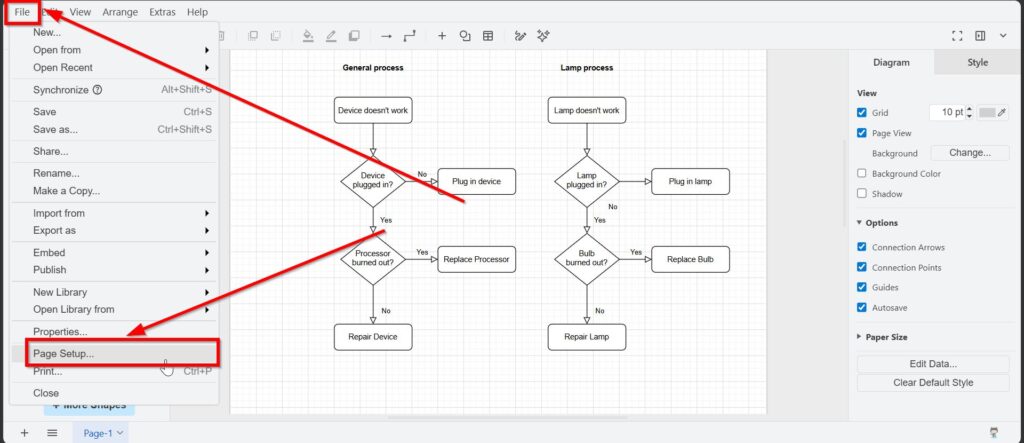
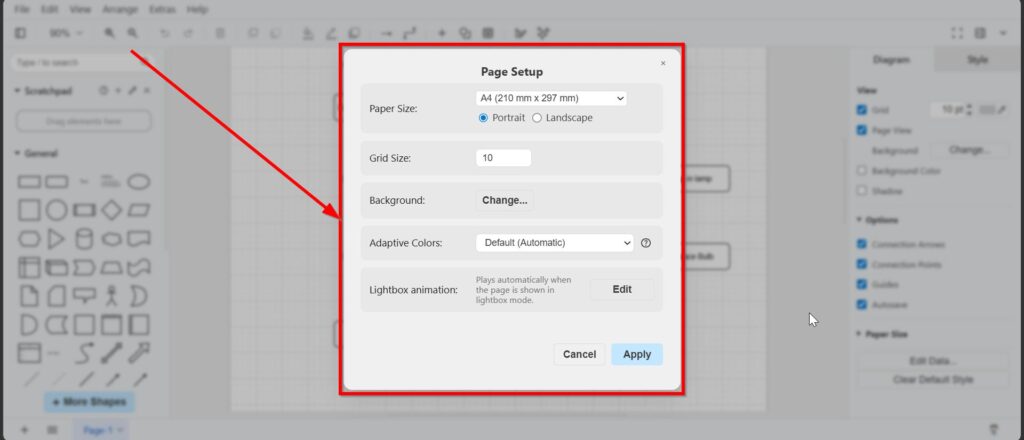
This opens the Page Setup dialog. The Page Setup dialog lets me change the main page settings in one place.
Step 2: Choose the Paper Size
The Paper Size dropdown controls the page format. I use paper size when I want my diagram to fit a document, a screen format, or a printed page.
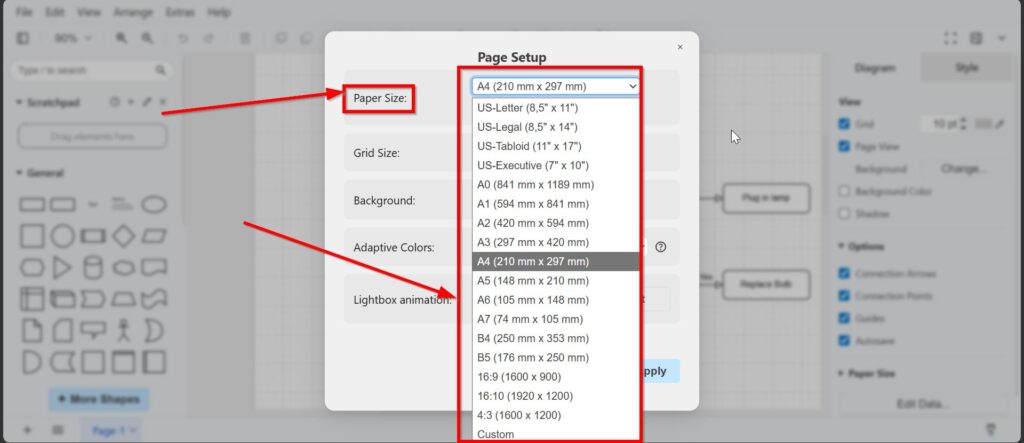
draw.io offers many common formats. For example, I can choose US-Letter, US-Legal, US-Tabloid, US-Executive, A0, A1, A2, A3, A4, A5, A6, A7, B4, B5, 16:9, 16:10, 4:3, or Custom.
For most documentation, I often use A4. For wide process models, I prefer A3 or 16:9. For presentations, I often choose 16:9 because it fits modern screens well.
Customize Your Page Size
If the predefined options do not fit my project, I choose Custom. Then I enter the width and height manually. I can also select the measurement unit, such as points, inches, or millimeters.
The custom page size helps me create diagrams for special formats and project-specific layouts. For example, I may need a diagram for a website banner, a large workshop printout, or a custom documentation layout.
Step 3: Set Portrait or Landscape
Next, I choose the orientation. Portrait gives me a vertical page. Landscape gives me a wide page.
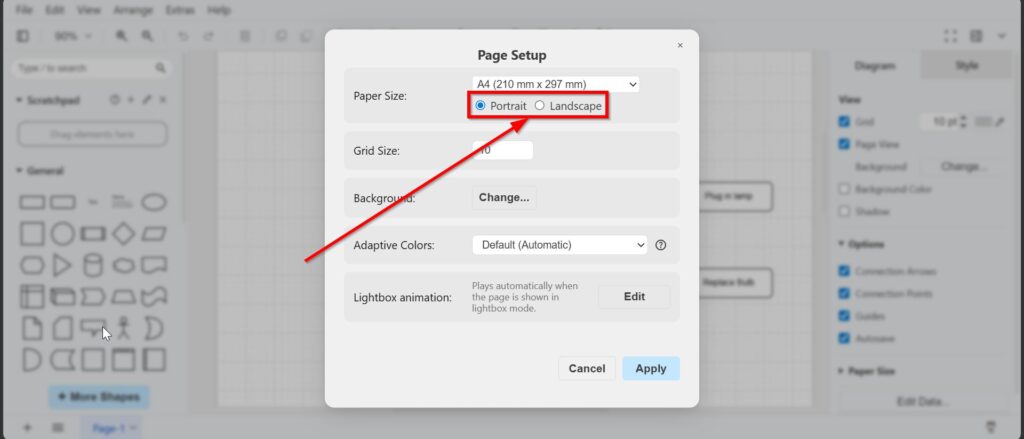
I choose portrait when my diagram grows from top to bottom. However, I choose landscape when my diagram grows from left to right. The right orientation can make a diagram much easier to read.
Step 4: Adjust the Grid Size
The Grid Size field controls the spacing of the grid. I use the grid size when I want to place objects more precisely.
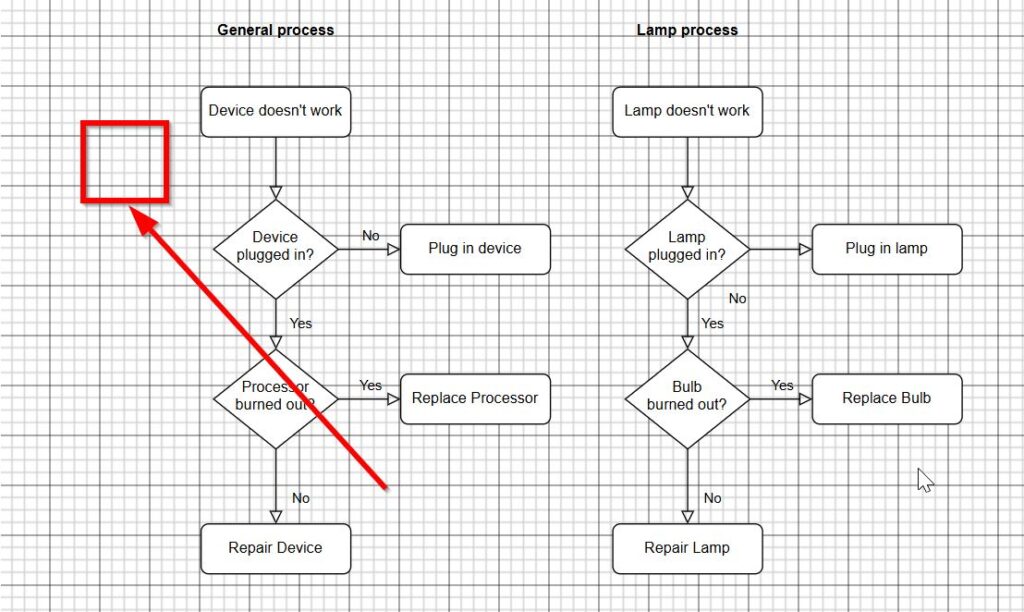
For demonstration purposes, I enter “20” for the grid size.

And the grid size visibly increases.
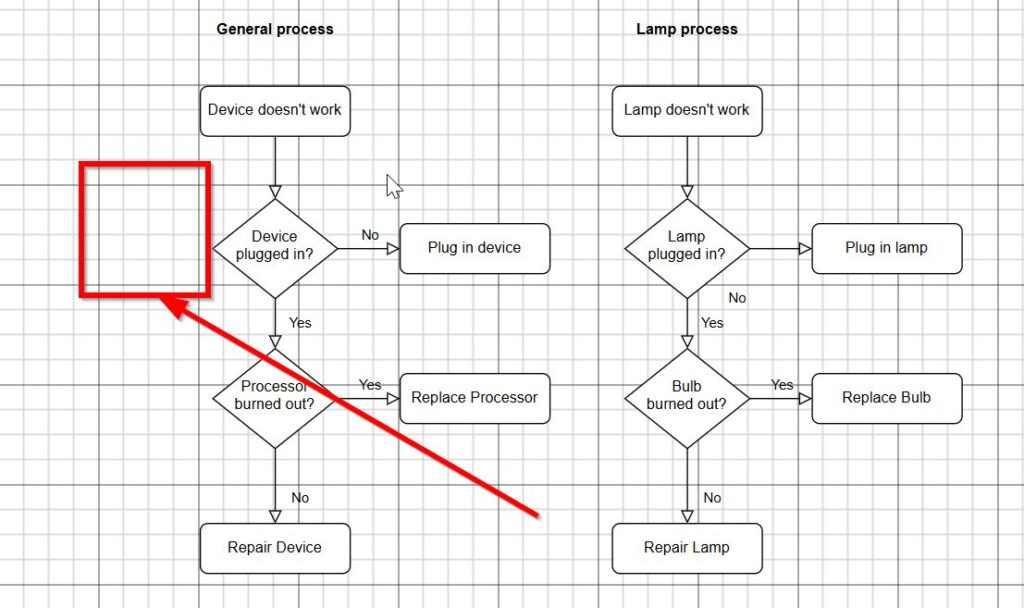
A smaller grid helps me align details more accurately. A larger grid helps me build cleaner layouts with bigger spacing. However, I do not use the grid as a design element. I use the grid as a work aid for alignment.
The screenshots show how grid settings change the visual workspace. This helps me see how shapes relate to the page structure.
Step 5: Change the Background
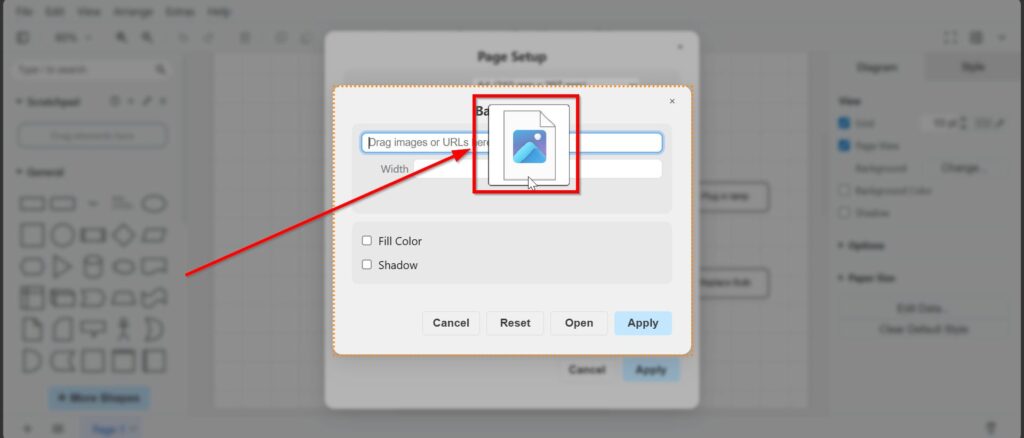
The Background option lets me add an image or URL as a page background. I click Change next to Background in the Page Setup dialog.
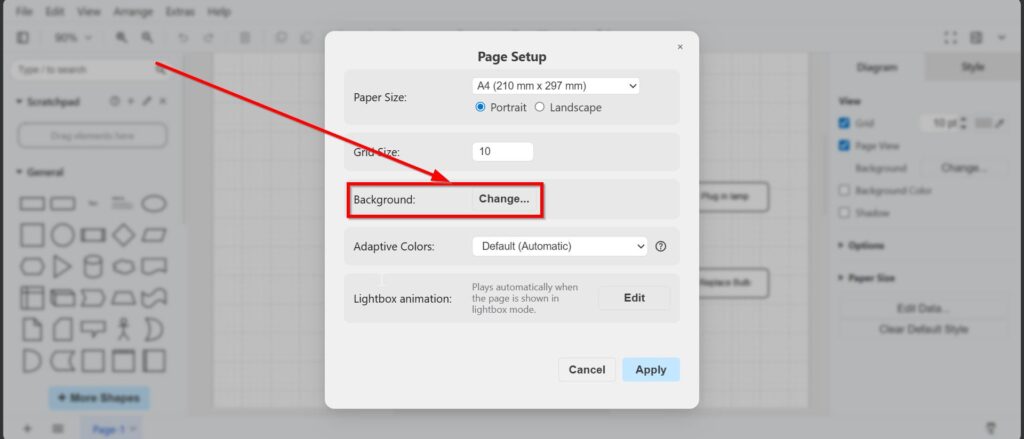
Then draw.io opens the Background dialog. The Background dialog lets me drag an image, paste an image URL, or choose a local file.
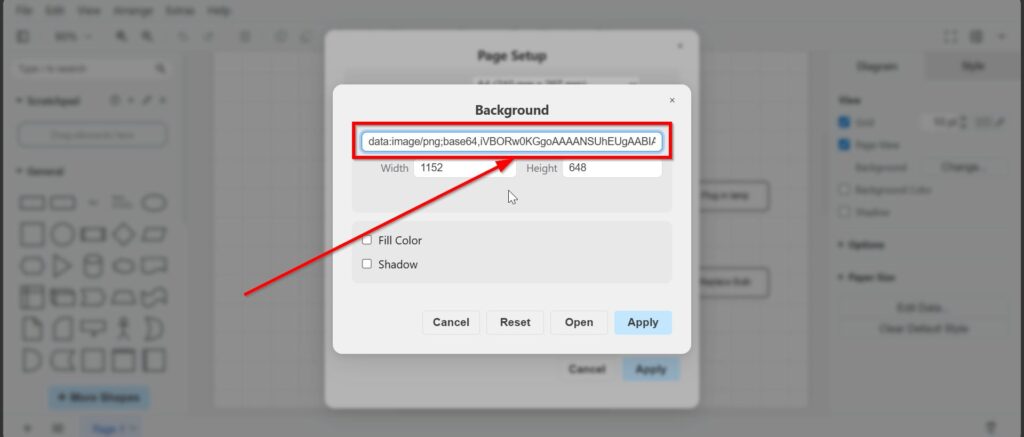
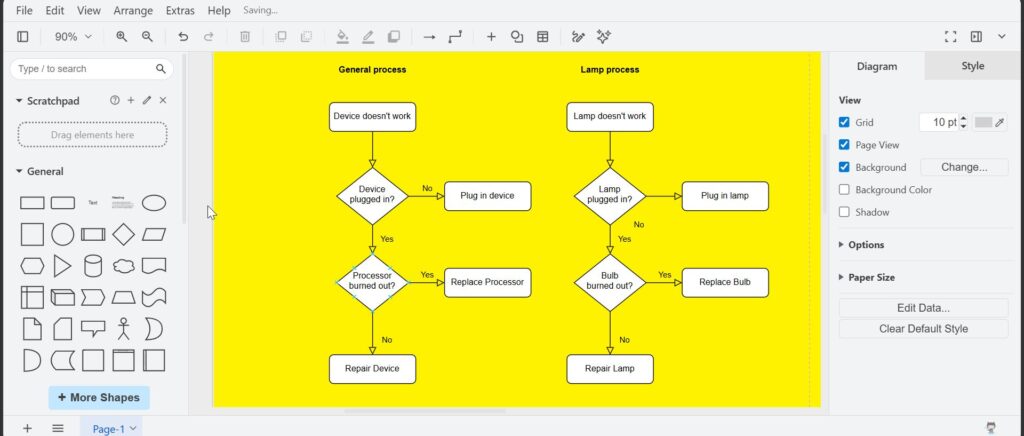
When I use an image, draw.io can insert it as a data image reference. The width and height fields help me scale the background correctly. The image in this example is simply a yellow background.
This option works well when I want to add a logo, a branded frame, or a visual template. However, I avoid busy background images. Busy background images can distract from the actual diagram.
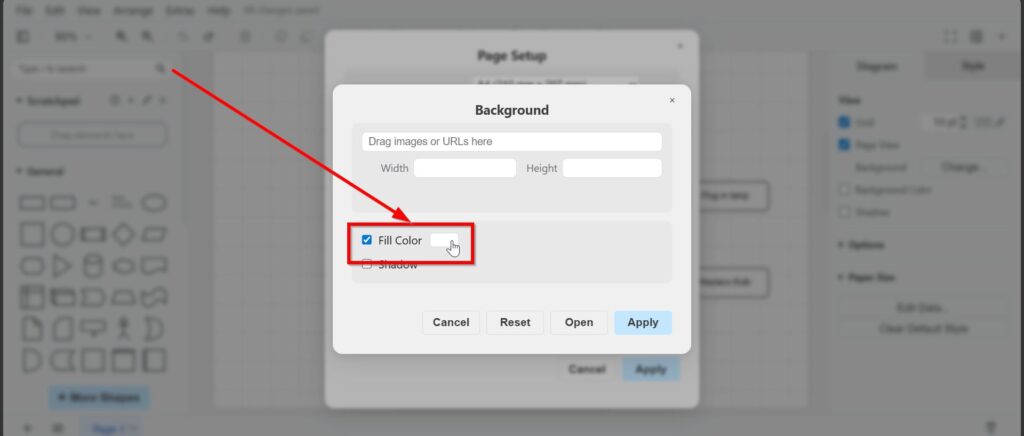
Step 6: Use Fill Color for a Solid Background
Sometimes I do not need an image. Instead, I only want a solid background color. In that case, I enable Fill Color in the Background dialog.
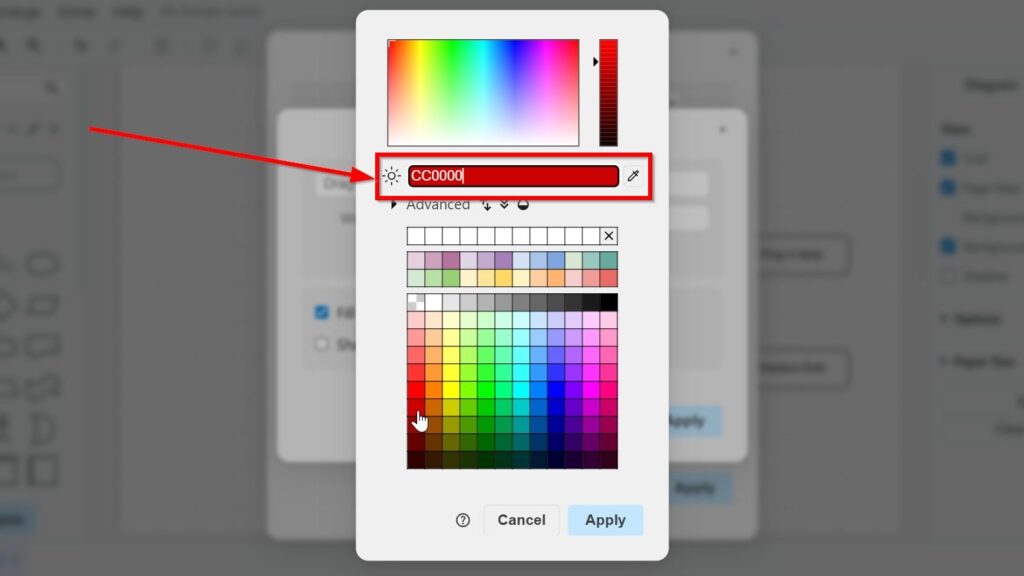
After that, I choose the color. I can use the color picker or enter a color code.
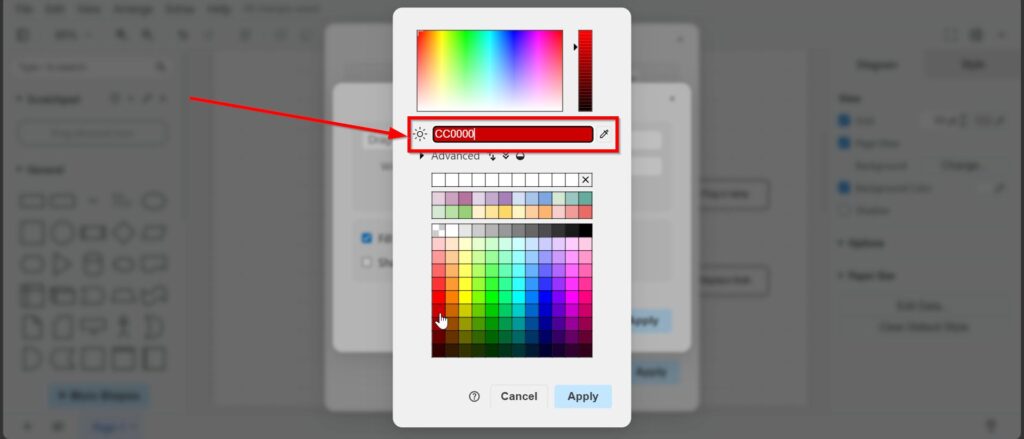
The screenshot shows a strong red background as an example. A strong background color demonstrates the effect clearly, but it can reduce readability in real diagrams.
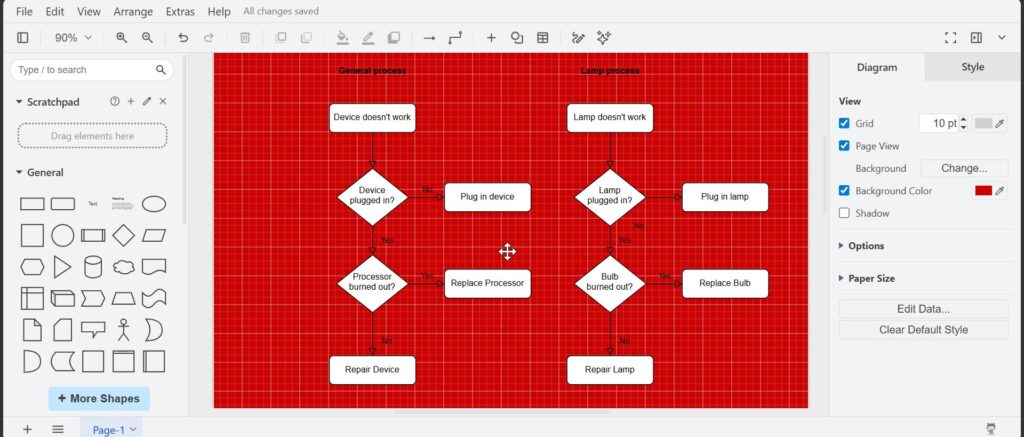
However, I would rarely use such a strong color in a real business diagram. For client work, I usually choose light and calm background colors. Light and calm background colors support readability and look more professional.
A softer yellow background also shows how the page changes after applying a fill color.
Step 7: Change the Background Color from the Diagram Sidebar
I can also adjust the background color from the right sidebar. To do this, I open the Diagram tab and activate Background Color.
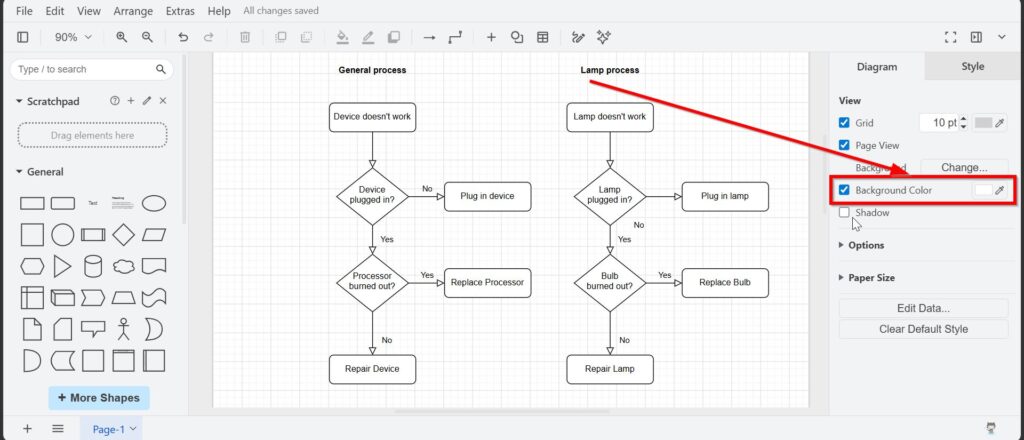
The Diagram sidebar gives me a faster way to adjust the visible page background. This is useful when I do not want to open the full Page Setup dialog again.
Step 8: Add or Remove a Shadow
The Background dialog also includes a Shadow option. I can activate the shadow when I want the page or background to stand out more.
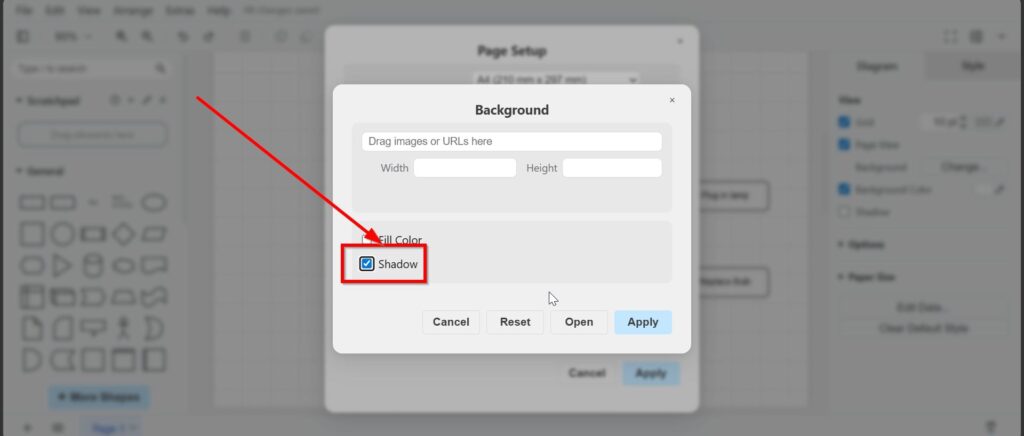
I use this option carefully. A shadow can create depth, but it can also make a diagram look less clean. I only use a shadow when it supports the presentation.
Step 9: Choose Adaptive Colors
The Page Setup dialog also includes Adaptive Colors. This option changes how colors behave in some display contexts.
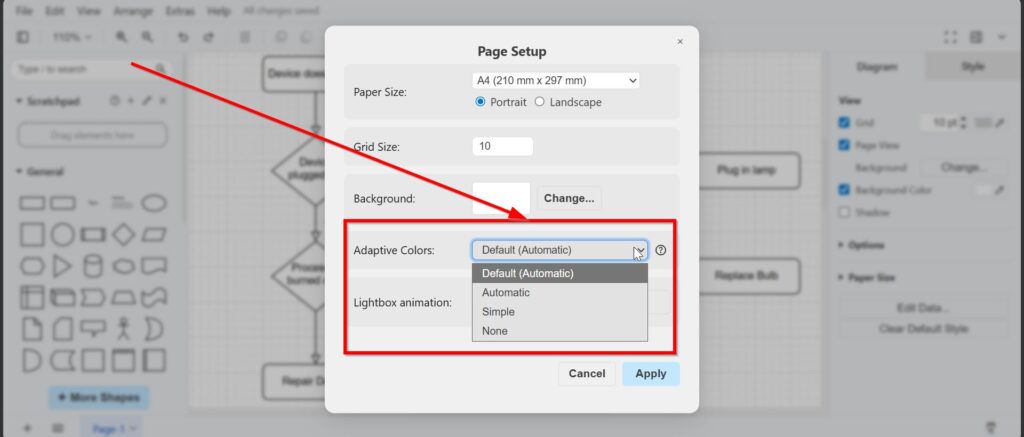
The available options include Default, Automatic, Simple, and None. I usually keep the default adaptive color setting unless I have a clear reason to change it. This prevents unexpected color changes.
Step 10: Configure Lightbox Animation
The Page Setup dialog also includes Lightbox animation. Lightbox animation matters when the page appears in lightbox mode.
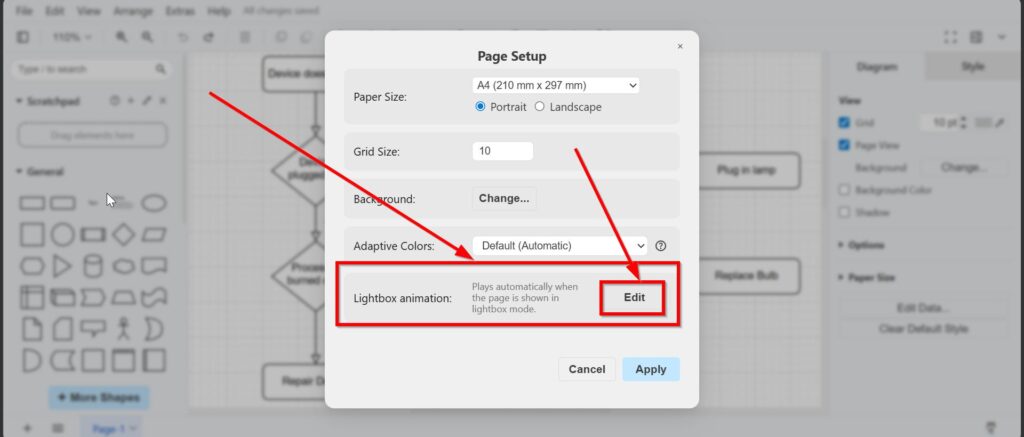
When I click Edit, draw.io opens the Lightbox animation dialog. Here, I can define how the diagram behaves during the lightbox presentation.
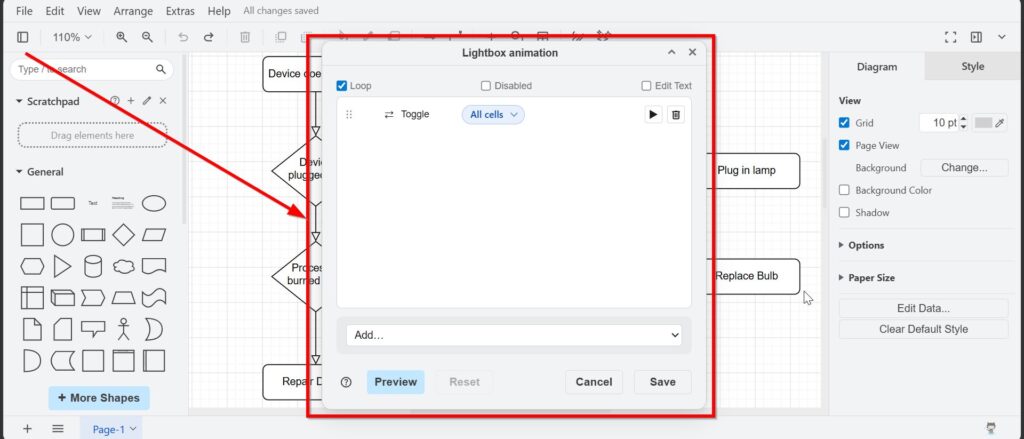
This feature goes beyond normal page layout. Lightbox animation can help me guide viewers through a diagram. However, I would only use it when the animation improves understanding.
Final Thoughts
Learning how to change the draw.io page setup helps me create cleaner and more polished diagrams. I can adjust paper size, orientation, grid size, background, colors, shadows, adaptive colors, and lightbox animation. Page setup helps me prepare diagrams for documentation, printing, presentations, and client communication. Therefore, I do not stick to the default settings when the diagram needs a better visual frame.
What’s Next?!
Now that I know how to change the Draw.io page setup, I can organize larger diagrams even better. A single page may not always be enough. Therefore, page tabs help me separate topics, versions, or diagram parts inside one file. In the next article, I’ll explain Adding and Using a New Page Tab in draw.io. You’ll learn how page tabs work and how they help you structure complex diagram content more clearly. Click below to continue and add your next page tab in draw.io.
Create Better Requirements Work with the Right Tools
Requirements engineering becomes easier when I use tools that support visual thinking, documentation, task management, and process modeling. Therefore, I use draw.io to create clear diagrams, Confluence to organize knowledge, Jira to manage requirements-related work, and Camunda to model business processes. Each tool helps me reduce confusion and improve collaboration. As a result, I can connect ideas, decisions, tasks, and workflows more effectively. In the main article on Requirements Engineering Tools, I show how these tools support a stronger and clearer requirements workflow.