Editing diagrams in draw.io often means testing ideas and correcting mistakes. Therefore, Undo and Redo help me stay in control. In this article, I explain How to Undo or Redo editing in draw.io step by step. You’ll learn how to reverse changes, restore actions, and edit diagrams with more confidence.
What is draw.io?
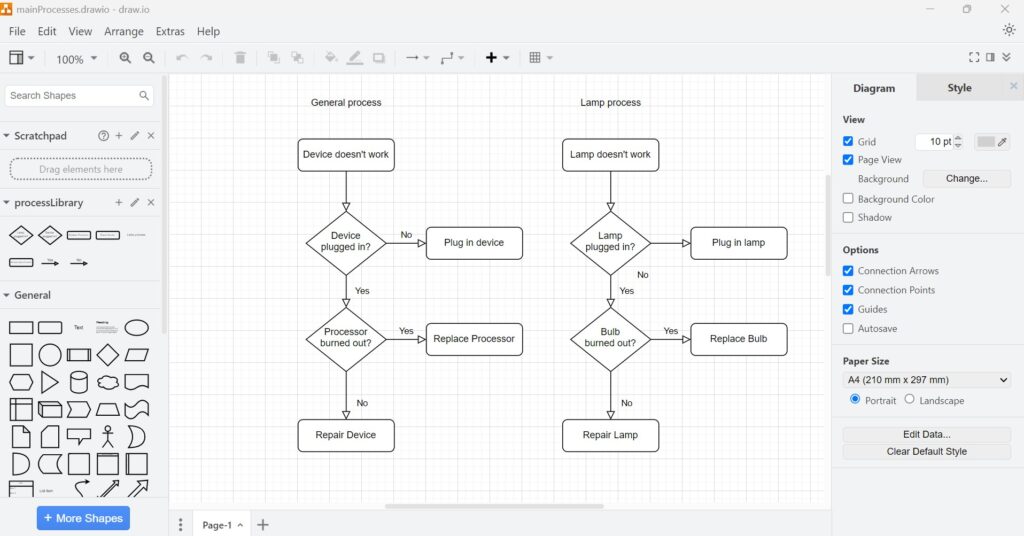
draw.io is a versatile diagramming tool. I use it regularly to create flowcharts, mind maps, and organizational charts. It’s a powerful, web-based platform with an intuitive interface that supports collaboration. Whether you’re working on software architecture or brainstorming ideas, it’s an invaluable resource. You can even save your diagrams directly to platforms like Google Drive or Microsoft OneDrive.
For me, the best part of draw.io is its simplicity. The clean layout and easy-to-navigate menu make it user-friendly. But what really elevates it is how it manages editing. If I make an error, I know I can undo it instantly. If I change my mind later, I can redo it just as easily. Let me show you how.
What Undo and Redo Mean in draw.io
Undo and Redo are basic editing functions in draw.io. However, they are very useful in daily work.
When I use Undo, I reverse my last change. For example, I can remove a fill color that I just added.
When I use Redo, I restore a change that I have just undone. Therefore, I can bring the fill color back without doing the same work again.
Undo moves one step back, while Redo moves one step forward again.
Why I Use Undo and Redo in draw.io
When I edit a diagram, I often test small changes. For example, I change the fill color of a rectangle to make one step more visible.
However, the first idea does not always fit. The blue fill may look too strong. It may also distract from the rest of the diagram.
Therefore, Undo and Redo help me compare both versions quickly.
I can test a change without being locked into it.
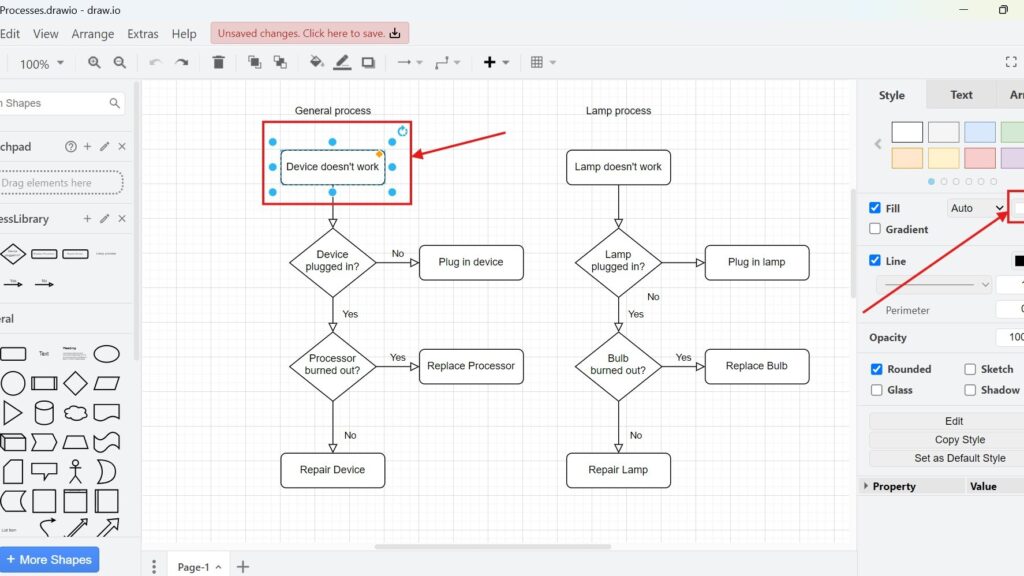
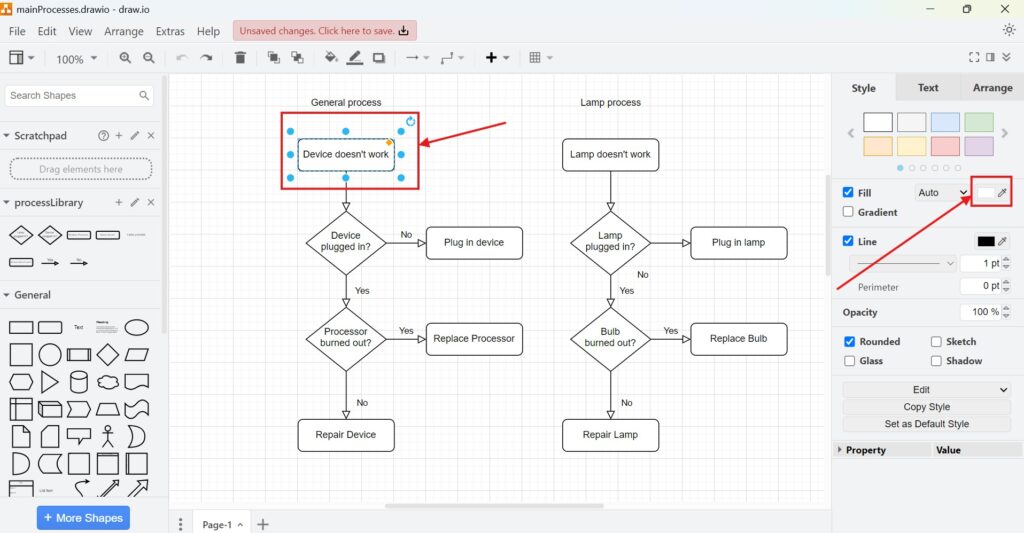
Step 1: Make a Change
First, I select the rectangle in my draw.io diagram. Then I go to the right side of the editor.
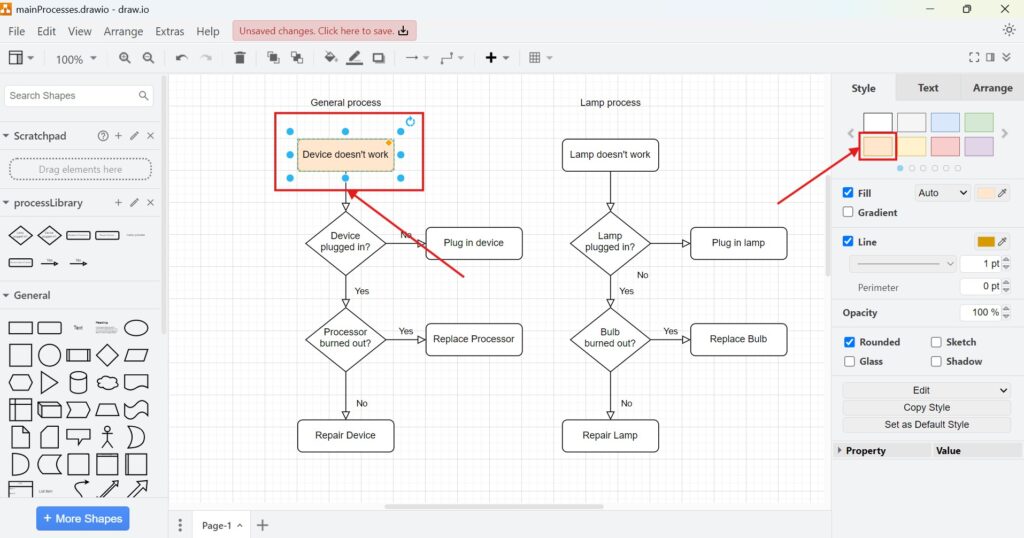
In the Style panel, I choose a fill color. As a result, the rectangle changes from unfilled to filled.
Now I check the result. The blue fill makes the rectangle stand out. However, I may decide that the original version looked better.
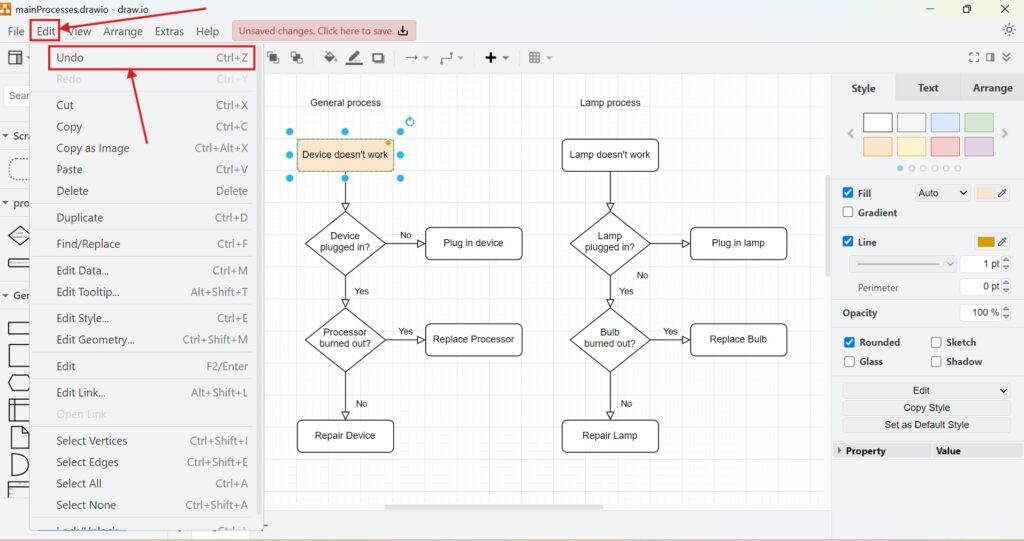
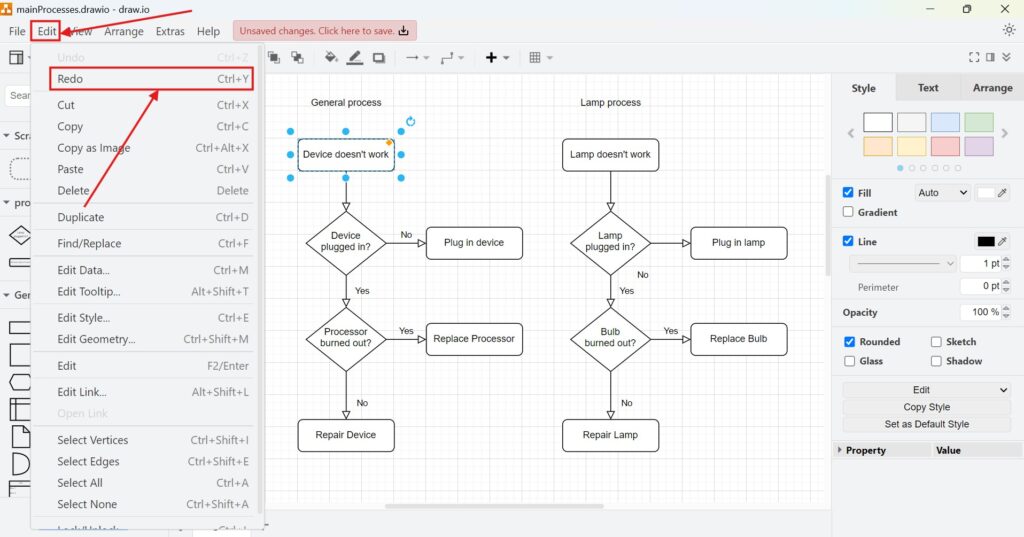
Step 2: Undo the Change
Next, I undo the fill color change.
I click Edit in the top menu. Then I click Undo. Alternatively, I use the shortcut Ctrl+Z, or Shift + CMD + Z / CMD + Y for iMac.
Now draw.io reverses the last change. The rectangle returns from blue to unfilled.
Undo only reverses the latest editing step. It does not delete the whole diagram.
This helps me correct the diagram quickly. In addition, it helps me test design ideas without risk.
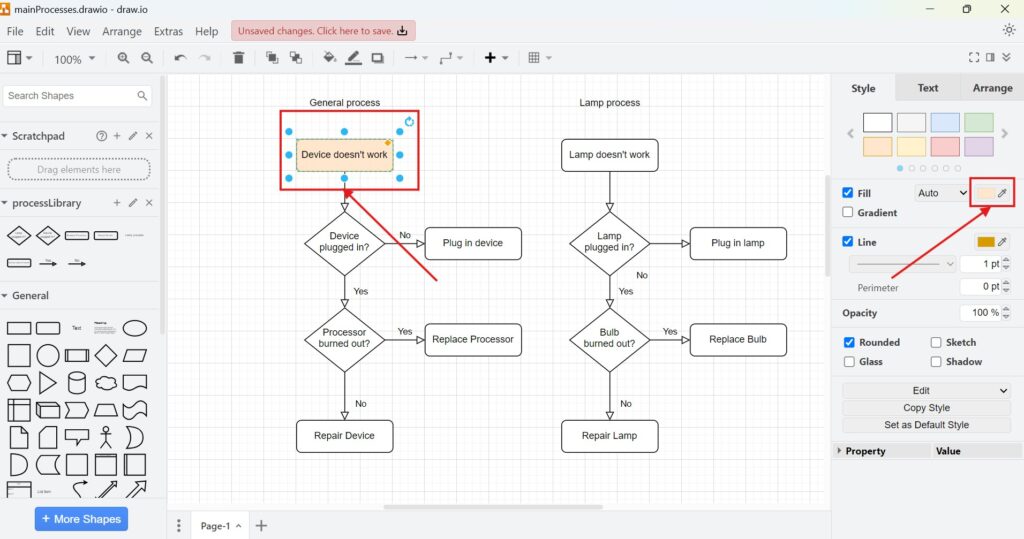
Step 3: Redo the Change
After that, I may change my mind again. Maybe the blue fill was useful after all.
So, I click Edit again. Then I click Redo. Alternatively, I use the shortcut Ctrl+Y, or Shift + CMD + Z / CMD + Y.
Now draw.io restores the change. The rectangle becomes blue again.
Redo restores an action that I have just undone.
Therefore, Redo is useful when I undo something too quickly.
In simple terms, the Undo function takes you one step backward in your changes, while Redo moves you forward through the steps you’ve undone. These functions provide flexibility when refining your diagrams.
Final Thoughts
How to Undo or Redo editing in draw.io is a simple workflow. However, it makes diagram editing much safer.
I can change the fill color of a rectangle, review the result, undo the change, and redo it again. Therefore, I stay flexible while I work.
Undo and Redo help me edit diagrams with more confidence.
As a result, I avoid unnecessary rework. I also make better decisions because I can compare changes step by step.
What’s Next?
Now that I know how to undo or redo editing in draw.io, I can handle basic changes with more confidence. However, I also need to move, reuse, and remove diagram elements efficiently. In the next article, I’ll explain Mastering Cut, Copy, Paste, and Delete in draw.io. You’ll learn how these editing actions work and how they help you build diagrams faster. Click below to continue and improve your everyday editing workflow in draw.io.
Use Tools That Support Clear Requirements Work
Requirements engineering becomes easier when I use tools that turn complex ideas into structure. Therefore, I use draw.io to visualize concepts, Confluence to document knowledge, Jira to manage requirements-related work, and Camunda to model business processes. Each tool supports a different part of the workflow. As a result, I can explain needs more clearly, connect decisions with tasks, and make processes easier to understand. In the main article on Requirements Engineering Tools, I show how these tools help me create a stronger and more reliable requirements workflow.