
Creating diagrams helps me plan, present, and solve problems. I often use draw.io because it keeps diagramming simple and flexible. In this guide, I show how to export a diagram as PNG in draw.io. You’ll learn the basic export steps, useful options, and practical tips so you can share your diagram across documents, websites, and presentations.
Prefer watching instead of reading? Here is the quick video walkthrough:
What is draw.io?
draw.io (opens in a new tab) is a free, user-friendly tool for creating professional diagrams. It’s ideal for everything from flowcharts and network diagrams to mind maps. Since it’s browser-based, there’s no need for complicated software installations. Moreover, it integrates easily with platforms like Google Drive, Microsoft OneDrive, and Dropbox. This makes it a go-to option for businesses, educators, and students. Whether you’re working alone or collaborating with a team, draw.io provides all the flexibility you need.
Exporting a Diagram as PNG
To export your diagram as a PNG in draw.io, follow these steps:
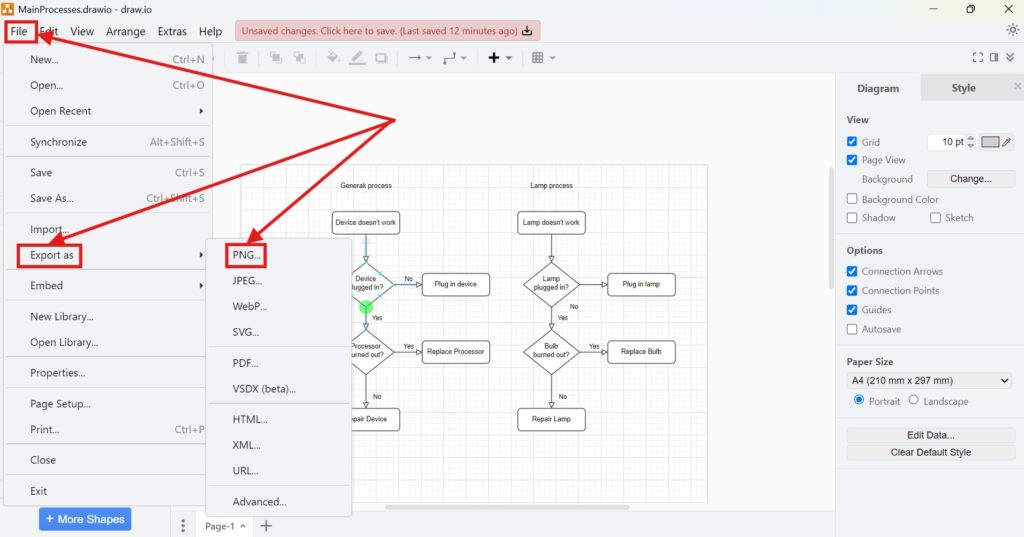
Step 1: Open the Export Menu
Start by selecting File > Export as from the top menu. Then, click on PNG to proceed.
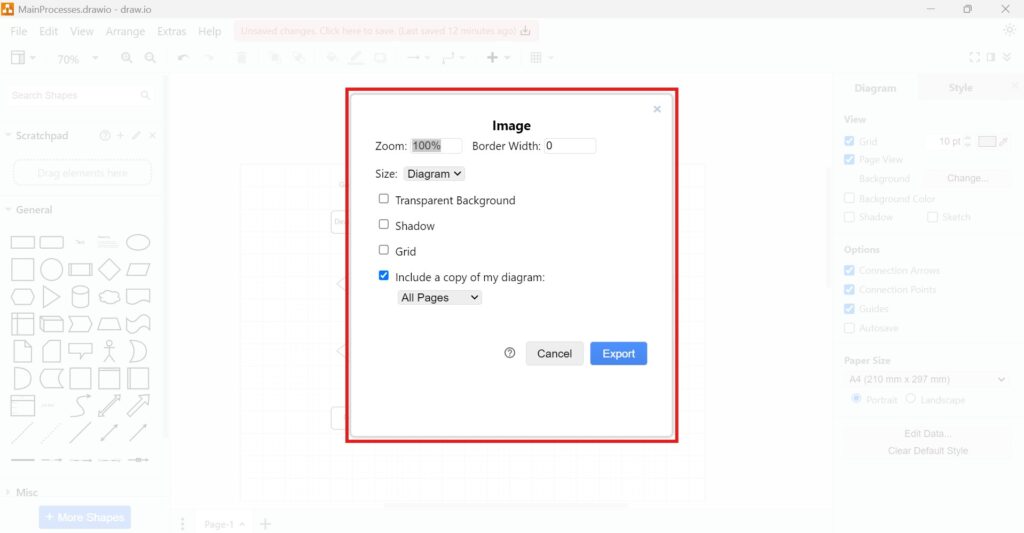
Step 2: Configure Basic Settings
You can adjust various settings to customize your PNG file. For example:
- Zoom: Modify the scale of the exported image.
- Border Width: Add or remove spacing around your diagram.
- Size: Define the dimensions of your PNG.
- Background: Choose between transparent or colored backgrounds.
- Shadow: Enable shadows to enhance the visual effect.
- Grid: Decide whether to include or exclude the grid.
- Copy of Diagram: Opt to embed a copy of your diagram.
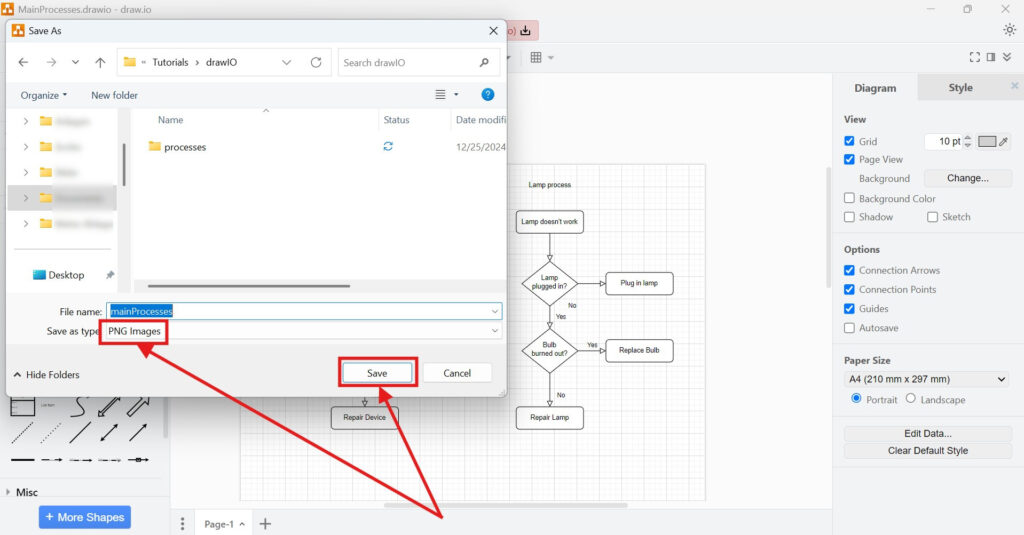
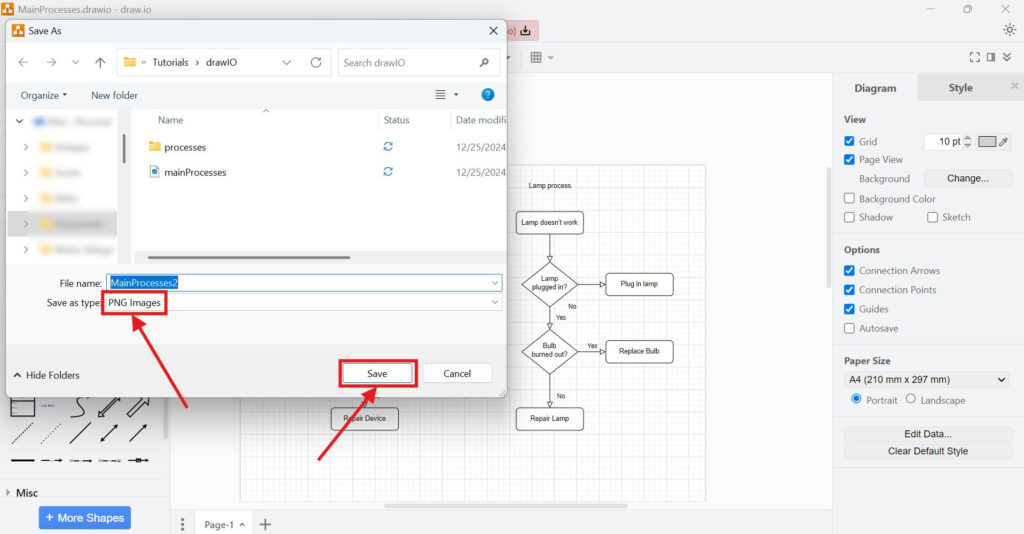
Step 3: Save Your File
Finally, type in a filename and choose a destination, either on your device or in the cloud. Once done, click Save to complete the process.
Advanced Export Options
If you need more precise configurations, try the advanced export options:
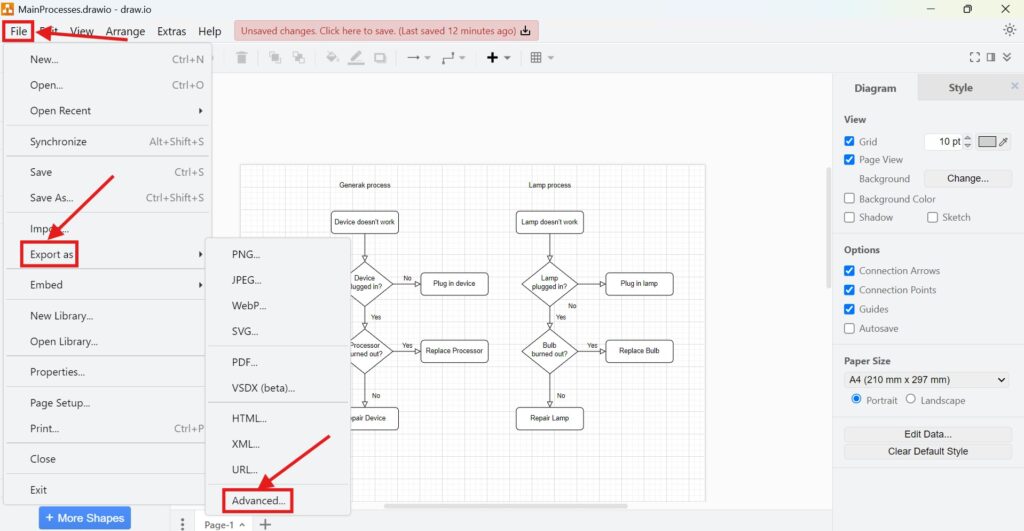
Step 1: Navigate to Advanced Export
Select File > Export as > Advanced from the menu.
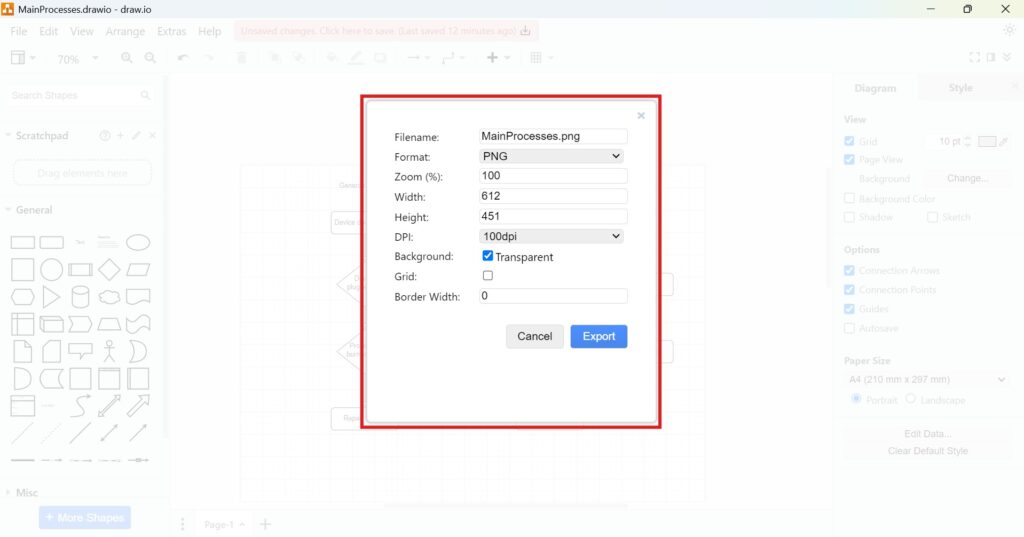
Step 2: Set Advanced Parameters
Here, you can fine-tune your export settings:
- Filename: Specify the name of the file.
- Format: Ensure you select PNG as the format.
- Zoom: Adjust the zoom percentage to control image scaling.
- Width and Height: Define exact dimensions for the output.
- DPI: Set the resolution for printing or display purposes.
- Background: Choose a transparent or colored backdrop.
- Grid: Include or exclude the gridlines.
- Border Width: Adjust the outer margin.
Step 3: Finalize and Save
Once satisfied with your configurations, enter the filename and click Save. It’s that simple!
Practical Business Case
Imagine this scenario: You’re preparing a presentation for stakeholders and need to include a diagram. However, the presentation software only supports image uploads. Using draw.io, you can quickly export your diagram as a PNG with transparent backgrounds, ensuring it blends seamlessly with your slide design. You can also adjust the DPI for a high-quality print version if required. This flexibility saves time and enhances professionalism.
Final Thoughts
Exporting diagrams as PNGs in draw.io is straightforward yet versatile. Whether you need a quick export or advanced customization, draw.io has you covered. With features like transparent backgrounds and adjustable dimensions, you can ensure your diagrams look perfect for any use case. Give it a try – it might just become your favorite diagramming tool.
What’s Next?
Now that I know how to export a diagram as PNG in draw.io, I can choose another useful image format. PNG works well for sharp visuals, but JPEG can help when I need smaller files or simple image sharing. In the next article, I’ll explain How to Export a Diagram as JPEG in draw.io. You’ll learn when JPEG makes sense, how the export works, and how it helps you share diagrams more easily. Click below to continue and export your draw.io diagram as a JPEG image.
Use Tools That Support Clear Requirements Work
Requirements engineering becomes more effective when I use tools that support visual thinking, documentation, coordination, and process modeling. Therefore, I use draw.io to create diagrams, Confluence to organize knowledge, Jira to manage requirements-related work, and Camunda to model business processes. Each tool helps me reduce complexity in a practical way. As a result, I can connect ideas, decisions, tasks, and workflows more clearly. In the main article on Requirements Engineering Tools, I show how these tools work together and help me build a stronger requirements engineering workflow.
| Read mora about draw.io |
|---|
| Import PNG Export JPEG Export WebP Export SVG Export |