Sharing diagrams in the right format matters. JPEG works well for presentations, documents, websites, and social media because it stays widely compatible. In this guide, I explain how to export a diagram as JPEG in draw.io. You’ll learn the basic steps and see why JPEG can make diagram sharing simple and practical.
Also, check the workflow in this video:
What is draw.io?
draw.io (opens in a new tab) is an intuitive, online diagramming tool. I’ve used it for everything from flowcharts to network diagrams. Its simplicity stands out, but it doesn’t skimp on advanced features. Best of all, it’s free and supports a wide range of file exports, including JPEG. Let me walk you through the steps to export your diagrams.
Steps to Export a Diagram to JPEG in draw.io
Basic Export Steps
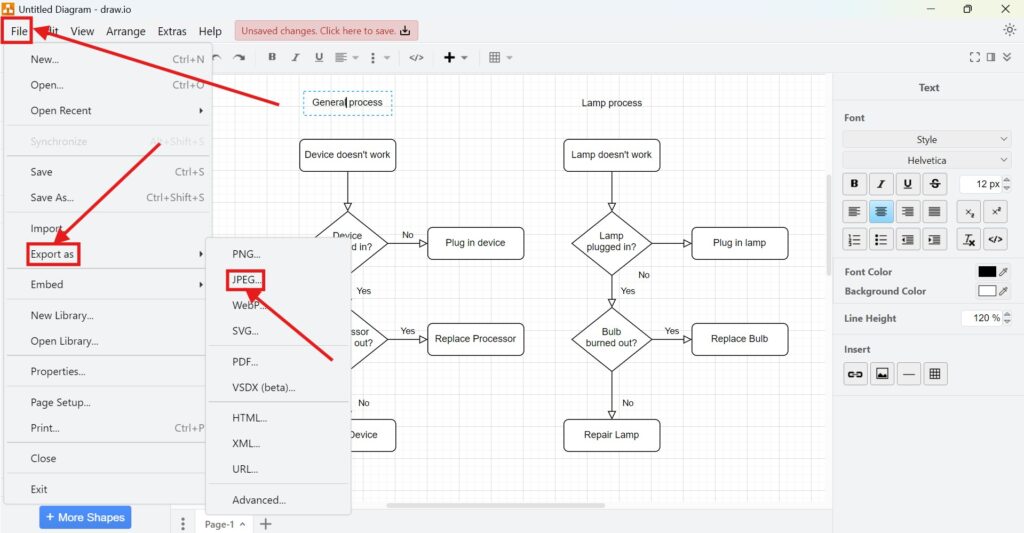
1. Step: Open your diagram in draw.io.
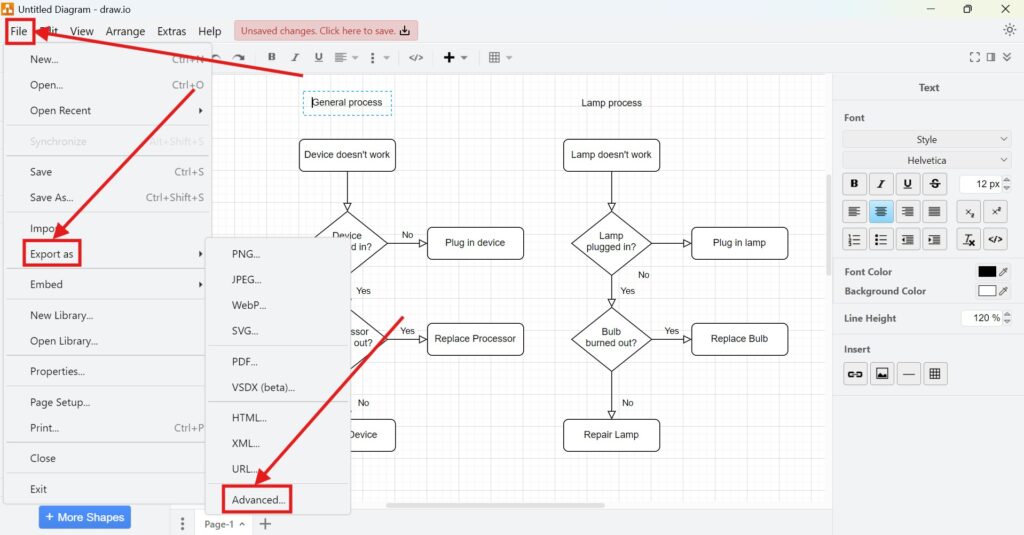
2. Step: Click File > Export as from the menu.
3. Step: Choose JPEG as the file type.
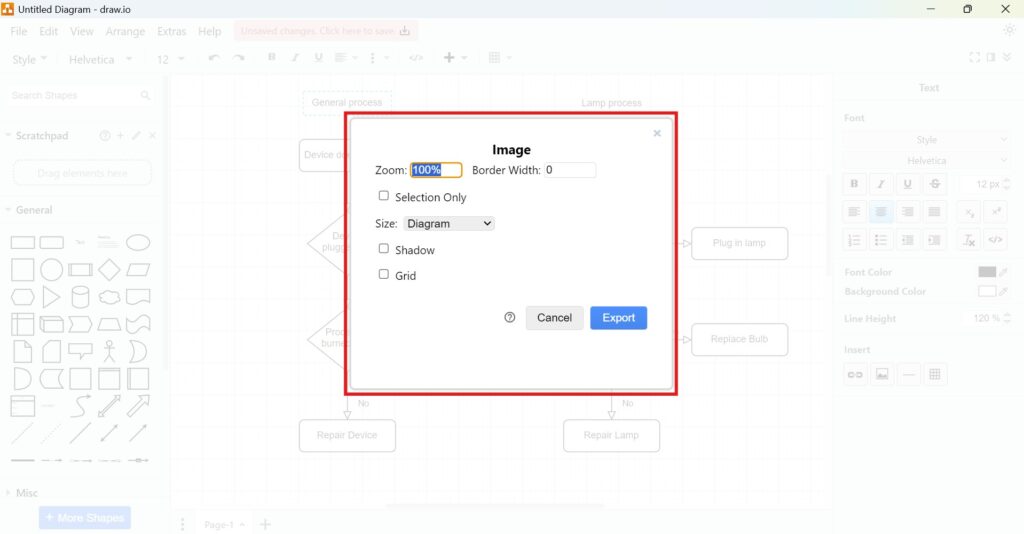
4. Step: Customize your export:
- Zoom: Adjust the percentage to control resolution.
- Border Width: Define the margins around your diagram.
- Size: Specify the dimensions.
- Shadow: Enable or disable shadows.
- Grid: Toggle grid visibility.
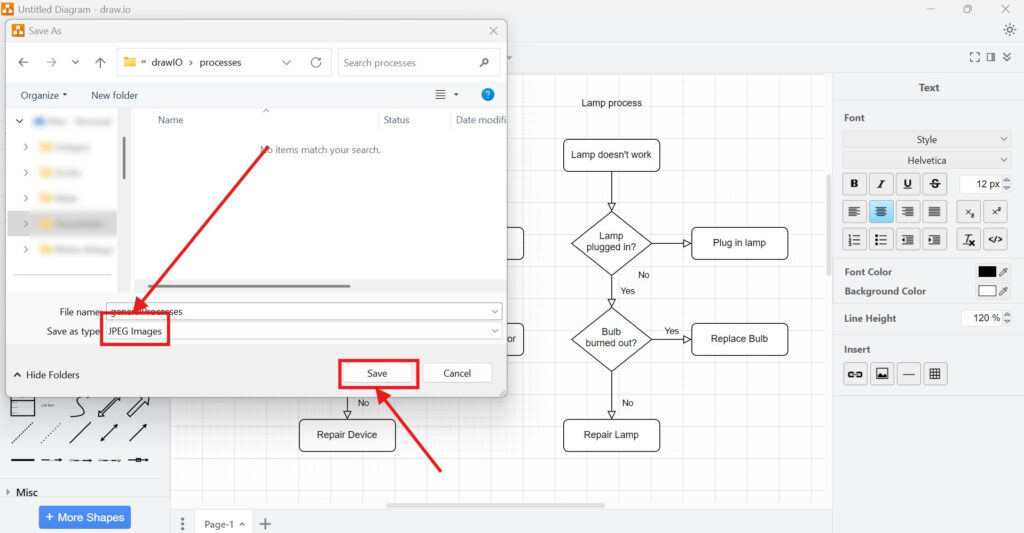
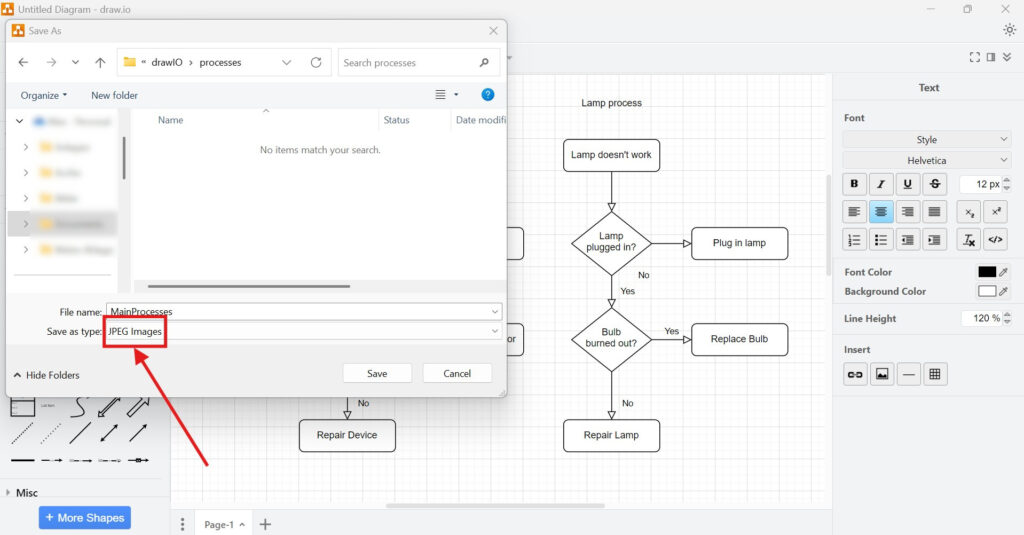
Step 5: Name your file and save it either locally or to your cloud storage.
Here’s a simple example:
Suppose e.g. you’ve created an organizational chart. By setting a 150% zoom, adding a 10-pixel border, and including shadows, the final JPEG looks polished and professional. You can save it directly to your desktop or a shared drive for easy access.
Advanced Export Options
For more control, use the advanced export feature:
1. Step: Open your diagram in draw.io again.
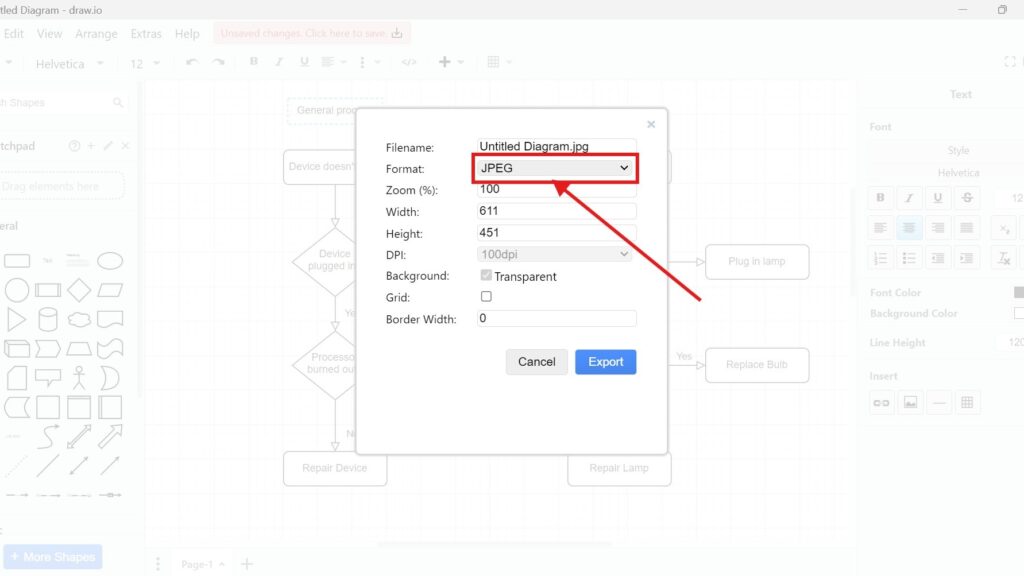
2. Step: Select File > Export as > Advanced from the menu.
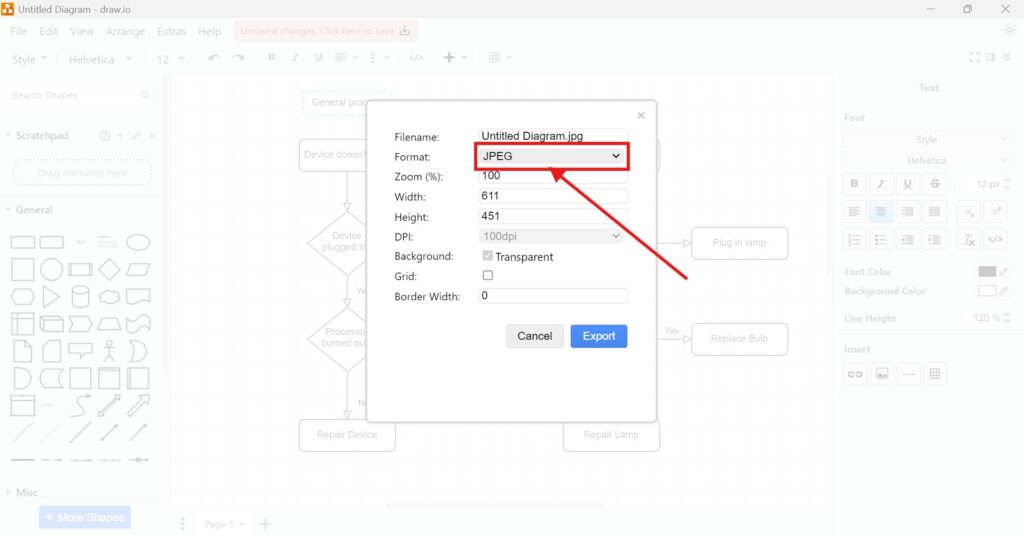
3. Step: Configure these additional options:
- Filename: Enter a descriptive name.
- Format: Ensure JPEG is selected.
- Zoom (%): Choose your desired level of detail.
- Width and Height: Manually set dimensions.
- DPI: Adjust the dots per inch for higher quality.
- Background: Pick a background color or make it transparent.
- Grid and Border Width: Fine-tune these elements.
4. Step: Click Save after finalizing your settings.
Here’s another example:
Imagine e.g. exporting a complex flowchart. You set a custom width and height of 1920×1080 pixels for widescreen presentations. Then, you choose 300 DPI to ensure print-quality resolution. The result? A crisp JPEG ready for slides or reports.
Business Case: Enhancing Collaboration
I recently worked on a network infrastructure diagram for a client. The client needed a high-resolution image for their website. Using draw.io’s advanced export, I created a JPEG with a transparent background and 10% grid visibility for alignment guidance. The client loved it because the image was easy to integrate and looked professional.
In conclusion using draw.io, I didn’t just save time—I delivered quality output without extra software.
Final Thoughts
Knowing how to export a diagram as a JPEG in draw.io is straightforward. With basic and advanced options, you can create visuals tailored to your needs. Whether for personal projects or professional presentations, draw.io has you covered. Try these steps today and elevate your diagramming experience.
What’s Next?
Now that I know how to export a diagram as JPEG in draw.io, I can look at an even more modern web format. JPEG helps with compatibility, but WebP can support smaller file sizes and better web performance. In the next article, I’ll explain How to Export a Diagram to WebP in draw.io. You’ll learn when WebP makes sense, how the export works, and how it helps you use diagrams more efficiently online. Click below to continue and export your draw.io diagram as a WebP file.
Improve Requirements Engineering with the Right Tools
Requirements engineering becomes clearer when I use tools that support visual thinking, documentation, coordination, and process modeling. Therefore, I use draw.io to create diagrams, Confluence to organize knowledge, Jira to manage requirements-related work, and Camunda to model business processes. Each tool gives structure to a different part of the workflow. As a result, I can connect ideas, decisions, tasks, and processes more effectively. In the main article on Requirements Engineering Tools, I show how these tools work together and help me build a stronger requirements engineering process.
| Read more about draw.io |
|---|
| PDF Export VSDX Export HTML Export URL Export XML Export |