
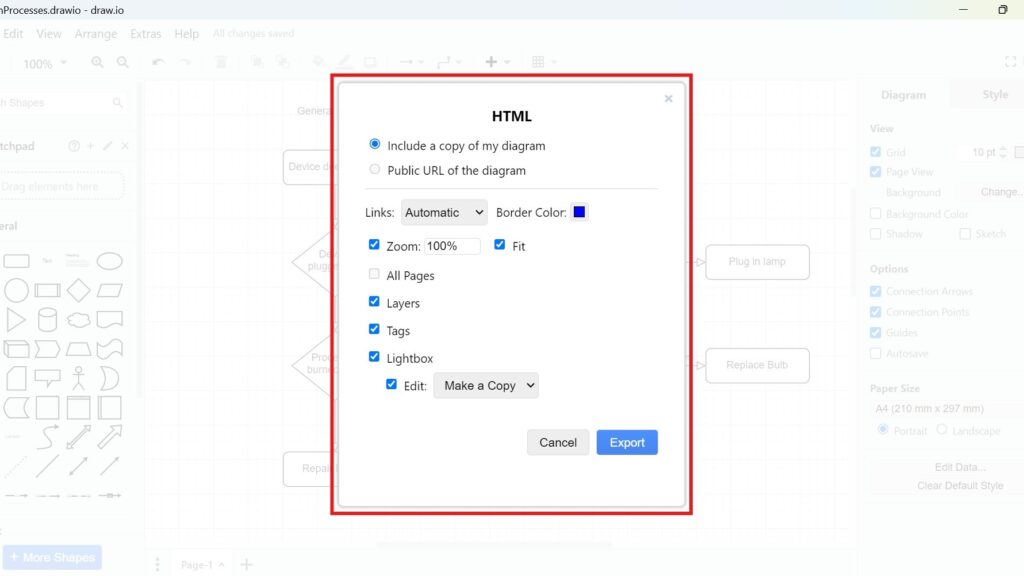
I often use draw.io to create diagrams for projects and documentation. However, sometimes I need more than an image export. In this guide, I explain how to export a diagram to HTML in draw.io. You’ll learn how HTML export works and how it helps you share or embed interactive diagrams more easily.
Prefer a video format? Watch the quick walkthrough here:
What is draw.io?
draw.io (opens in a new tab) is an intuitive diagramming tool. It lets you create flowcharts, network diagrams, UML models, and more. What sets it apart is its versatility. You can work online or offline, collaborate with your team, and export diagrams in multiple formats. One standout feature is exporting diagrams to HTML. This allows you to share interactive diagrams easily.
How to Export a Diagram to HTML
The HTML export works well when I want other people to view a diagram through a web browser. Moreover, I can preserve features such as links, multiple pages, layers, and viewer controls when the selected settings support them.
Step 1: Open the Diagram
First, I open the diagram that I want to export.
Before I continue, I check the content and layout. For example, I review labels, connections, pages, and hidden elements.
I prepare the source diagram first because the HTML export reflects the content that I provide.
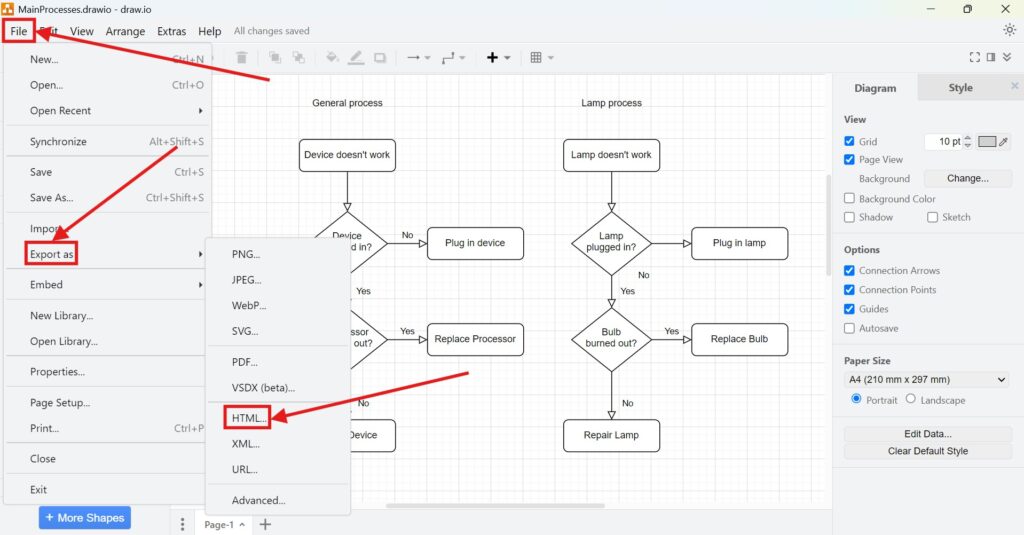
Step 2: Select File > Export as
Next, I open File in the top menu.
Then, I select Export as.
Draw.io shows the available export formats. Therefore, I can choose the format that matches my intended use.
Step 3: Choose HTML
I select HTML from the available export options.
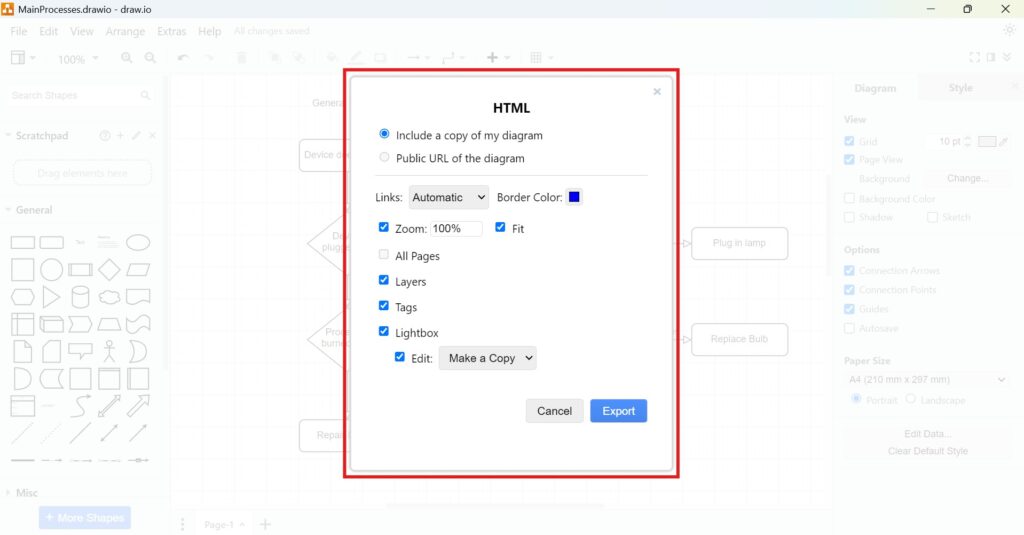
Draw.io then opens the HTML export settings.
Unlike a static image, an HTML file can provide a browser-based view of the diagram. Therefore, I use this format when viewing and interaction matter more than creating a simple image.
HTML export is particularly useful when I want to distribute a diagram that people can open directly in a web browser.
Step 4: Configure Your Export Settings
Next, I review the available options.
I do not enable every setting automatically. Instead, I select only the features that support the way I want people to use the exported diagram.
Include a Copy of the Diagram
I enable this option when I want to include the diagram data in the exported file.
This can make the output more self-contained. Moreover, embedded diagram data may support later reuse or editing, depending on the workflow.
However, I still keep the original draw.io file as my main editable source.
Public URL of the Diagram
A public URL can connect the viewer to a diagram that already exists online.
I use this option only when I deliberately want the exported page to reference an online source.
In contrast, I prefer an embedded copy when I want the file to work more independently.
Links
If the diagram contains links, I define how they should open.
Depending on the available options, I can let draw.io handle links automatically or open them in another browser context.
I check this setting carefully when I use the HTML file for documentation or navigation.
Links can turn a diagram from a static illustration into a practical navigation interface.
Zoom Options
Zoom controls help readers examine large or detailed diagrams.
I normally keep useful navigation controls available when the diagram contains small labels or many elements. As a result, readers can inspect details without changing the original file.
All Pages
I enable All Pages when I want to include every page from a multi-page diagram.
Otherwise, I export only the relevant page.
Therefore, I avoid distributing unrelated content when one page is enough.
Layers and Tags
Layers help me organise content within a diagram. Tags can also support structured views, depending on how I built the source model.
When the export provides related options, I decide whether viewers need access to this structure.
For example, layers can help readers switch between different levels of detail.
However, I avoid exposing unnecessary complexity when the diagram should communicate one clear message.
Lightbox
The lightbox option provides a focused diagram viewer.
I use it when I want readers to navigate the diagram without seeing unnecessary surrounding page content.
This mode can improve viewing for large process models, architecture diagrams, or other complex visualisations.
Lightbox Editing
Some export options may allow viewers to create or edit a copy of the diagram.
I enable this only when collaboration or reuse forms part of my intended workflow.
In contrast, I leave editing options disabled when I only want to distribute a controlled view.
I distinguish clearly between viewing a diagram and giving other people the ability to modify or reuse it.
Step 5: Save Your File
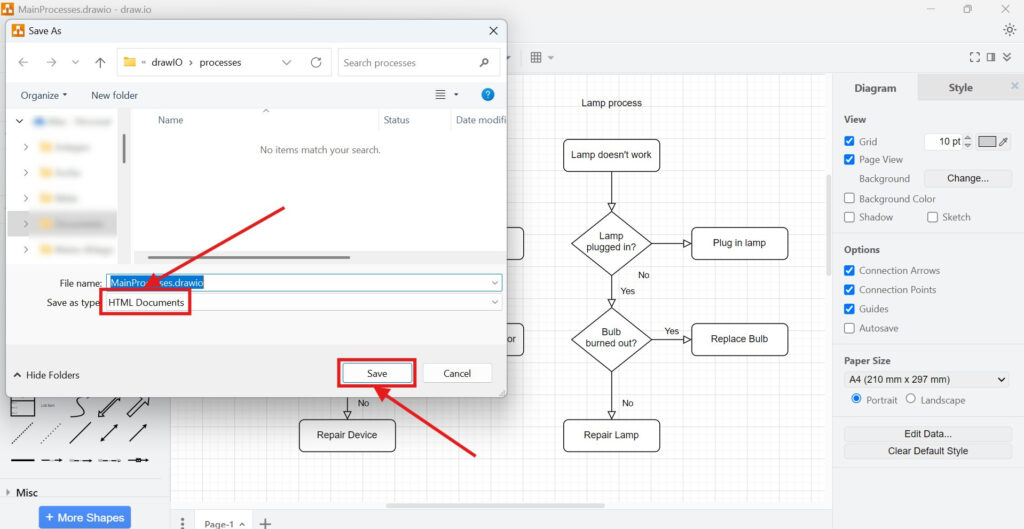
Finally, I start the export.
Then, I enter a clear file name and choose the storage location.
I normally keep the same base name as the original draw.io file. Therefore, I can identify the related source and export quickly.
After saving, I open the HTML file in a browser.
I check navigation, links, pages, layers, zoom behaviour, and overall readability.
I always test the finished HTML export before I publish or distribute it.
When I Use HTML Instead of PDF, SVG, or PNG
I choose HTML when browser-based viewing or interaction matters.
For example, I may want readers to follow links, navigate multiple pages, zoom into a large diagram, or use viewer controls.
In contrast, I choose PDF when I need a fixed document for printing or formal documentation.
I use SVG when I need a scalable vector graphic. Meanwhile, PNG works well when I need a simple fixed image.
Therefore, I choose the export format according to its final purpose.
I Keep the Original draw.io File
I treat HTML as an output format rather than my main source file.
For example, I keep:
- order-process.drawio
- order-process.html
When I change the diagram, I update the draw.io source first. Then, I create a new HTML export.
As a result, I maintain one authoritative source instead of editing several independent copies.
Keeping one editable source reduces version conflicts and makes later updates easier to control.
Final Thoughts
To export a diagram to HTML in draw.io, I open the diagram, select File > Export as > HTML, configure the relevant viewer options, and save the file.
The most important settings control embedded diagram data, links, pages, layers, zoom behaviour, and the viewing experience.
I keep the configuration as simple as possible. Moreover, I test the finished file in a browser before I share it.
A well-configured HTML export gives me a practical way to share interactive draw.io diagrams through a standard web browser.
What’s Next?
Now that I know how to export a diagram to HTML in draw.io, I can explore another flexible sharing option. HTML helps with interactive output, but a URL can make sharing even faster. In the next article, I’ll explain How to Export a Diagram to URL in draw.io. You’ll learn how URL export works, when it helps, and how it can make diagrams easier to share online. Click below to continue and export your draw.io diagram as a URL.
Create Better Requirements Work with Connected Tools
Requirements engineering becomes clearer when I use tools that support visual thinking, documentation, coordination, and process modeling. Therefore, I use draw.io to create diagrams, Confluence to organize knowledge, Jira to manage requirements-related work, and Camunda to model business processes. Each tool adds value to a different part of the workflow. As a result, I can connect ideas, decisions, tasks, and processes more effectively. In the main article on Requirements Engineering Tools, I show how these tools work together and help me build a stronger requirements engineering workflow.