Saving my work in draw.io matters. I know how frustrating lost changes can feel. In this article, I explain How to Save Files in draw.io in a clear and practical way. You’ll learn where to save your diagrams, which options matter, and which formats help most. As a result, you can protect your work and continue later with confidence.
Prefer watching instead of reading? Here is the quick video walkthrough:
What is draw.io?
draw.io (opens in a new tab) is an online diagramming tool. It’s perfect for creating flowcharts, network diagrams, and process visuals. I use it because it’s user-friendly and versatile. With its intuitive interface, I can quickly create and edit diagrams. It supports many export formats, making it ideal for sharing or embedding.
Saving Your Diagrams
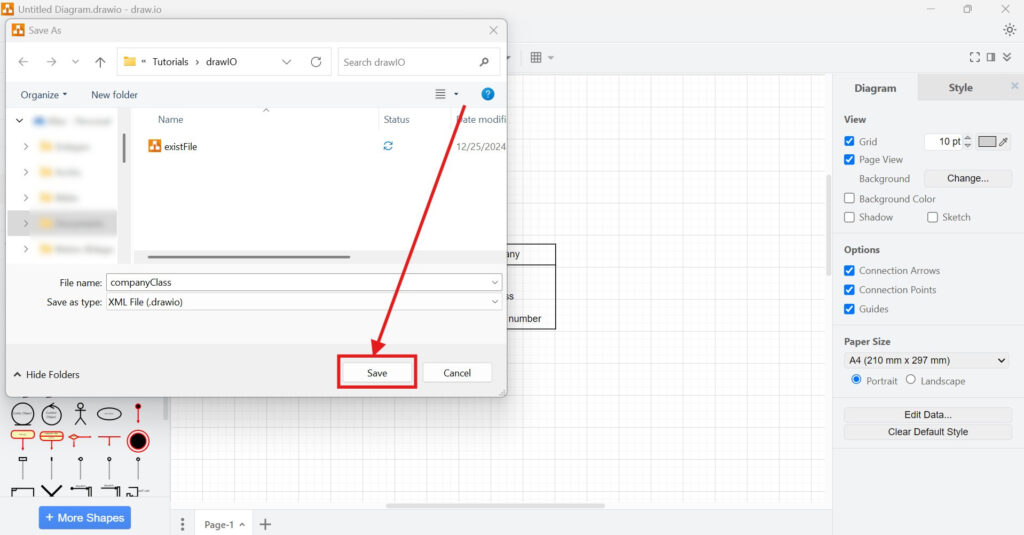
The default and recommended format to save draw.io diagrams is “.drawio.” This format ensures compatibility with the draw.io editor and other supported tools. Here’s how to save your work:
Using the Menu
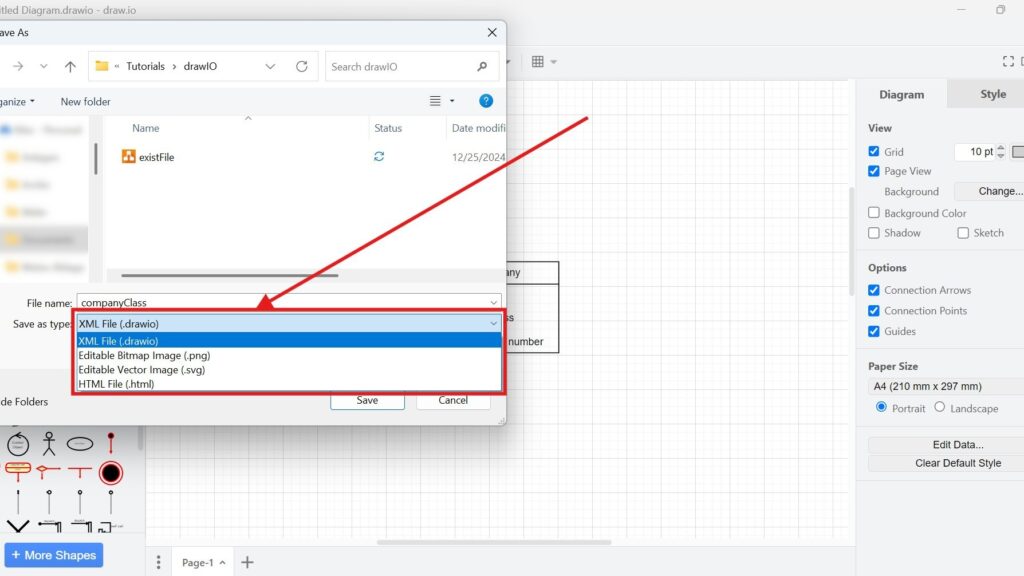
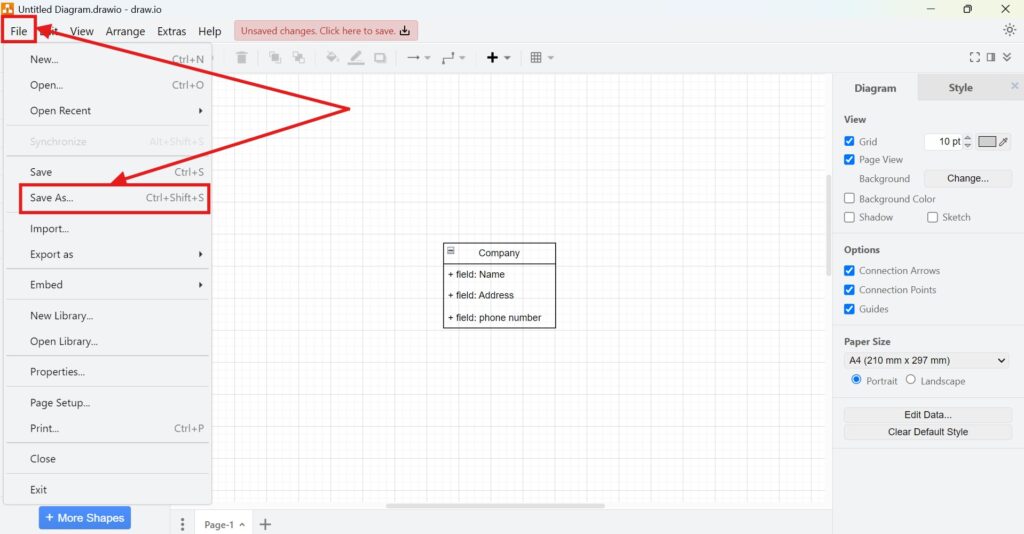
Go to the menu and select File > Save As.
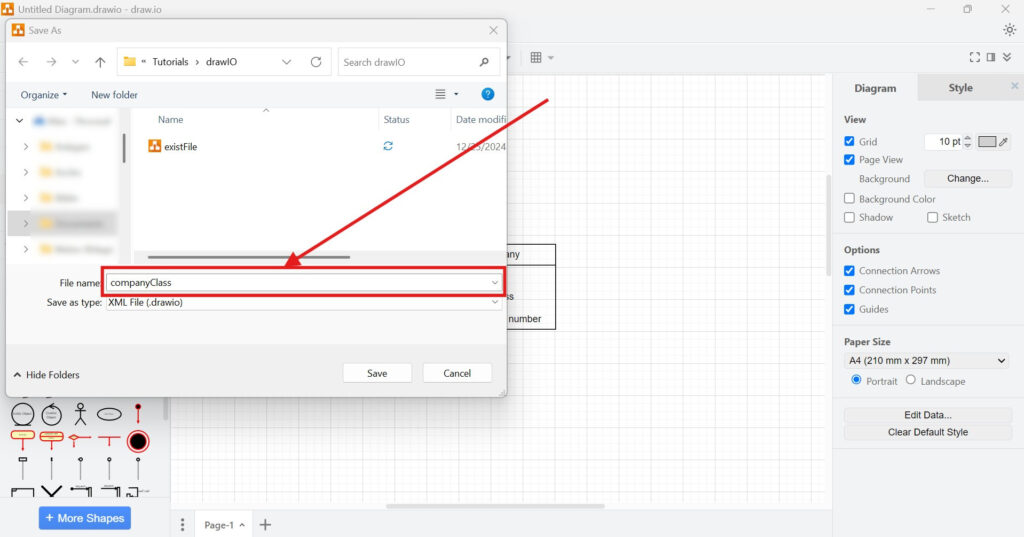
Enter a file name in the “File name” text field.
Choose a location from the “Where” dropdown list. Your last saved location is selected by default.
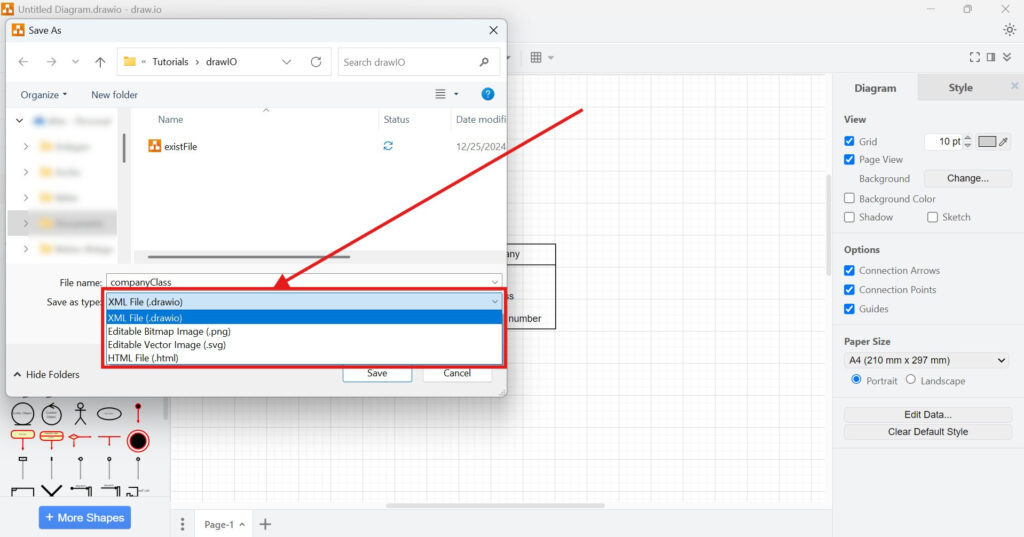
Select your desired format from the “Type” dropdown list.
Click Save to finalize.
Using Keyboard Shortcuts
On Windows: Press Ctrl+Shift+S.
On macOS: Press Cmd+Shift+S.
These shortcuts save time, especially if you’re working on multiple files.
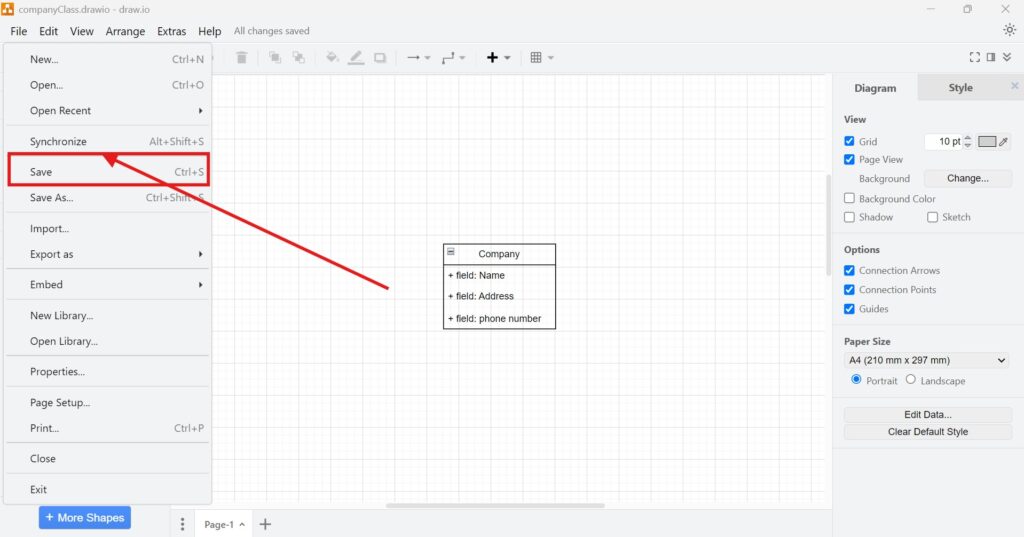
Using the “Save” Menu Option
The “Save” option in the File menu is a quick way to save changes to your diagram without creating a new file. When you’ve already named and saved your file, this option updates the existing file with your latest changes. I often use this for incremental updates while working on a project to avoid losing progress.
Supported File Formats
Draw.io supports several formats. Each serves specific needs. Here are the most common ones I’ve used:
- .drawio (XML File)
- This is the standard format. It’s uncompressed and easy to reopen in the editor.
- Tools like draw.io Desktop and the VSCode extension recognize it immediately.
- .png (Editable Bitmap File)
- This format embeds diagram data in the image.
- It’s great for embedding in websites or emails while keeping it editable for recipients.
- .svg (Editable Vector Image)
- This format is ideal for high-quality visuals. However, some SVG viewers may struggle with fonts or text formatting. If you face this issue, export a compatible SVG version.
- .html (HTML File)
- This format contains your diagram data and a redirect to the web version of draw.io.
- If your file is stored in a cloud platform, this file makes editing seamless.
- PDF (Portable Document Format)
- PDF files can embed diagram data, but only when generated via draw.io’s servers. Ensure you select “Include a copy of my diagram” during export.
Business Case: Team Collaboration
Let’s say I’m working with my team to design a process workflow. We use draw.io to create the diagram. To ensure everyone can contribute:
- I save the file as a .png and share it via email.
- Team members edit the file using draw.io by importing the embedded data.
- After finalizing, I export the diagram as a PDF for presentation.
This approach keeps everyone on the same page and ensures the diagram’s integrity.
Final Thoughts
How to save files in draw.io is simple, but choosing the right format is key. By understanding these formats, I ensure my work is accessible, editable, and shareable. Whether you’re a beginner or an experienced user, these steps make saving files a breeze. Try these tips and see how they streamline your workflow.
What’s Next?
Now that I know how to save files in draw.io, I can make my workflow even safer. Saving helps me protect my diagram. However, synchronization helps me keep changes aligned across storage locations. In the next article, I’ll explain How to Synchronize in draw.io: A Step-by-Step Guide. You’ll learn how synchronization works, why it matters, and how it helps you avoid outdated diagram versions. Click below to continue and synchronize your draw.io files with more confidence.
Connect Your Requirements Engineering Tools
Requirements engineering becomes stronger when I connect the right tools with a clear workflow. Therefore, I use draw.io to visualize ideas, Confluence to document knowledge, Jira to manage work, and Camunda to model processes. Each tool supports a different part of requirements work. As a result, I can move from early ideas to structured documentation, traceable tasks, and clear process models. In the main article on Requirements Engineering Tools, I show how these tools work together and help me improve requirements engineering from start to finish.