
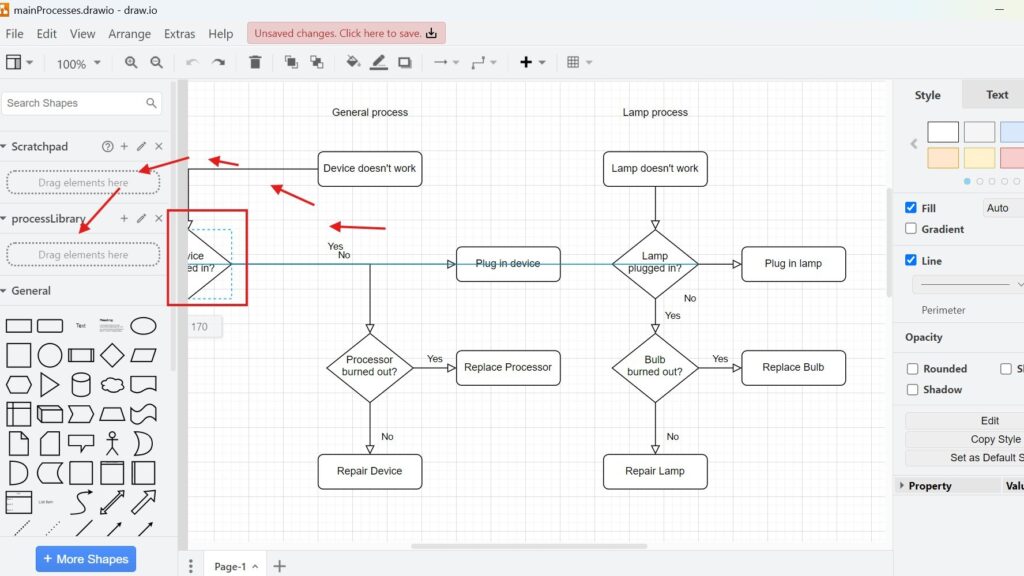
A custom library helps me reuse shapes, symbols, and diagram elements in draw.io. This saves time and keeps my diagrams consistent. In this guide, I explain how to create a library in Draw.io step by step. You’ll learn how libraries make daily diagram work faster, easier, and more structured.
If you would prefer to watch a video on this topic, you can watch it here:
What is Draw.io?
draw.io is an intuitive diagramming tool. It’s widely used for flowcharts, network diagrams, and wireframes. It works directly in your browser or as a desktop application. I love how simple it is to use. You can drag and drop shapes, connect them, and customize everything with just a few clicks. The real magic? Its ability to let you create libraries of reusable elements. This feature saves time and ensures consistency in your diagrams.
How to Create a Library in Draw.io
How to Create a Library in Draw.io is useful when I want to reuse the same shapes, icons, or diagram elements across several models. Instead of rebuilding them each time, I can store them in a custom library and drag them into new diagrams when needed. This saves time and also helps me keep a consistent visual style. In this guide, I show the complete process step by step, from creating and saving the library to adding elements and reusing them in future diagrams.
Why I Create a Library in Draw.io
A custom library stores diagram elements that I use repeatedly.
For example, I can save network components, process symbols, company-specific shapes, or standardised modelling elements.
Therefore, I do not need to recreate them for every diagram.
A custom library saves time and helps me use the same shapes and visual conventions consistently across diagrams.
Steps to Create a Library in Draw.io
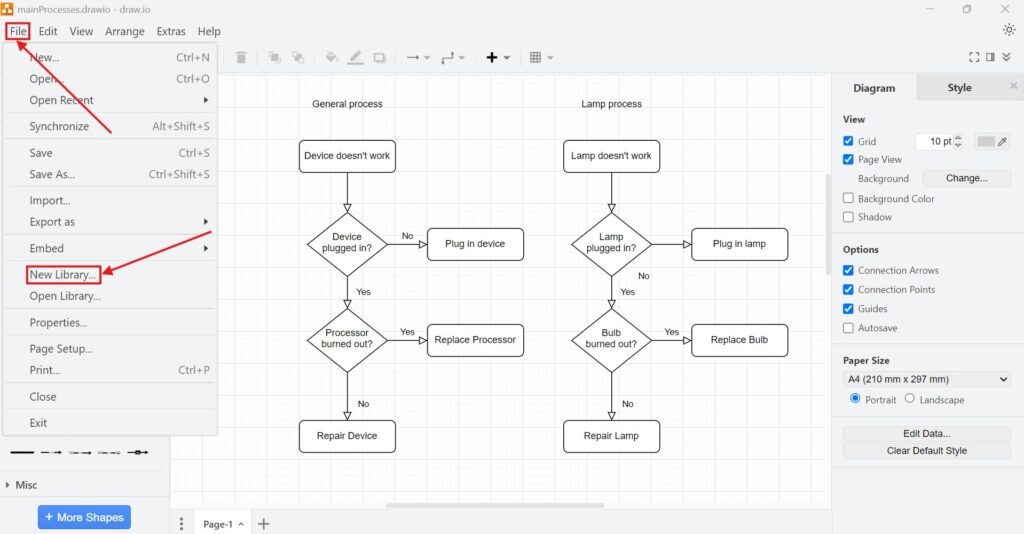
Step 1: Navigate to New Library
First, I open draw.io.
Then, I select File > New Library.
Draw.io starts the process for creating a custom library.
Step 2: Name and Save the Library
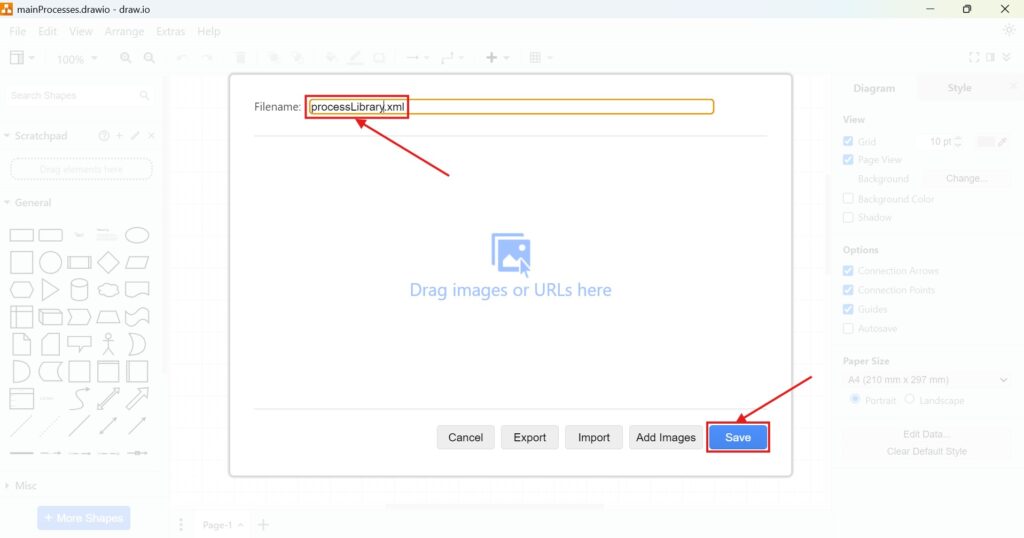
Next, I enter a clear name for the library.
For example, I may use names such as:
- Network Components
- BPMN Custom Shapes
- Company Diagram Elements
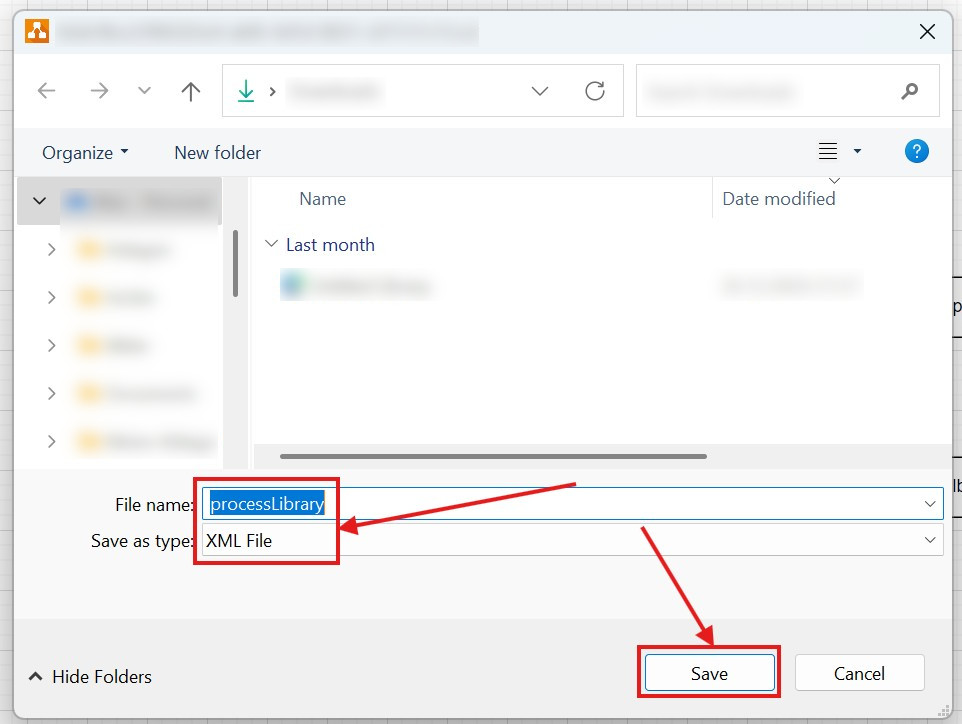
Then, I choose where I want to save the library.
Draw.io stores custom libraries in an XML-based library file.
I choose a descriptive name because it helps me identify the correct library later.
Step 3: Take a Look at the New Library
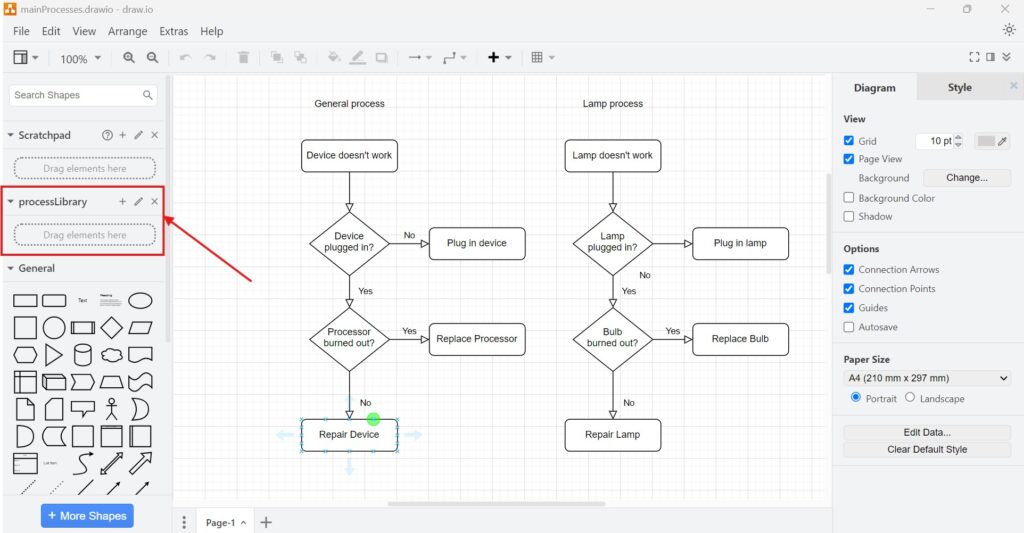
After I create the library, draw.io displays it in the shapes panel.
At first, the library contains no custom elements.
Therefore, I can now start adding the shapes that I want to reuse.
Step 4: Add Elements to Your Library
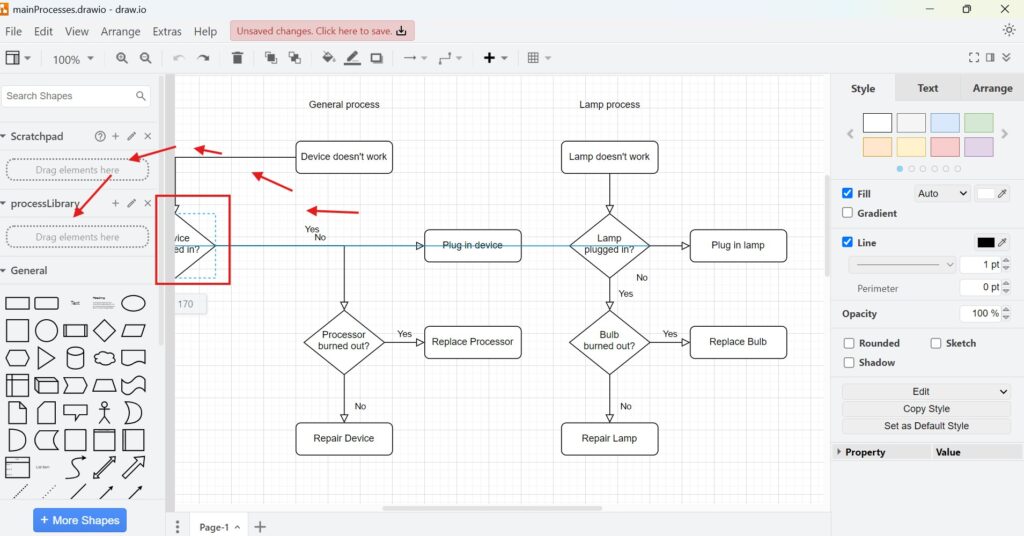
Next, I add elements from my diagram to the library.
I select the shape or group that I want to save and drag it into the custom library panel.
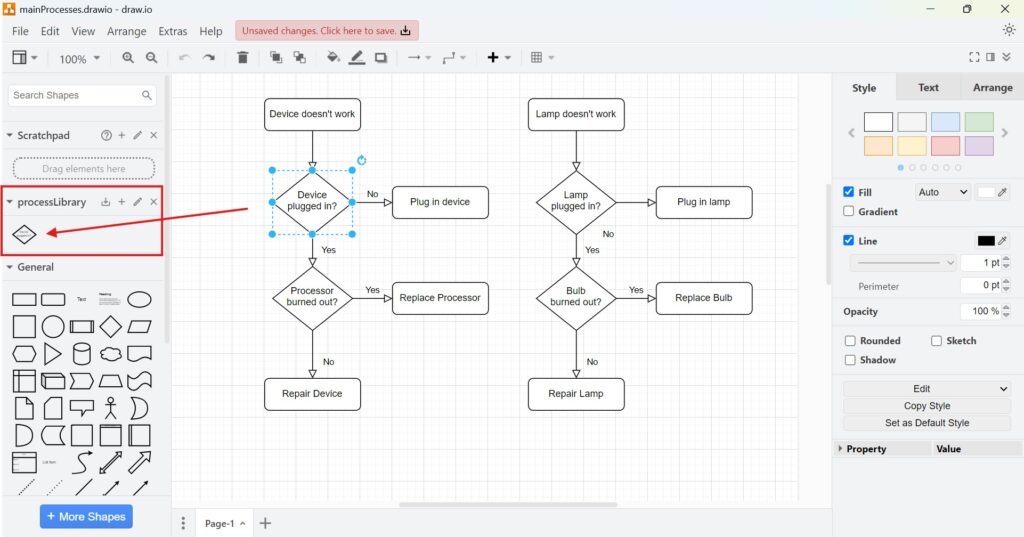
Draw.io then adds the element to the library.
I can repeat this process for additional shapes.
Moreover, I can store complete groups of elements when I regularly reuse the same structure.
I add only elements that I expect to reuse because a focused library remains easier to navigate.
Step 5: Reuse Elements
Once the library contains elements, I can reuse them in other diagrams.
I open the library and drag the required element onto the canvas.
Then, I position and edit it like any other draw.io shape.
As a result, I can create diagrams faster while keeping recurring elements consistent.
How I Organise Custom Libraries
I create separate libraries when different groups of shapes serve different purposes.
For example, I may keep network symbols separate from requirements engineering or process modelling elements.
Moreover, I use clear names and remove elements that I no longer need.
This keeps the library manageable as it grows.
Final Thoughts
To create a library in draw.io, I select File > New Library, name and save the library, add reusable elements, and drag them into future diagrams when needed.
Custom libraries help me reduce repetitive work, maintain consistent diagram elements, and build new models more efficiently.
What’s Next?
Now that I know how to create a library in Draw.io, I can take the next practical step. A library only helps when I know how to open it and use its saved elements. In the next article, I’ll explain How to Open a Library in Draw.io: A Step-by-Step Guide. You’ll learn how to access your library, reuse custom shapes, and speed up repeated diagram work. Click below to continue and open your draw.io library with confidence.
Use Tools That Make Requirements Engineering Clearer
Requirements engineering becomes stronger when I use tools that support visual thinking, documentation, coordination, and process modeling. Therefore, I use draw.io to create diagrams, Confluence to structure knowledge, Jira to manage requirements-related work, and Camunda to model business processes. Each tool helps me reduce complexity in a practical way. As a result, I can connect ideas, decisions, tasks, and workflows more effectively. In the main article on Requirements Engineering Tools, I show how these tools work together and help me build a clearer requirements engineering workflow.