
Visual communication helps me explain ideas faster. That is why I use draw.io for diagrams and workflows. In this guide, I explain How to add the draw.io add-on to your Microsoft Office apps. You’ll learn how the integration works, why it improves daily work, and how it helps you create diagrams directly inside familiar Office tools.
What Does the draw.io Add-in for Microsoft Office Do?
I use the draw.io add-in to place draw.io diagrams in Word, PowerPoint, and Excel.
For example, I can add a process model to a Word document. I can also place an architecture diagram in PowerPoint or add a visual model to an Excel workbook.
The add-in connects Office with the diagram file. I can select diagrams from supported storage locations such as OneDrive, Google Drive, or my device.
The Office document contains the diagram as an image, while the draw.io file remains the editable source.
This distinction matters. I do not edit individual draw.io shapes directly with Word or PowerPoint drawing tools. Instead, I edit the source diagram in draw.io and then update the diagram in Office.
Therefore, I use the add-in when I want to keep the diagram and the surrounding documentation clearly separated while still maintaining them together.
How I Install the draw.io Add-in
1. Open Microsoft AppSource
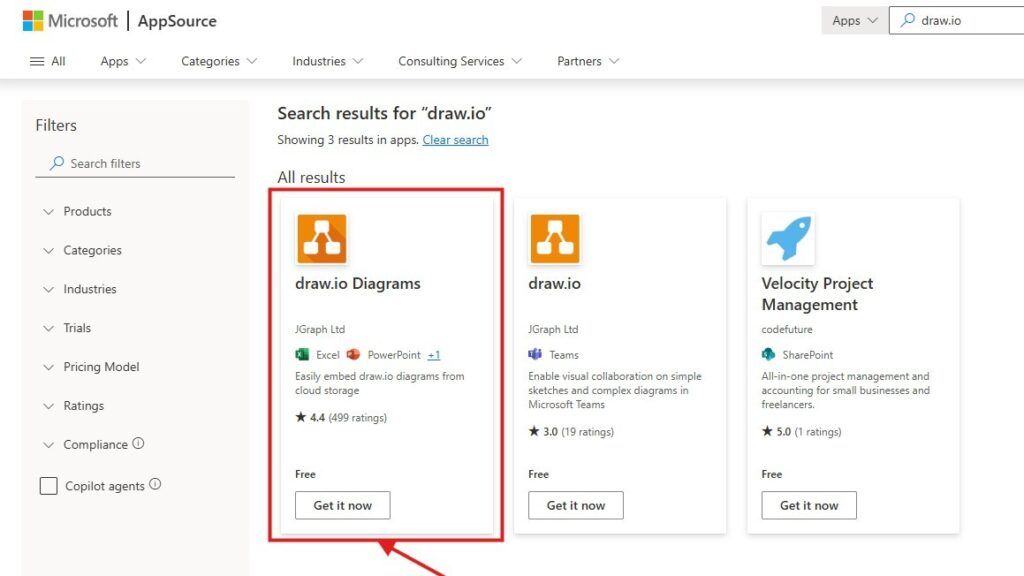
First, I open Microsoft AppSource in my browser.
AppSource provides add-ins and other extensions for Microsoft products. Therefore, it is the starting point for installing draw.io in Office.

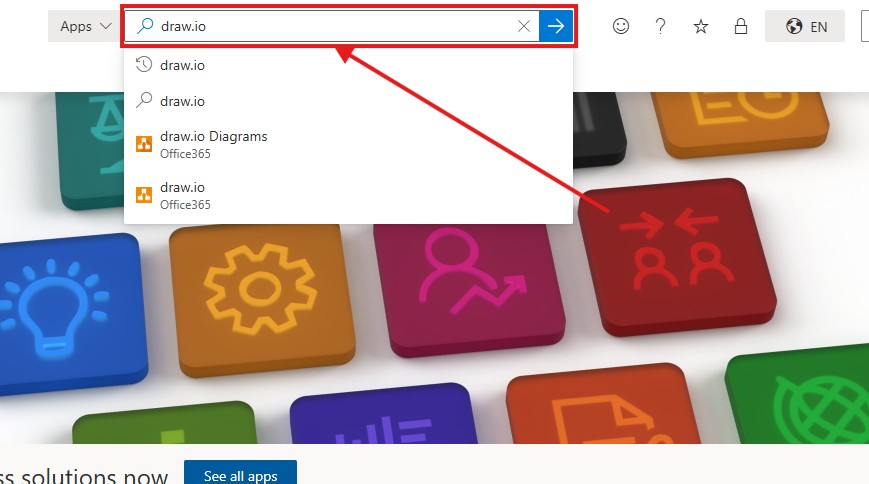
2. Search for draw.io
Next, I enter draw.io in the AppSource search field and start the search.
I use the product name instead of browsing through categories. This takes me directly to the relevant results.
3. Select draw.io Diagrams
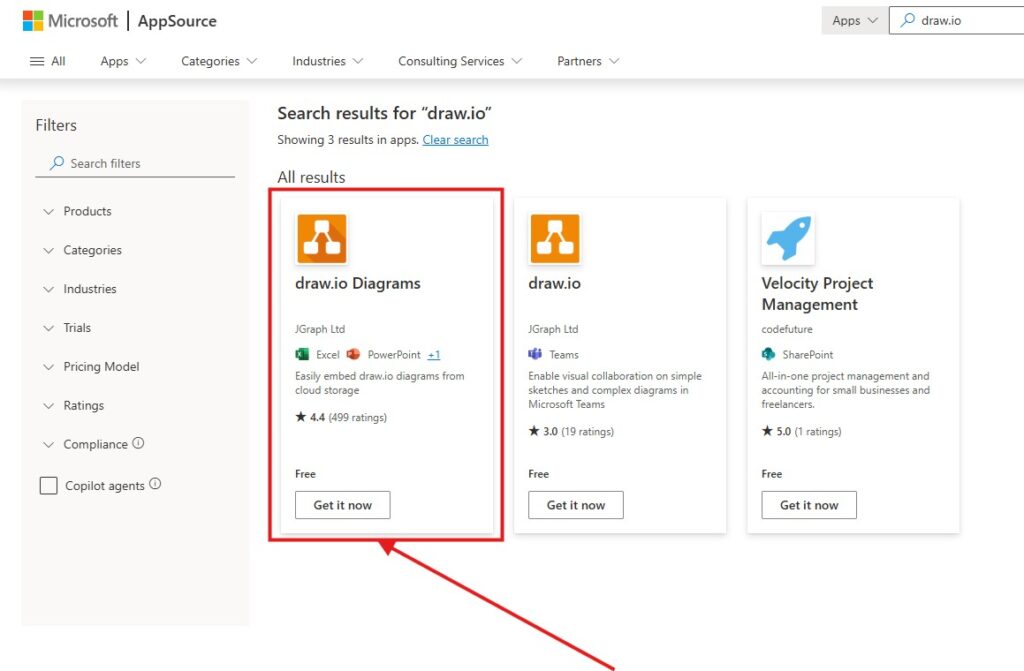
AppSource may show several results. Therefore, I select draw.io Diagrams from JGraph Ltd for the Microsoft Office integration.
I make sure that I choose the Office add-in and not a separate integration for another Microsoft product, such as Teams.
4. Sign In to Microsoft
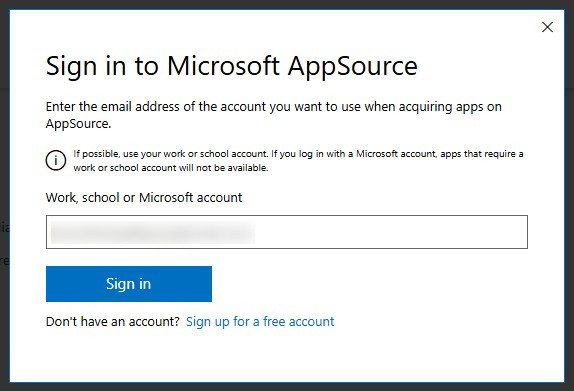
Next, Microsoft asks me to sign in.
I use the Microsoft account that I also use with the relevant Office environment.
A company or school account can have additional restrictions. Therefore, an administrator may need to approve the add-in before I can install or use it.
5. Confirm My Details
After I sign in, AppSource may ask me to confirm account information.
I review the information and select Get it now to continue.
Depending on the account and current AppSource interface, Microsoft may show different fields or consent information. Therefore, I check the displayed permissions before I continue.

6. Continue to Microsoft 365
Microsoft now processes the request and transfers me to the appropriate Microsoft 365 environment.
Normally, I only need to wait for this step to complete.

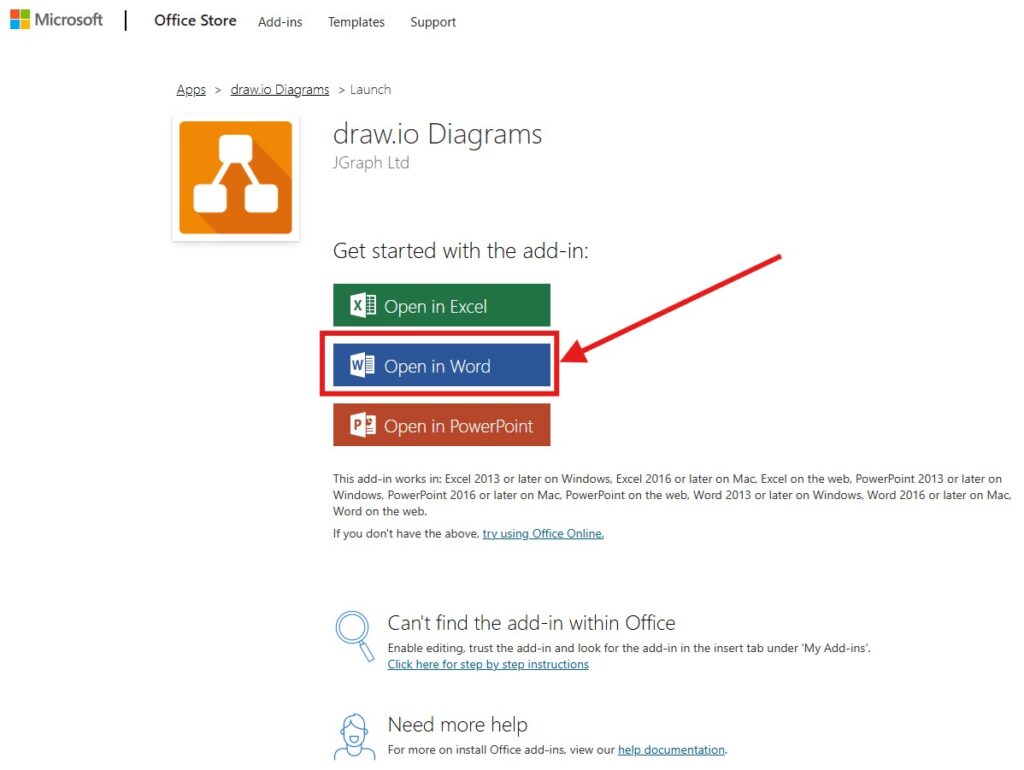
7. Choose an Office Application
Next, I select the Office application in which I want to start the add-in.
For example, I can choose Word. Depending on the current Microsoft interface, I may also see options for PowerPoint or Excel.
I only need one application to verify the installation. Afterward, I can use the add-in in the supported Office applications available to my account.
How I Open draw.io in Word
After installation, I open a new or existing Word document.
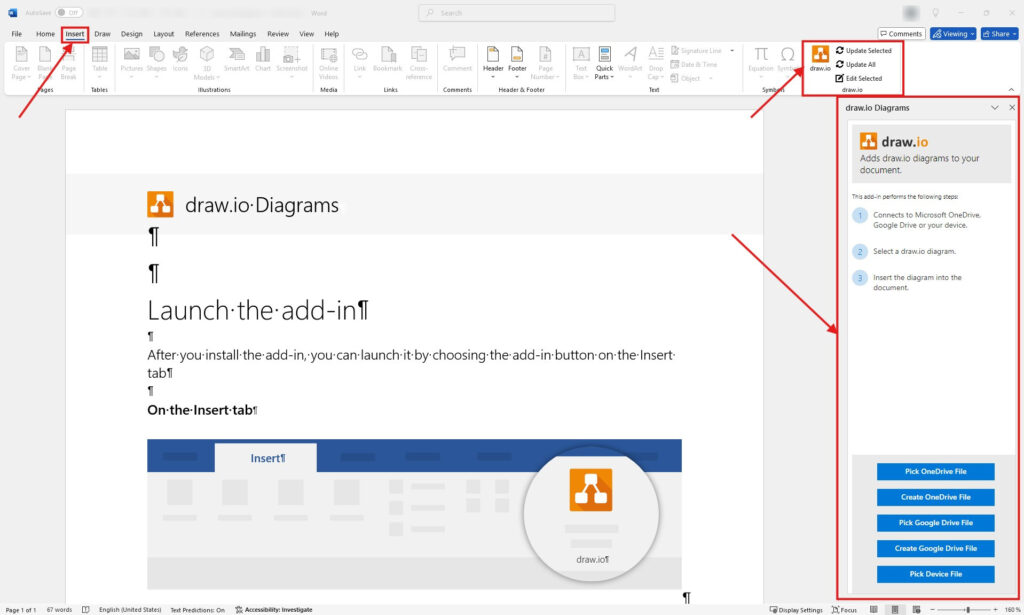
Then I select the Insert tab. From there, I open the draw.io add-in.
Word displays the draw.io controls and opens the add-in panel on the right.
From this panel, I can select a diagram from OneDrive, Google Drive, or my device. Depending on the available options, I can also create a new diagram file.
What Happens After I Insert a Diagram?
When I select a diagram, the add-in inserts the selected diagram page into my Office document.
The inserted object represents the diagram visually, but the original draw.io file remains the source for diagram editing.
This gives me a clear workflow.
I create and maintain the model in draw.io. Then I use Word, PowerPoint, or Excel to provide the surrounding information.
For example, I can maintain a business process as a draw.io file and insert it into a requirements document. If the process changes, I edit the original diagram. Afterward, I update its representation in the Office document.
In Word, the add-in also provides commands such as Update Selected, Update All, and Edit Selected. Therefore, I can reopen a selected diagram in draw.io or refresh the document after I change the source.
Where Should I Store My Diagrams?
The add-in supports several storage options. I can use OneDrive, Google Drive, or a file from my device.
For regular documentation, I prefer a storage location that keeps the source diagram accessible. This becomes especially important when I expect the diagram to change.
For example, OneDrive can work well when the Office document and the diagram already belong to the same Microsoft-based working environment.
I treat the draw.io file as the source model and the diagram inside Office as its representation in the document.
This simple distinction helps me avoid maintaining separate exported images manually.
What If I Cannot Install the Add-in?
In a private Microsoft account, I can usually install the add-in myself.
However, organizations can restrict Microsoft 365 add-ins. Therefore, I may not see draw.io or may not have permission to install it.
In that situation, I ask the Microsoft 365 administrator to approve the draw.io add-in. After approval, the organization may provide it through the managed add-ins available in Office.
This is not a draw.io error. It is part of Microsoft 365 application management.
Conclusion
The draw.io add-in gives me a practical connection between diagramming and Microsoft Office. I keep the actual model in draw.io and use Word, PowerPoint, or Excel to present it in context.
The installation follows a simple sequence: I find draw.io Diagrams in Microsoft AppSource, sign in, confirm the installation, choose an Office application, and open the add-in from the Insert tab.
The main advantage is that I can maintain the diagram as a draw.io file instead of repeatedly exporting new images whenever the model changes.
For requirements engineering, technical documentation, process descriptions, and presentations, this gives me a clean separation between visual models and the documents that explain them.
What’s Next?
Now that I know how to add the draw.io add-on to my Microsoft Office apps, I can use diagrams directly inside Word. This helps me combine written explanations with clear visual models. In the next article, I’ll explain How to Use draw.io in Microsoft Office Word. You’ll learn how draw.io supports better documentation, clearer reports, and more visual requirements work. Click below to continue and use draw.io in Word with more confidence.
Build Better Requirements Work with Connected Tools
Requirements engineering becomes stronger when I use tools that support visual thinking, documentation, coordination, and process modeling. Therefore, I use draw.io to create diagrams, Confluence to organize knowledge, Jira to manage requirements-related work, and Camunda to model business processes. Each tool helps me handle complexity in a different way. As a result, I can connect ideas, decisions, tasks, and workflows more clearly. In the main article on Requirements Engineering Tools, I show how these tools work together and support a more reliable requirements engineering workflow.