
Diagrams make documents easier to understand. That is why I use draw.io directly in Word when I want clear visuals inside my text. In this guide, I explain How to use the draw.io in Microsoft Office Word. You’ll learn how it supports better documentation, faster diagram editing, and clearer communication inside your Office workflow
How to Use draw.io in Microsoft Office Word
I use draw.io in Microsoft Office Word when I want to place a structured diagram directly inside a document without exporting and managing separate image files. The add-in connects Word with diagram files stored on a device, OneDrive or Google Drive. I can select a diagram, preview it, insert it as an image, and update it later after I change the source file. This workflow works well for process descriptions, requirements documents, reports, and other content where the diagram supports the text.
The Word add-in does not turn Word into the draw.io editor. Instead, it connects my document with an existing draw.io diagram. Word displays the diagram as an embedded image. Therefore, I can position, resize, and format it like other pictures in Word.
The main advantage is that I can keep the editable diagram separate while using its current visual representation inside my document.
What I Need Before I Start
I need Microsoft Word with the draw.io add-in installed. I also need a draw.io diagram file.
The diagram can come from my local device, Microsoft OneDrive, or Google Drive. In this example, I use a file stored on my computer.
Step 1: Open the Word Document
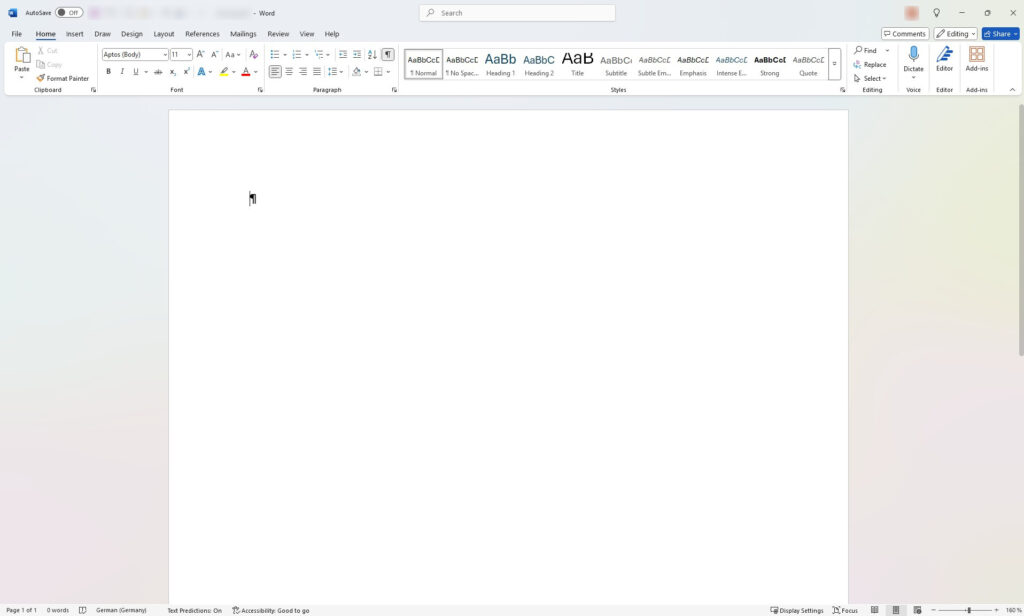
First, I open the Word document in which I want to use the diagram. I can start with a new document or use an existing one.
I also place the cursor where I want Word to insert the diagram.
Word inserts the diagram at the current document position, so I choose that position before I continue.
Step 2: Open the draw.io Add-In
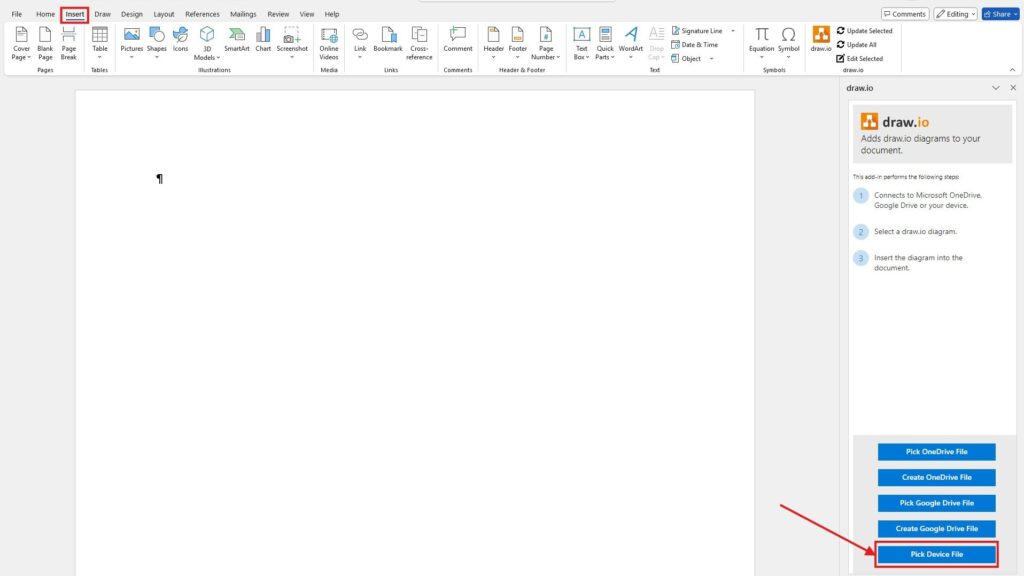
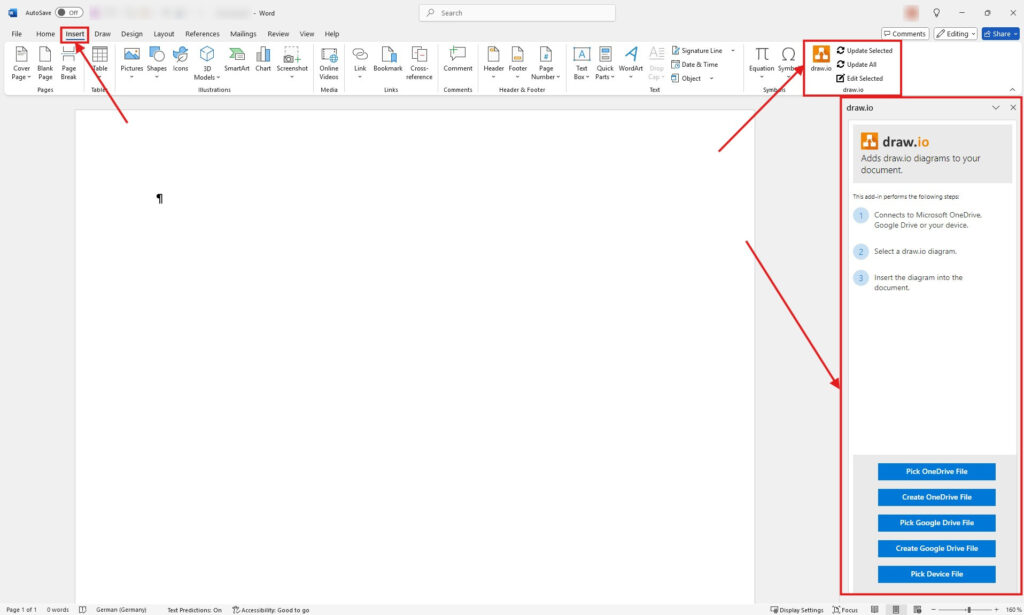
Next, I select the Insert tab in Word.
Then, I open draw.io from the ribbon. Word displays the draw.io pane on the right side of the document.
From this pane, I can choose where my diagram file is stored. Depending on my workflow, I can select OneDrive, Google Drive, or a file on my device.
The ribbon also provides commands such as Update Selected, Update All, and Edit Selected. I use these commands later when I work with diagrams that are already in the document.
Step 3: Select the Diagram Source
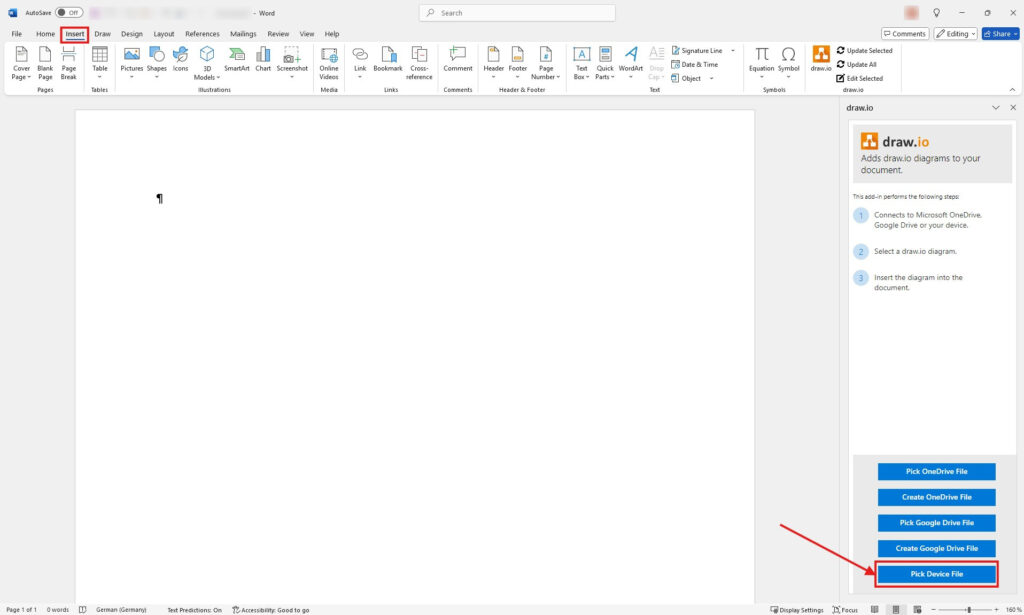
Because my example diagram is stored locally, I choose Pick Device File.
However, I could follow the same basic process with a diagram stored in OneDrive or Google Drive. In those cases, I may first need to sign in and allow the add-in to access the selected storage location.
I choose the storage option that contains the editable draw.io source file, not an exported PNG or JPEG.
This distinction matters. The add-in works with the diagram file and generates the image that Word displays.
Step 4: Choose the draw.io File
After I select Pick Device File, Word opens the file selection dialog.
I navigate to the folder that contains my diagram. Then, I select the draw.io file and choose Open.
In this example, I select the file named mainProcesses.

Step 5: Preview and Insert the Diagram
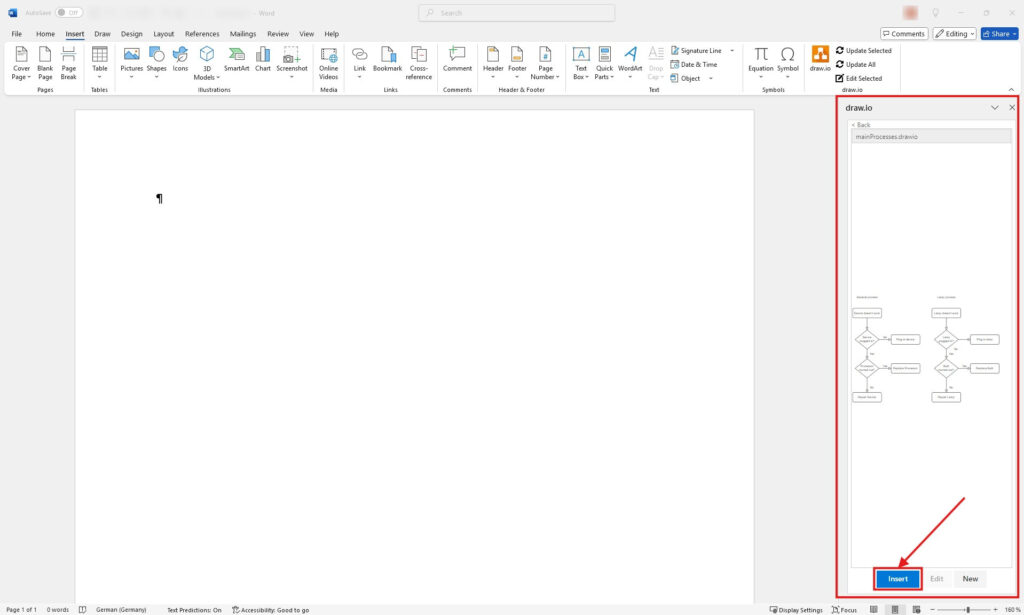
The draw.io pane now loads a preview of the selected diagram.
I check the preview before I insert it. This step helps me confirm that I selected the correct file and diagram.
If the source file contains several pages, the add-in can also let me choose which diagram page I want to insert.
Finally, I select Insert.
Word now adds a rendered image of the selected draw.io diagram to the document.
The source diagram remains a draw.io file. Therefore, I can continue editing the original diagram independently.
Step 6: Position and Resize the Diagram
After insertion, I can work with the diagram much like any other picture in Word.
For example, I can resize it, move it, change its position in the document, or adjust the surrounding text layout. I can also use Word’s picture formatting options when appropriate.
However, resizing the image does not change the actual draw.io diagram structure. It only changes how Word displays the embedded image.
Therefore, I make structural changes in draw.io rather than trying to reproduce them with Word’s picture tools.

How I Update a draw.io Diagram in Word
A useful part of the integration is the connection between the Word document and the original diagram file.
However, this connection does not mean that Word updates the displayed image automatically whenever I edit the source diagram.
Instead, I first change the diagram in draw.io. Then, I return to Word and open the Insert tab.
I can now use:
- Update Selected to refresh the diagram I selected.
- Update All to refresh all draw.io diagrams in the document.
- Edit Selected to open the selected diagram for editing.
When I change the source diagram, I must update the embedded image in Word before the document shows those changes.
This behavior is especially useful for documents that I maintain over time. For example, I can update a process model without manually exporting a new image, deleting the old image, and inserting the replacement.
When I Use draw.io in Microsoft Office Word
I find the integration most useful when the diagram forms part of documentation that changes regularly.
Typical examples include:
- process descriptions;
- requirements specifications;
- system documentation;
- architecture documents;
- operating procedures;
- project reports;
- technical concepts.
In these cases, I want the diagram to support the written explanation. At the same time, I want to keep the actual model editable in draw.io.
I therefore treat the draw.io file as the editable source and the diagram in Word as its document representation.
That distinction creates a clear workflow. I edit diagrams in the diagramming tool. I write and structure documentation in Word. Then, I use the add-in to connect both.
Final Thoughts
Using draw.io in Microsoft Office Word gives me a simple way to combine structured diagrams with written documentation.
The process is straightforward. I open the draw.io add-in, select the source file, check the preview, and insert the diagram. If I later modify the source diagram, I update the corresponding image in Word.
For documentation that contains diagrams I expect to maintain, this approach is more practical than repeatedly exporting and replacing static image files.
Most importantly, I keep the responsibilities clear: I create and maintain the diagram in draw.io, while I use Word to present the diagram together with the surrounding documentation.
What’s Next?
Now that I know how to use draw.io in Microsoft Office Word, I can also connect diagrams with other knowledge tools. Word helps me create structured documents, but Notion can help me organize linked knowledge and project pages. In the next article, I’ll explain How to Use Links to Notion Draw.io Diagrams. You’ll learn how diagram links support better access, clearer documentation, and smoother collaboration. Click below to continue and connect draw.io diagrams with Notion.
Strengthen Requirements Work with the Right Tools
Requirements engineering becomes clearer when I use tools that support visual thinking, documentation, coordination, and process modeling. Therefore, I use draw.io to create diagrams, Confluence to organize knowledge, Jira to manage requirements-related work, and Camunda to model business processes. Each tool helps me structure a different part of the workflow. As a result, I can connect ideas, decisions, tasks, and processes more effectively. In the main article on Requirements Engineering Tools, I show how these tools work together and help me build a stronger requirements engineering workflow.