
Embedding diagrams can make a website more visual and useful. I use Draw.io to create flowcharts, organization charts, and network diagrams. In this article, I show how to embed a Draw.io diagram with HTML. You’ll learn the basic workflow, why HTML embedding helps, and how it can make your content clearer and more interactive.
If you would like to watch the video tutorial, click here:
What is Draw.io?
Draw.io, or diagrams.net, is a free, user-friendly diagramming tool. It allows you to create a wide variety of diagrams such as flowcharts, mind maps, network diagrams, and much more. With its drag-and-drop interface, it’s easy to design professional-looking diagrams even if you have no design experience. You can save your work in various formats like PNG, JPEG, or SVG. However, in this article, we’ll focus on embedding these diagrams directly into your website via HTML.
How to Embed a Draw.io Diagram with HTML
How to Embed a Draw.io Diagram with HTML is useful when I want to display an interactive diagram directly on a website instead of uploading a static image. Draw.io can generate the required HTML for me and lets me control links, zoom, layers, tags, lightbox behaviour, and editing options. In this guide, I show the complete process step by step. I also explain the relevant settings, so I can choose between embedding a copy of the diagram or linking to an online version.
Why I Embed Draw.io Diagrams with HTML
An HTML embed can provide more interaction than a simple image.
For example, viewers may zoom, follow links, switch layers, or open a larger lightbox view. Therefore, this method works well for detailed process models, system diagrams, and technical documentation.
Depending on the selected configuration, I can embed diagram data directly or reference an online diagram.
I use HTML embedding when viewers need more than a static representation of the diagram.
Create or Open a Diagram in Draw.io
First, I create or open the diagram that I want to embed.
Before I continue, I check labels, connectors, layers, links, and the overall layout. Moreover, I make sure the diagram remains readable at typical website sizes.
I prepare the source diagram before embedding because the generated HTML reflects its current structure and configuration.

Choose Embed HTML
Next, I open File > Embed and select HTML.
Draw.io then opens the configuration options for the HTML embed.

Configure
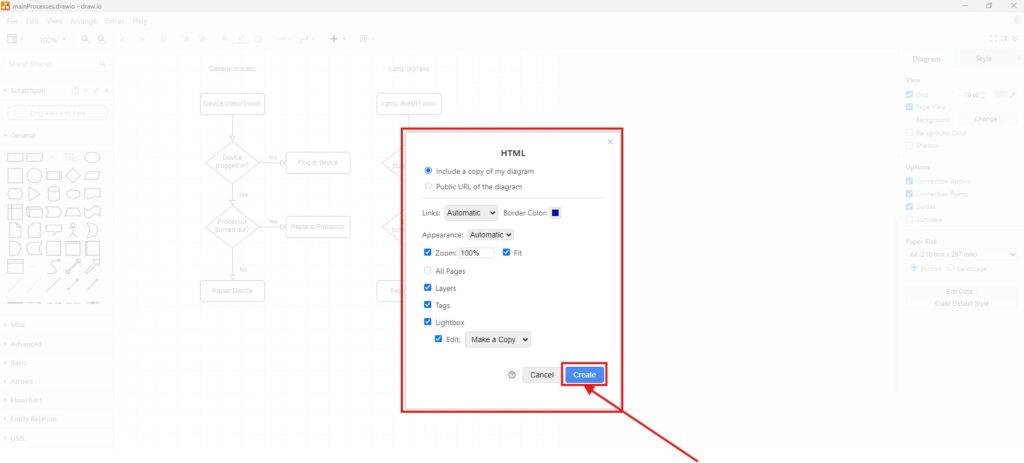
Now, I define how the embedded diagram should work.
Include a Copy of My Diagram or Public URL
I can include a copy of the diagram in the generated output or reference an available public URL.
An embedded copy makes the generated content more independent from the original online location.
In contrast, a URL-based configuration can reference an online source. Therefore, I check access permissions and availability before I use this approach.
I choose the source method according to whether I want a self-contained embed or a connection to an online diagram.
Links
If the diagram contains hyperlinks, I choose how they open.
- Automatic uses the normal behaviour.
- Open in New Window opens the destination separately.
- Open in This Window uses the current browser context.
I select the behaviour that best fits the website.
Border Color
I can define a border colour around the embedded viewer.
However, I normally keep the border simple so it does not distract from the diagram.
Zoom
Zoom controls the initial scale of the diagram.
I use it when I need to make detailed content easier to read immediately.
Fit
Fit adjusts the diagram to the available space.
Therefore, it helps when the embed must adapt to the width of the page or content area.
Layers
If I use layers in draw.io, I can make them available in the embedded viewer.
This can help viewers switch between different levels of detail.
Tags
Tags can support navigation or selective display when the source diagram uses them.
However, I include them only when they provide a clear benefit.
Lightbox
Lightbox opens the diagram in a larger focused view.
I use it for diagrams with many elements or small labels.
Lightbox Edit
Editing options can let viewers reuse the diagram.
For example,
- Make a Copy can allow someone to create an independent editable version.
- Custom settings can provide more specific behaviour when the option is available.
I enable only the interaction and editing functions that the audience actually needs.
Generate HTML Code
After I configure the options, I click Embed.
Draw.io then generates the HTML.
I review the configuration once more before I continue.
Copy the HTML Code
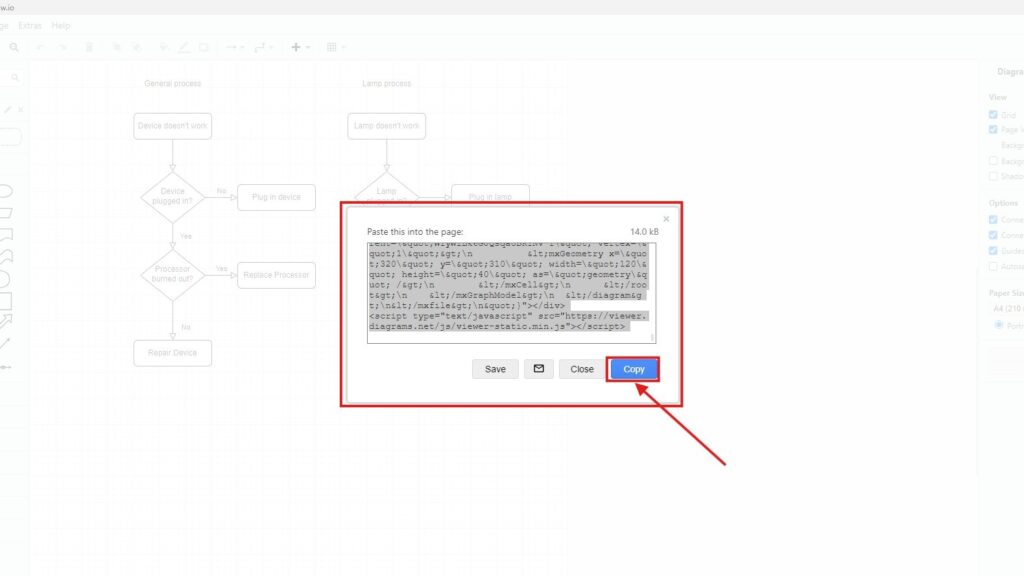
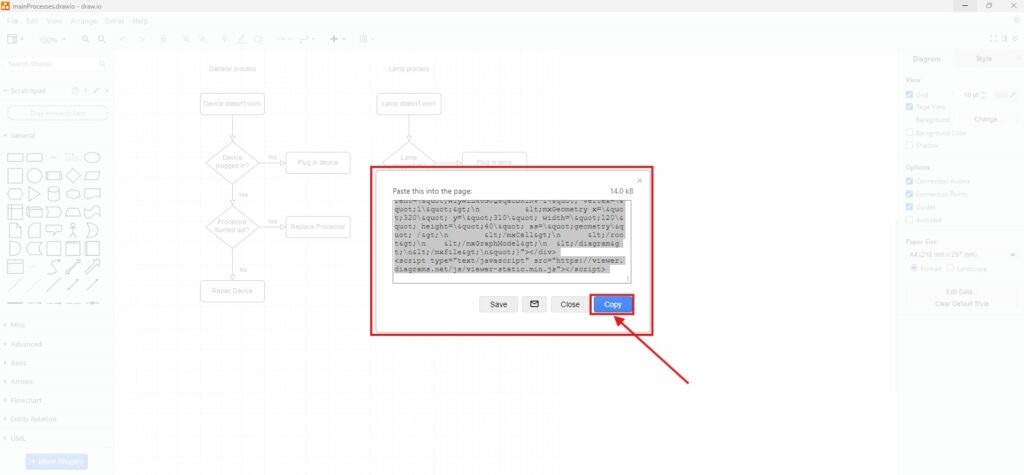
Next, I click Copy.
The generated HTML moves to my clipboard. Therefore, I can paste it directly into a website or another environment that accepts HTML.
I keep the original draw.io file as my editable source and treat the generated HTML as publication output.

Embed into Your HTML Site
Finally, I open the page where I want to display the diagram.
If I use WordPress, for example, I add a Custom HTML block and paste the generated content there.
Other content management systems provide similar HTML areas.
Afterwards, I preview the page before publishing it.
I check:
- the diagram size,
- text readability,
- zoom behaviour,
- links,
- layers,
- tags,
- lightbox functions,
- and editing options.
I also test the page on smaller screens when mobile use matters.
I always test the final embed in its actual website environment because the surrounding page layout can affect how the diagram appears.
Keep the Original Draw.io File
I do not treat the embedded HTML as my main diagram source.
Instead, I maintain the original draw.io file. When I change the diagram, I update that source first. Then, I generate new HTML when necessary.
As a result, I avoid maintaining several independent versions.
Final Thoughts
To embed a Draw.io diagram with HTML, I open File > Embed > HTML, configure the viewing options, generate the code, copy it, and paste it into my website.
The main settings control the diagram source, links, zoom, fitting, layers, tags, lightbox behaviour, and editing.
A well-configured HTML embed gives me a practical way to display interactive draw.io diagrams directly inside web content.
What’s Next?
Now that I know how to embed a Draw.io diagram with HTML, I can explore another flexible embedding option. HTML embedding helps me place diagrams on a page, but an iframe can display diagram content in a separate embedded frame. In the next article, I’ll explain How to Embed an IFrame draw.io Diagram. You’ll learn how iframe embedding works, when it makes sense, and how it can help you present diagrams more clearly on your website. Click below to continue and embed your draw.io diagram with an iframe.
Bring Requirements Engineering Tools Together
Requirements engineering becomes clearer when I use tools that support diagrams, documentation, coordination, and process modeling. Therefore, I use draw.io to visualize ideas, Confluence to organize knowledge, Jira to manage requirements-related work, and Camunda to model business processes. Each tool helps me reduce complexity in a different way. As a result, I can connect requirements, decisions, tasks, and workflows more effectively. In the main article on Requirements Engineering Tools, I show how these tools work together and help me build a stronger requirements engineering workflow.