Learning to create a blog post in Confluence helps me share updates, insights, and progress directly in my team workspace. Blog posts keep communication clear and content easy to find. In this step-by-step guide, I show you how to draft, edit, and publish posts efficiently, so you can improve collaboration and build a smoother content workflow.
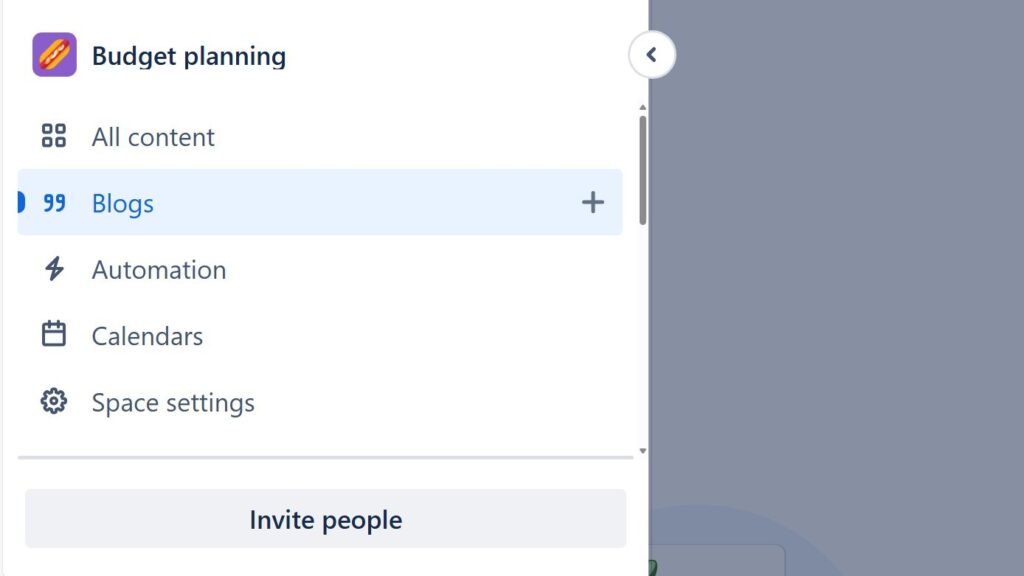
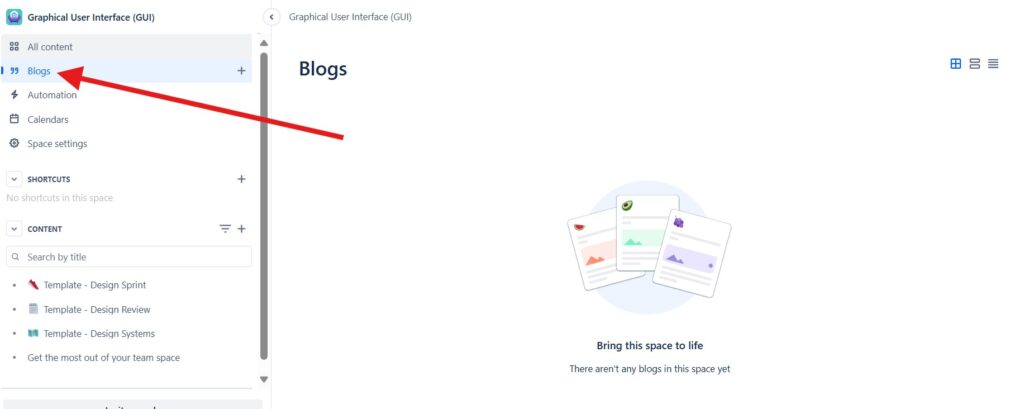
Step 1: Navigate to Your Space
Log in to Confluence. Go to the space where you want to publish your blog post. Navigate to the “Blog” section.
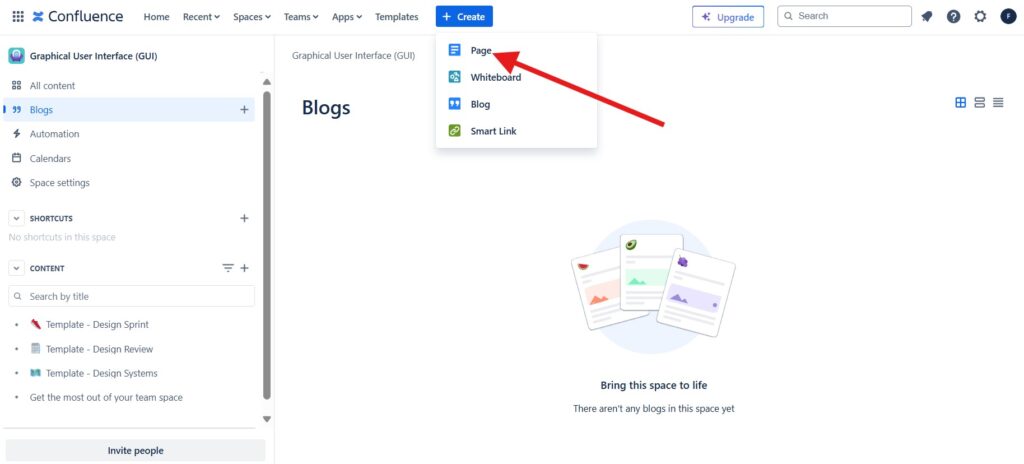
Step 2: Create a Blog Post
Click on the “Create” button at the top of the screen. Select ‘Blog’ from the content types.
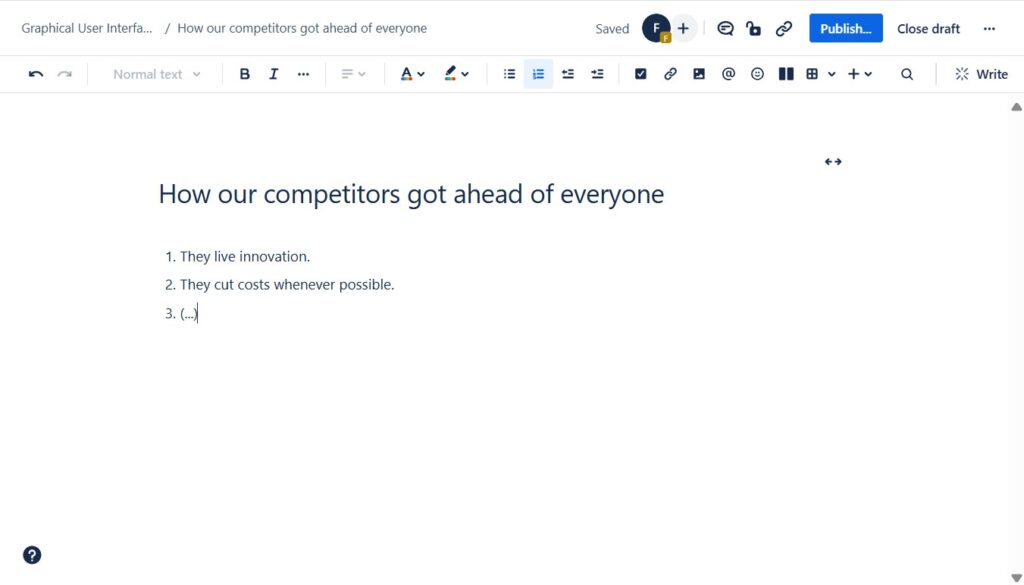
Step 3: Start Writing
Now you can start to edit your blog post.
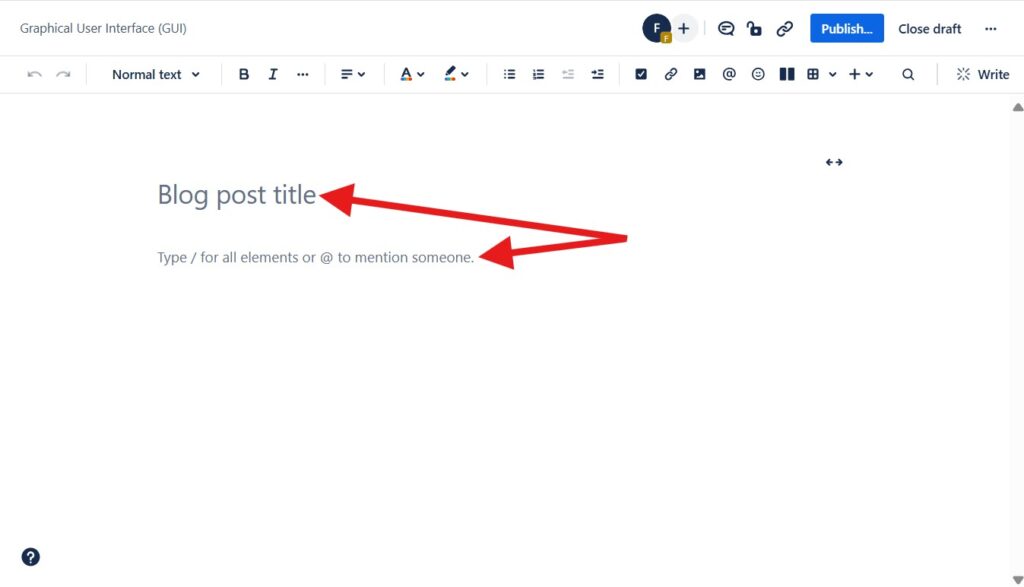
Enter a catchy title for your blog post. Write your content using the intuitive Confluence editor. Add headings, lists, images, etc.
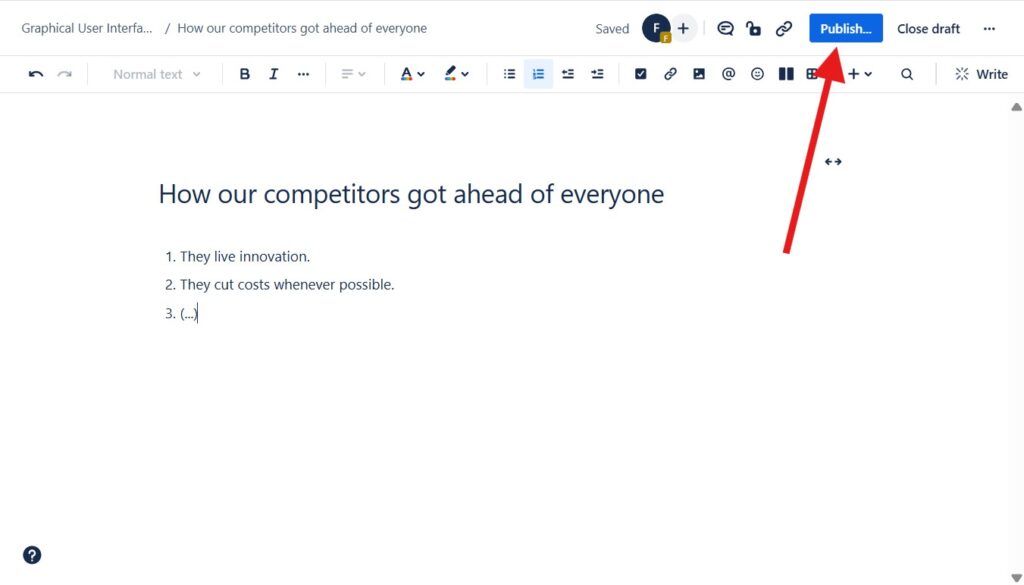
Step 4: Publish
Once satisfied, click on the ‘Publish’ button to make your post live.
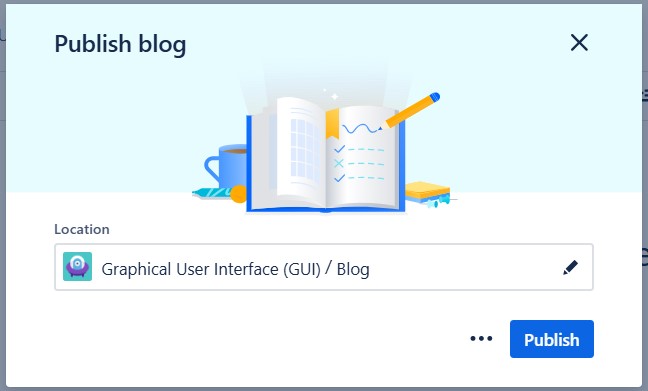
Step 5: Select the space
Choose in which space the blog post should be published.
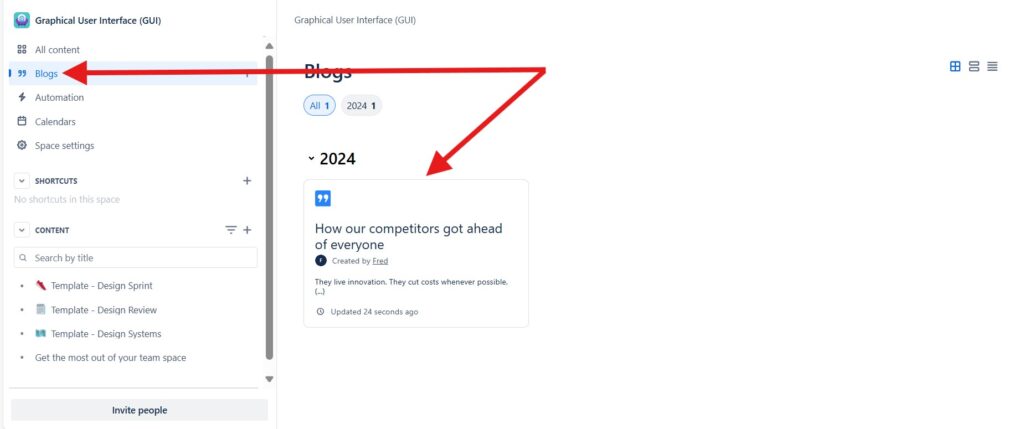
Step 6: Check out your blog post
Now you can see the result of your work. A new entry appears on the blog overview.
Conclusion
To create a blog post in Confluence is straightforward and efficient, offering powerful tools to enhance your content. By following these steps, you can effectively collaborate with your team and produce well-crafted blog posts. Give it a try, and experience the seamless process of blogging in Confluence. Happy blogging!
What’s Next?!
Now that you know how to create a blog post in Confluence, you can share updates, insights, and progress more clearly. Blog posts help teams communicate news in a visible way. However, communication becomes even more useful when it leads to clear action.
In the next article, I’ll show you How to Assign and Manage Tasks in Confluence (Step-by-Step Guide). You’ll learn how tasks help you assign responsibilities, track follow-up work, and keep collaboration organized. Click the next article to turn Confluence content into practical team action.
Improve Requirements Engineering with the Right Tools
Requirements engineering becomes clearer when I use tools that support thinking, documentation, tracking, and process work. In my main article on Requirements Engineering Tools, I show how draw.io, Confluence, Jira, and Camunda work together in a practical workflow. Draw.io helps me visualize ideas. Confluence helps me organize knowledge. Jira helps me manage tasks and issues. Camunda helps me model processes. Click through to the full article and learn how these tools help you create better requirements.
| Read more about Confluence and How to |
|---|
| Format Text in Confluence Make Lists in Confluence Change the Headings in Confluence Create a Blog Post in Confluence Align Text in Confluence |