
The confluence editor mode helps me create, edit, and share content with less friction. It supports clear teamwork because everyone can work on pages in one shared space. As a result, teams improve communication, reduce scattered information, and build better documentation. In this article, I show how the editor supports smoother content creation and daily collaboration.
What Is the Confluence Editor Mode?
I use the Confluence editor whenever I create or change page content. It combines writing, formatting, collaboration, and page-management functions in one interface.
Therefore, I can work on the content while also seeing where the page belongs, who else is editing it, and which actions are available.
The Confluence editor combines content creation with the collaboration and management functions that surround a page.
Step 1: Enter the Editor
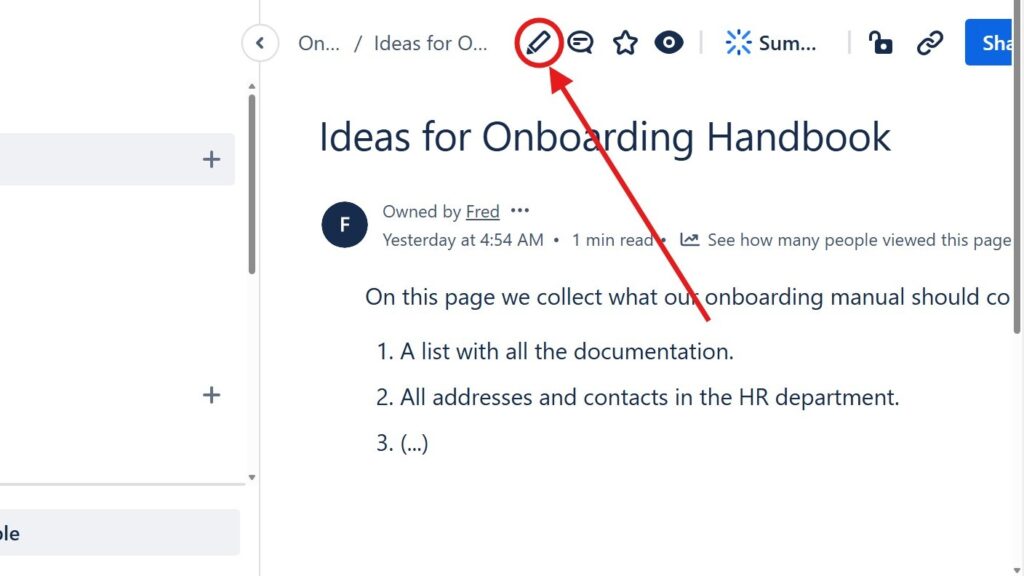
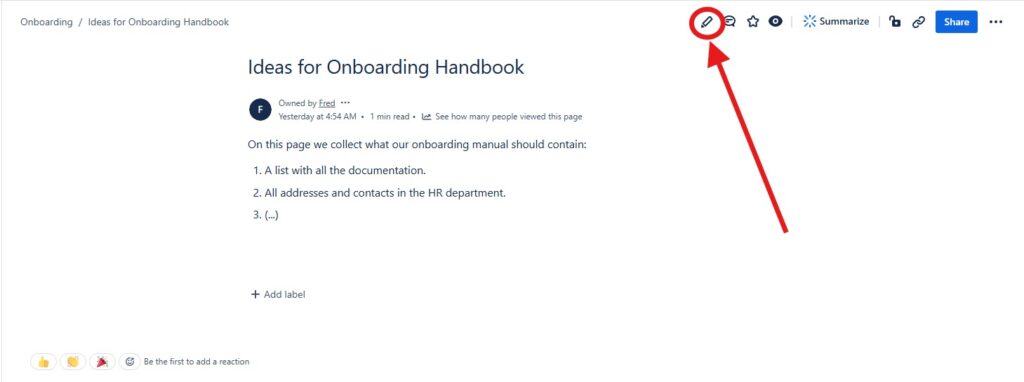
First, I open the page that I want to change. Then I select the pencil icon at the top of the published page.
Confluence opens the page in editing mode.
Step 2: Check the Page Location
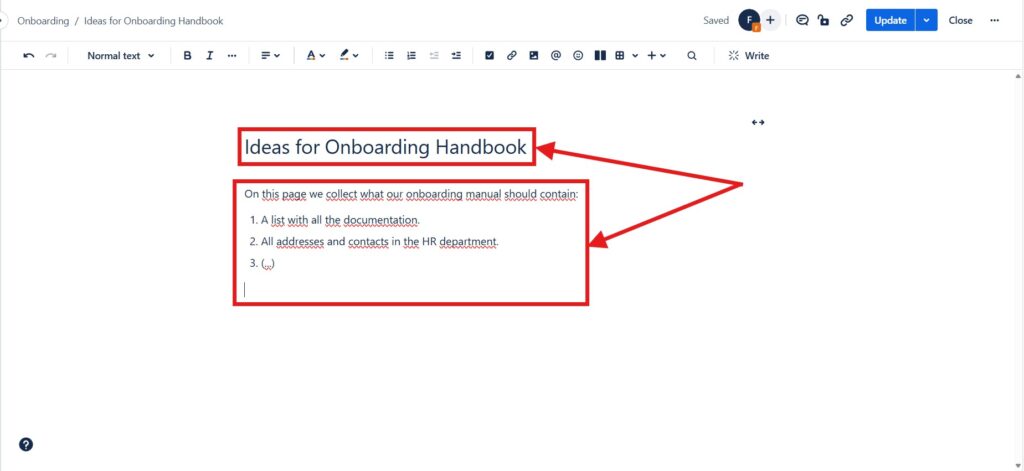
At the upper left of the editor, I see the page location.
The breadcrumb shows the space and the page structure around the current page. Therefore, I can understand where the content belongs while I edit it.
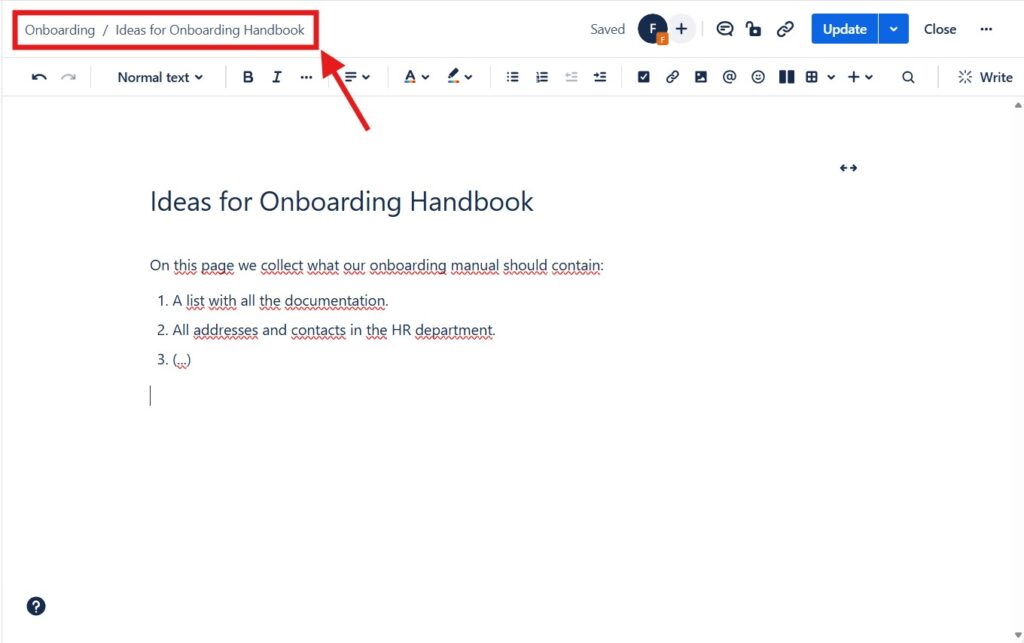
The page location gives me important context because Confluence organizes knowledge through spaces and page hierarchies.
Step 3: Use the Main Page Controls
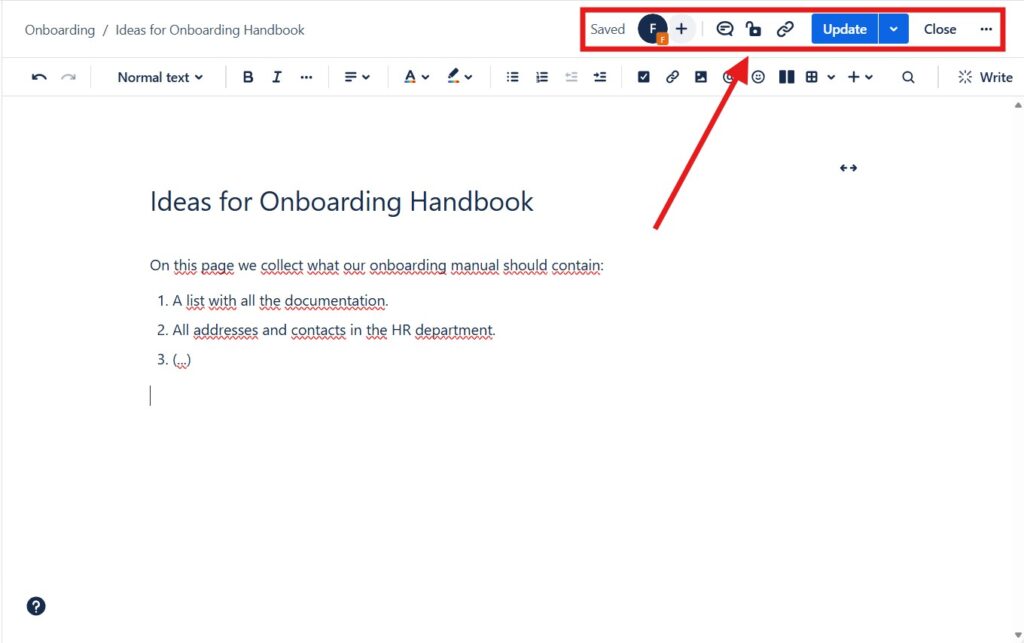
The upper-right area contains important controls for the current editing session.
Depending on the page and configuration, I can see the save status, collaborators, comments, restrictions, links, the Update button, Close, and additional actions.
Confluence saves my draft while I work. However, I select Update when I want to publish my changes to an existing page.
Step 4: Open Additional Page Actions
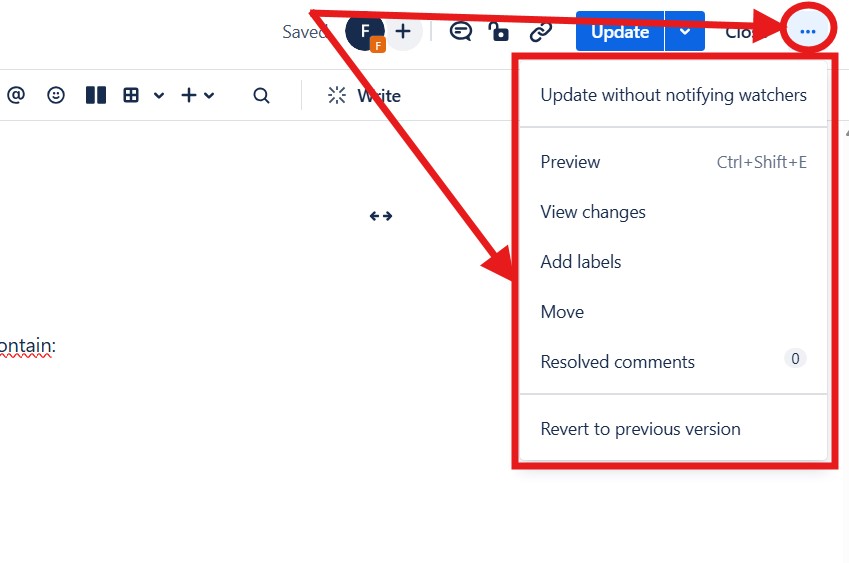
The three-dot menu gives me additional options.
For example, the interface shown here provides actions for previewing changes, viewing changes, adding labels, moving the page, reviewing resolved comments, or reverting to a previous version.
I use these actions when I need to manage the page beyond normal text editing.
Step 5: Edit the Title and Content
The central area contains the page title and content.
I can change the title, add paragraphs, create headings and lists, insert links, build tables, and use other editor elements. Therefore, this area contains the actual knowledge that the page communicates.
I keep the title specific and structure longer content with clear headings.

In text ads, you can choose the title of the page and the text area above. This is where the magic happens.
Step 6: Collaborate in Real Time
Several people can work on the same page.
When others edit the page, I can see their presence in the editor. I can also see where they are working in the content.
This makes joint editing useful for workshops, documentation, requirements work, and other situations where several people contribute at the same time.
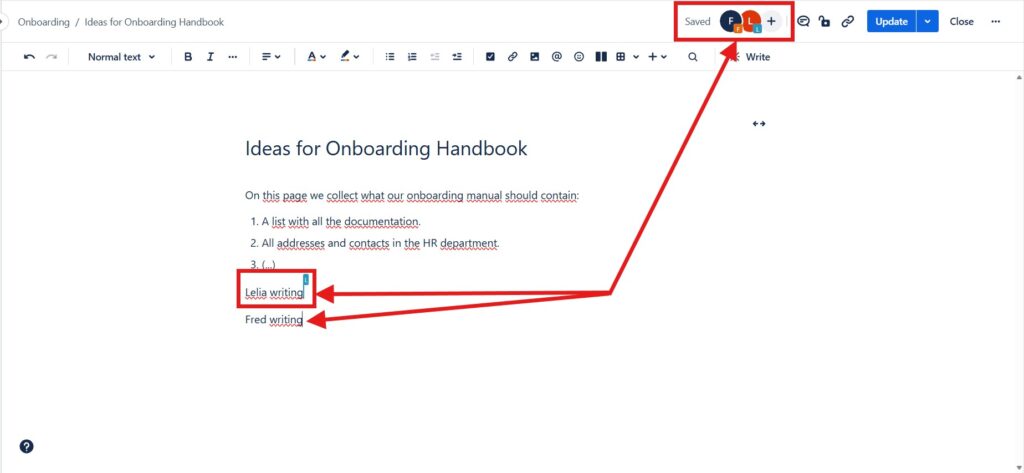
Real-time editing lets several contributors work with the same current content instead of exchanging separate document versions.
Step 7: Mention People
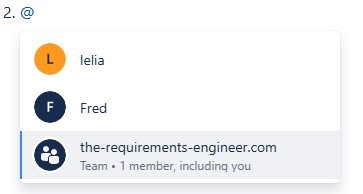
I can type @ to mention another person.
Confluence then shows available people or teams. After I select an entry, the mention connects that person with the relevant point in the page.
I use mentions when someone needs context, input, or attention. However, I avoid mentioning people when the reference adds no practical value.
Step 8: Insert Additional Elements
The insert menu lets me add more than normal text.
Depending on the available products and configuration, I can insert elements such as a table of contents, Confluence content, or connected Jira information.
In the example, the menu also provides options for Jira issues, Jira timelines, creating a Jira issue, and creating another Confluence page.
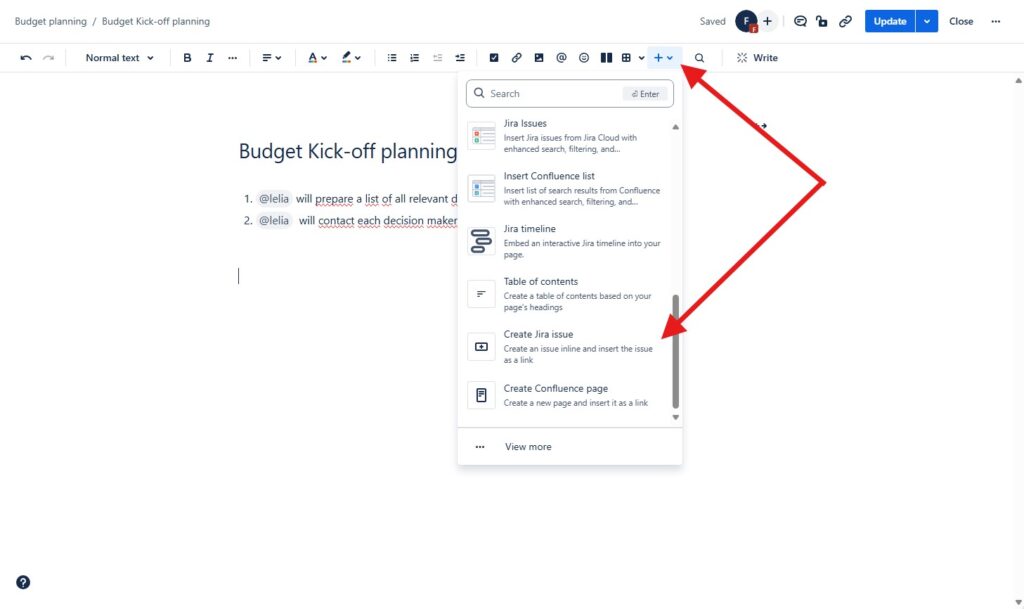
Inserted elements help me connect a Confluence page with supporting information instead of copying that information into isolated text.
How I Use the Editor Effectively
The editor offers many functions. However, I do not use every function on every page.
I focus on a few principles:
- I give each page a clear purpose.
- I use headings to create a logical structure.
- I keep formatting consistent.
- I use comments and mentions when collaboration requires them.
- I insert connected content when it provides useful context.
- I check the page location before moving or reorganizing information.
- I update the page when the content is ready for others to use.
As a result, the editor supports the information instead of making the page unnecessarily complex.
Conclusion
The Confluence editor mode brings writing, formatting, collaboration, and page management into one working environment.
I use it to edit content, understand its location, collaborate with others, mention people, manage changes, and connect additional information.
For me, the main value of the Confluence editor is that content creation and team collaboration happen in the same context.
This makes it easier to create documentation that remains clear, connected, and maintainable.
What’s Next?!
Now that you understand Introducing the Confluence Editor Mode: A Seamless Experience for Teams, you know how the editor supports smoother content creation. You can write, format, and collaborate more easily inside Confluence. However, Confluence can also help you share updates in a more visible way.
In the next article, I’ll show you How to Create a Blog Post in Confluence: Step-by-Step Guide. You’ll learn how blog posts work, when to use them, and how they help teams communicate news, updates, and insights clearly. Click the next article to start creating better Confluence blog posts.
Build Stronger Requirements with Practical Tools
Requirements engineering becomes easier when I use tools that support clear thinking, shared knowledge, and reliable execution. In my main article on Requirements Engineering Tools, I show how draw.io, Confluence, Jira, and Camunda fit into one practical workflow. Draw.io helps me visualize ideas. Confluence helps me document knowledge. Jira helps me track work. Camunda helps me model processes. Click through to the full article and learn how these tools help you create clearer requirements and better project results.