Learning to create a jira issue helps me manage project work with more structure. In this guide, I show the process step by step. You will learn how to report bugs, track tasks, and describe work clearly. As a result, your team can stay organized, improve visibility, and keep projects moving forward with more control.
What is Jira?
Jira is a powerful project management tool developed by Atlassian, designed to help teams plan, track, and deliver work efficiently. Originally created for bug and issue tracking, Jira has evolved into a versatile platform for managing e.g. agile projects, workflows, and tasks. Teams can create and assign issues, set priorities, and monitor progress in real time. With customizable boards and detailed reporting, Jira keeps projects transparent, organized, and aligned with team goals.
Step 1: Log in to Your Jira Account
Begin by logging into your Jira account. Ensure you have the necessary permissions to create issues in the project you are working on.
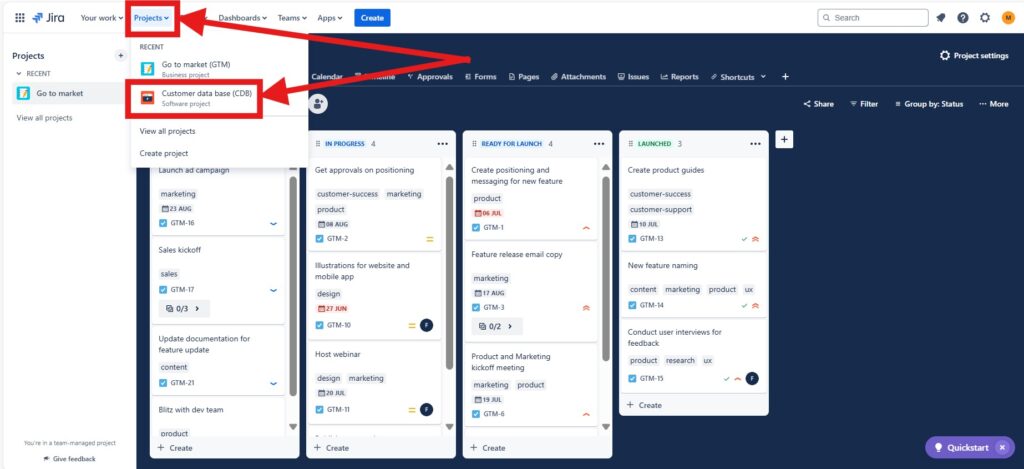
Step 2: Select the Project
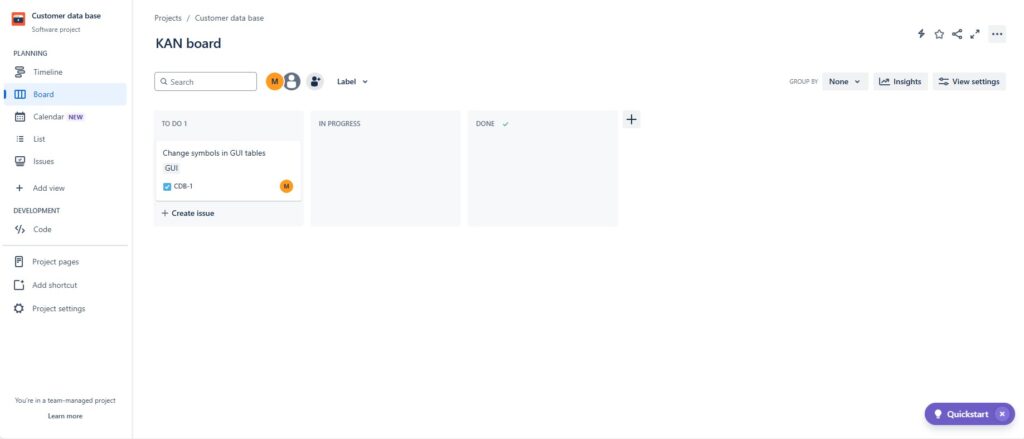
Once logged in, navigate to the project where you want to create the issue. At this point, you can do this by selecting the project from the sidebar or the main dashboard.
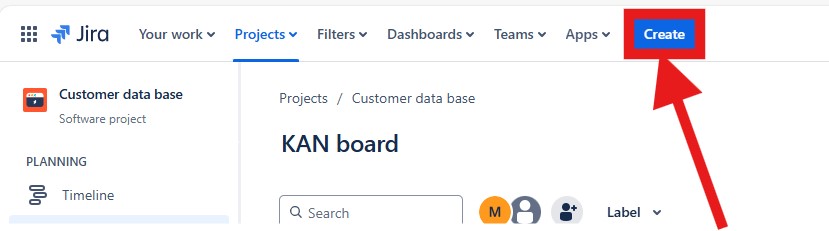
Step 3: Click on “Create”
On the top navigation bar, you will find a “Create” button. Click on it to open the issue creation dialog.
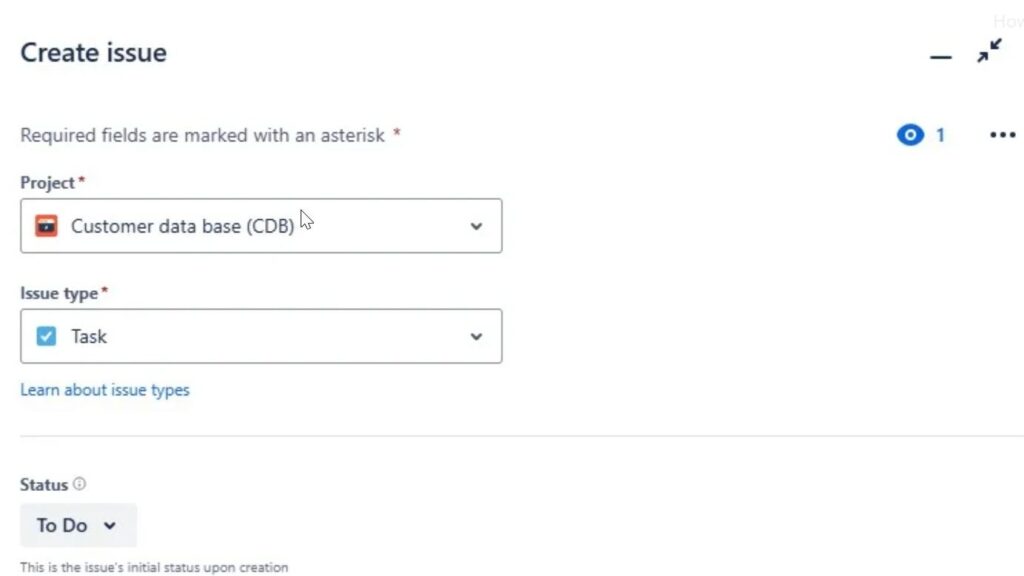
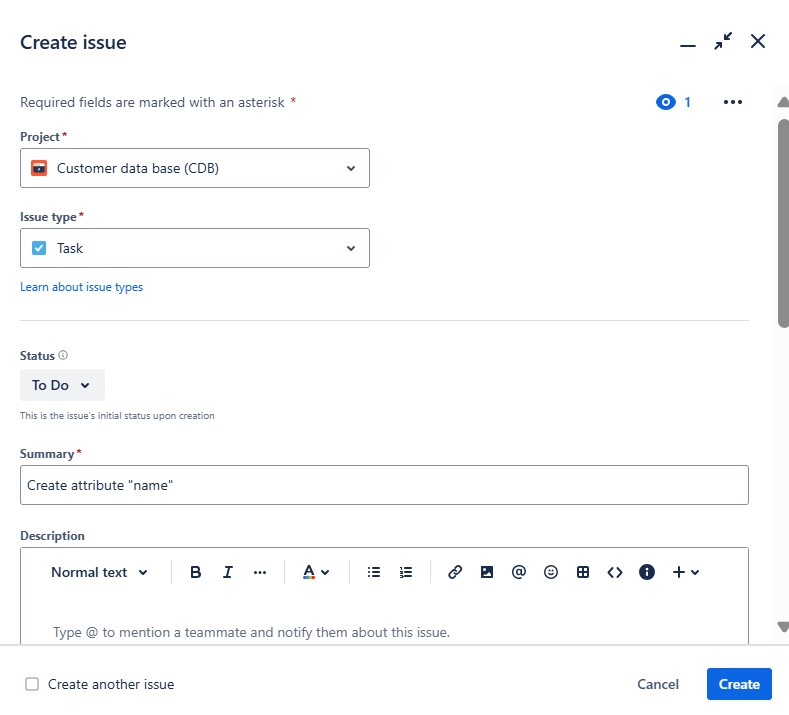
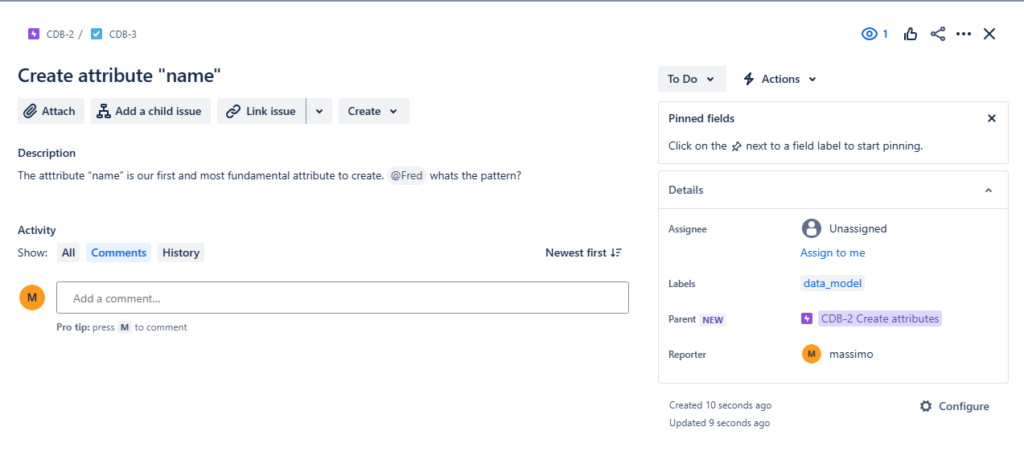
Step 4: Fill in the Issue Details
The issue creation dialog will prompt you to enter various details. Here’s a breakdown of the fields you need to fill:
- Project: Ensure the correct project is selected. It depends to your working environment how many projects you work on.
- Issue Type: Choose the type of issue you want to create, such as Bug, Tas>k, Story, etc.
- Status: Choose if the task is still “ToDo” or “Done” yet.
- Summary: Enter a brief summary of the issue. This is a mandatory field.
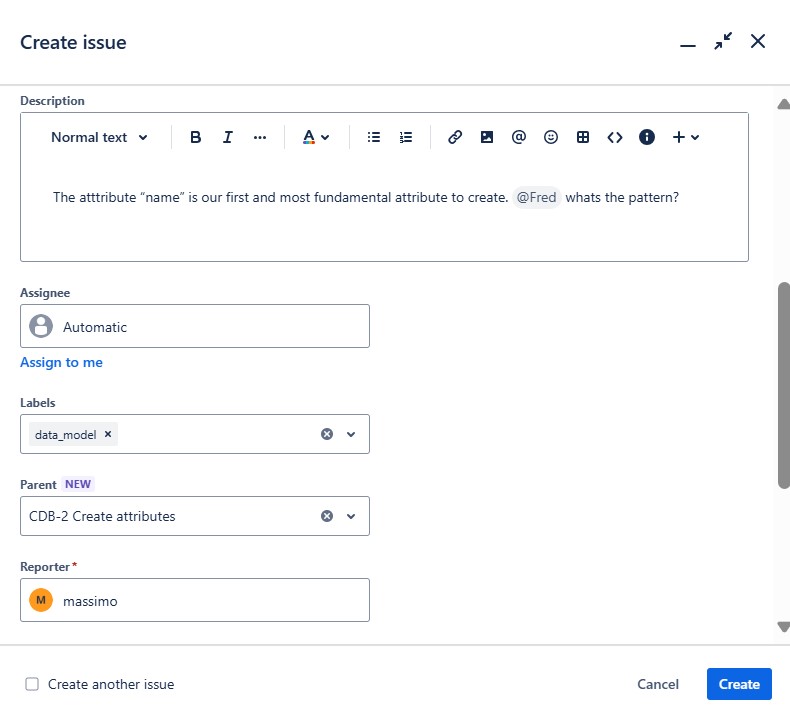
- Description: Provide a detailed description of the issue. Include all relevant information to help the assignee understand the task.
- Assignee: Assign the issue to a team member. You can also leave it unassigned.
- Labels: Add any labels to categorize the issue.
- Parent: Pick an “Epic” you want to declare as a parent section.
- Reporter: Declare to whom changes of this issues should be reported to. This is a mandatory field. You are picked as a default option.
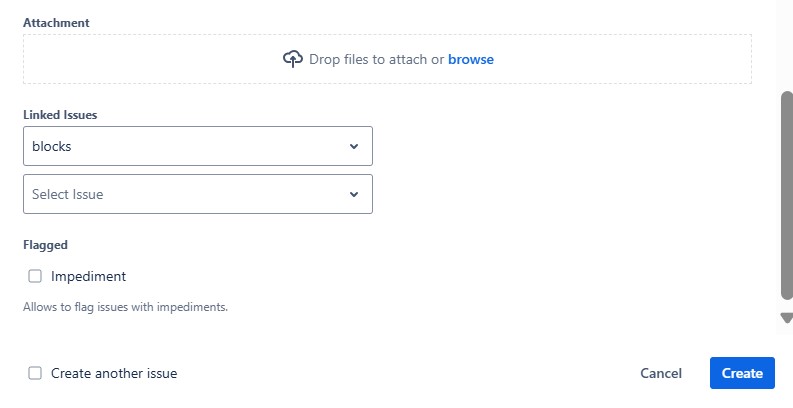
- Attachments: Attach any relevant files or screenshots.
- Linked Issues: Here you can link other issues to your new issue.
- Flagged: You can flag if there are impediments to this issue.
- Create another issue: After completion you can create another issue directly.
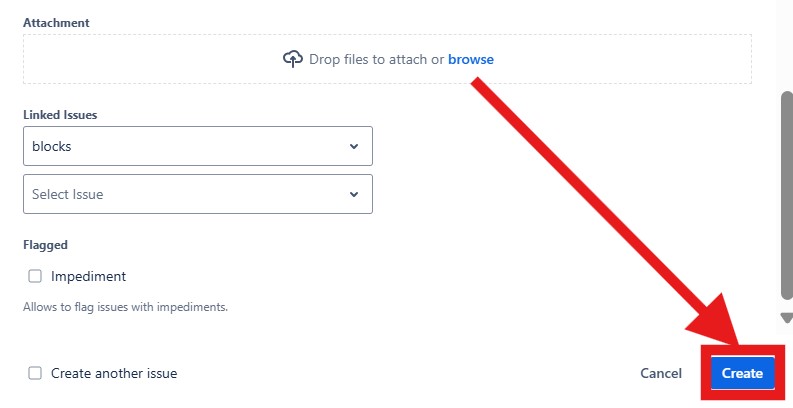
Step 5: Save Your Issue
After filling in all the required fields, click on the “Create” button at the bottom of the dialog. Your issue will be created and assigned an ID.
Step 7: Review and Track the Issue
Once the issue is created, you can view it in the project’s backlog or board. Monitor the progress, add comments, and update fields as the work progresses.
Tips for Creating Effective Jira Issues
- Be Clear and Concise: Ensure your summary and description clearly state the problem or task, i.e. avoid jargon and ambiguity.
- Use Screenshots: Visual aids can help clarify the issue, especially for bugs and UI/UX tasks.
- Set Realistic Priorities: Assign priorities based on the impact and urgency of the issue.
- Collaborate: Use comments to communicate with team members and keep the issue updated with relevant information.
Creating a Jira issue is a straightforward process that, when done correctly, can significantly enhance your team’s workflow and productivity. By following these steps, you’ll ensure that issues are well-documented and actionable, making it easier for your team to tackle them efficiently.
Conclusions
By following this guide, you can streamline the process of how to create an issue in Jira, ensuring that your project management is both effective and efficient. Happy issue tracking!
What’s Next?!
Now that I know how to create a Jira issue, I want to work faster inside Jira. Therefore, the next step is How to Use Shortcuts in Jira to Boost Your Productivity.
In that article, I explain how Jira shortcuts help me move through common actions with less effort. You will learn how shortcuts save time, reduce repeated clicks, and make daily project work smoother. In addition, you will see how small navigation improvements can make Jira feel easier and more efficient.
Click the next article to discover how Jira shortcuts can speed up your workflow and help you manage project work more confidently.
Requirements Engineering Tools: Create a Strong Foundation for Better Projects
Requirements engineering works best when I connect ideas, documentation, tasks, and processes clearly. Therefore, I use draw.io to visualize concepts, Confluence to structure knowledge, Jira to manage work, and Camunda to model business processes. Together, these tools help me move from early requirements to practical project execution.
In the main article on Requirements Engineering Tools, I show how this toolset improves communication, traceability, collaboration, and delivery. Click through to discover how draw.io, Confluence, Jira, and Camunda can support your requirements engineering workflow.