
Jira helps me organize tasks, bugs, features, and project work in one clear place. In this guide, I’ll show you how to create a project in jira step by step. You will learn how to set up your workspace, structure your work, and prepare your team for better task management. As a result, you can start faster and manage projects with more clarity.
A Note on Current Jira Terminology
The screenshots in this guide use the earlier Jira term project. Current Jira Cloud documentation calls this organizational container a space. A Jira space groups related work items and can provide boards, timelines, workflows, and other views.
The terminology has changed, but the main purpose remains the same: I create a structured environment for related work.
Step 1: Start a New Project
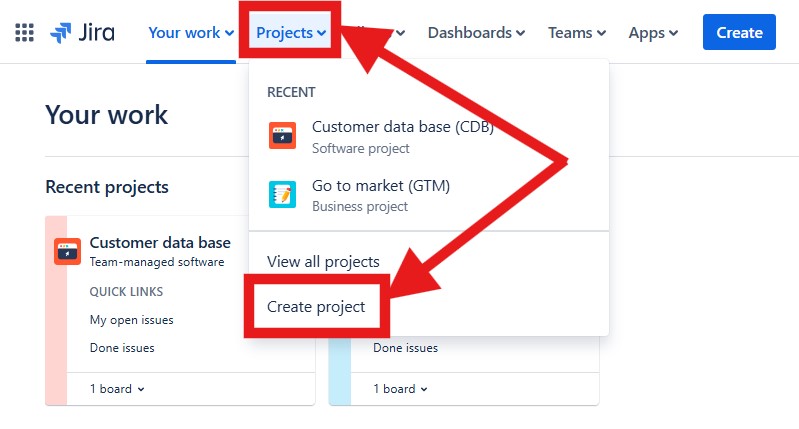
First, I open the Projects menu and select Create project.
In the current Jira Cloud interface, I may instead see Spaces and Create space.
Step 2: Choose the Type of Work
Next, I select the category that best matches my work.
For a software project, I choose Software development.
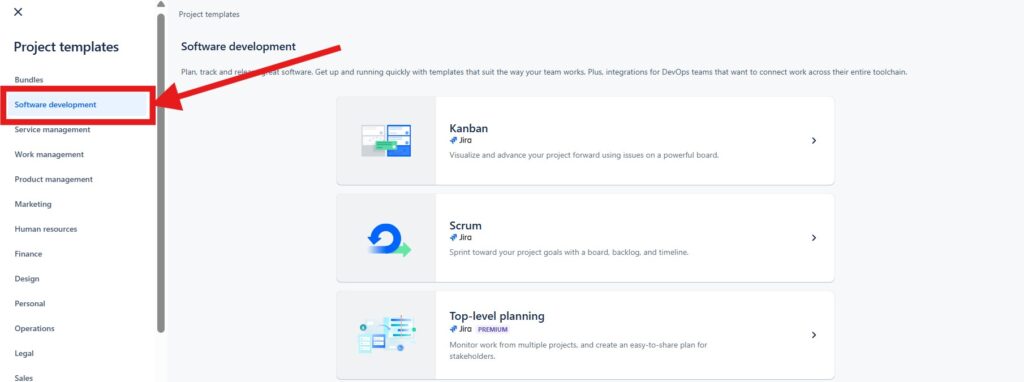
Jira then shows templates for different ways of organizing work. The available choices can include Kanban, Scrum, planning, roadmap, or bug-tracking approaches.
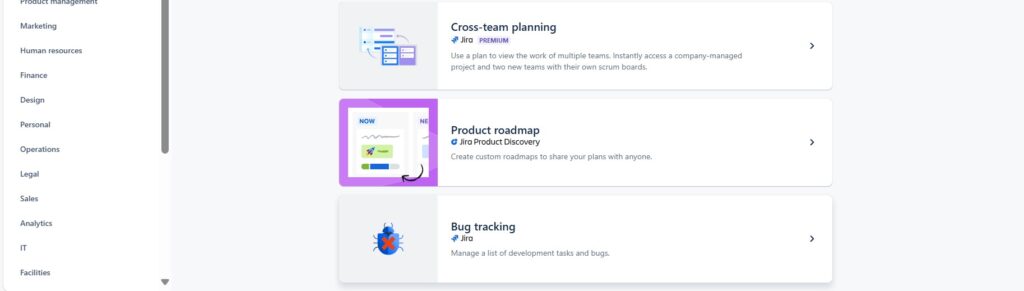
I choose the template according to how the team intends to manage work, not according to which template offers the most features.
Step 3: Select the Kanban Template
In this example, I choose Kanban.
Kanban gives me a board that visualizes work as it moves through workflow stages.

Jira also gives me an overview before I continue. Therefore, I can check whether the template fits the intended workflow.
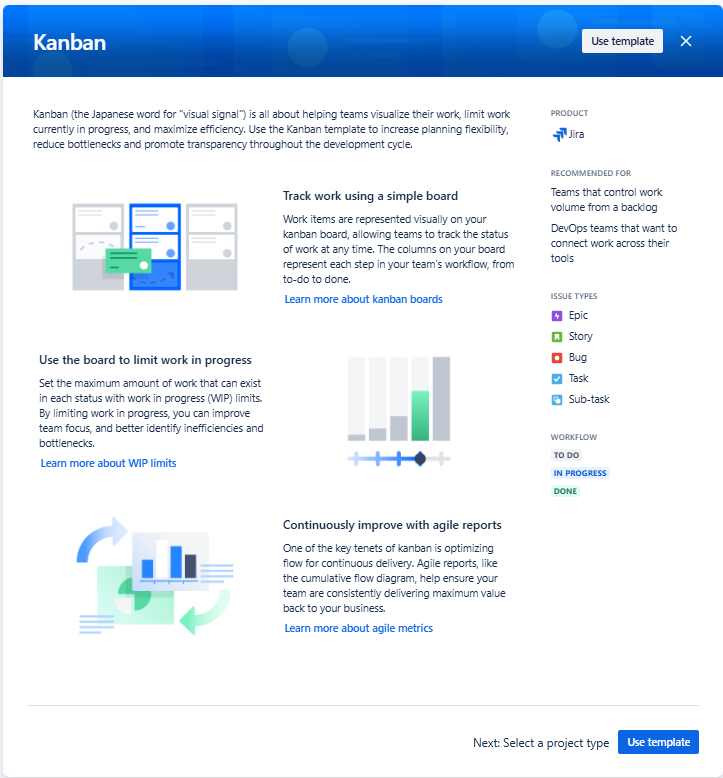
Then I select Use template.
Step 4: Choose How Jira Should Manage the Project
Next, I choose between a team-managed and company-managed setup.
A team-managed setup gives the individual team more control and simpler configuration. In contrast, a company-managed setup supports standardized configuration across multiple spaces and usually requires stronger Jira administration. (Atlassian Support)
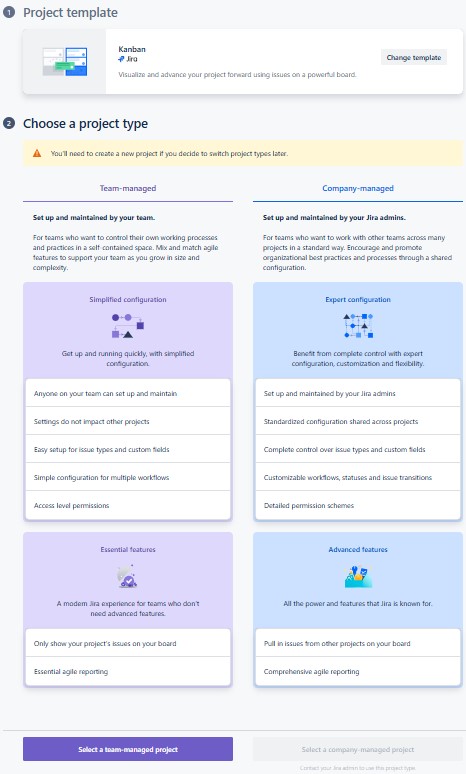
I use team-managed configuration when a team needs autonomy and company-managed configuration when shared organizational standards matter more.
For this example, I continue with team-managed.
Step 5: Add the Project Details
Now I enter the project name.
Jira also uses a key to identify the project and its work items. For example, a key such as DA can lead to work-item identifiers such as DA-1 or DA-2. (Atlassian Support)
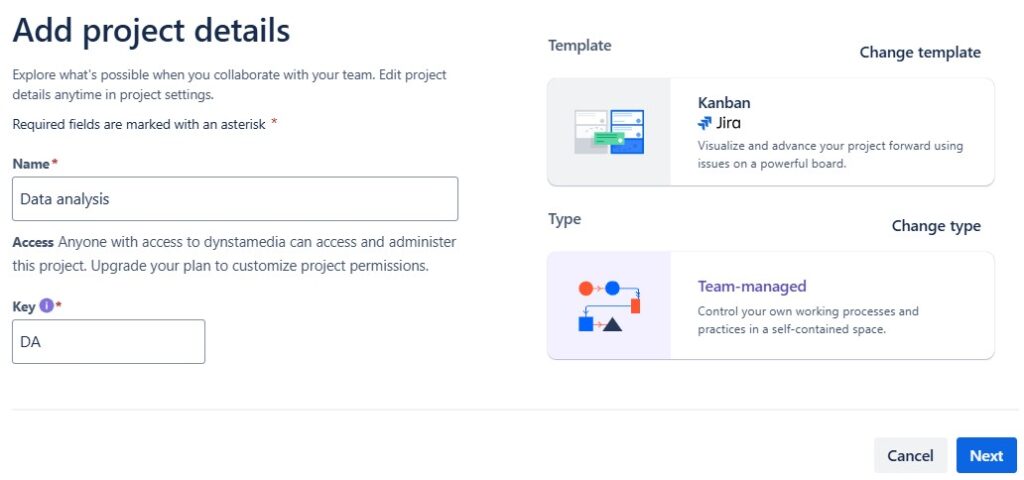
I keep both values clear and recognizable because they will appear throughout the project.
Step 6: Connect Related Work
Jira may offer connections to other tools.
For example, I can connect a Confluence space so that project documentation and Jira work remain easier to navigate together.
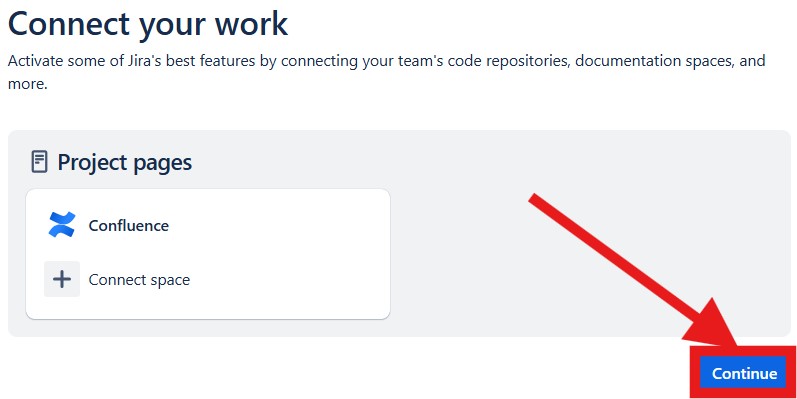
However, I only create integrations that support an actual workflow.
A connection between tools should reduce information gaps rather than create another place that the team must maintain.
Then I select Continue.
Step 7: Review the New Board
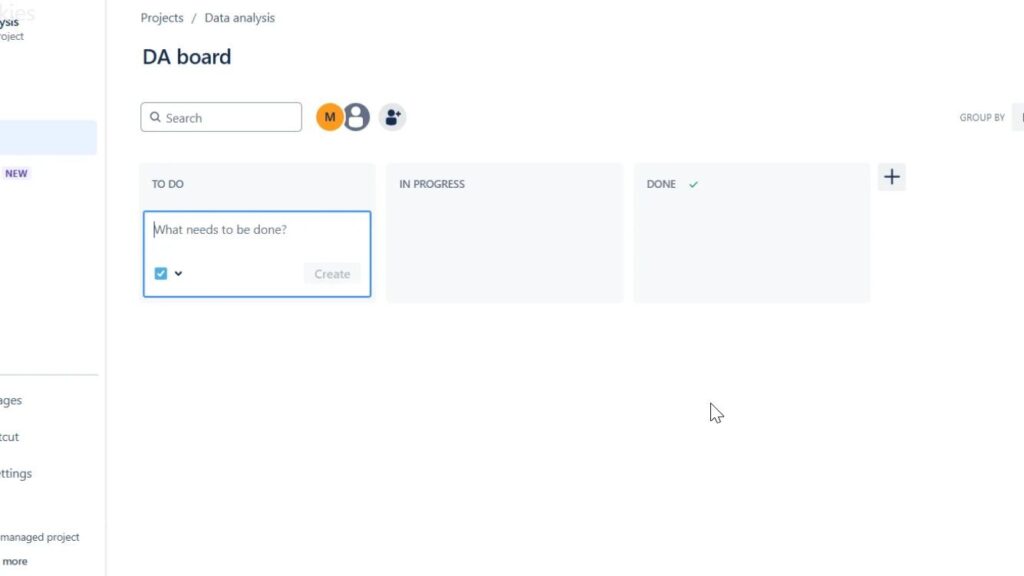
After setup, Jira opens the new project board.
In this example, the Kanban board contains To Do, In Progress, and Done columns. I can now begin adding work and move it through the workflow.

The board gives me a visual view of work status from the moment the project starts.
What I Configure After Creation
I do not consider project creation finished just because the board exists.
Next, I check whether the default workflow and work types fit the team. I also review access, responsibilities, fields, and integrations.
However, I start simply.
If To Do, In Progress, and Done describe the actual workflow, I keep them. I add additional statuses only when they represent a meaningful difference in how work is managed.
A simple Jira configuration that reflects real work is more useful than a complex configuration that the team struggles to maintain.
Conclusion
To create a project in Jira, I choose a template, select the management model, define the project details, connect useful tools, and review the resulting board.
The technical setup is straightforward. However, the choices behind it determine how well Jira supports the team afterwards.
I create a Jira project so that its structure reflects how the team actually plans, tracks, and completes work.
What’s Next?!
Now that I know how to create a project in Jira, I want to understand the work items inside it. Therefore, the next step is Introduction to Issues in Jira.
In that article, I explain what Jira issues are and why they matter. You will learn how issues represent tasks, bugs, stories, requests, and other project work. In addition, you will see how issues help teams describe, assign, track, and complete work in a structured way.
Click the next article to discover how Jira issues turn project plans into clear and manageable action items.
Requirements Engineering Tools: Turn Requirements into Action
Requirements engineering becomes more practical when I connect analysis, documentation, modeling, and delivery. Therefore, I use draw.io to create clear diagrams, Confluence to organize knowledge, Jira to manage tasks, and Camunda to model business processes. Together, these tools help me turn ideas into structured requirements and visible workflows.
In the main article on Requirements Engineering Tools, I show how this tool combination supports clearer communication, better traceability, and stronger project control. Click through to learn how draw.io, Confluence, Jira, and Camunda can improve your requirements engineering work.