
Embedding a draw.io diagram on a website may look tricky at first. However, it is easier than it seems. In this article, I show how to embed a draw.io diagram with a tag. You’ll learn how draw.io works, what an HTML tag does, and how a simple business case brings the workflow together.
If you prefer the video walkthrough, check it out:
What is draw.io?
Draw.io is an online diagramming tool that’s incredibly versatile. I use it for creating flowcharts, wireframes, and even network diagrams. What makes it stand out is its ease of use. You can create professional diagrams without much effort. It’s free to use, though premium options exist for businesses that need more features.
For example, imagine a project manager visualizing a workflow. Instead of writing steps in a document, they can use draw.io to make a clear flowchart. This not only looks better but also helps teams understand processes faster.
How to Embed a draw.io Diagram with an <img> HTML Tag
How to Embed a draw.io Diagram with an <img> HTML Tag is useful when I want to place a diagram directly on a web page without uploading a separate image manually. Draw.io can generate the required HTML through its Embed function. I can then paste this code into a website, content management system, or HTML document. In this guide, I show the complete process and explain the relevant settings for fitting, display quality, lightbox behaviour, layers, and editing.
What Is an HTML <img> Tag?
The HTML <img> tag displays an image on a web page. It defines the image source and how the browser should display it.
Draw.io can generate this HTML automatically. Therefore, I do not need to write the complete markup myself.
The generated <img> tag lets me place a draw.io diagram directly inside HTML content.
How to Embed a draw.io Diagram with an HTML <img> Tag
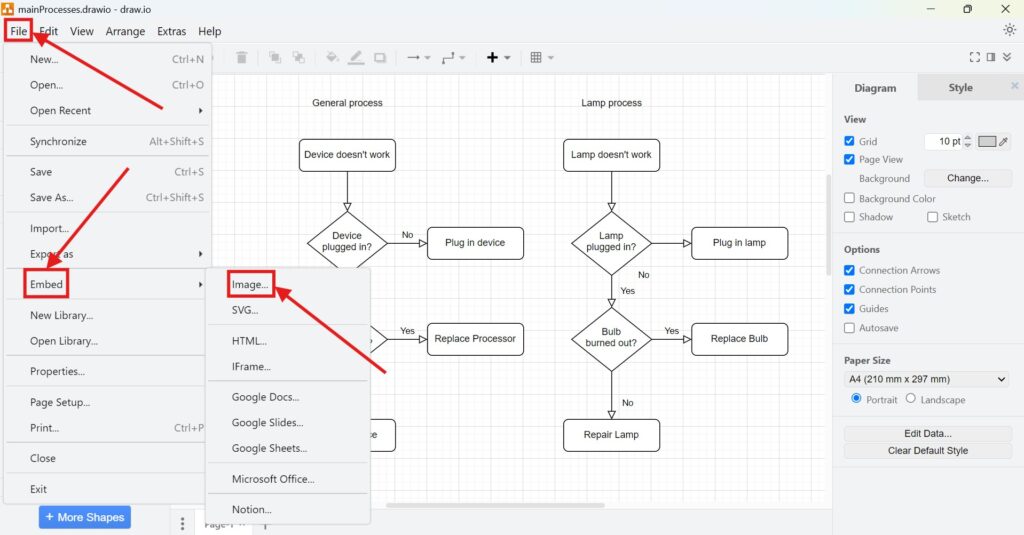
Step 1: Export Your Diagram as HTML Code
First, I open the diagram.
Then, I select File > Embed > Image.
Draw.io opens the available embedding settings.
I use Embed > Image when I want draw.io to generate HTML for direct use on a web page.
Step 2: Choose Your Configuration
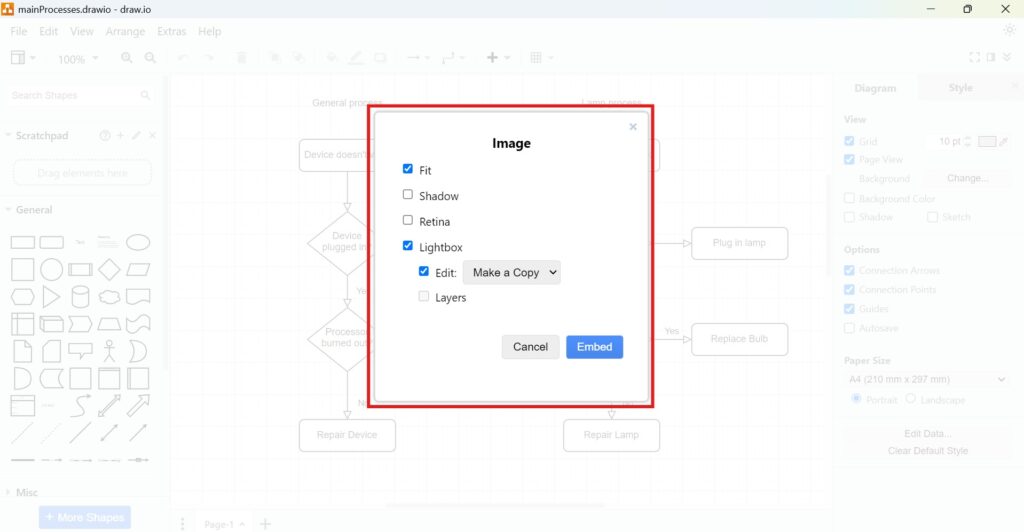
Next, I configure how the diagram should appear and behave.
The available options may depend on the draw.io version and environment.
Fit
Fit adjusts the diagram to the available display area. Therefore, I use it when the image should adapt to the available width.
Shadow
Shadow preserves visual shadow effects. I enable it only when shadows support the intended design.
Retina
Retina can improve clarity on high-resolution screens when this option is available.
Lightbox
Lightbox opens the diagram in a larger viewer. I use it for detailed diagrams with small labels or many elements.
Lightbox Edit
Editing options can let viewers reuse or modify the diagram. For example, Make a Copy can create a separate editable version.
Lightbox Layers
This option can let viewers show or hide diagram layers. Therefore, one diagram can provide different levels of information.
I enable only the options that improve understanding or support the intended interaction.
Afterwards, I click Embed.
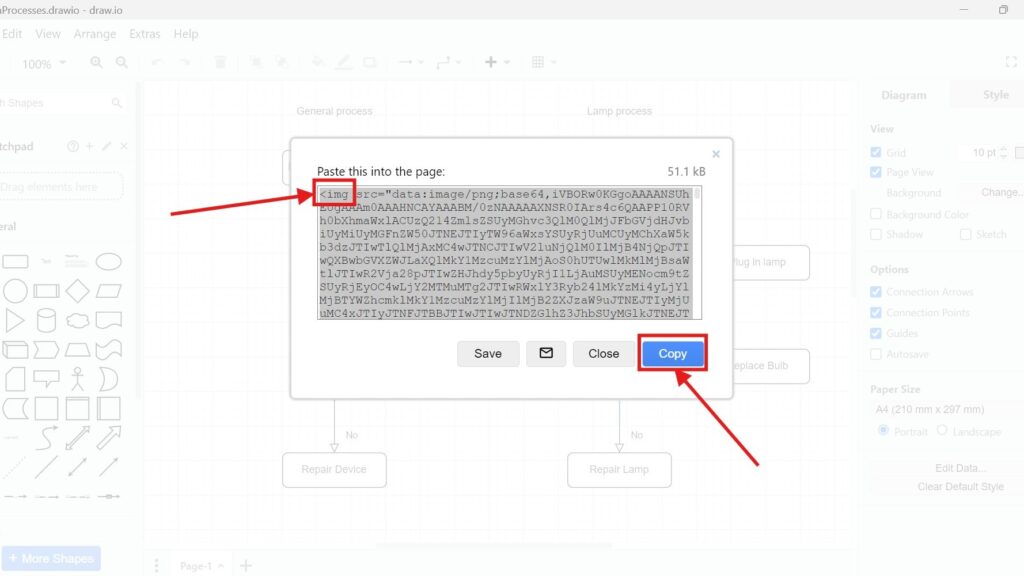
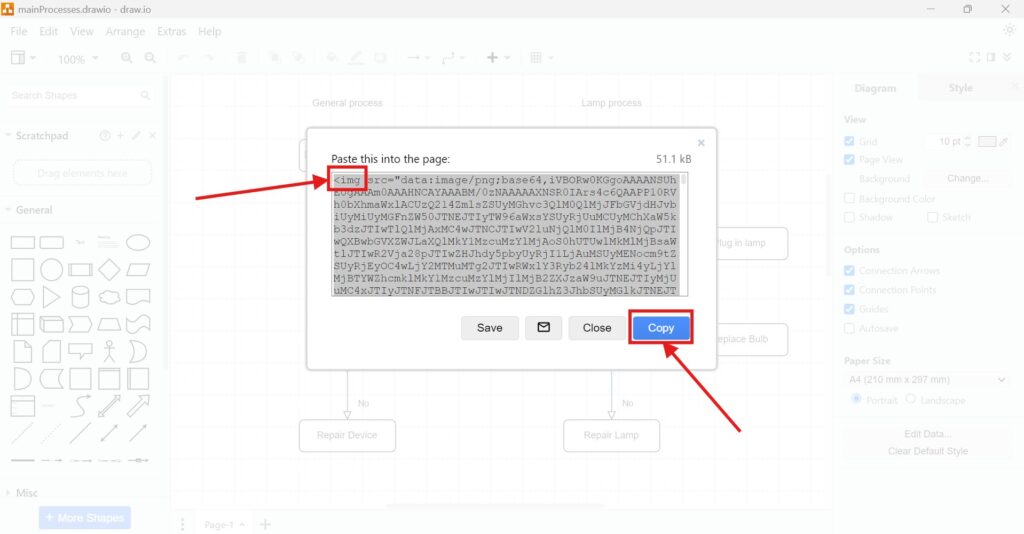
Step 3: Copy the Generated Code
Draw.io now generates the required HTML.
I click Copy to place it on my clipboard.
I keep the original draw.io file because the generated HTML serves as an output, not as my main source.
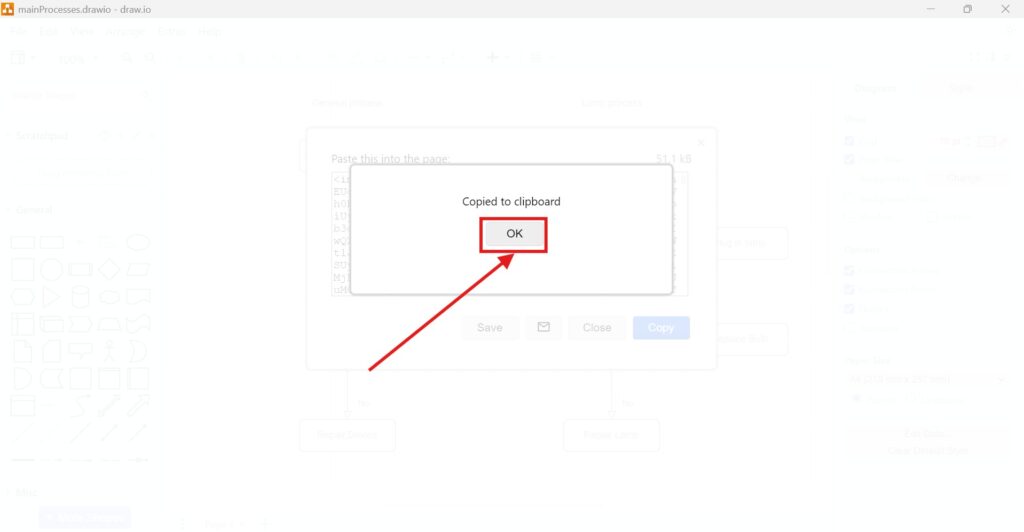
Step 4: Paste the Code into Your Web Page
Next, I open the HTML editor of my website.
For example, in WordPress I use an HTML or code area that accepts markup.
Then, I paste the generated code where I want the diagram to appear.
The exact method depends on the platform. Therefore, I make sure the editor interprets the content as HTML instead of plain text.
Step 5: Preview and Publish
Finally, I preview the page.
I check size, readability, alignment, links, lightbox behaviour, layers, and editing controls. Moreover, I test the page on smaller screens when mobile display matters.
If necessary, I return to draw.io, change the settings, and generate the code again.
I always test the embedded diagram before publishing because the website layout can affect its final appearance.
Once everything works correctly, I publish or update the page.

When I Use an <img> Embed
I use this method when I want a diagram to appear directly inside normal web content.
For example, it works well for tutorials, process documentation, technical articles, and knowledge-base pages.
In contrast, I use HTML export when I need a standalone viewer. I use SVG or PNG when I only need a normal image file.
Therefore, I choose the method according to the required interaction.
Keep the Source Diagram Separate
I treat the generated HTML as publication output.
The original draw.io file remains my editable source. When I change the diagram, I update that file first and then generate new embed code if necessary.
Keeping one editable source reduces version conflicts and simplifies maintenance.
Final Thoughts
To embed a draw.io diagram with an HTML <img> tag, I select File > Embed > Image, configure the options, generate the HTML, copy it, and paste it into my website.
The main settings control fitting, display quality, lightbox behaviour, layers, and editing.
A well-configured image embed gives me a practical way to display draw.io diagrams directly inside web pages while preserving useful viewer features.
What’s Next?
Now that you know how to embed a draw.io diagram with an HTML <img> tag, you can take the next step and explore another powerful option. In the next article, I’ll show youHow to Embed a draw.io <svg> Image Tag. You’ll learn how SVG embedding works, why it can be useful for sharp and scalable diagrams, and when it makes sense to use it on your website. Click the next article to continue your draw.io embedding journey.
Explore the Right Requirements Engineering Tools
Requirements engineering becomes much easier when I use the right tools for the right job. That is why the main article on Requirements Engineering Tools gives you a practical overview of draw.io, Confluence, Jira, and Camunda. You will see how these tools support visual modeling, structured documentation, agile collaboration, issue tracking, and process automation. Click through to learn how these tools work together and how they can help you manage requirements with more clarity, speed, and confidence.