
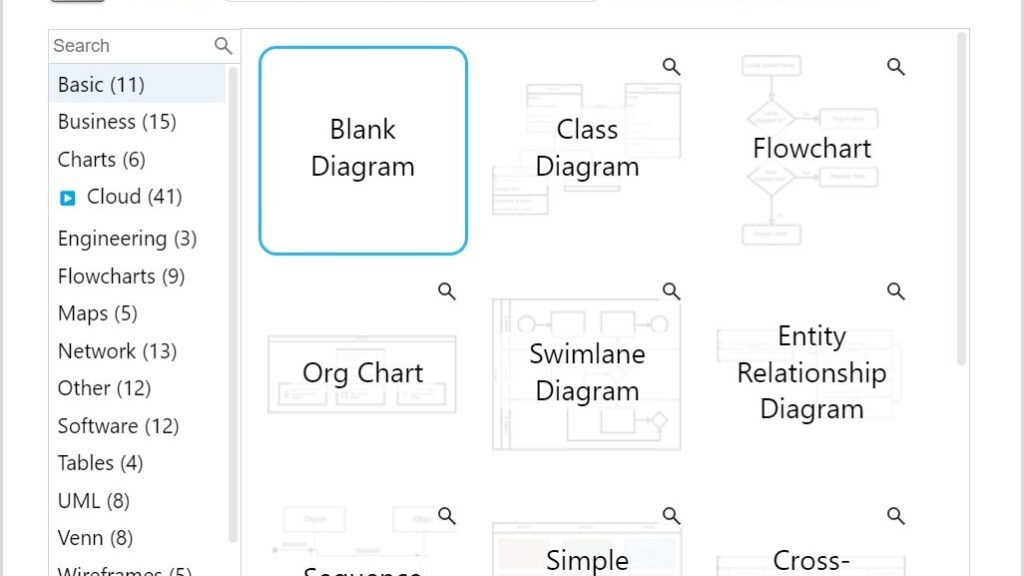
Creating a blank diagram in draw.io is simple and efficient. I use it whenever I want a clean canvas for structured thinking. Whether I outline processes, sketch system landscapes, or prepare visual concepts, I always start the same way. In this guide, I show you step by step how to create a blank diagram in draw.io so you can begin with clarity and full control from the very first click.
Prefer watching instead of reading? Here is the quick video walkthrough:
What Is draw.io?
draw.io is an intuitive online diagramming tool. It’s free, flexible, and packed with features for visualizing concepts. Whether you’re crafting a flowchart, wireframe, or an organizational chart, draw.io has got you covered. Starting with a blank diagram allows me to build completely customized visuals from scratch.
Why I Start with a Blank Diagram
A blank diagram contains no predefined shapes, connectors, or layout. Therefore, I can develop the diagram around my exact purpose. I also avoid deleting template elements that I do not need. A blank canvas gives me full control from the first modeling decision.
Two Ways to Create a Blank Diagram
I can start a blank diagram when I open draw.io. Alternatively, I can create one from the File menu during an active session. Both methods use the template selection and lead to the editor. Therefore, I choose the method that fits my current workflow.
Creating a Blank Diagram When I Start draw.io
1. Step: Open draw.io
I open the draw.io website or launch the desktop application. Then, I wait for the start screen or template selection to appear.
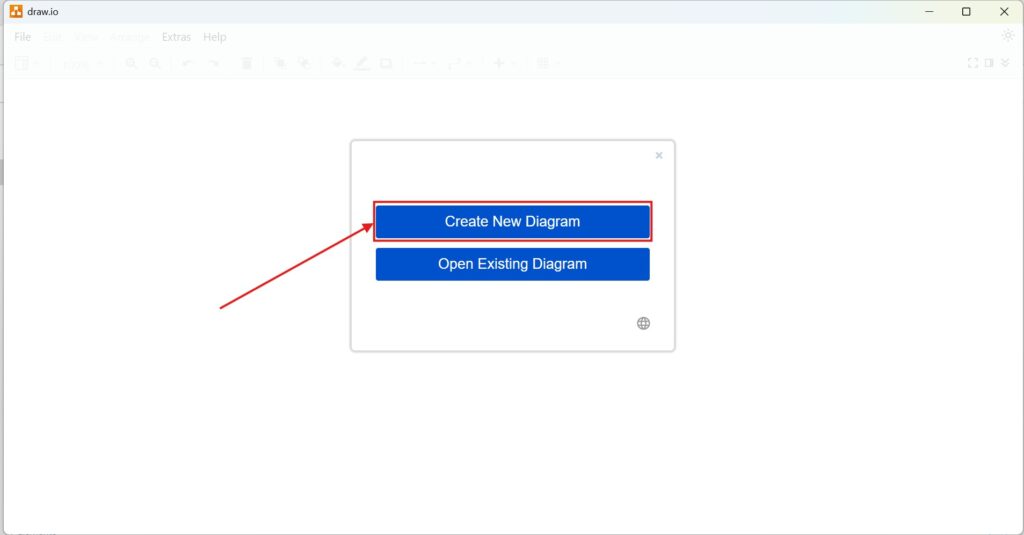
2. Step: Select Create New Diagram
I select Create New Diagram when the start screen presents this option. However, some configurations open the template selection immediately. In that case, I continue directly with the next step.
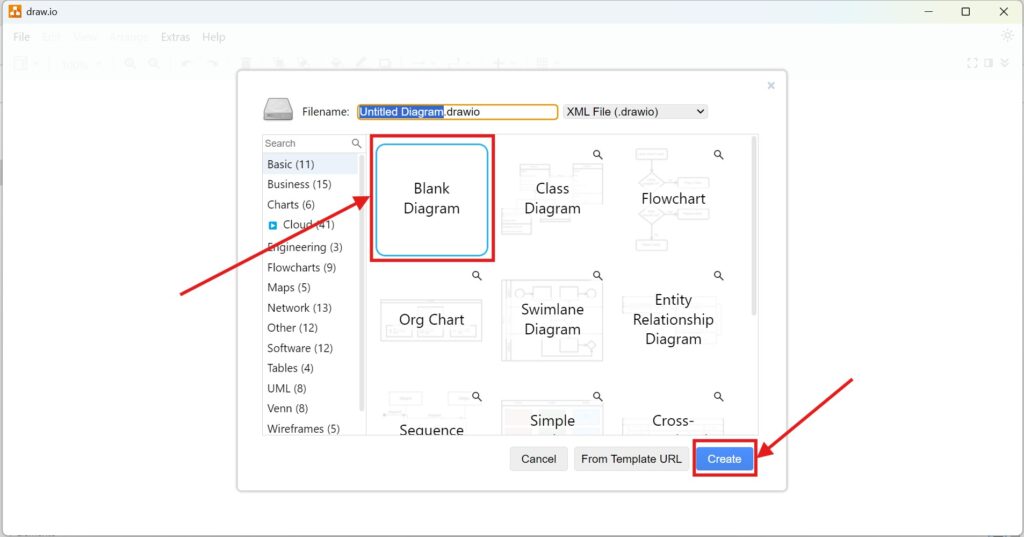
3. Step: Select the Blank Diagram
I select the blank diagram option in the template selection. Then, I click Create to open an empty diagram. I do not select another template because I want a completely open canvas.
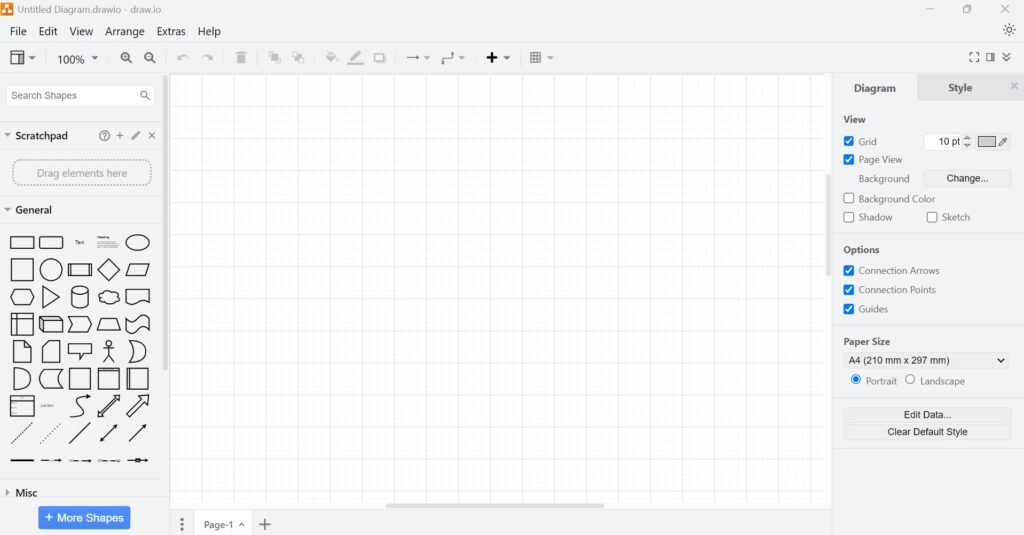
4. Step: Start with the Main Editor
draw.io now opens the main editor with an empty drawing area. I can add shapes, connectors, text, and other elements. Therefore, I can begin modeling without removing existing content.
Creating a Blank Diagram Using the Menu
1. Step: Open the File Menu
I select File in the upper-left corner of the editor. This method lets me create another diagram without closing my current work.
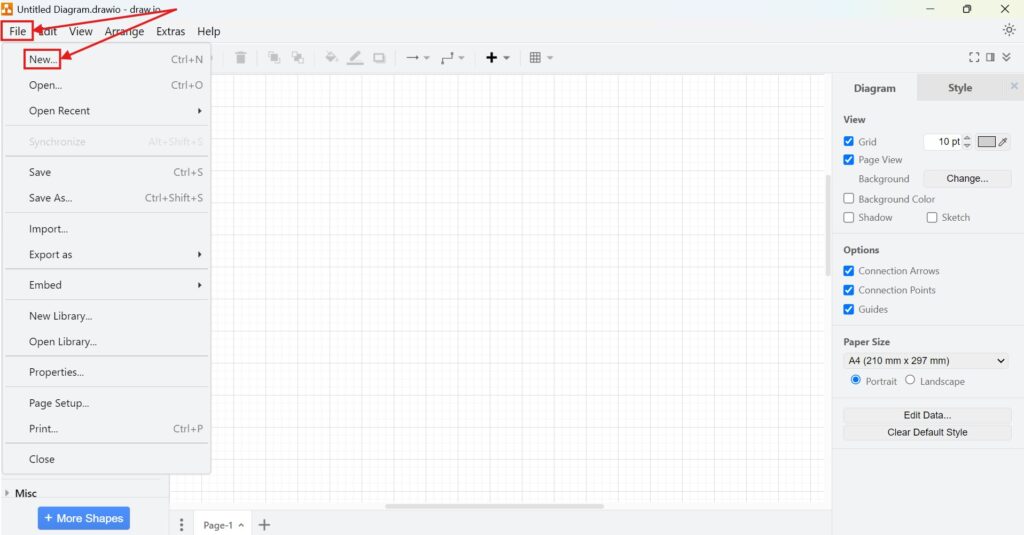
2. and 3. Step: Select New and Choose Blank
I select New from the File menu. Then, I choose the blank diagram option and click Create. The current draw.io workflow uses File, New, Blank, and Create for this method.
4. Step: Open the New Diagram
draw.io opens the blank diagram in the editor. If draw.io asks where to open it, I choose my preferred browser tab. Therefore, I can keep the current diagram open while starting another one.
Which Method Should I Use?
I use the start screen when I begin a new draw.io session. However, I use File and New when another diagram is already open. Both methods create the same blank canvas. Therefore, the result does not depend on the method I choose.
Final Thoughts
Creating a blank diagram gives me a clean and controlled starting point. I can define every element without adapting a prepared template. Therefore, I use this option for custom processes, structures, and visual concepts. Once I create a blank diagram in draw.io, I can begin modeling immediately.
What’s Next?
Now that I know how to create a blank diagram in draw.io, I can also speed up my work with templates. Templates give me a ready-made structure and help me start faster. In the next article, I’ll explain How to Create a Diagram using Templates in draw.io. You’ll learn how to choose a template, adapt it to your needs, and build a clear diagram with less effort. Click below to continue and create your next diagram from a template.
Build Better Results with Requirements Engineering Tools
Requirements engineering works better when I connect clear thinking with practical tools. Therefore, I use draw.io to visualize ideas, Confluence to structure knowledge, Jira to manage requirements-related work, and Camunda to model business processes. Each tool supports a different step in my workflow. As a result, I can document needs, clarify processes, track decisions, and communicate with stakeholders more effectively. In the main article on Requirements Engineering Tools, I show how these tools help me turn requirements work into a clearer and more reliable process.