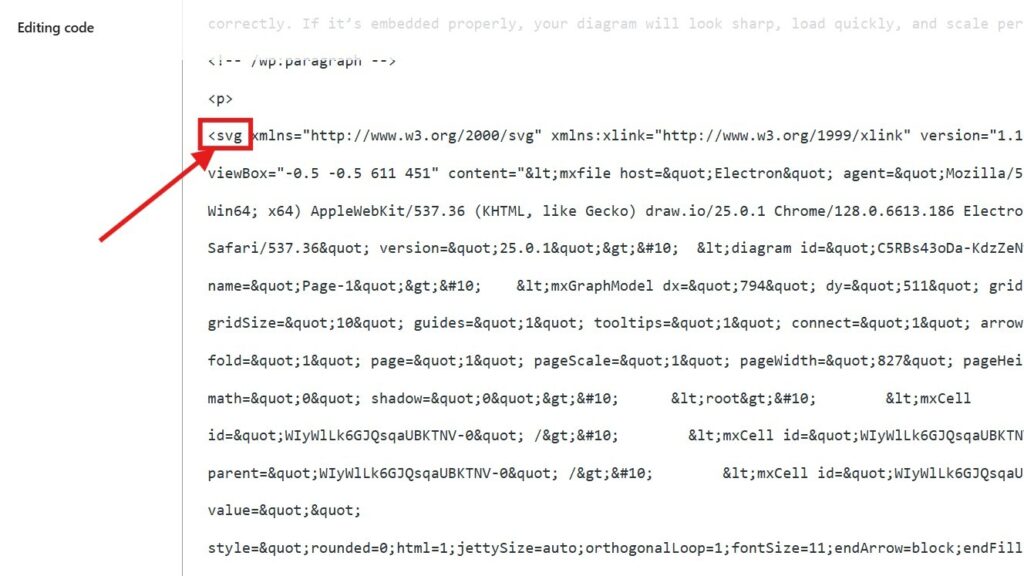
Embedding a draw.io diagram into a website can seem tricky at first. But trust me, it’s easier than you think. I’ve done it many times, and with a little guidance, you’ll be embedding diagrams like a pro in no time. In this article, I’ll walk you through the process of how to embed a draw.io diagram with an HTML tag. Let’s dive right in!
What is draw.io?
draw.io (opens in new tab), now part of diagrams.net, is a fantastic tool for creating diagrams. It’s intuitive, flexible, and completely free. I use it for flowcharts, network diagrams, and even quick mockups. One of its standout features is the ability to export diagrams as different file types. For example, you can save your work as an image, a PDF, or even a scalable vector graphic (SVG) file.
But why SVG? An SVG file keeps your diagram crisp and clear at any zoom level. It’s perfect for embedding into a website because it’s lightweight and scales beautifully. Plus, it’s easy to use with HTML—which brings us to our next point.
What is an HTML <svg> Image Tag?
An HTML <svg> tag is a way to include vector graphics directly in your webpage. Unlike other image formats like PNG or JPEG, SVG graphics are written in XML. This means browsers can render them with high precision without losing quality. Here’s why I love it:
- Scalability: The diagram stays sharp, whether it’s on a small phone screen or a large monitor.
- Customization: You can tweak elements directly in the HTML code if needed.
- Performance: SVG files load faster because they’re smaller in size.
So how do you embed a draw.io diagram using this amazing tag? Let’s break it down.
Step-by-Step Guide to Embedding with <svg>
Start by opening your diagram in draw.io. Then, follow these steps:
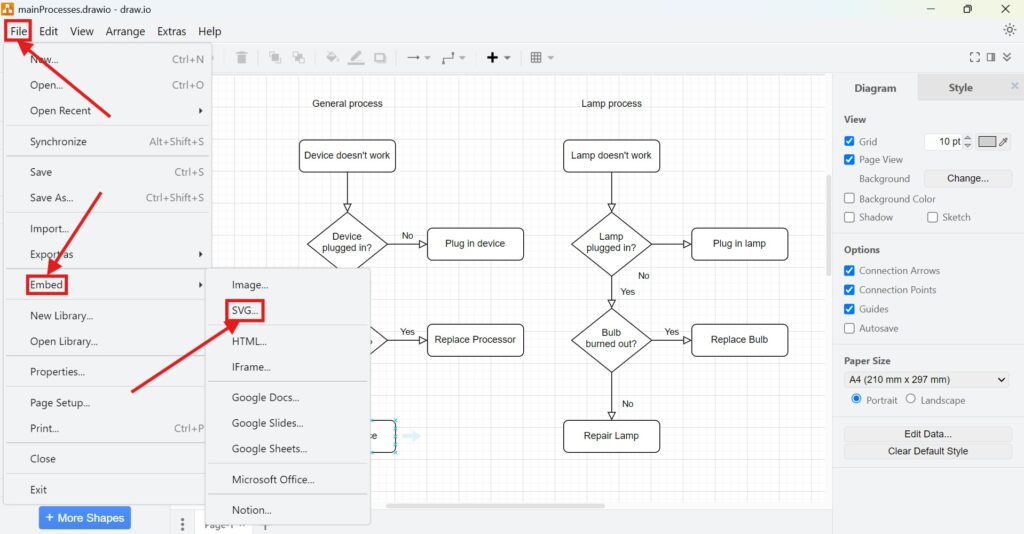
1. Step: Click on File > Embed. Choose SVG from the options.
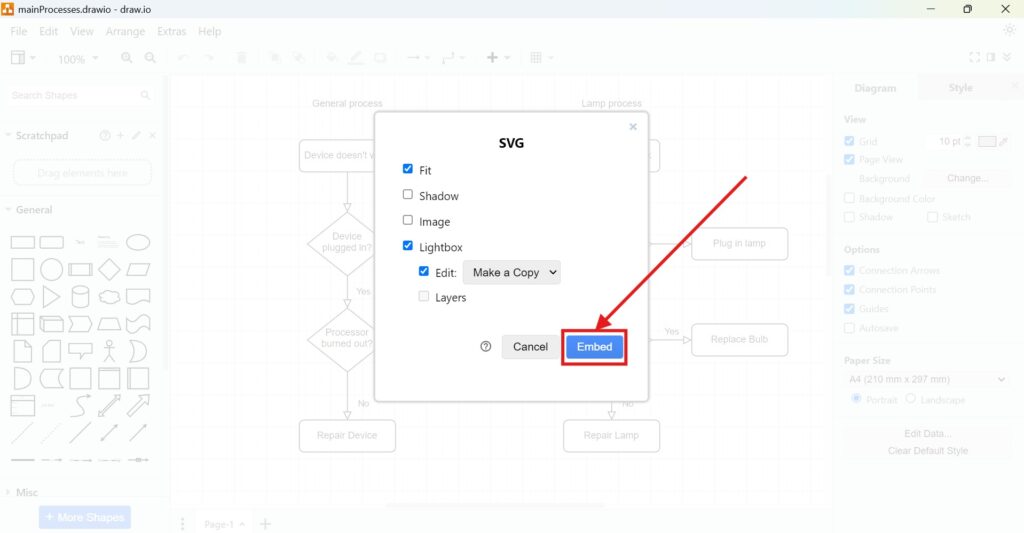
2. Step: Select your preferred configuration. Options include:
- Fit: Adjusts the diagram to fit within the chosen dimensions.
- Shadow: Adds a subtle shadow effect.
- Image: Exports as a static image within the SVG.
- Lightbox: Creates an interactive preview mode.
- Lightbox Edit: Includes options like “Make a Copy” or custom editing tools.
- Lightbox Layers: Enables layer-based navigation.
Click Embed to generate the HTML code.
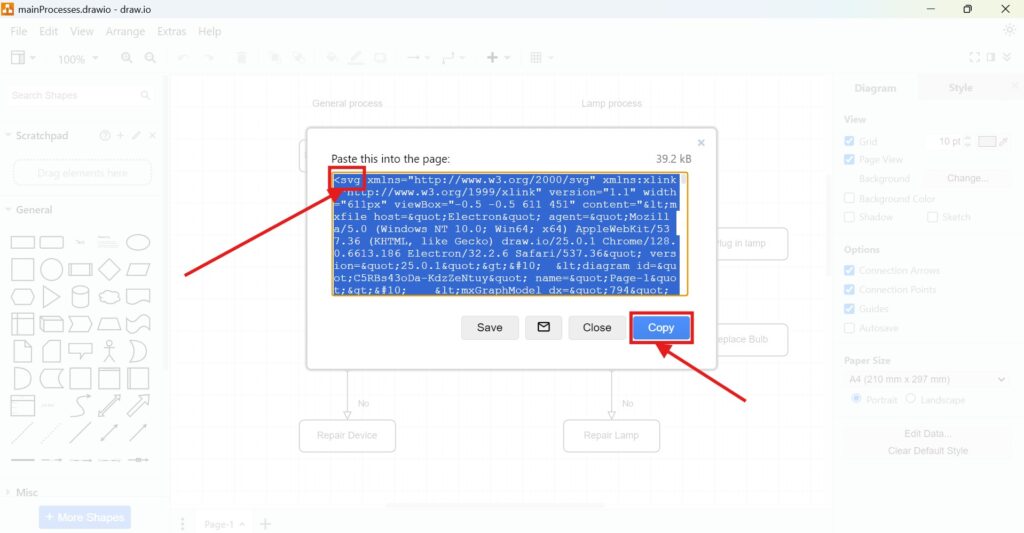
3. Step: Copy the Code
Once you’ve configured your settings, the tool will generate the necessary HTML code. Click Copy to save it to your clipboard. This is the magic snippet that makes embedding so simple.
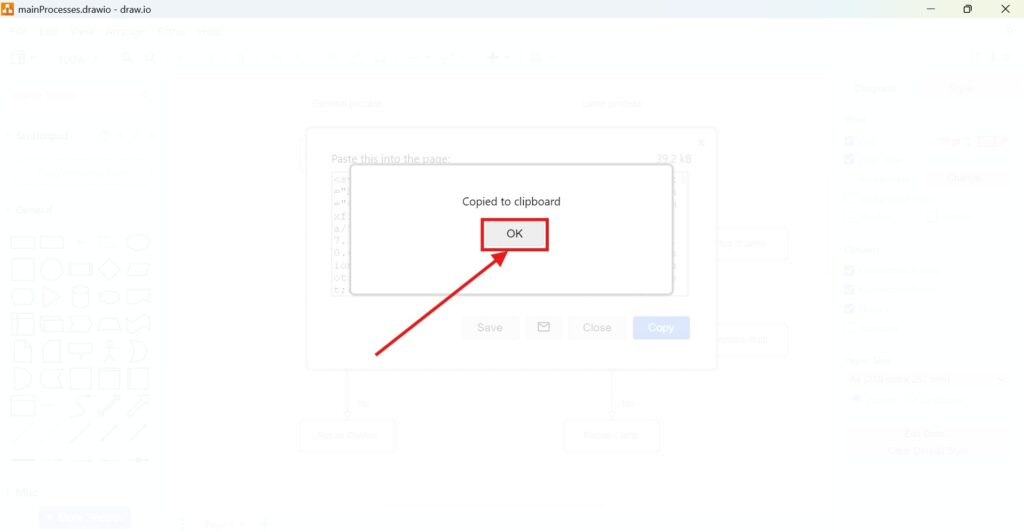
5. Step: Use the Code like you want
Business Case: Embedding Diagrams for Requirement Documentation
Let me share a quick business case to illustrate the benefits. Imagine you’re managing a requirements engineering blog. You want to share a UML diagram that explains a complex process. Instead of uploading a PNG or JPEG, you embed an SVG exported from draw.io. Readers can now zoom in without losing quality, ensuring they fully understand your content. This improves engagement and enhances the user experience.
In my case, I recently embedded a sequence diagram into a blog post. By using the <svg> tag, I could keep the file size small while maintaining clarity. My readers appreciated the professional presentation.
Final Thoughts
How to embed a draw.io diagram with an HTML tag is a game-changer. It’s quick, clean, and professional. Whether you’re documenting requirements, presenting a workflow, or sharing ideas, this method delivers top-notch results. So why wait? Try it out today and elevate your content.
If you’ve followed along, I’d love to hear how it worked for you. Got questions or tips of your own? Drop a comment below. Let’s keep the conversation going!


