Starting something new can feel overwhelming. Especially when working with powerful tools like Camunda. But don’t worry. I’ve got you covered. In this article, I’ll show you exactly how to create a new project in Camunda. It’s easier than it sounds. Whether you’re a beginner or already familiar with business process management, this guide will walk you through each step. You’ll get hands-on tips. And I’ll share naming suggestions that make your project structure more professional and clear.
Let’s get started!
What is Camunda?
Camunda (open in new tab) is an open-source platform that helps automate and improve business processes. I use it to design workflows, manage decision logic, and track performance.
With Camunda, you get full control over how tasks flow in your system. Also, it works well with modern development tools. That makes it perfect for software teams who want to stay agile and efficient.
Most importantly, Camunda gives you flexibility. You can build processes with BPMN diagrams, handle decisions with DMN, and design forms with ease.
What is BPMN?
BPMN stands for Business Process Model and Notation. It’s a standard. And it helps me visualize business workflows clearly.
When I build processes in Camunda, I often use BPMN diagrams. They let me map each task, event, and gateway in a simple, visual way.
Because BPMN is widely adopted, other people on my team can easily understand and maintain the models. That’s why BPMN is so powerful—it keeps everyone on the same page.
Step-by-Step: How to Create a New Project in Camunda
Let me walk you through how to create a new project in Camunda. I’ll keep it simple, practical, and to the point.
First, I go to the Home view. Right there, I click on the button labeled “New Project.”
Immediately, a new window pops up. It asks me to name the project. Since “Project 1” already exists in my workspace, I name this one “Project 2”. You could also use names like “OrderProcessingApp”, “CustomerOnboardingFlow” or “HRApprovalSystem”.
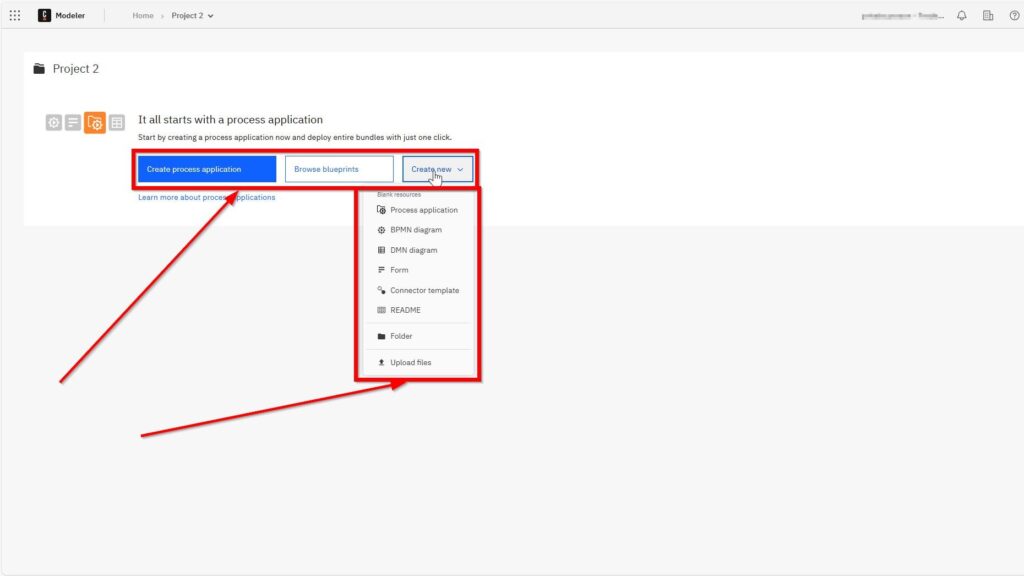
After naming the project, I choose how I want to begin. I can either start from scratch or pick a ready-made blank resource. Options include:
- Process application (highlighted by the default blue button)
- BPMN diagram
- DMN decision table
- Form
- Connect template
- README file
- Folder
- Or upload files directly
To keep it clean and focused, I go with the first option—Create process application. It’s the best way to begin if you want structure from the start.
Next, I name my first process. Since the project is called Project 2, I name the process “Project 2 main process” You might use something like “Order Fulfillment Process”, “Customer Registration Workflow” or “Leave Request Approval” depending on your use case.
Then I click “Create.”
That’s it. I’m in! Now I see the OrderProcessingApp listed at the top, along with the Order Fulfillment Process.
From here, I can begin modeling my BPMN diagram, add forms, link decision tables, and customize the workflow however I like.
Everything is neatly organized. The interface gives me full visibility and flexibility. I love how it all comes together.
Final Thoughts
Creating a project in Camunda is not just easy—it’s fun. With just a few clicks, I’m ready to build real business workflows using BPMN and modern tools.
In this guide, I showed you how to create a new project in Camunda, name it wisely, and launch the first process application.
You don’t need to overthink it. Just start. The more you explore, the better your processes will get. Camunda gives you all the tools. You only need to take the first step.
So go ahead—create your next project. And let the music play.