
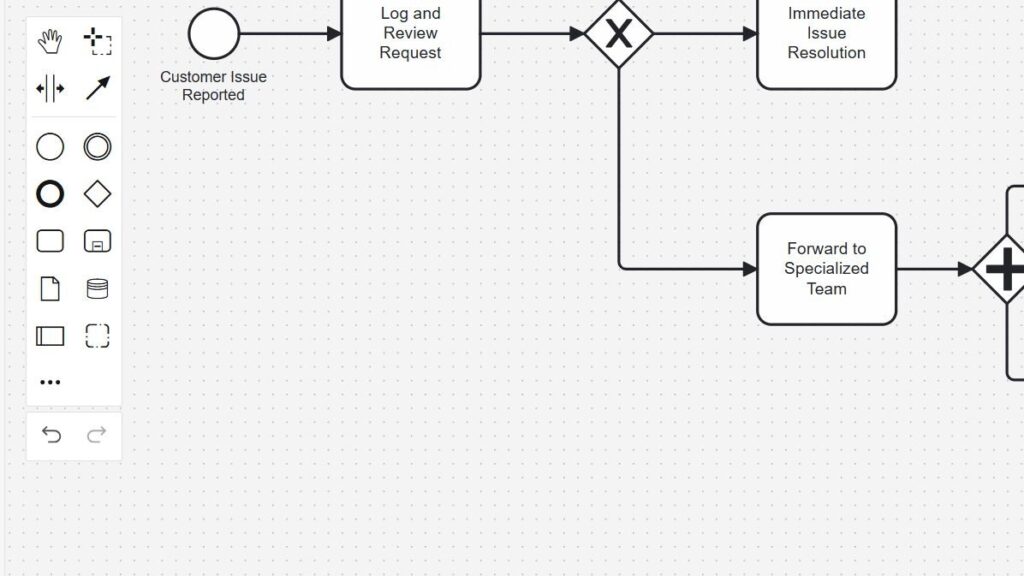
When I first worked with BPMN, process models felt complex. However, Camunda made the structure much easier to understand. In this guide, I show you a clear BPMN example using Camunda. You will build a simple process step by step and see how events, tasks, gateways, and flows work together in practice.
What is Business Process Management?
Before diving into our BPMN example, let’s clarify what Business Process Management (BPM) really means. Simply put, BPM helps organizations analyze, improve, and automate their processes. As a result, workflows become more efficient and transparent. By managing processes well, businesses save time, reduce costs, and enhance customer satisfaction. Read more about Camunda and Process Management in BPMN Lanes in Camunda: A Step-by-Step Guide and How to Create a New Project in Camunda (open in new tabs).
What is Business Process Model and Notation?
Business Process Model and Notation (BPMN) is a visual language for illustrating business processes. With BPMN, I can clearly communicate complex workflows using simple diagrams. This visual approach makes processes understandable for everyone involved, from developers to business stakeholders.
BPMN Example with Camunda: Step-by-Step Guide
Let me show you an engaging BPMN example using Camunda.
Create a New Diagram
First, open the Camunda Modeler. Next, select “New BPMN Diagram” to begin creating your process.
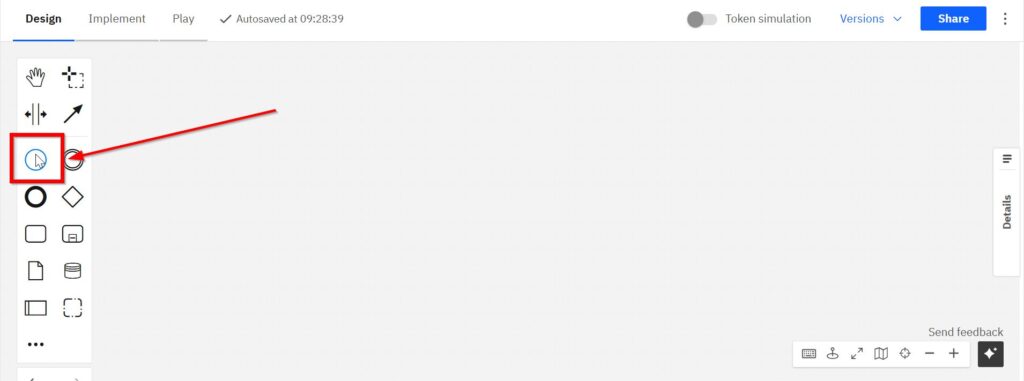
Add Start Event
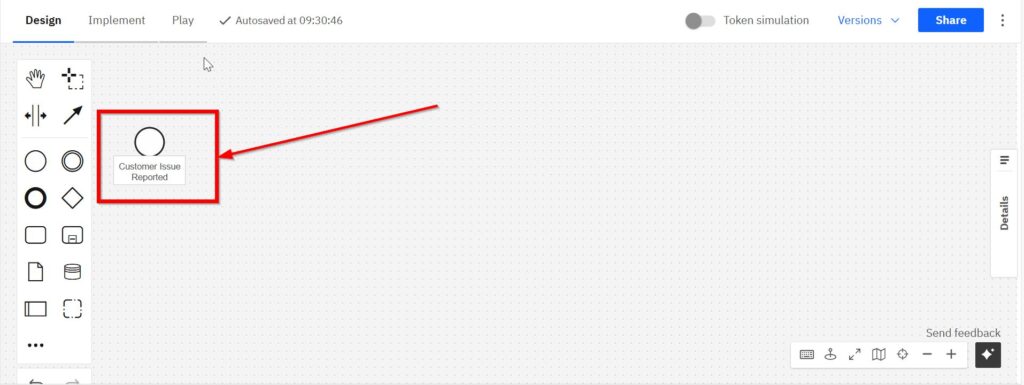
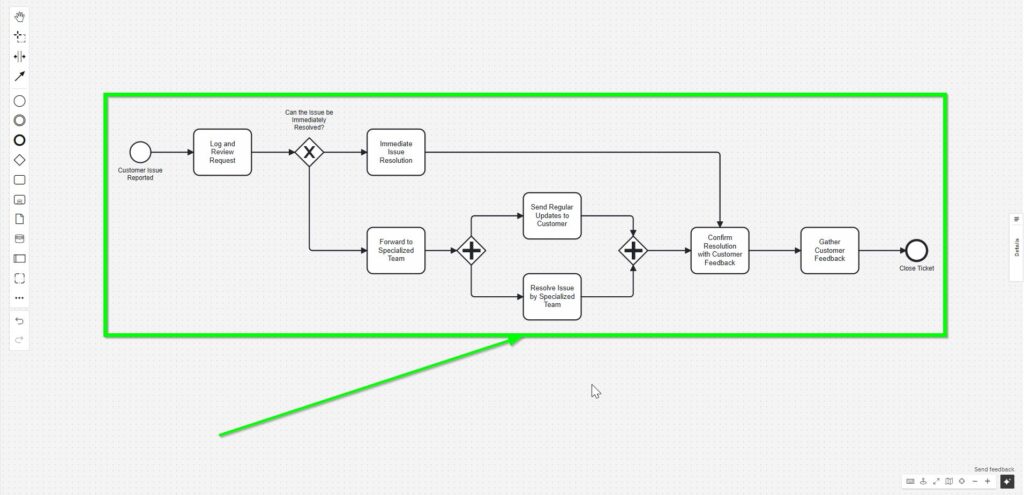
Drag a “Start Event” onto your workspace. Then label it clearly, such as “Customer Issue Reported.”
Select the Start item in the left bar.
Name the Start element.
Add First Task
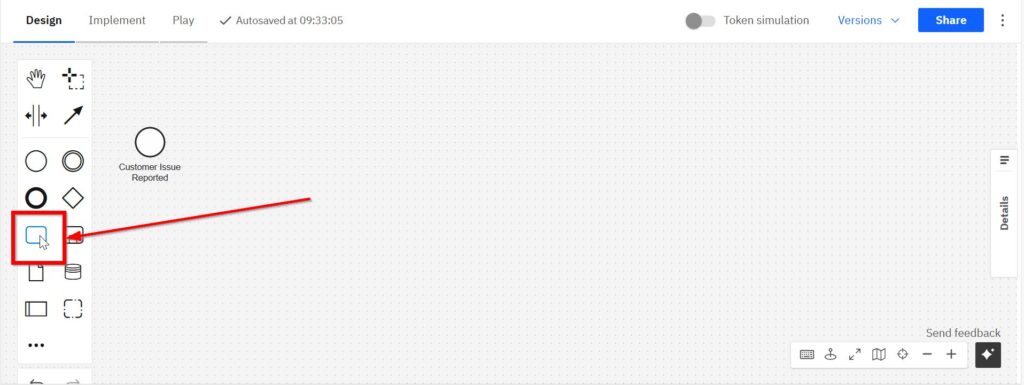
Next, connect your start event to a new task. Name this task “Log and Review Request.”
Select the Task item in the left bar.
Name the Task element.
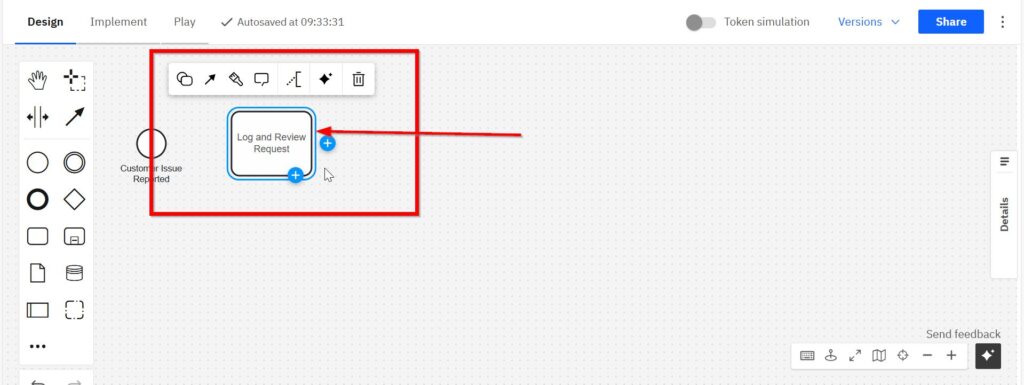
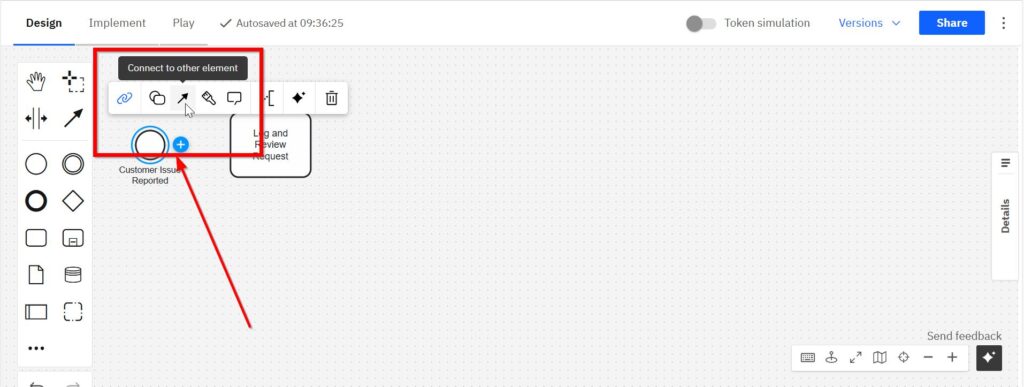
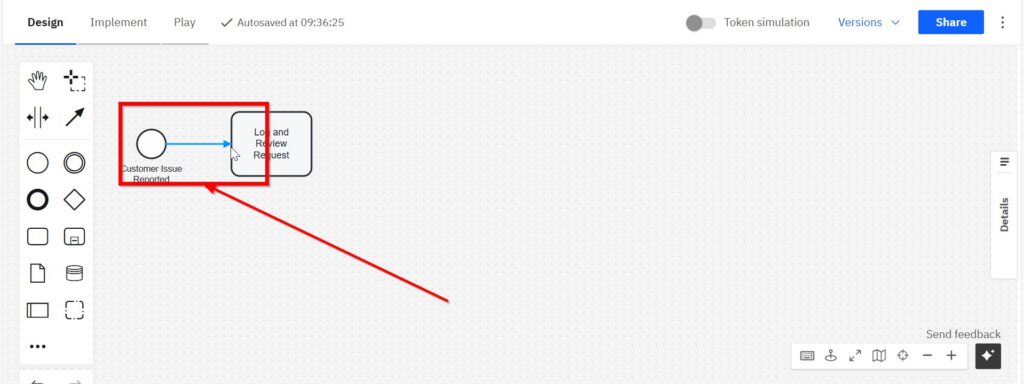
Connect the Start element to the Task element by clicking on the Start element, selecting the arrow, dragging it to the Task element and then clicking on the Task again.
Now both elements are connected.
Add Decision (Exclusive Gateway)
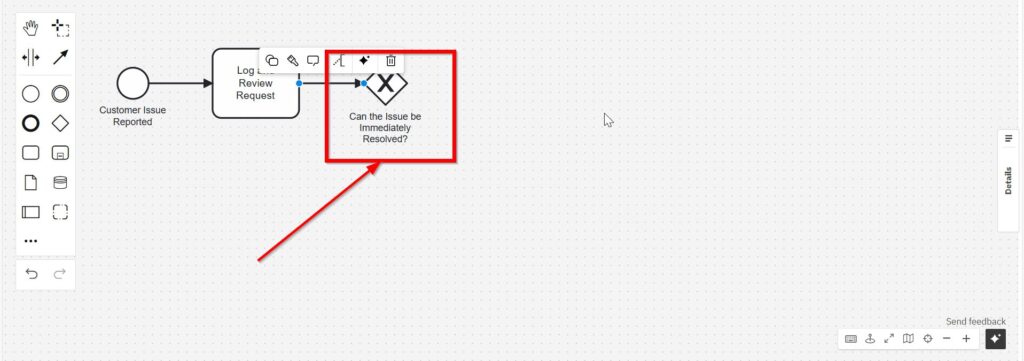
Afterwards, add an “Exclusive Gateway.” Label it explicitly: “Can the Issue be Immediately Resolved?”
Select the three dots element.
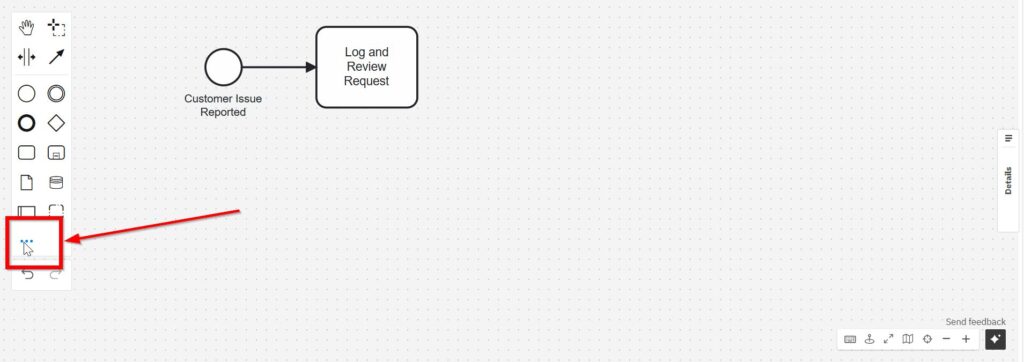
Click on “Exclusive gateway”.
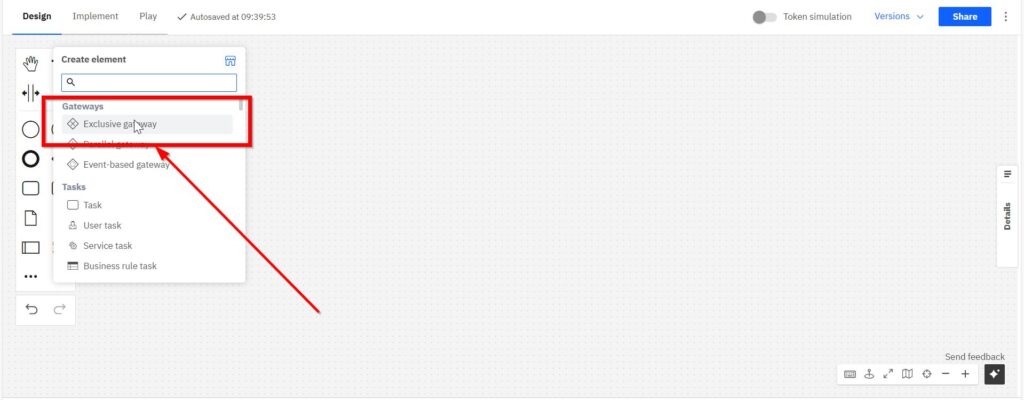
Set the Exclusive gateway on the grid.
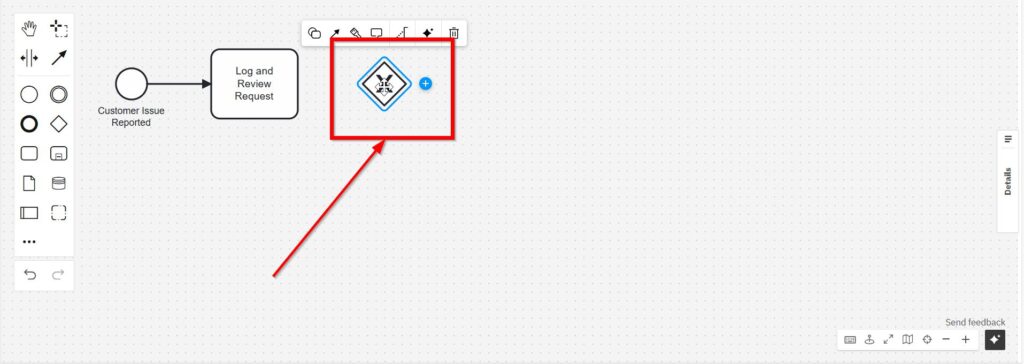
Name the Exclusive gateway.
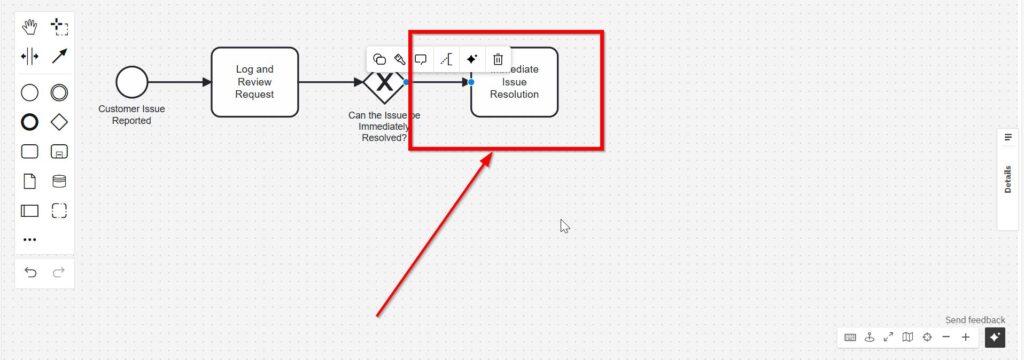
Immediate Resolution Path
From this gateway, create a path for quick solutions. Add a task labeled “Immediate Issue Resolution.”
Specialized Resolution Path
If the issue requires more specialized attention, connect another task labeled “Forward to Specialized Team.”
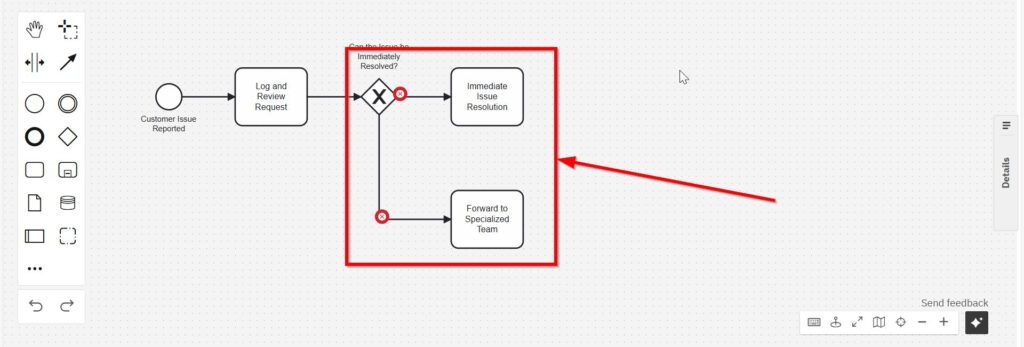
handle condition expression errors
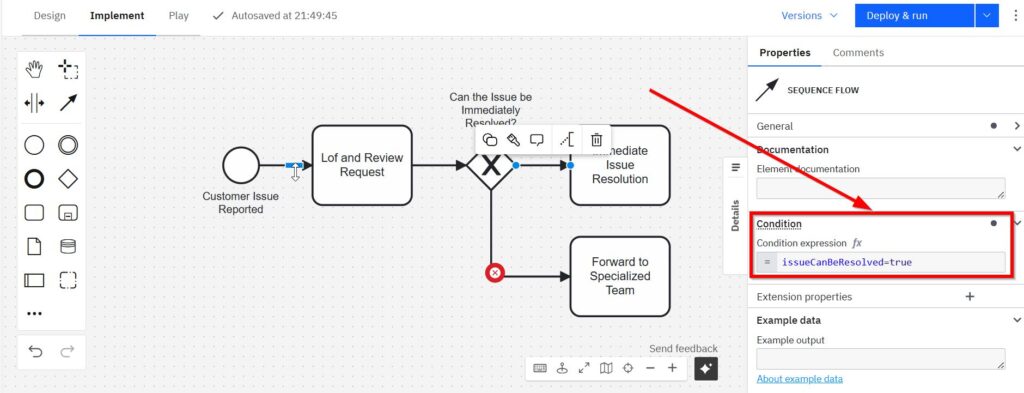
The BPMN modeling of exclusive gateways in Camunda requires the handling of condition expressions. Clicking the red circled “x” at the top opens the Properties pane. I enter the FEEL expression “issueCanBeREsolved=true” into the “condition expression” field.
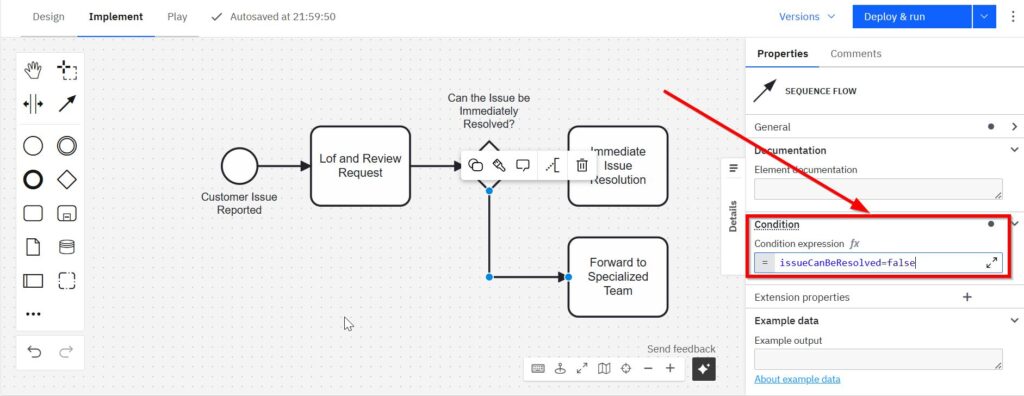
For the lower path, I enter: “issueCanBeResolved=false”.
Add Parallel Gateway (Split)
Now, introduce a “Parallel Gateway” after the specialized team task.
Select again the three dots element.
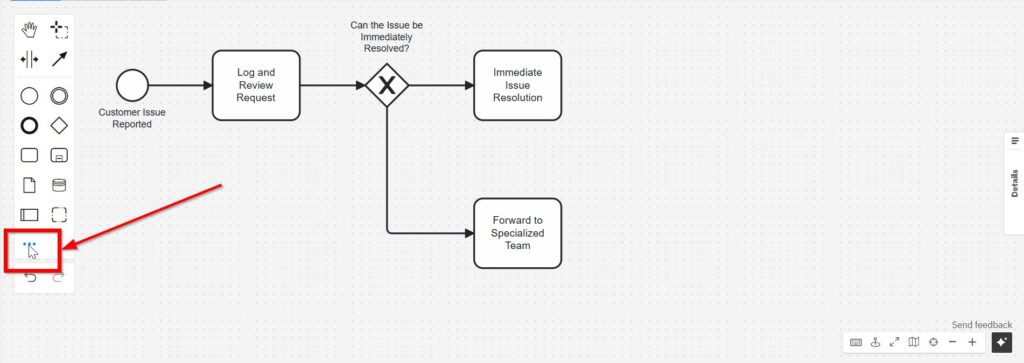
Click on “Parallel gateway”.
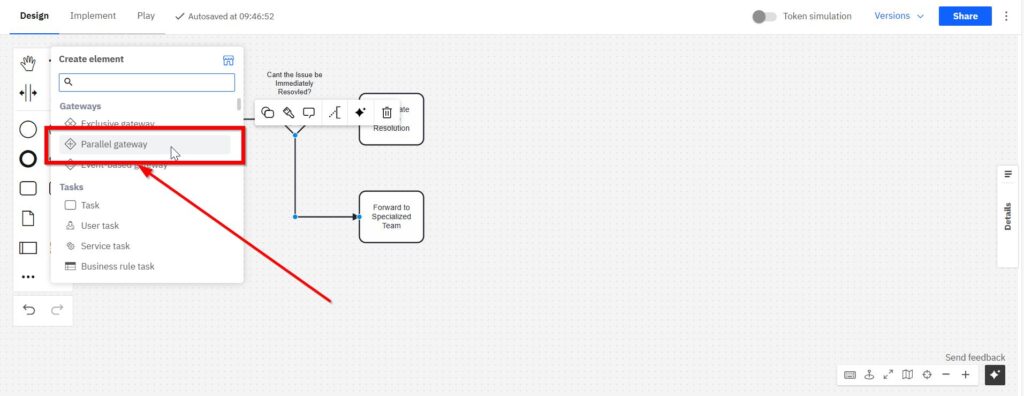
Set the Exclusive gateway on the grid.
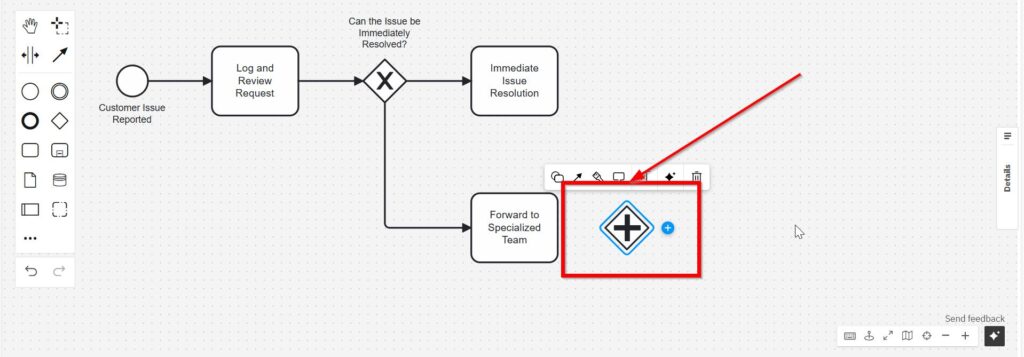
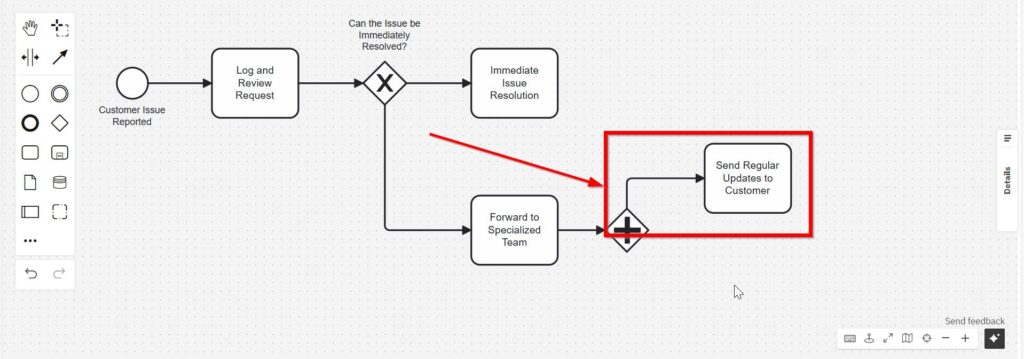
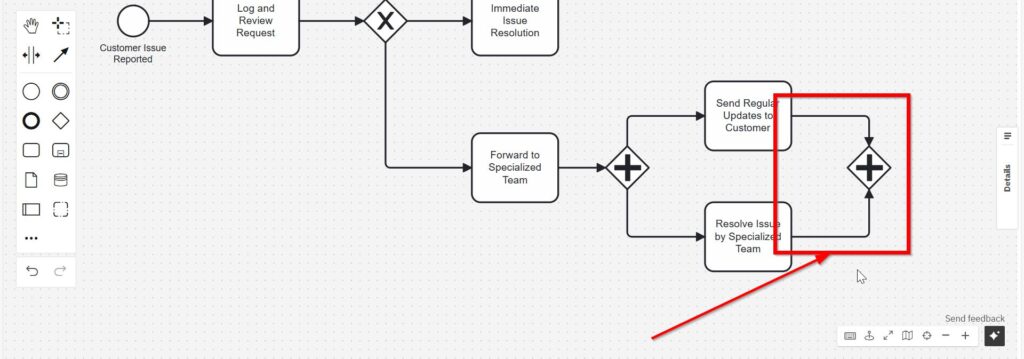
Here, split into two parallel paths:
- Path A: Add a task labeled “Send Regular Updates to Customer.”
- Path B: Create a second task labeled “Resolve Issue by Specialized Team.”
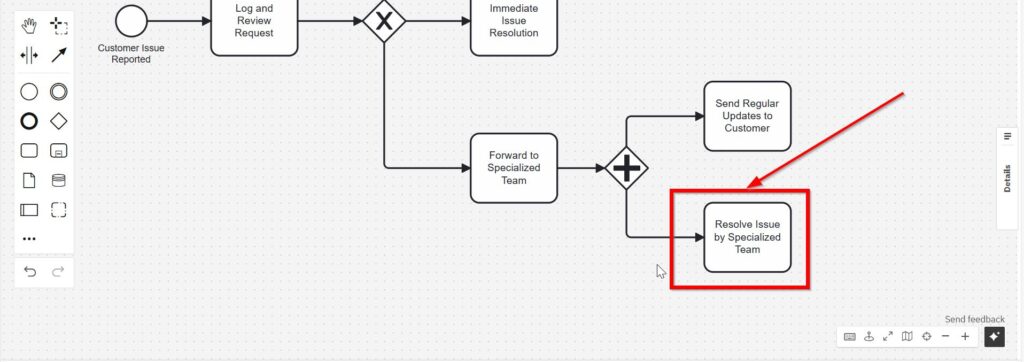
Parallel Gateway (Join)
After completing these parallel tasks, reconnect them using another parallel gateway. This ensures synchronization.
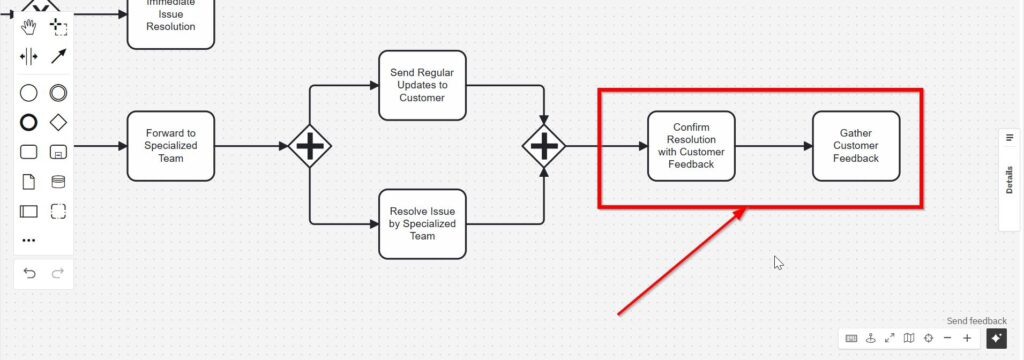
Customer Confirmation and Feedback
Continue with the next task: “Confirm Resolution with Customer.” Then, connect another task labeled “Gather Customer Feedback.”
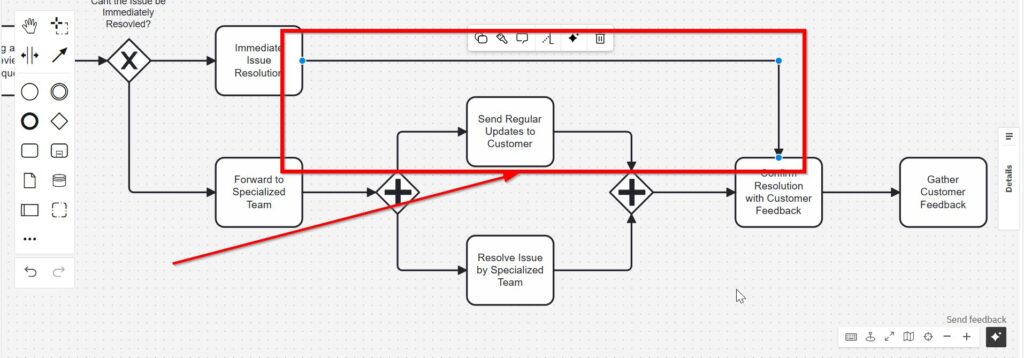
Continue Immediate Resolution
At this point, we can revisit the “Immediate Issue Resolution” task and connect it with “Confirm Resolution with Customer Feedback.”
Close the Process
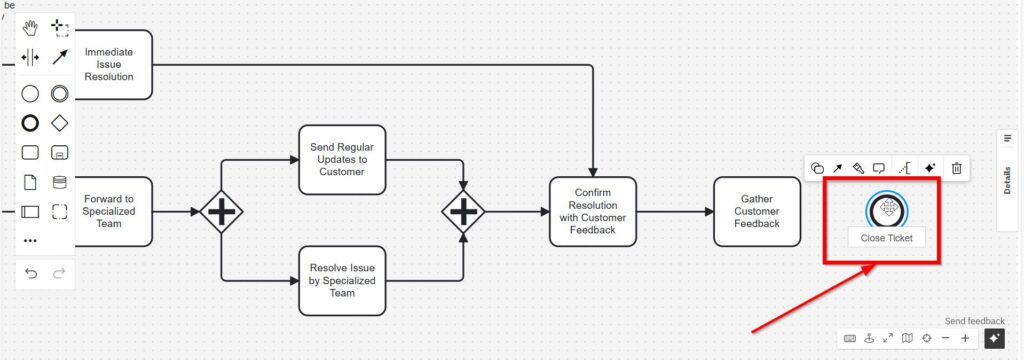
Finally, end your process by adding an “End Event.” Clearly label it “Close Ticket.”
Select the End element in the left bar.
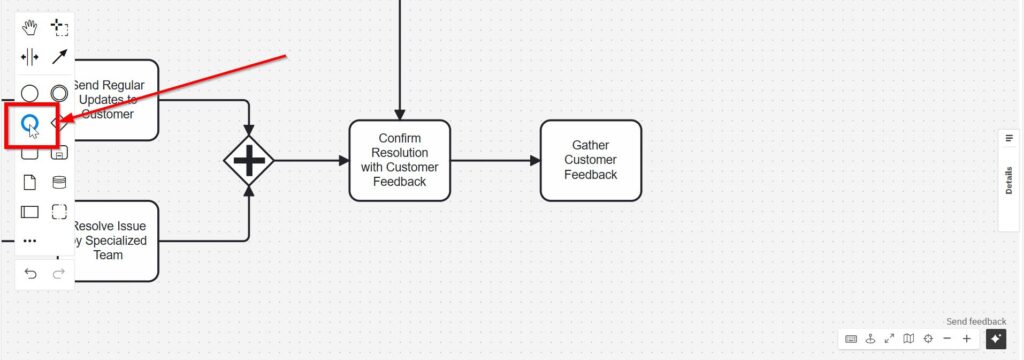
Name the end element.
With this BPMN example, you can effortlessly visualize and optimize your workflows. I recommend practicing regularly with Camunda to become even more confident.
Final Thoughts
Creating a BPMN example doesn’t need to be complicated. By following these clear, straightforward steps, you’ll quickly grasp the essentials. Camunda simplifies process modeling and makes managing workflows intuitive and enjoyable. So, why not start practicing today?
What’s Next?
Now that I have created a practical BPMN example using Camunda, I can improve the process structure. A simple flow helps me understand the logic. However, I also need to show who does what.
Therefore, the next article guides me through BPMN Lanes in Camunda: A Step-by-Step Guide. I will learn how lanes separate responsibilities, roles, teams, or systems inside one process model.
This makes my BPMN diagram easier to read and discuss. As a result, stakeholders can follow the process faster and understand each handover more clearly. Click the next article and continue with a stronger Camunda process structure.
Connect Your Requirements Work with Better Tools
Requirements engineering becomes stronger when I use tools that support clear thinking and practical delivery. In my main article on Requirements Engineering Tools, I show how draw.io, Confluence, Jira, and Camunda work together. I use draw.io to visualize structures and processes.
I use Confluence to document decisions and knowledge. I use Jira to manage tasks, issues, and progress. Then I use Camunda to model business processes in a clear way. Therefore, this guide helps me choose the right tool for each step of my requirements work.
Credits: The diagrams were created with Camunda (opens in a new tab).
| Read more about Business Process Modeling and Notation (BPMN) |
|---|
| Exclusive Gateways in BPMN 2.0: Clear and Simple Parallel Gateways in BPMN 2.0: Understanding and Using Them Effectively Event-Based Gateways in BPMN 2.0: A Practical Guide Complex Gateways in BPMN 2.0: A Simple Guide |