Precise diagrams need clean alignment. When I move shapes or connectors, I want everything to look neat and professional. That is why I rely on Guides in draw.io. In this guide, I explain how to activate and use Guide in draw.io. You’ll learn how guides help you align elements faster and create clearer diagrams with less frustration.
What is draw.io
draw.io (opens in a new tab) is an online diagramming tool. I use it to create flowcharts, network diagrams, organizational charts, and more. It is free and easy to access. I can open it in my web browser without installing any software. Moreover, I can collaborate with others on the same diagram in real-time. That saves time and avoids misunderstandings.
What are Guides in draw.io
Guides help me align objects precisely in draw.io. They show as red lines when I move shapes or connectors. These lines indicate when elements line up with others. Guides prevent misalignment and keep my diagrams structured. This visual assistance speeds up my work and improves accuracy.
Activating Guides in draw.io
When I start a new diagram, I want to ensure that Guides are active. Otherwise, aligning my objects becomes difficult. Here is how I activate Guides in draw.io.
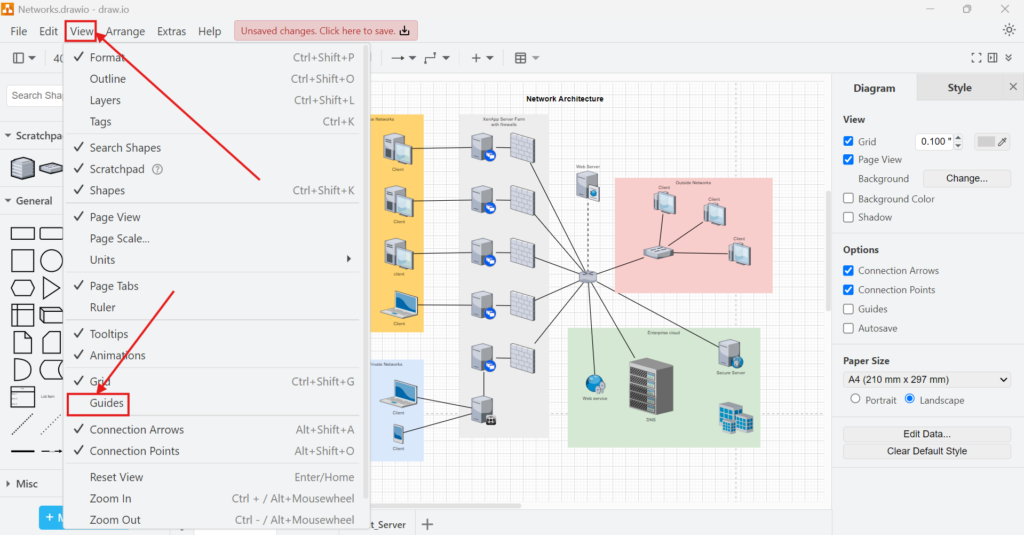
First, I click on the “View” menu at the top of the screen. Then, I select the menu item called “Guide.” That activates the Guides.
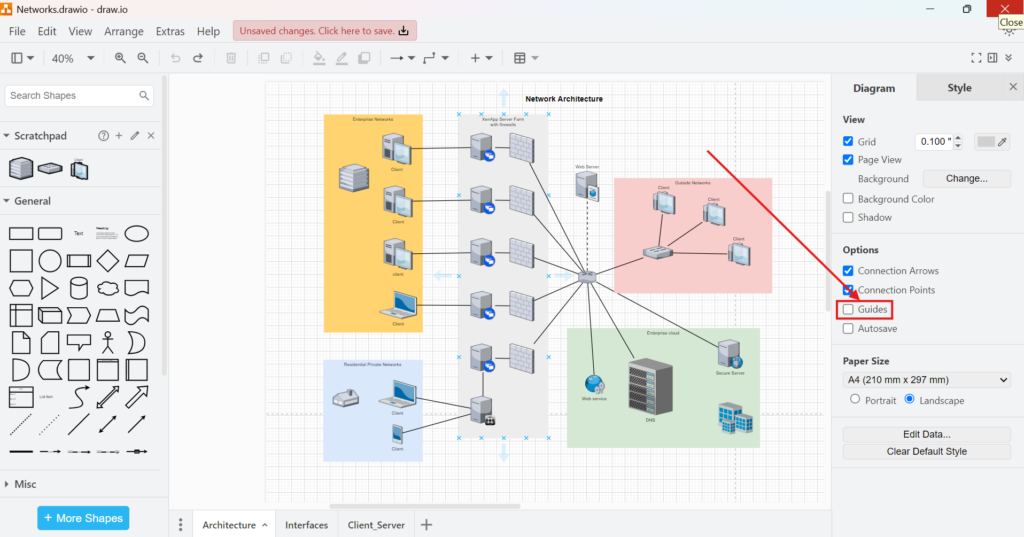
Alternatively, I can enable Guides using the right sidebar. I open the sidebar and switch to the “Diagram” tab. Then, I look for the checkbox labeled “Guides” and click it.
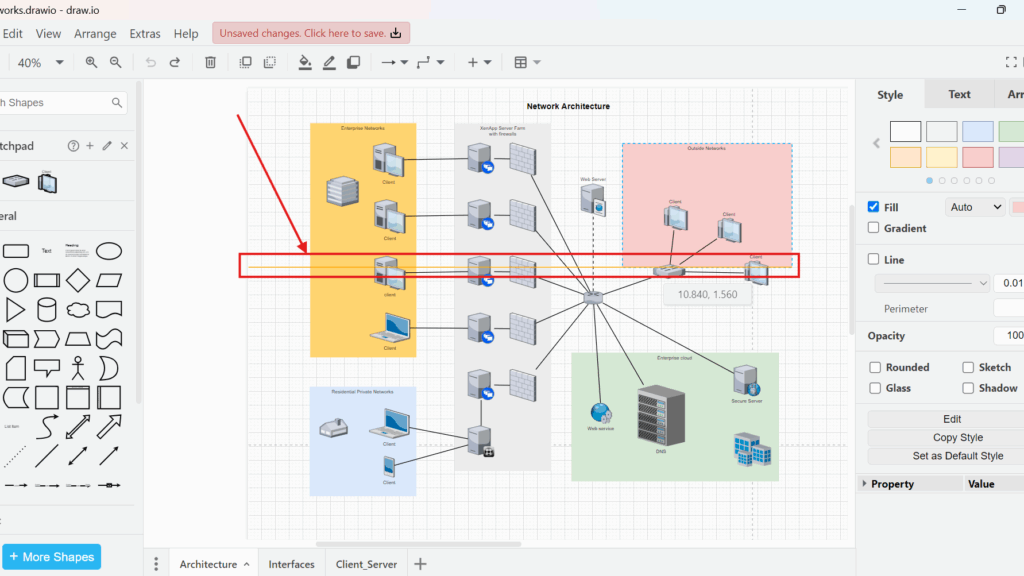
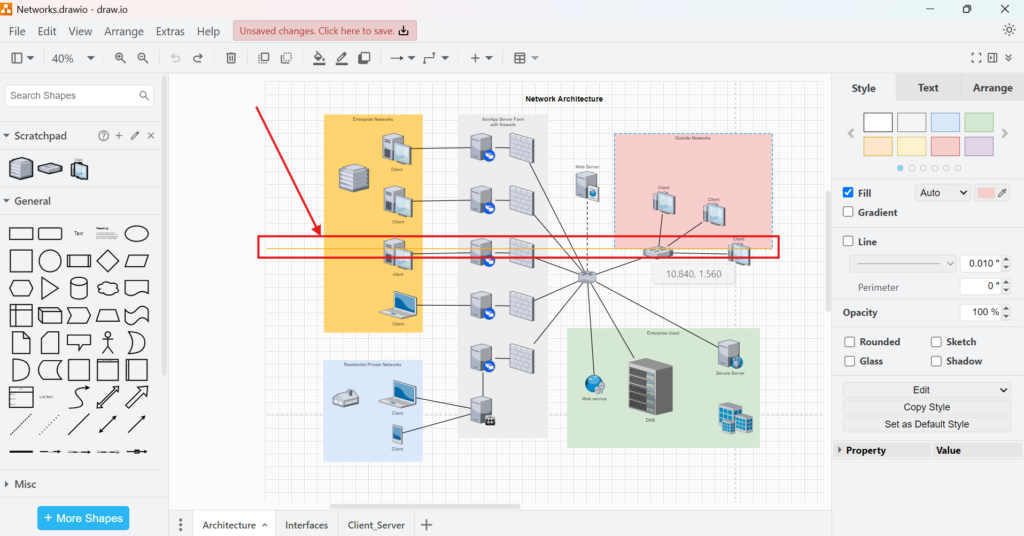
After activating the Guides, I see red lines appear when I move objects around. These lines show me when shapes align horizontally or vertically. That visual cue helps me position everything perfectly. The orange line only appears after I drag and move the pink element with a click:
Example for Activating Guides
Let me walk you through an example to make this clearer.
- I open draw.io in my browser.
- I create a new blank diagram.
- I click on the “View” menu and select “Guide.” Guides activate.
- I drag a rectangle shape onto the canvas.
- I drag a circle next to the rectangle.
- As I move the circle closer, red guide lines appear. They show me when the top edges of the circle and rectangle align.
- I release the mouse when the red line appears. Now, both shapes align perfectly.
This simple example highlights how Guides work. I can also use the sidebar method instead of the menu if I prefer. Either way, the result remains the same: perfectly aligned objects.
Why I Use Guides Every Time
Whenever I prepare a presentation or a technical flowchart, my diagrams need to look clean. I often collaborate with team members. If my diagrams look untidy, others struggle to understand them. Guides ensure I avoid that issue. They help me line up shapes quickly, saving time. That efficiency lets me focus on content rather than layout.
Final Thoughts
Guides in draw.io simplify my diagramming process. They reduce alignment errors and make my work look professional. I activate them through the “View” menu or the right sidebar under the “Diagram” tab. Once active, red lines appear when I move objects. Those lines help me align everything effortlessly.
If you want your diagrams to look neat and polished, I highly recommend using Guides. They save time and improve your results. Try them today in draw.io. You will see the difference immediately.
What’s Next?
Now that I know how to activate and use Guide in draw.io, I can align diagram elements more clearly. However, I may also need a stronger sense of distance, size, and position. That is where the ruler view helps. In the next article, I’ll explain How to Activate and Use the Ruler View in draw.io. You’ll learn how the ruler supports precise placement and cleaner diagram layouts. Click below to continue and control your draw.io workspace with more accuracy.
Strengthen Requirements Engineering with Practical Tools
Requirements engineering becomes clearer when I use tools that support visual thinking, documentation, task management, and process modeling. Therefore, I use draw.io to create diagrams, Confluence to organize knowledge, Jira to manage requirements-related work, and Camunda to model business processes. Each tool helps me handle complexity in a different way. As a result, I can connect ideas, decisions, tasks, and workflows more effectively. In the main article on Requirements Engineering Tools, I show how these tools work together and help me build a stronger requirements engineering workflow.
| Read more about draw.io |
|---|
| PDF Export VSDX Export HTML Export URL Export XML Export |