When I began modeling processes, I quickly learned that defining the what isn’t enough. I also needed to show the who. That’s why I love using BPMN Lanes in Camunda. Lanes help assign tasks to the right person, department, or system. They make process models readable and practical. In this post, I’ll show you exactly how to use them—step by step—with a clean, minimal example.
What is BPMN 2.0?
BPMN 2.0 is short for Business Process Model and Notation. It’s a standardized way to model workflows. I use it to describe business processes so everyone—analysts, developers, or stakeholders—can understand them.
The notation includes tasks, events, gateways, and more. Importantly, it also includes pools and lanes. While a pool shows the overall process environment, lanes divide it by responsibility. That’s where things get interesting.
What are Lanes in BPMN?
Lanes are visual sections inside a pool. A lane shows who is responsible for certain tasks. Lanes can represent individuals, teams, departments, roles, or systems. I use them to clarify ownership across a process.
But here’s something important: lanes cannot exist without a pool.
A pool represents one participant in a process. It could be a company, a system, or even a customer. Think of it as the container for a specific process flow. Without it, there’s no boundary to divide.
So, when I add lanes, I’m splitting a pool into roles or units. For example, the “Sales Department” pool might include lanes for “Sales Rep” and “Manager.” These divisions help clarify who does what inside the same organization or system.
Why do I use pools and lanes?
- Pools define the process participant (who’s involved).
- Lanes define responsibility within that participant (who does what).
- Together, they bring structure to complex workflows.
- And visually, they guide the reader through tasks like lanes in a swim race—everyone stays in their track.
Using BPMN Lanes in Camunda
Let’s now walk through a very basic example. I’ve reduced it to just two lanes and a few tasks—just enough to understand the concept. This will help you start modeling responsibly from the beginning.
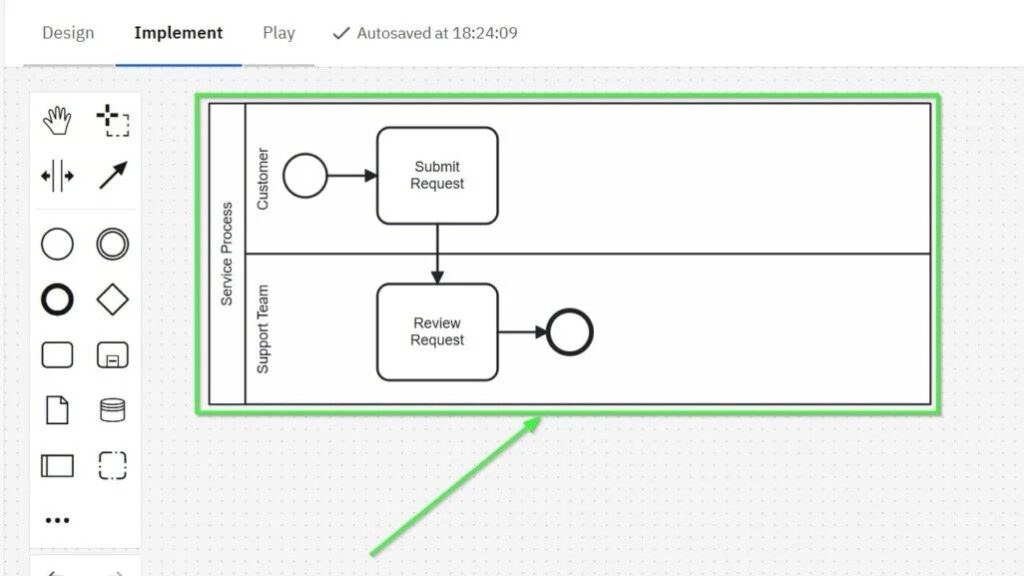
Scenario: A customer submits a request. The support team reviews it.
That’s all. Simple, right? But it’s perfect to demonstrate BPMN Lanes in Camunda.
Step 1: Open Camunda Modeler
Launch Camunda Modeler and create a new BPMN diagram.
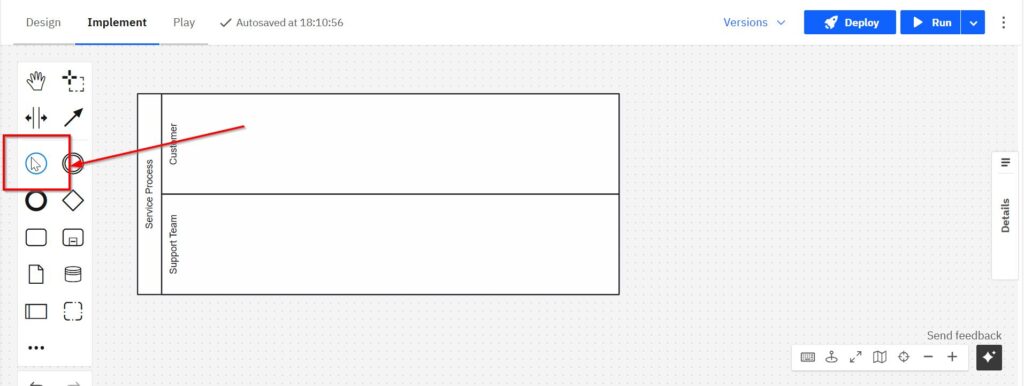
Step 2: Add a Pool
Drag a pool onto the canvas
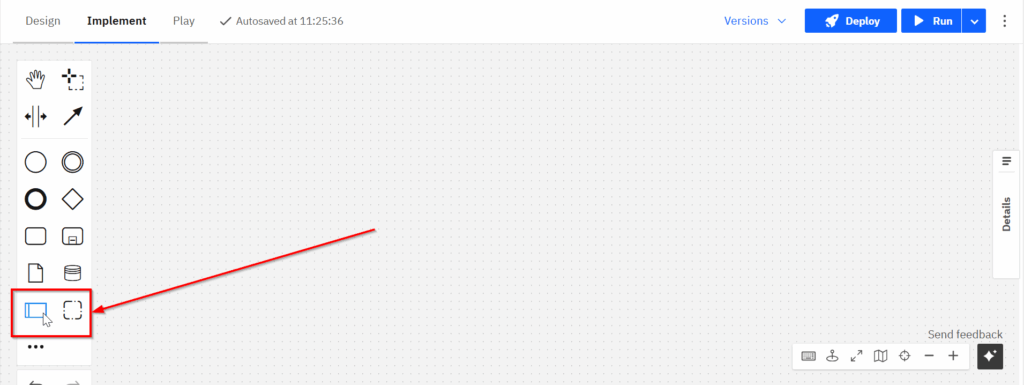

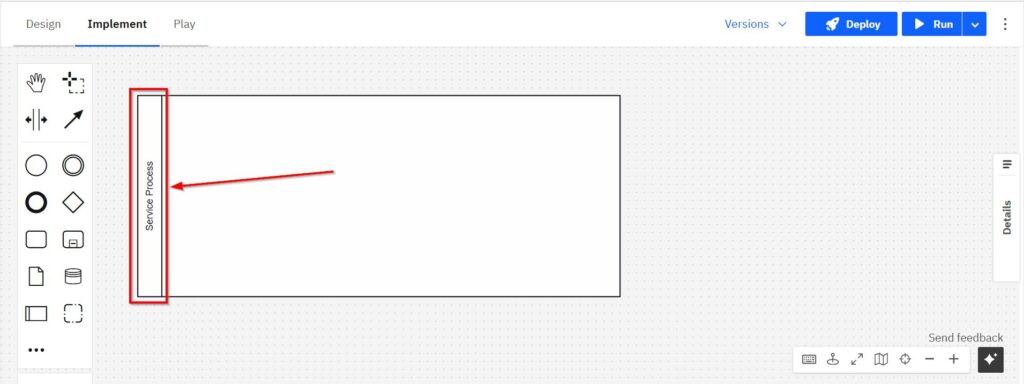
Name it “Service Process”. This represents the overall process and its participants.
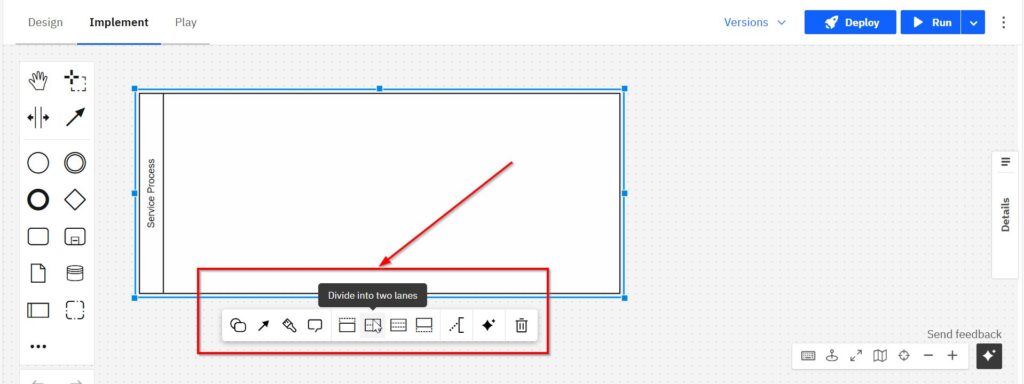
Step 3: Add Two Lanes
Create two lanes inside the pool:
- Customer
- Support Team
Each lane shows who is responsible for each task.

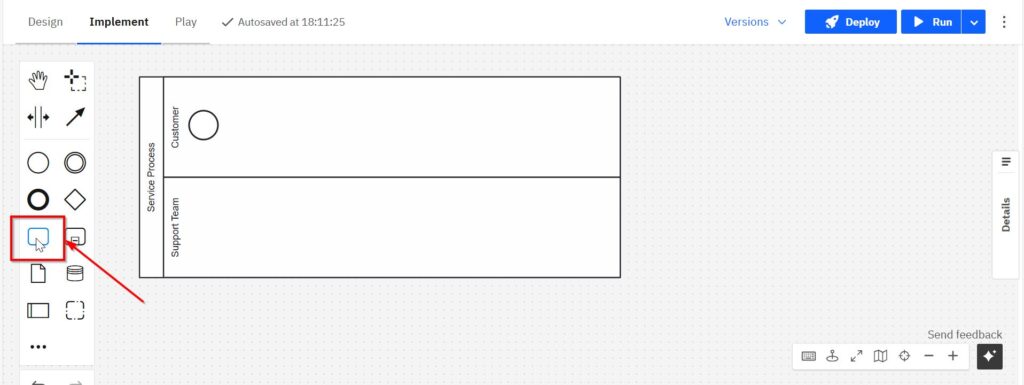
Step 3: Add Start Element
In the Customer lane, add:
- Start element

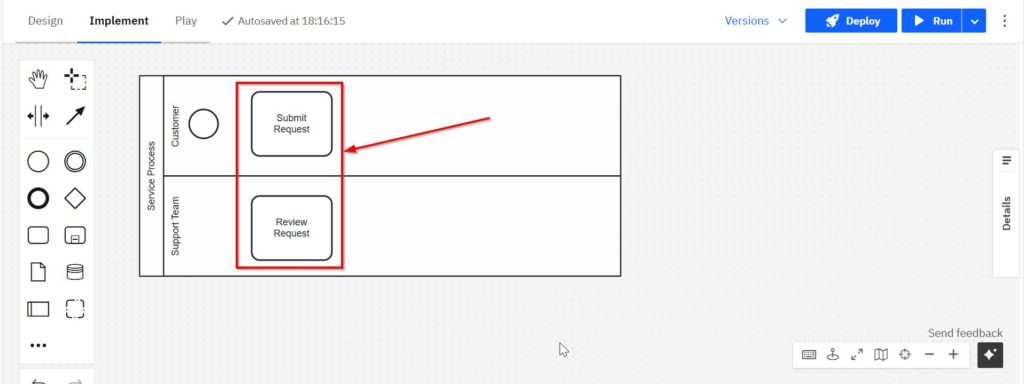
Step 5: Add Tasks
In the Customer lane, add:
- Submit Request
In the Support Team lane, add:
- Review Request
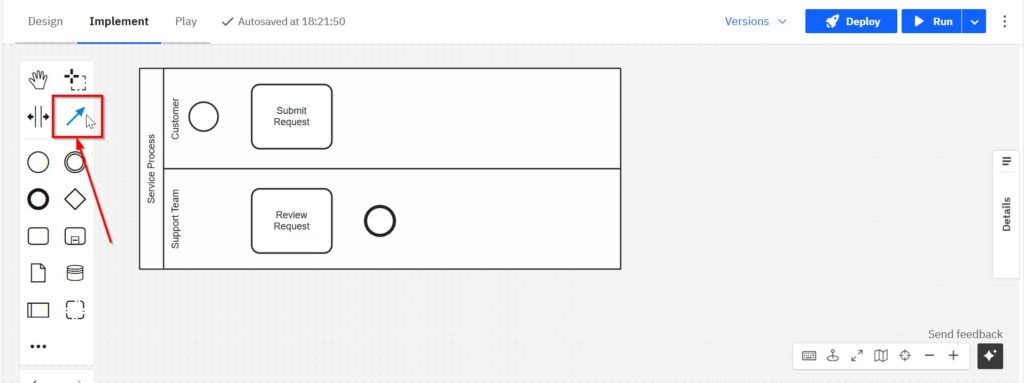
Step 6: Add End Events
Place an End Event after “Review Request.”


Step 7: Connect with Sequence Flow
Use arrows to link:
- Start → Submit Request → Review Request → End
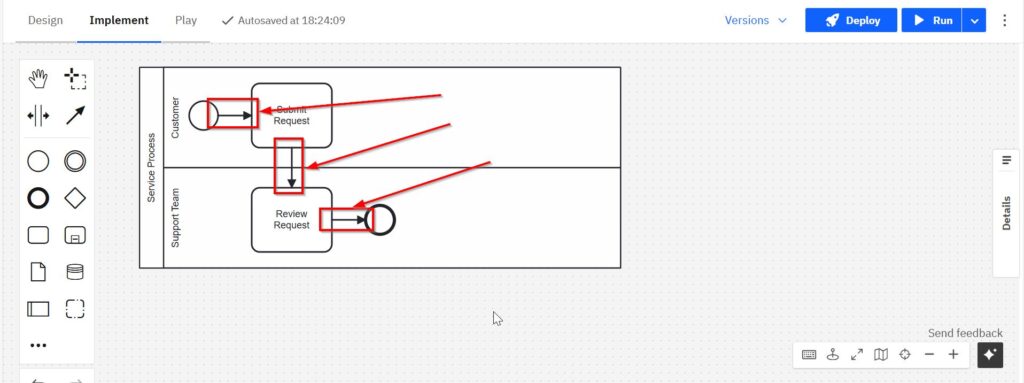
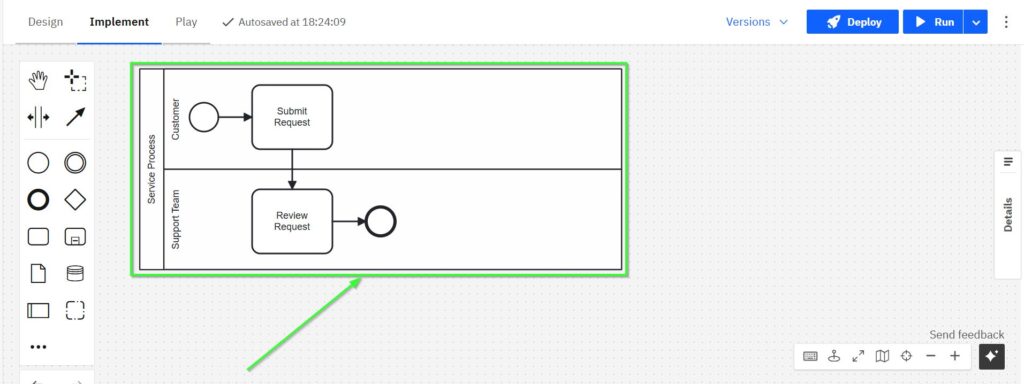
That’s it. A lean, clean BPMN diagram that uses BPMN Lanes in Camunda the right way.
Why Lanes Matter
Even in this tiny example, lanes make the process clearer. I instantly see who starts the process and who continues it. With more complex models, this clarity becomes even more critical.
Lanes help in many ways:
- They define accountability.
- They support collaboration.
- They structure the process logically.
And the best part? They scale well. Whether it’s one actor, two or twenty.The principle stays the same.
Final Thoughts
Adding BPMN Lanes in Camunda is one of the simplest ways to boost your diagram’s readability. Even minimal processes benefit from clear role separation. And once you’ve mastered this technique, it becomes second nature.
So start simple. Keep it clean. And always define who does what. That’s how great process modeling begins—with clear lanes and smart thinking. Would you like me to generate the BPMN XML or a downloadable Camunda file for this example? Just let me know.
Credits: The diagrams were created with Camunda (opens in a new tab).