Layers help me organize complex diagrams in draw.io. They let me show, hide, and separate different parts of a diagram. In this guide, I explain how to use layers in draw.io with a practical example. You’ll learn how layers improve visibility, support focus, and make larger diagrams easier to understand.
What is draw.io?
draw.io is a popular diagramming tool used for creating flowcharts, network diagrams, and other visual representations. It offers flexibility, collaboration features, and intuitive controls. One of its key features is layers, which allow me to separate elements into different groups. This makes it easier to edit, visualize, and manage diagrams efficiently.
Step-by-Step Guide to Using Layers in draw.io
To demonstrate how to use layers in draw.io, I will modify one of the built-in templates.
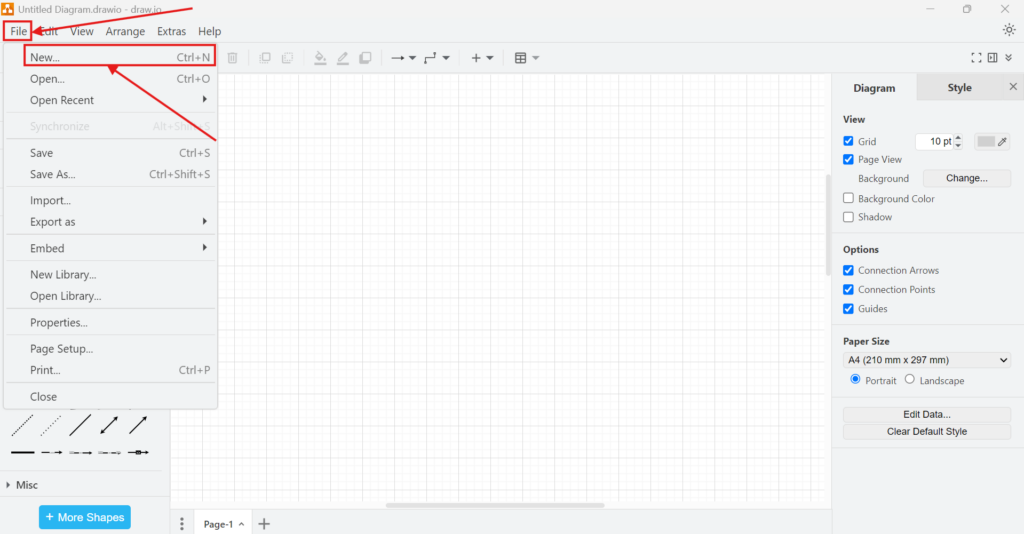
1. Step: Create a New Diagram. First, I go to “File” in the menu and click “New.” Alternatively, I can use the shortcut Ctrl+N. (In these articles we will guide you through the basic steps of how to create new diagrams from scratch or using a template.)
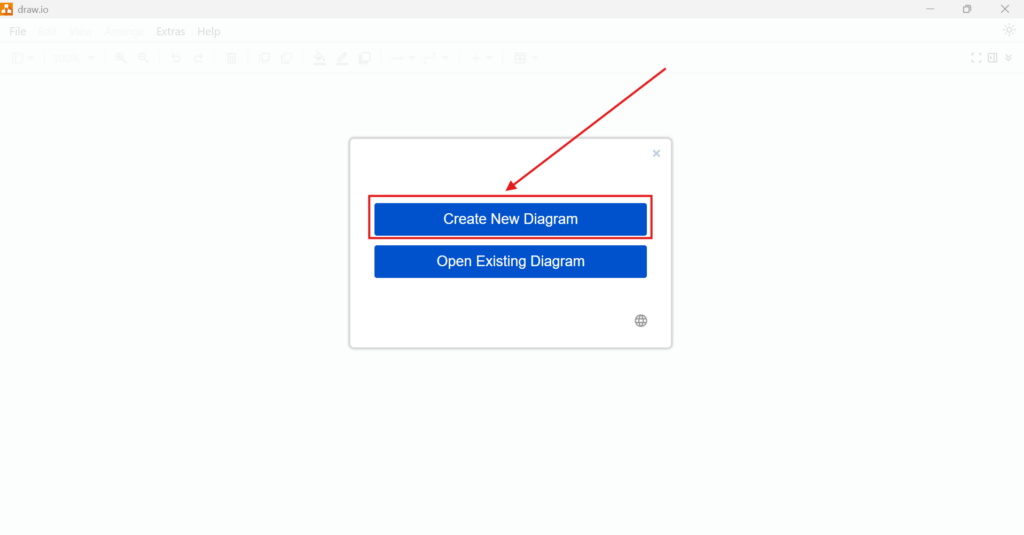
2. Step: I choose “Create New Diagram” from the available options.
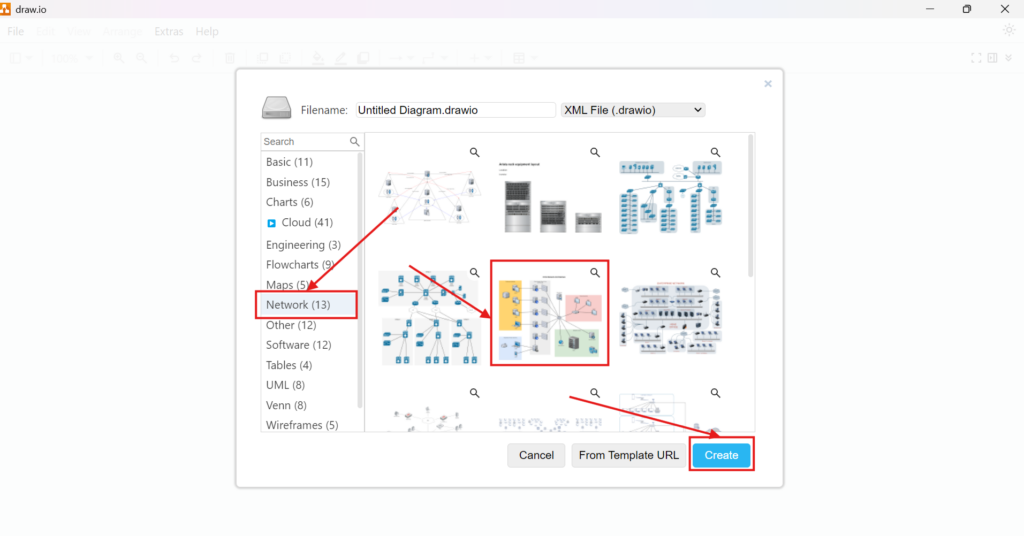
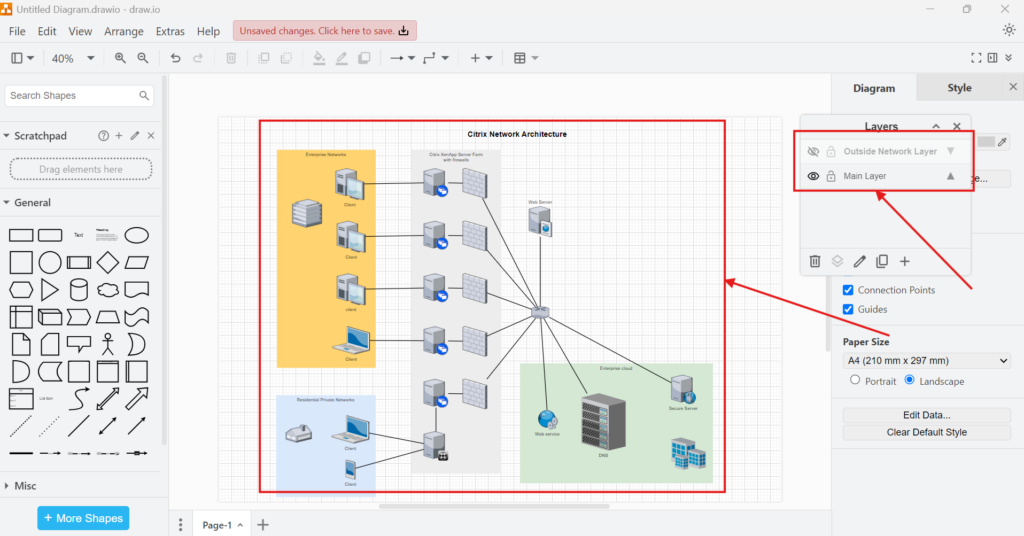
3. Step: Select a Template. I navigate to the “Network” category and choose the Citrix Network Architecture template. The specific template choice is not important for this guide.
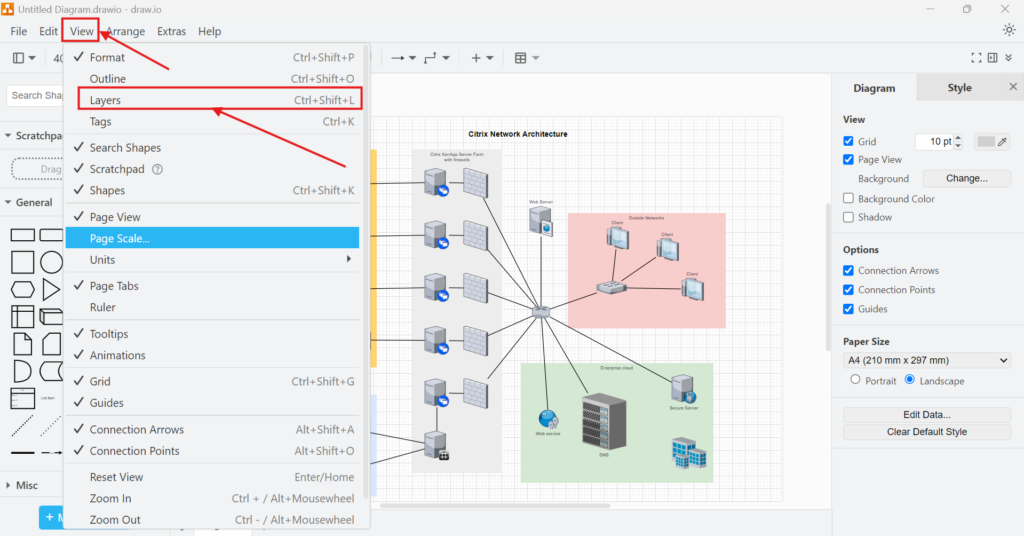
4. Step: Open the Layers Panel. I go to “View” in the menu and click “Layers”.
5. Step: A new internal window appears, allowing me to edit layers.
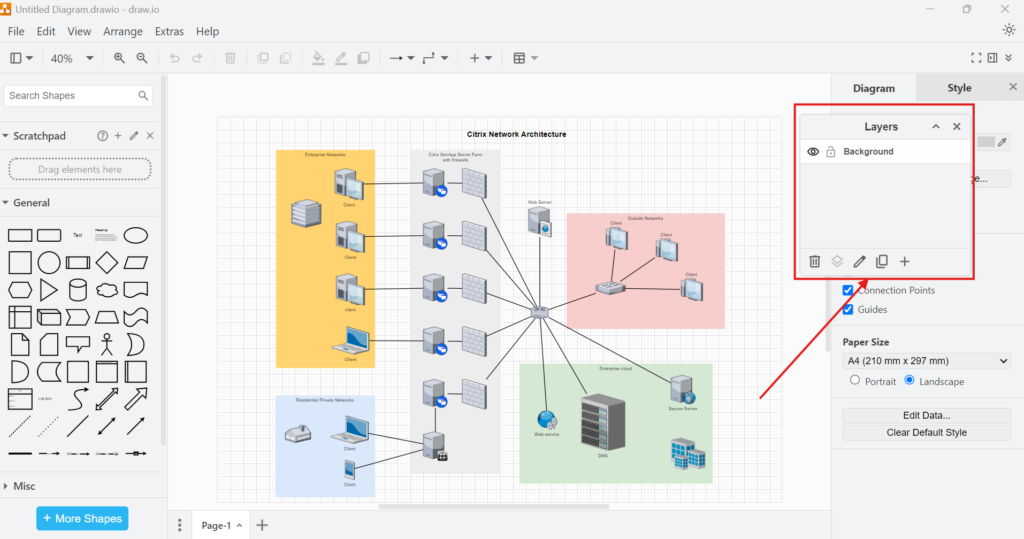
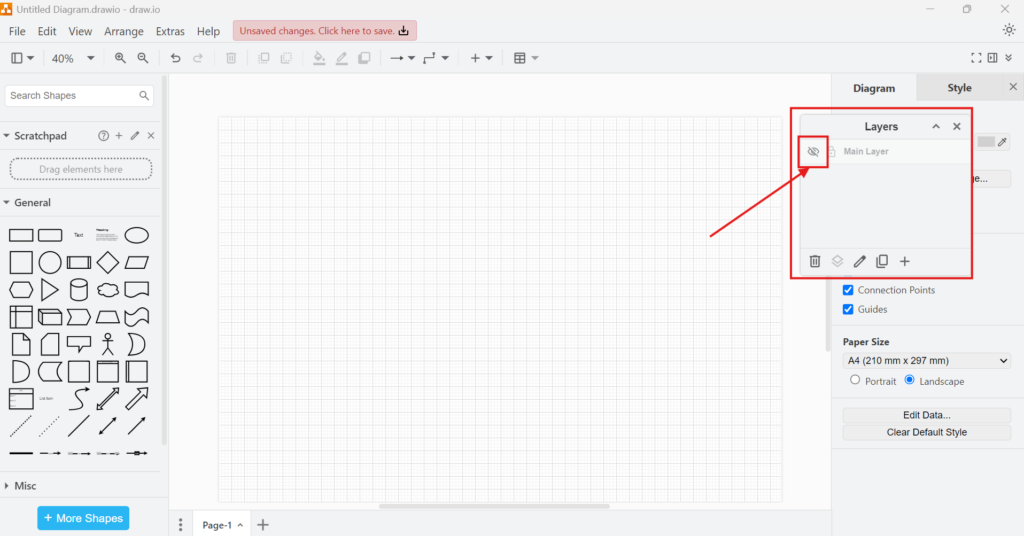
6. Step: Rename the Default Layer. The default layer is usually called “Background.” I rename it to “Main Layer” for better organization. Next, I turn off the Main Layer by clicking on the eye icon.
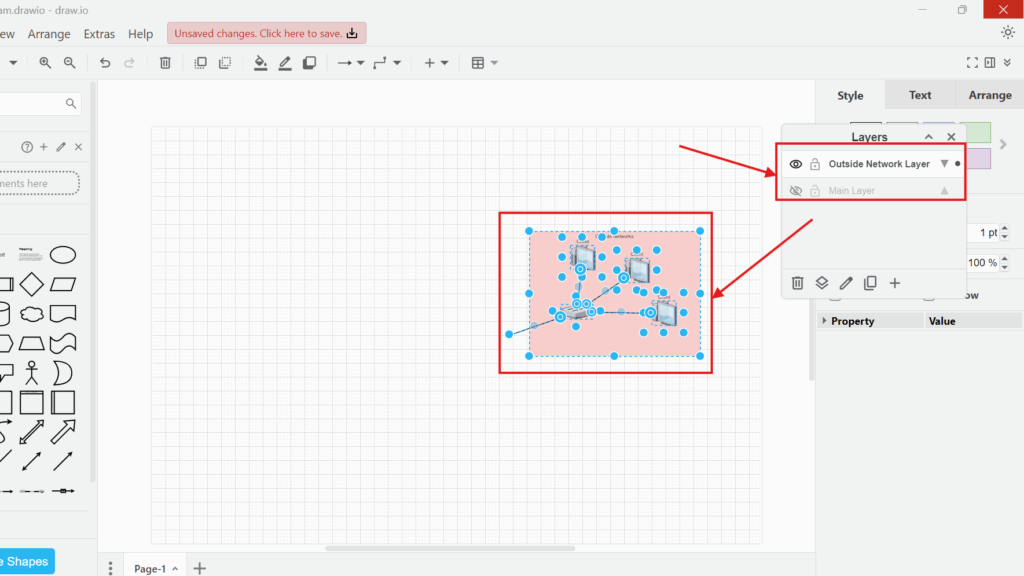
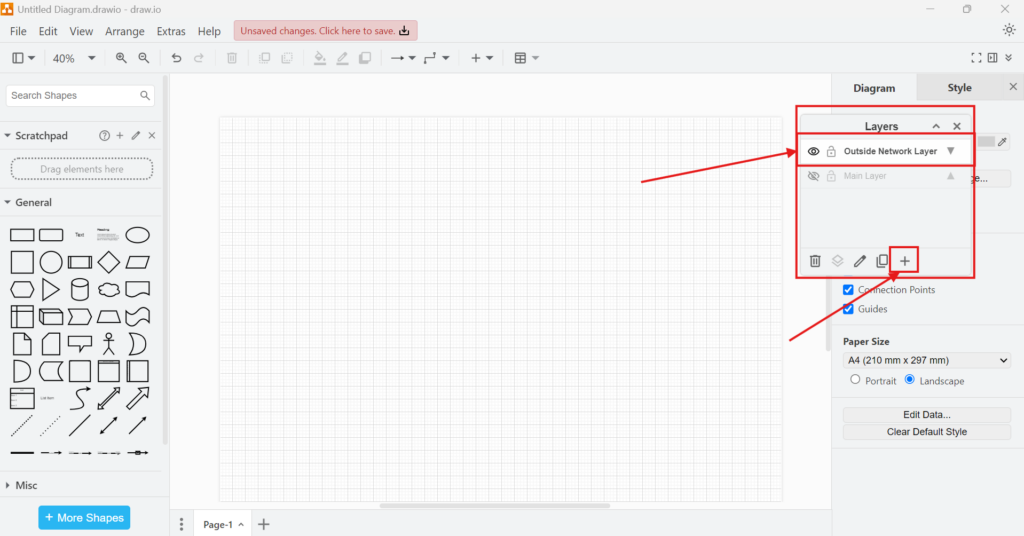
7. Step: Create a New Layer. I click the plus icon to add a new layer. I name it “Outside Network Layer”.
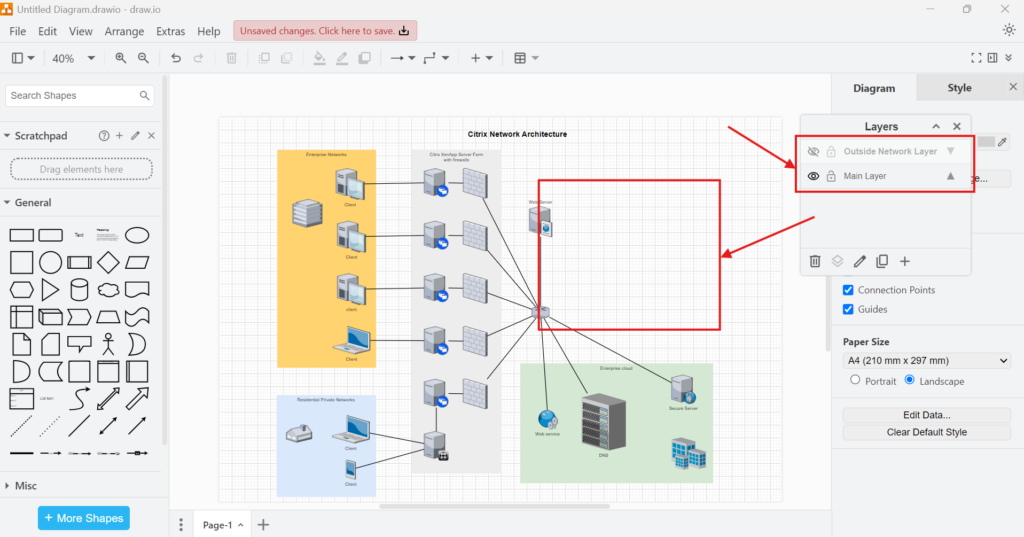
8. Step: Move Elements to a New Layer. I activate the “Main Layer” and deactivate “Outside Network Layer.” I select all elements related to the outside networks.
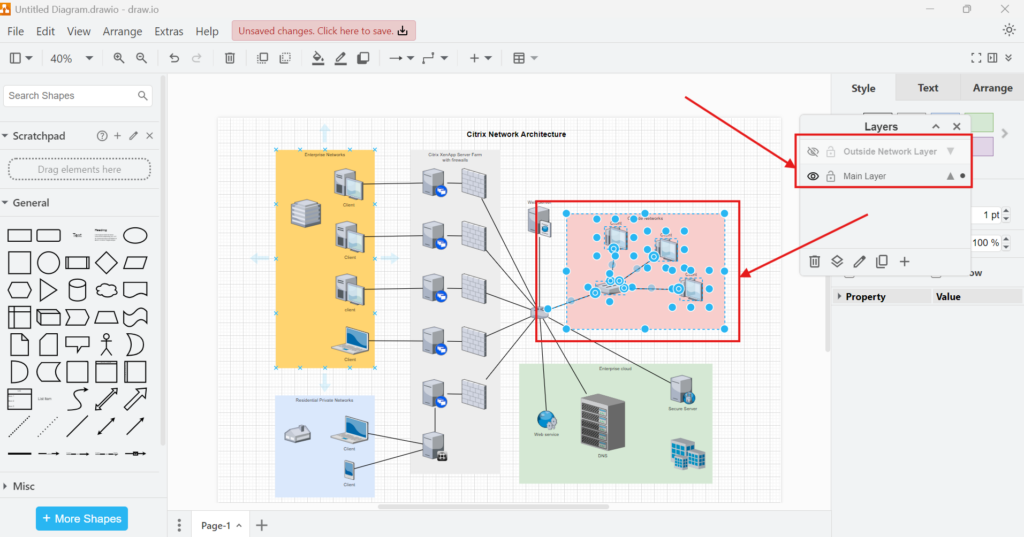
9. Step: Using Ctrl+X, I cut these elements.
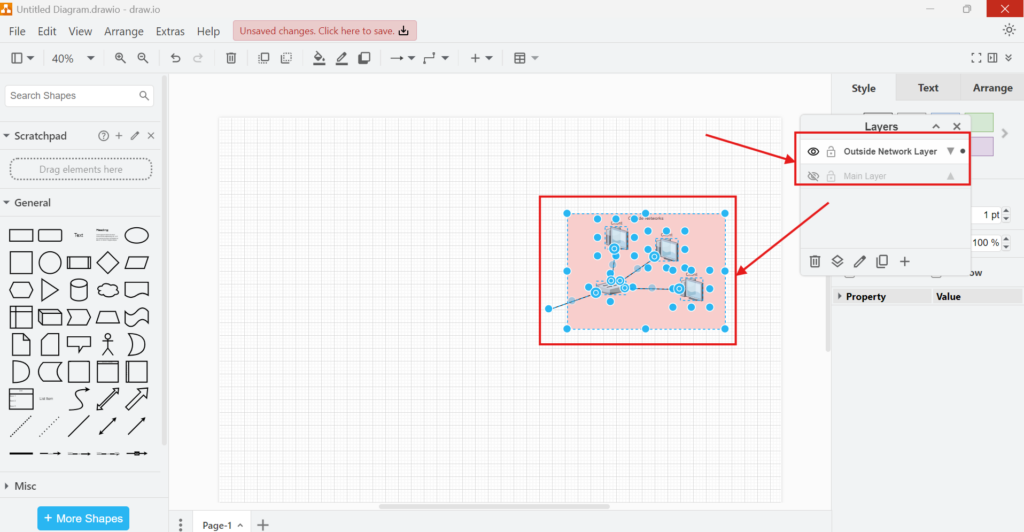
10. Step: Paste Elements into the New Layer. I deactivate the “Main Layer” and activate the “Outside Network Layer.” I paste the previously cut elements.
11. Step: Manage Layer Visibility. Now, both layers can be activated to display the complete diagram.
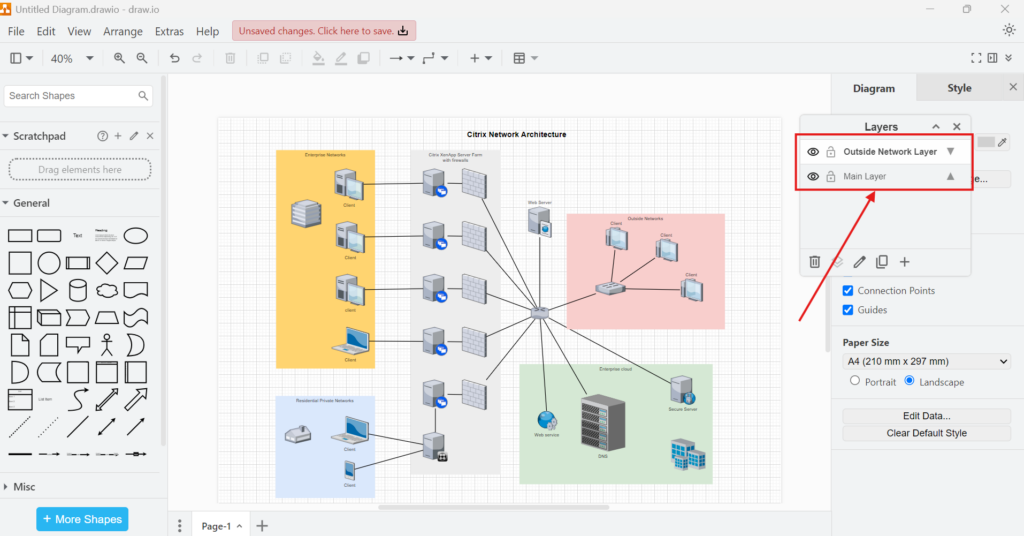
12. Step: If needed, I can deactivate the “Outside Network Layer” without deleting its contents now.
Business Case: Enhancing IT Documentation
Imagine a large IT team working on a network infrastructure diagram. Without layers, modifying the diagram would be difficult. By using layers, I can separate hardware, software, and external network elements. This makes it easier to update sections without affecting the whole diagram. For example:
- The security team can focus on firewall layers.
- The network team can manage router and switch configurations.
- The management team can review a high-level overview without technical details.
This structured approach streamlines workflow and improves collaboration.
Final Thoughts
Learning how to use layers in draw.io boosts productivity and keeps diagrams well-structured. By separating elements into different layers, I can easily manage visibility and organization. Whether working on IT documentation, software architecture, or business workflows, layers provide flexibility. Try it out in your next diagram and experience the benefits firsthand.
What’s Next?
Now that I know how to use layers in draw.io, I can organize complex diagrams with more control. However, I may also want to classify related elements across my diagram. That is where tags become useful. In the next article, I’ll explain How to Use the Tags View in draw.io. You’ll learn how tags help you group elements, find diagram parts faster, and manage larger diagrams more clearly. Click below to continue and structure your draw.io diagrams with tags.
Connect Requirements Work with Practical Tools
Requirements engineering becomes clearer when I use tools that support visual thinking, documentation, task management, and process modeling. Therefore, I use draw.io to create diagrams, Confluence to organize knowledge, Jira to manage requirements-related work, and Camunda to model business processes. Each tool helps me structure a different part of the workflow. As a result, I can connect ideas, decisions, requirements, and processes more effectively. In the main article on Requirements Engineering Tools, I show how these tools work together and help me build a stronger requirements engineering workflow.