Have you ever needed to tidy up your workspace and remove outdated content? I recently faced the same challenge and decided to share what I learned. In this guide, I’ll show you step by step how to delete a page in Confluence safely and efficiently. Whether you’re new to Confluence or just refining your skills, this walkthrough will help you manage your pages with confidence and keep your space clean and well-organized.
What is Confluence?
Confluence is a collaborative workspace developed by Atlassian that enables teams to create, share, and organize information in one central place. It serves as a digital hub for documentation, project planning, and knowledge management. With Confluence, teams can work together in real time, track updates, and maintain transparency across projects. Its structured yet flexible design helps transform scattered ideas into organized, actionable knowledge accessible to everyone.
Step 1: Navigate to the Page
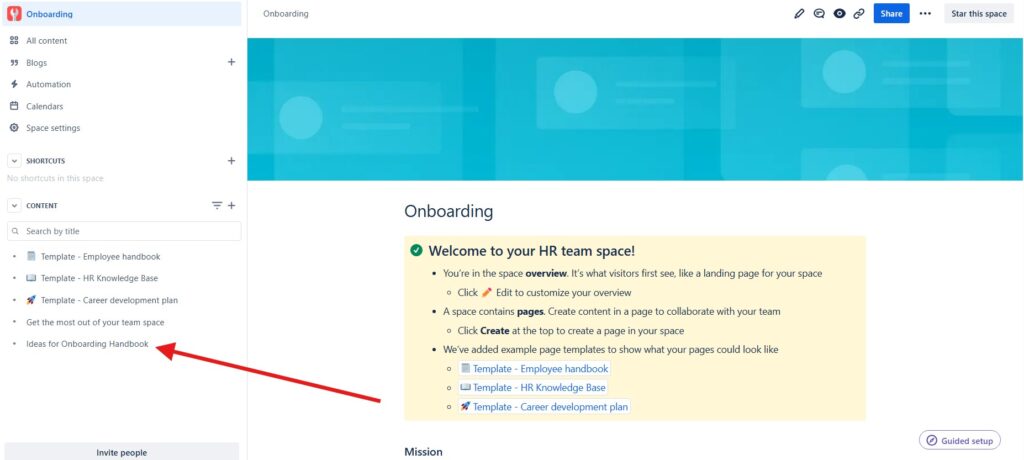
First and foremost, you need to locate the page you want to delete. Open your Confluence space and browse through the navigation pane to find the specific page. If you’re dealing with a large number of pages, you can use the search bar at the top to quickly find the page by its title.
Step 2: Open the Page
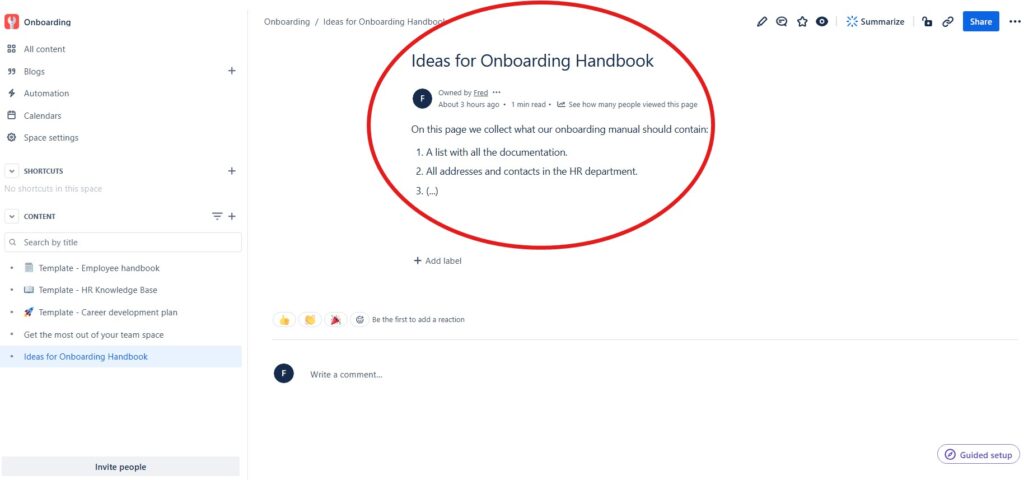
Once you’ve found the page, click on its title to open it. It’s important to review the content one last time before proceeding with deletion, just to make sure you’re not removing something valuable.
Step 3: Access the Page Tools
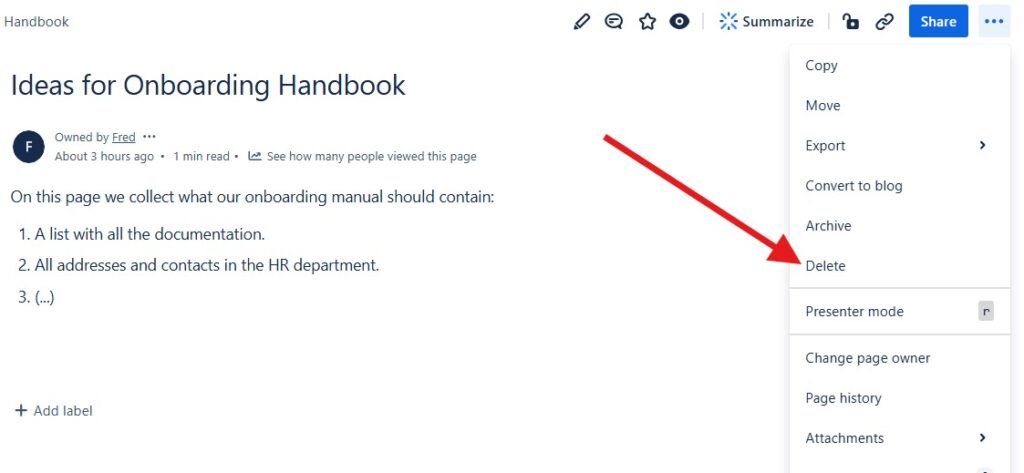
With the page open, look towards the top right corner of the screen. You will see three dots (also known as the “More actions” menu). Click on these dots to access a dropdown menu with various options related to the page.
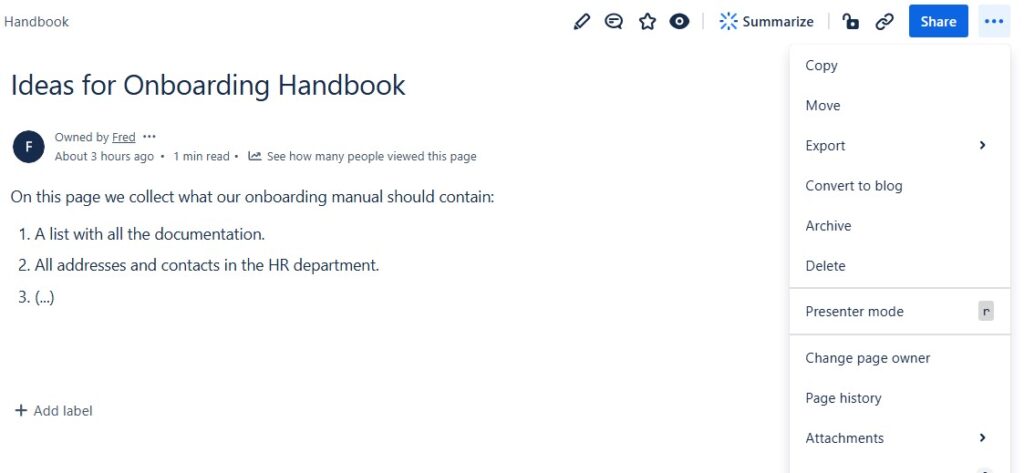
Step 4: Select “Delete”
From the dropdown menu, choose the “Delete” option. Confluence will prompt you with a confirmation message to ensure that you really want to delete the page. This is a crucial step because once a page is deleted, it can only be restored from the trash if your space permissions allow it.
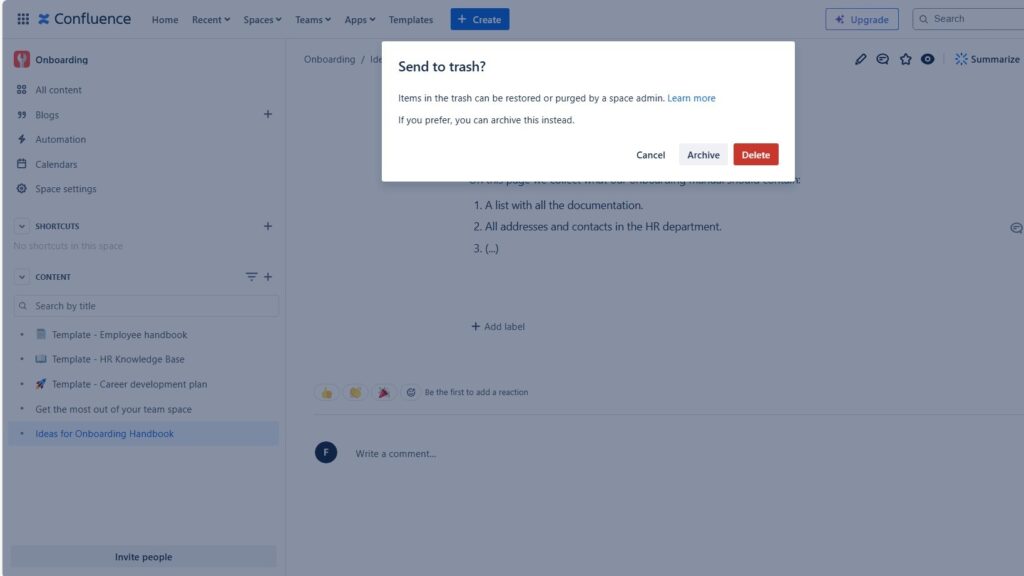
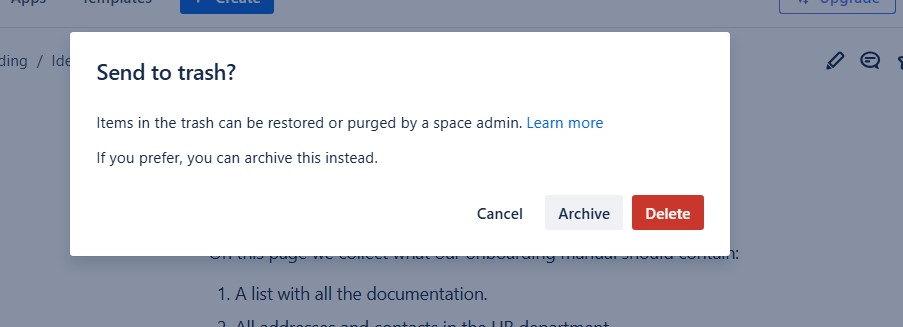
Step 5: Confirm the Deletion
After selecting “Delete,” a dialog box will appear asking you to confirm the action. Take a moment to double-check the page name and its content. If you’re absolutely sure about the deletion, click the “Delete” button in the confirmation dialog.
Step 6: Check the Trash
If you have space permissions that allow for it, the deleted page will move to the trash rather than being permanently deleted right away. You can access the trash by going to the space settings and selecting “Trash” from the sidebar.

Here, you have the option to restore the page if you change your mind – or purge right away.

Final Thoughts
Deleting a page in Confluence is a straightforward process, but it’s always good to be cautious. Make sure to double-check the content before deletion and understand your space permissions regarding the trash. Cleaning up your Confluence space can help keep it organized and efficient, making it easier for your team to find the information they need.
I hope this guide was helpful! If you have any further questions or tips on managing Confluence pages, feel free to share in the comments below. Happy organizing!
What’s Next?!
Now that you understand what Confluence is and how it supports collaboration, let’s explore how to make your pages more structured and readable. In my next article, How to Change the Headings in Confluence, I’ll guide you through simple steps to format and customize headings effectively. Learn how proper heading levels can improve navigation, readability, and the overall presentation of your Confluence content.
| Read more about Service Management |
|---|
| Key Roles and Responsibilities in ITIL Service Design What Is ITIL Service Transition? Key Principles of ITIL Service Transition: A Practical Guide Change Management in ITIL: A Complete Guide Service Asset and Configuration Management (SACM) in ITIL Service Transition |