
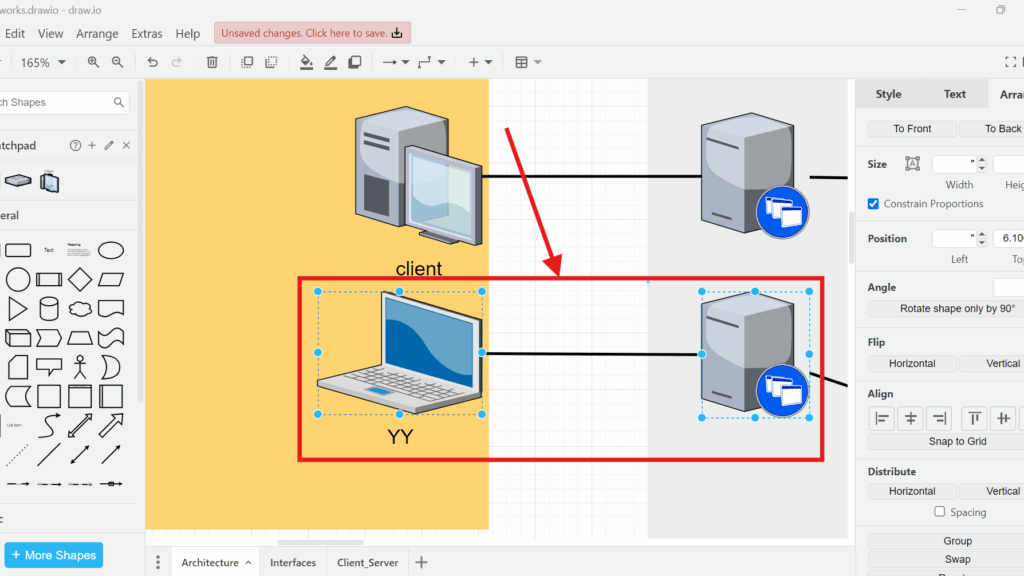
Have you ever struggled with messy diagrams? I know I have. Elements like valves, connectors, and devices often end up scattered, making everything look chaotic. Luckily, draw.io offers powerful alignment features to organize your diagrams quickly.
What Does Alignment Do in draw.io?
Alignment changes the position of selected elements so that they share a common edge or center line.
draw.io gives me six alignment options:
| Alignment | What I use it for |
|---|---|
| Left | Align the left edges |
| Center | Align the vertical centers |
| Right | Align the right edges |
| Top | Align the top edges |
| Middle | Align the horizontal centers |
| Bottom | Align the bottom edges |
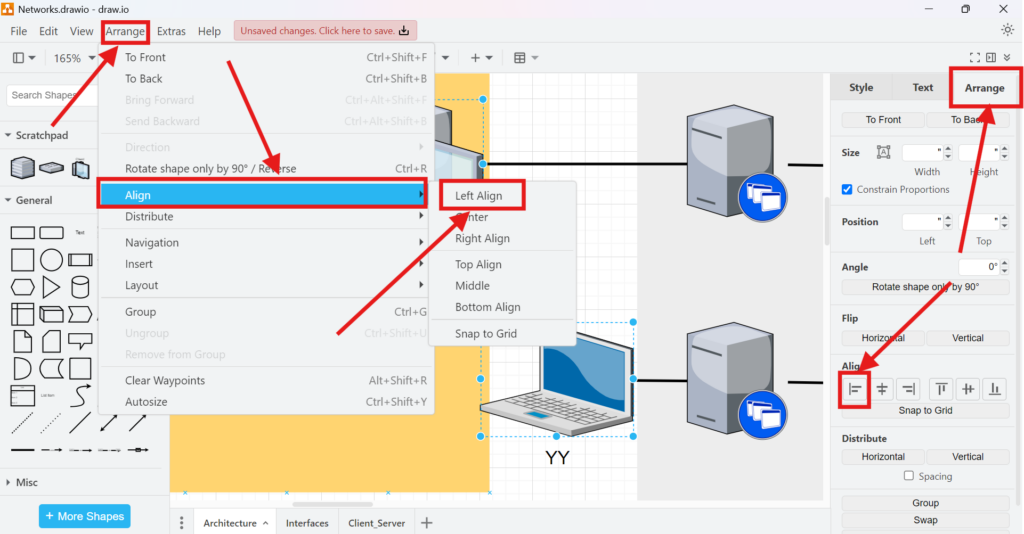
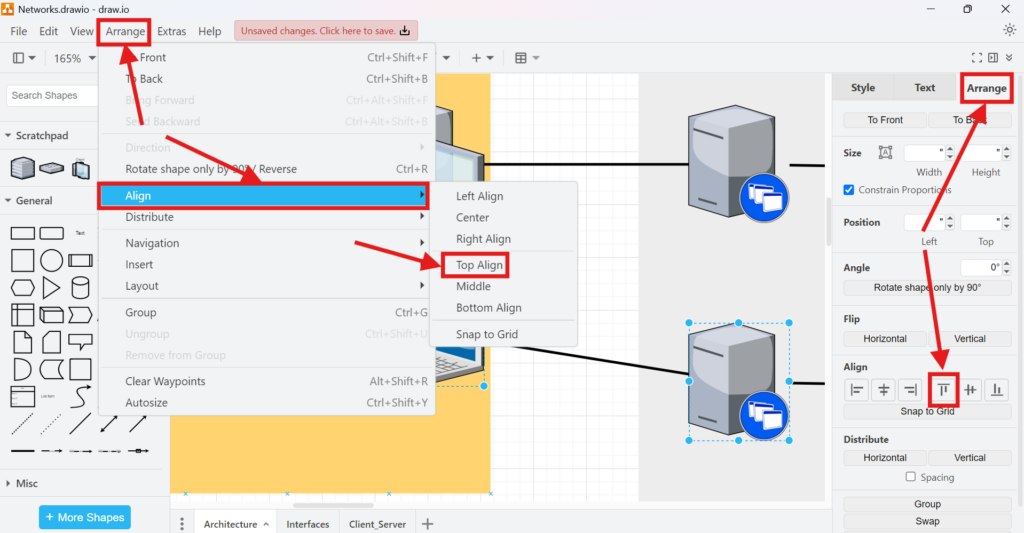
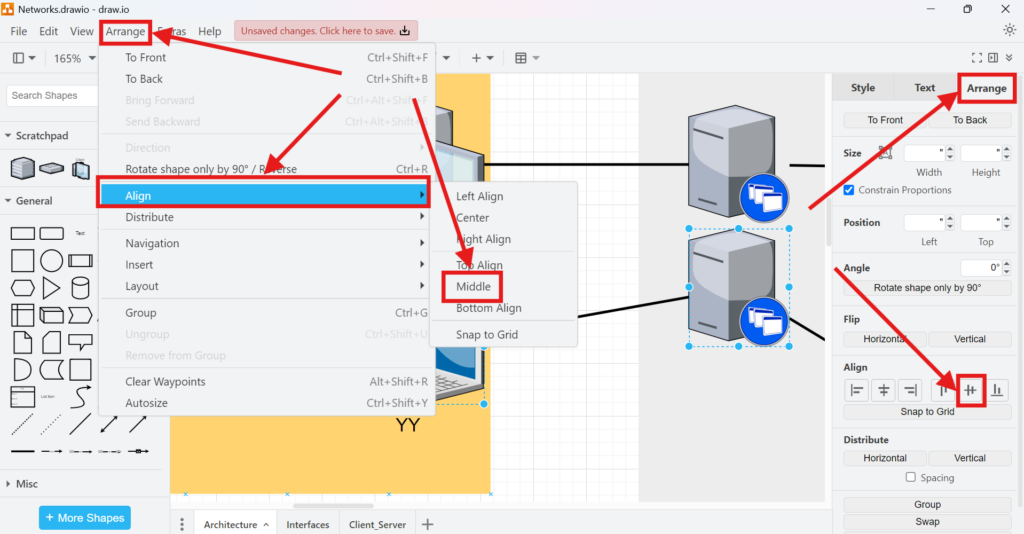
I can access these commands in two places. First, I can use Arrange > Align in the main menu. Alternatively, I can use the alignment controls in the Arrange tab on the right.
Both methods perform the same alignment, so I can use whichever fits my workflow better.
How to Align Elements Vertically in draw.io
For vertical alignment, I use Left, Center, or Right. These commands control the horizontal position of the selected elements.
Align Elements to the Left
First, I select the elements that I want to align. In this example, the desktop computer and laptop do not share the same left edge.
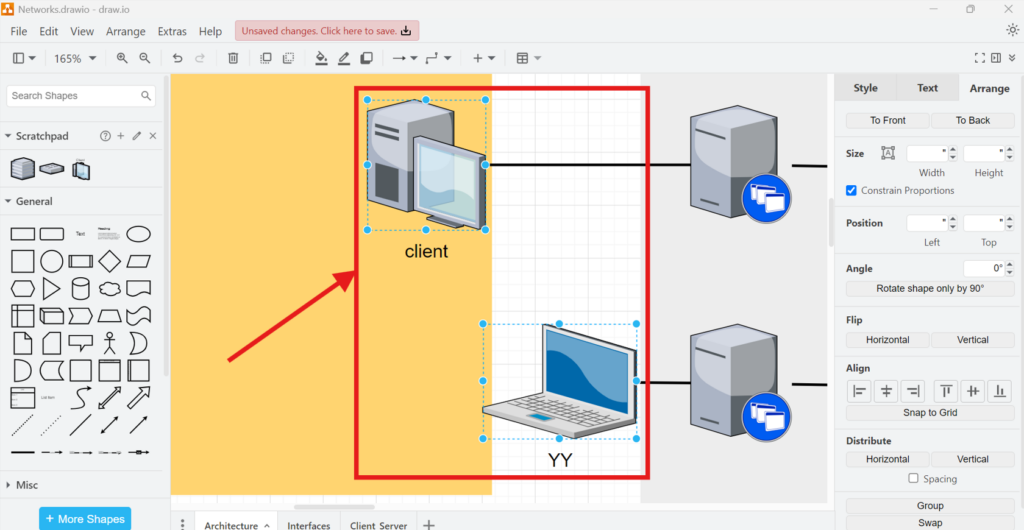
Next, I open Arrange > Align > Left. Alternatively, I select Left in the Arrange panel on the right.
As a result, draw.io places the selected elements on the same left alignment line.
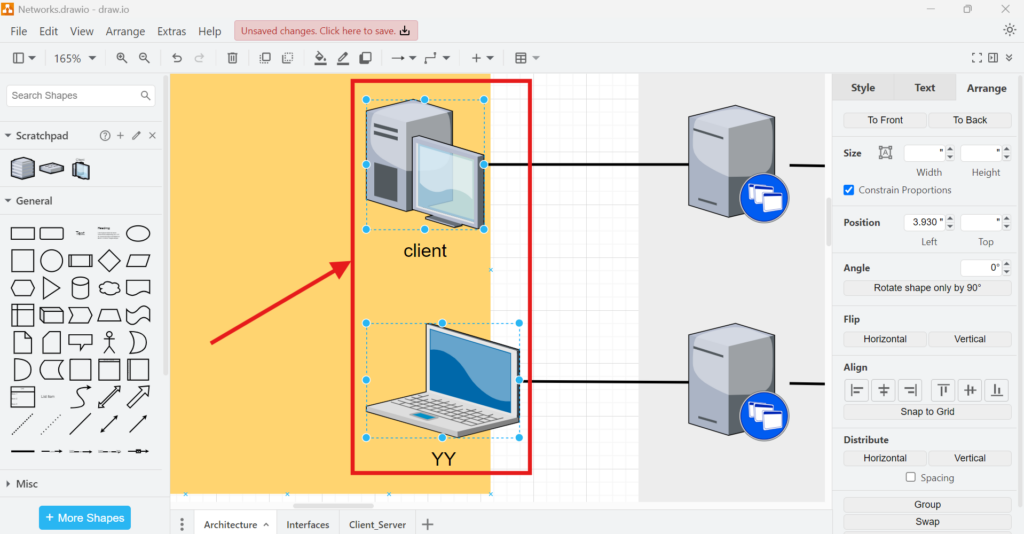
I use Left when several elements should start at the same horizontal position.
Align Elements to the Center
If I want the elements to share the same vertical center line, I use Center.
First, I select the elements.
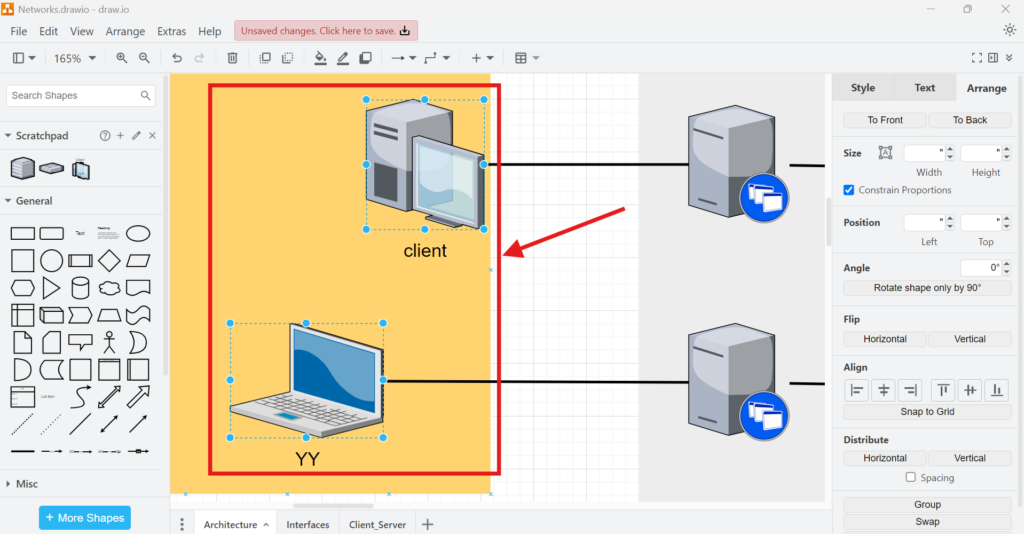
Next, I choose Arrange > Align > Center. Alternatively, I use Center in the Arrange panel.
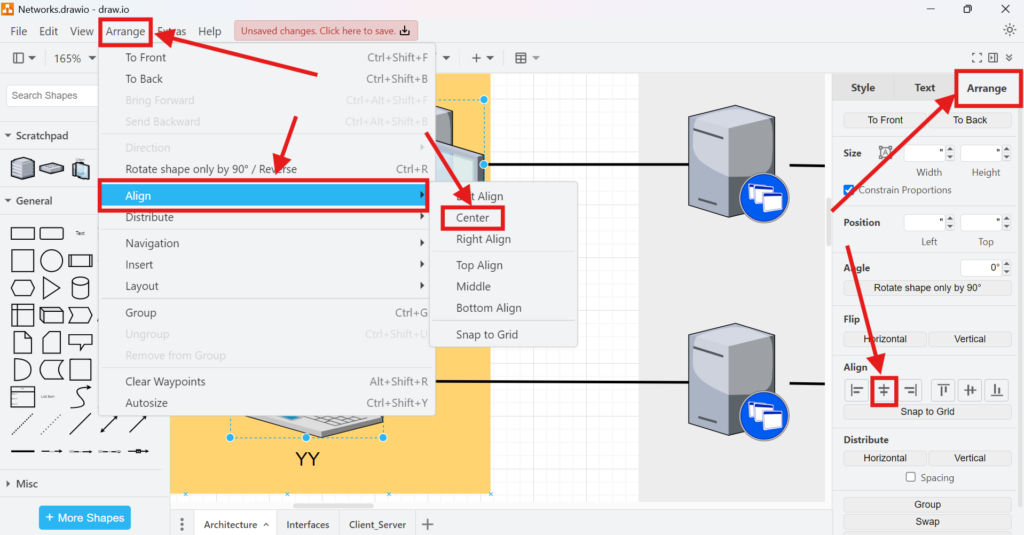
draw.io then positions both elements around the same vertical center line.

Center alignment is useful when the elements have different widths but should appear visually centered.
Align Elements to the Right
For a common right edge, I use Right.
First, I select the elements that I want to align.
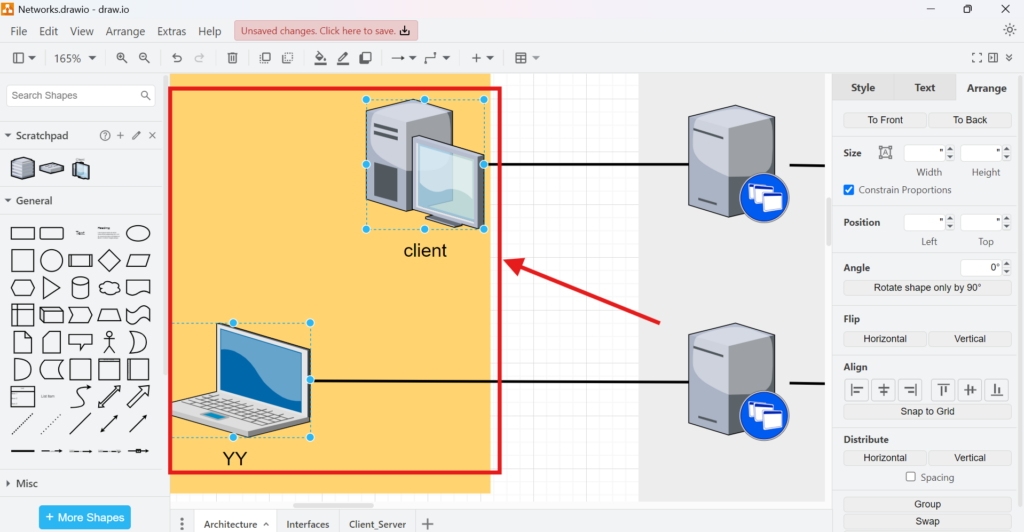
Then, I choose Arrange > Align > Right. Alternatively, I select Right in the Arrange panel.
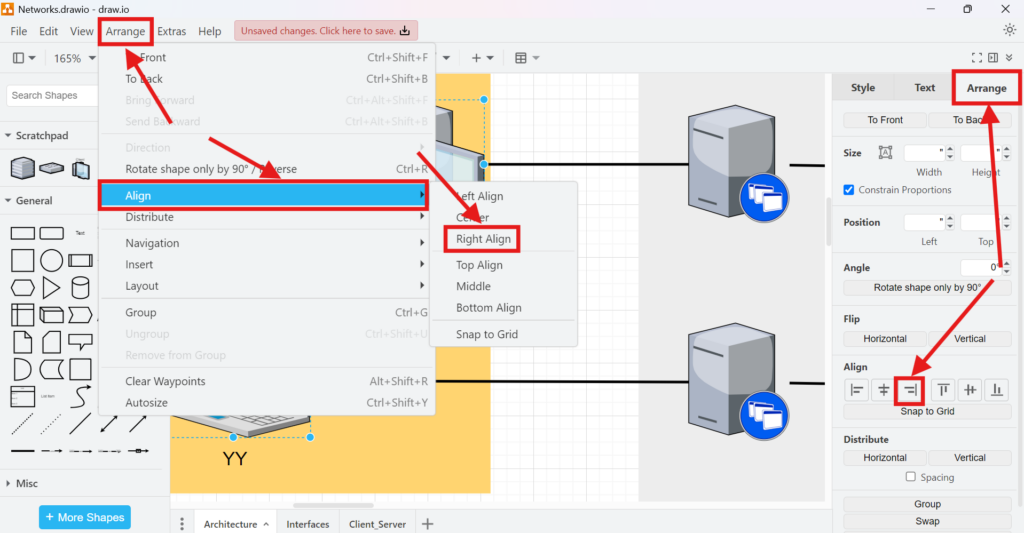
The selected elements now share the same right edge.
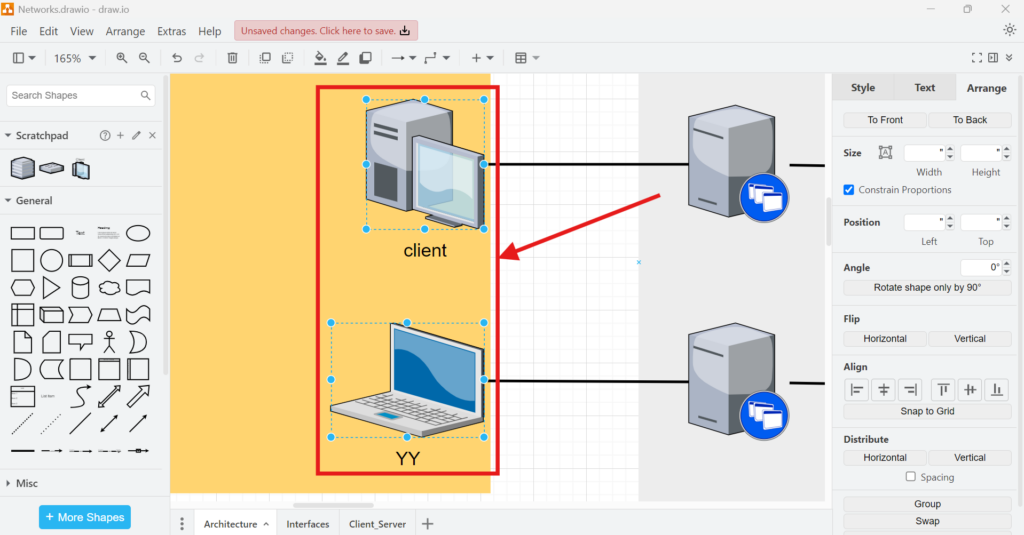
I use Right when several elements should end at the same horizontal position.
How to Align Elements Horizontally in draw.io
For horizontal alignment, I use Top, Middle, or Bottom. These commands control the vertical position of the selected elements.
Align Elements to the Top
First, I select the elements that should share the same top edge.
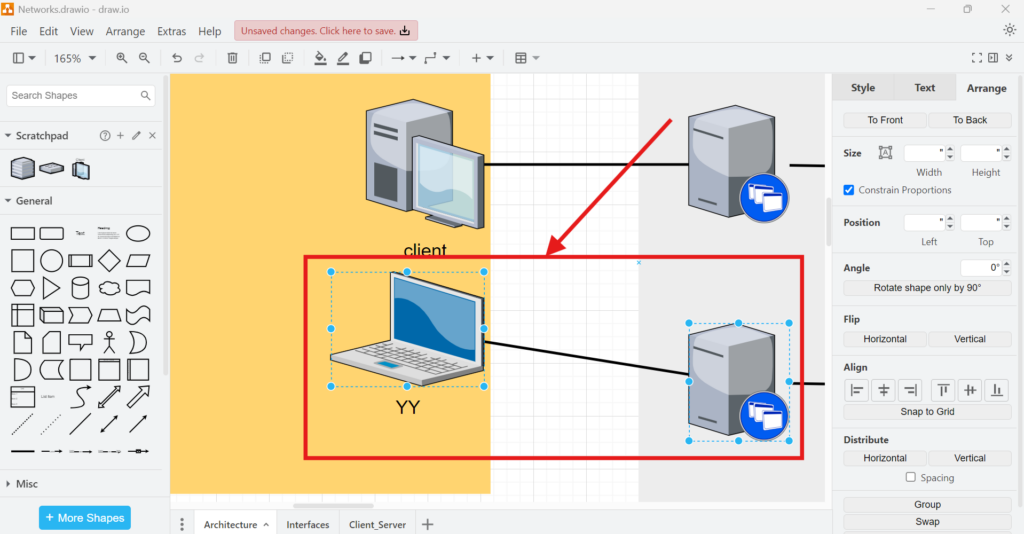
Next, I choose Arrange > Align > Top. Alternatively, I select Top in the Arrange panel.
draw.io moves the elements so that their top edges line up.
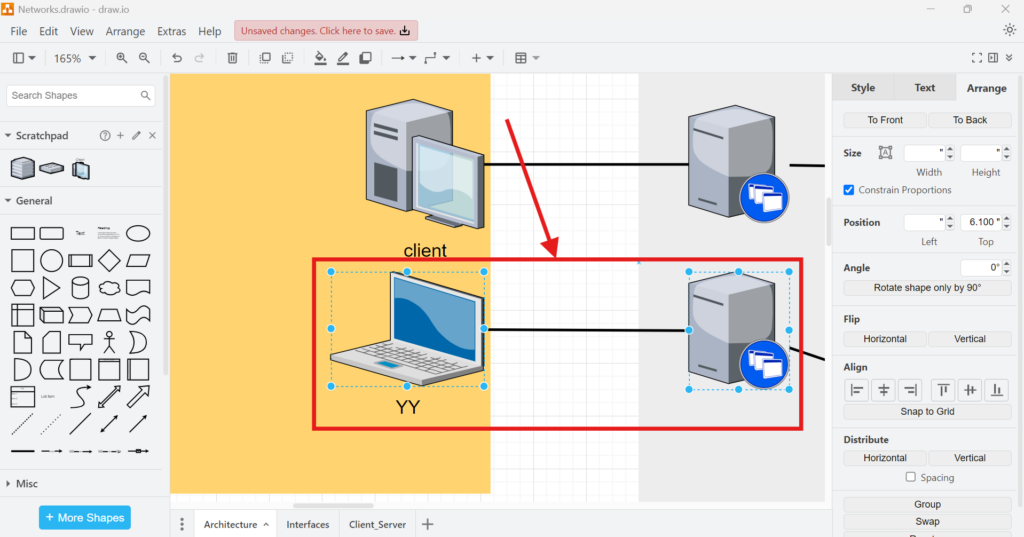
I use Top when elements placed next to each other should begin at the same vertical position.
Align Elements to the Middle
If I want the elements to share the same horizontal center line, I use Middle.
First, I select the elements.
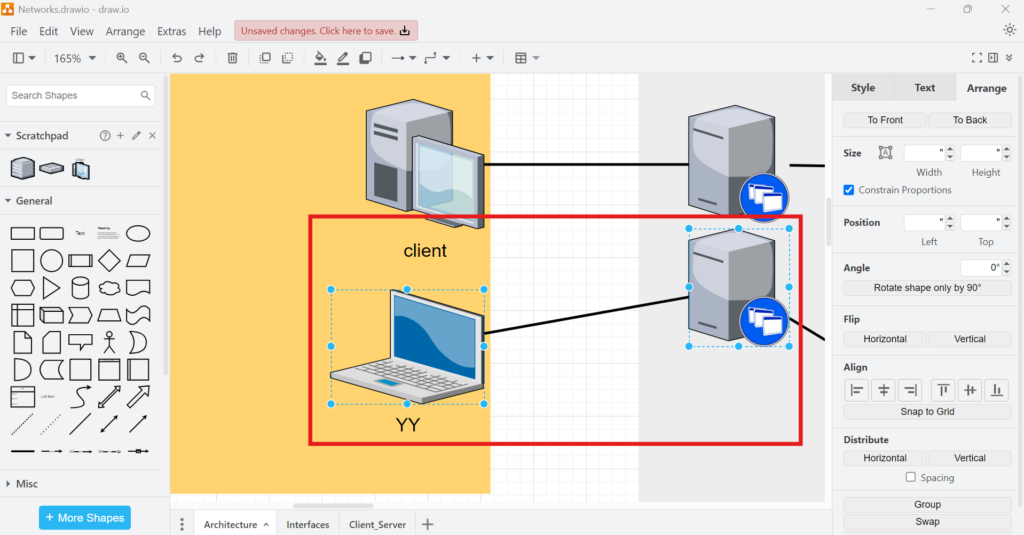
Then, I choose Arrange > Align > Middle. Alternatively, I use Middle in the Arrange panel.
As a result, draw.io places the centers of the selected elements on the same horizontal line.
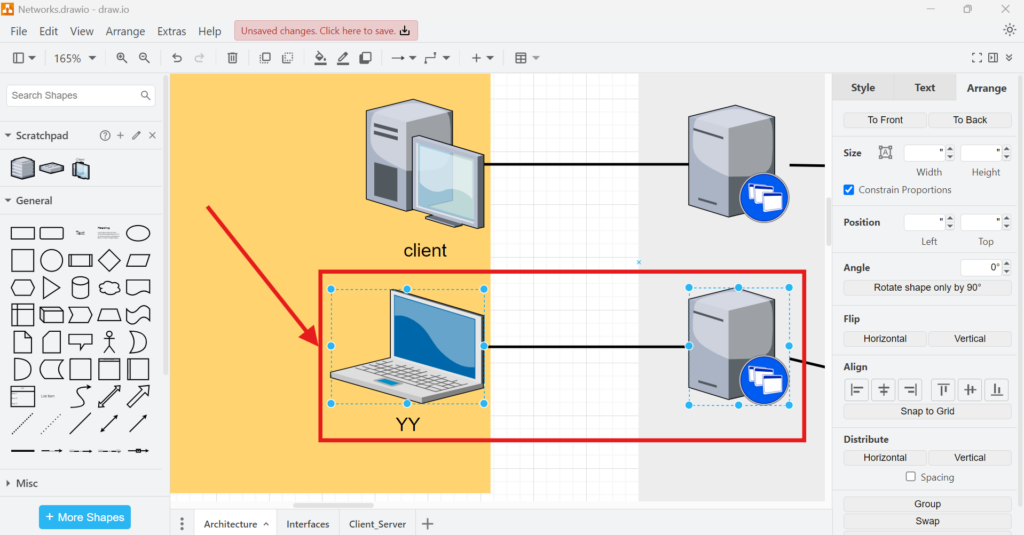
Middle alignment works well when elements have different heights but should appear centered next to each other.
Align Elements to the Bottom
Finally, I use Bottom when the selected elements should share a common lower edge.
First, I select the elements.
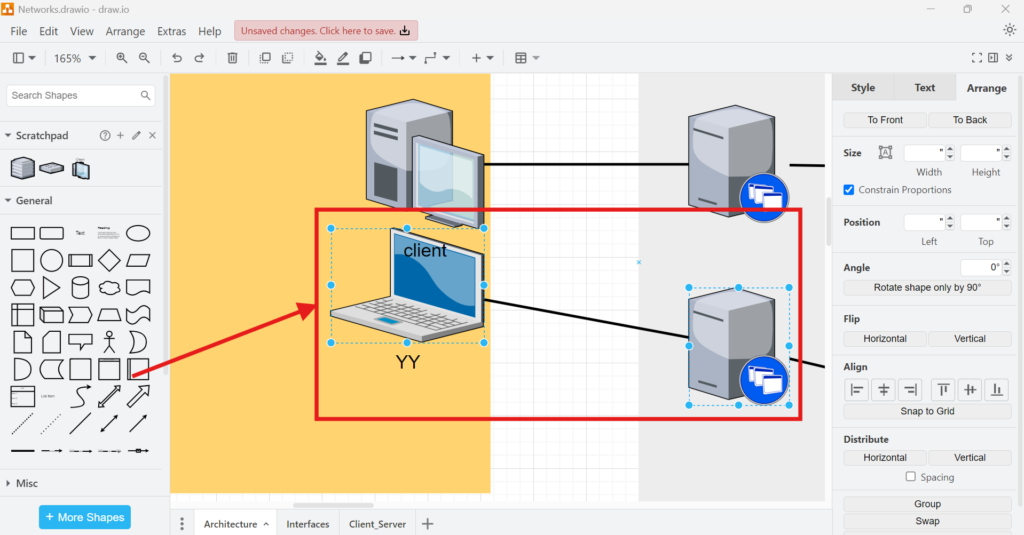
Next, I choose Arrange > Align > Bottom. Alternatively, I select Bottom in the Arrange panel.
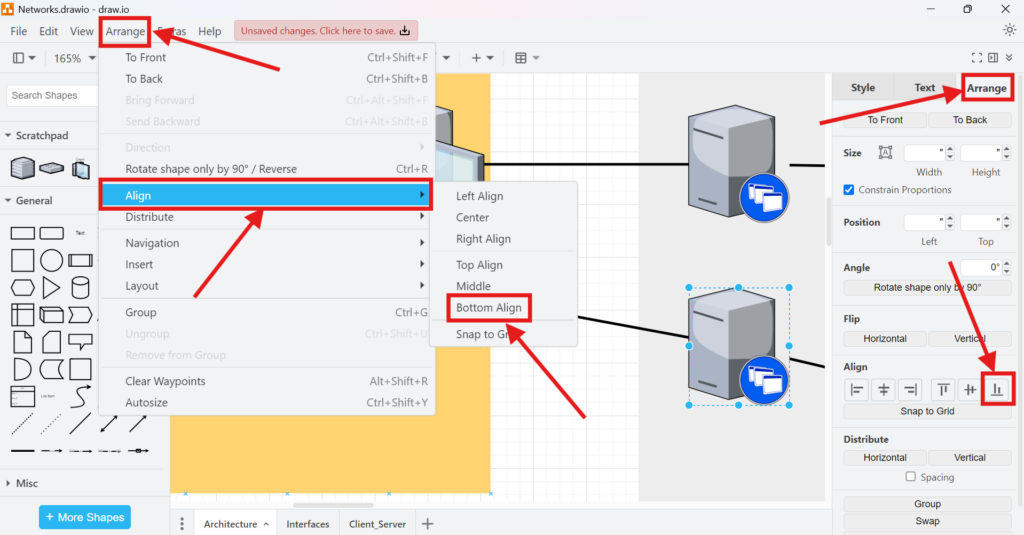
draw.io then places the selected elements on the same bottom line.
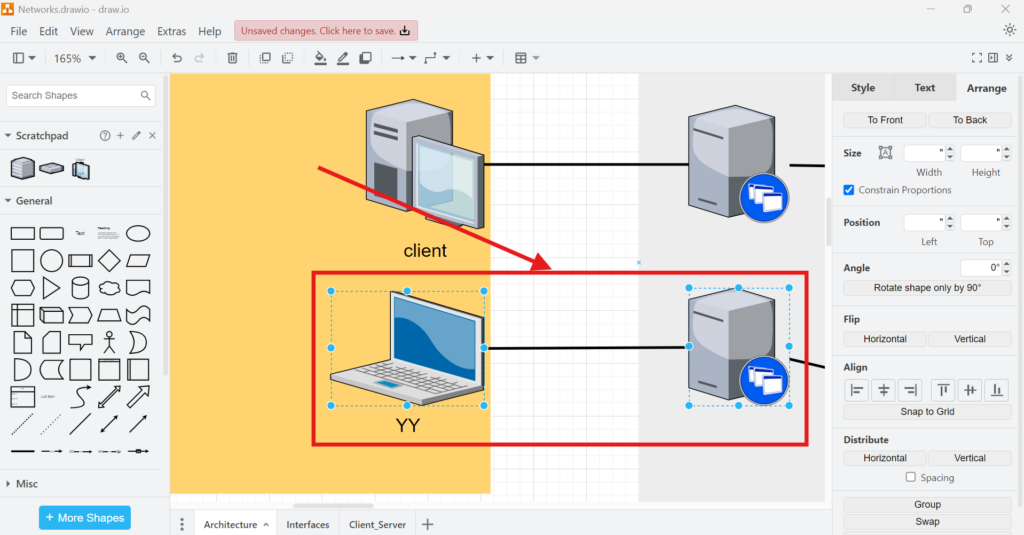
I use Bottom when elements should finish at the same vertical position.
Aligning Elements in draw.io Efficiently
The basic workflow always remains the same:
- I select the elements.
- I open Arrange > Align or use the Arrange panel.
- I choose Left, Center, Right, Top, Middle, or Bottom.
- I check the resulting layout.
Therefore, I do not need to move each shape manually until the positions appear correct.
Alignment gives me a repeatable way to create orderly diagrams and makes relationships between elements easier to recognize.
Conclusion
I use the alignment functions in draw.io whenever several elements should follow a common visual line. Left, Center, and Right control vertical alignment. Top, Middle, and Bottom control horizontal alignment. Because I can access all six commands from either the Arrange menu or the Arrange panel, the process remains quick.
By aligning elements consistently, I improve the visual structure of a diagram without adding unnecessary complexity.
What’s Next? Learn How to Use the Ruler View in draw.io
Now that you have learned how to work with the grid in draw.io, the next step is to explore another useful feature for precise diagram layouts: the Ruler View. Rulers provide visual references that help you position, align, and size elements more accurately. In the next tutorial, How to Activate and Use the Ruler View in draw.io, you will learn how to enable rulers and use them to create cleaner, more consistent, and professional-looking diagrams.
Explore Essential Requirements Engineering Tools
The right tools can make requirements engineering more efficient, structured, and collaborative. From creating clear diagrams with draw.io and managing project knowledge in Confluence to tracking requirements and tasks in Jira and automating business processes with Camunda, each tool plays an important role in modern requirements engineering. Discover their key features, practical applications, and how they support different stages of the requirements engineering process in our comprehensive guide to Requirements Engineering Tools.