
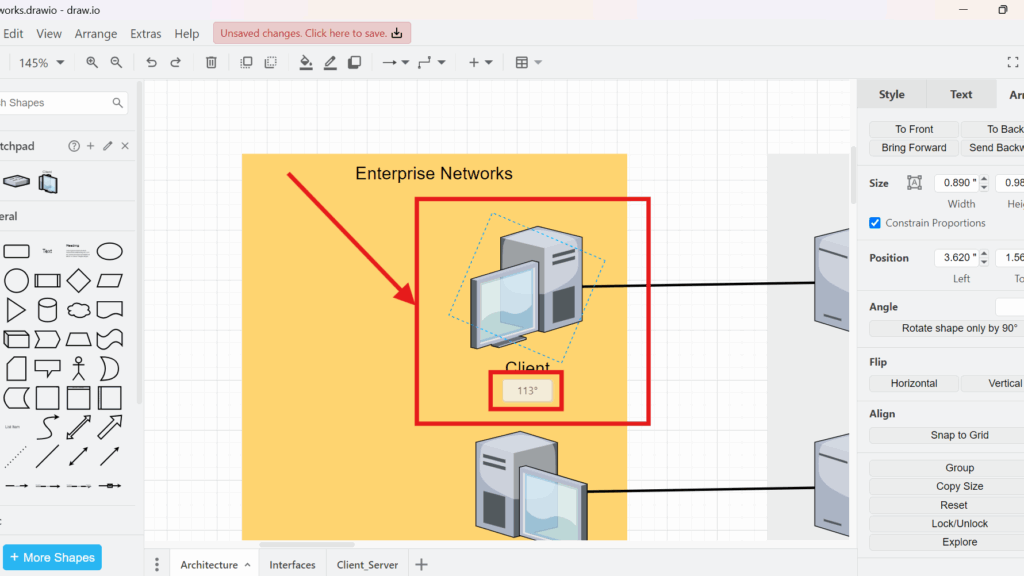
Have you ever struggled to change the direction of an element in draw.io? It might seem tricky at first, but it’s actually very simple. Whether you need to flip an element horizontally, vertically, or rotate it by an exact degree, draw.io offers three straightforward options. Let me walk you through each method step by step.
How I Change the Direction of an Element in draw.io
I use three basic options:
- Flip Horizontal mirrors an element from left to right.
- Flip Vertical mirrors an element from top to bottom.
- Rotation turns an element to a specific angle.
Therefore, I can correct an element without deleting, replacing, or redrawing it.
Flip an Element Horizontally
I use Flip Horizontal when an element faces the wrong horizontal direction. For example, I can make a symbol that faces right face left instead.
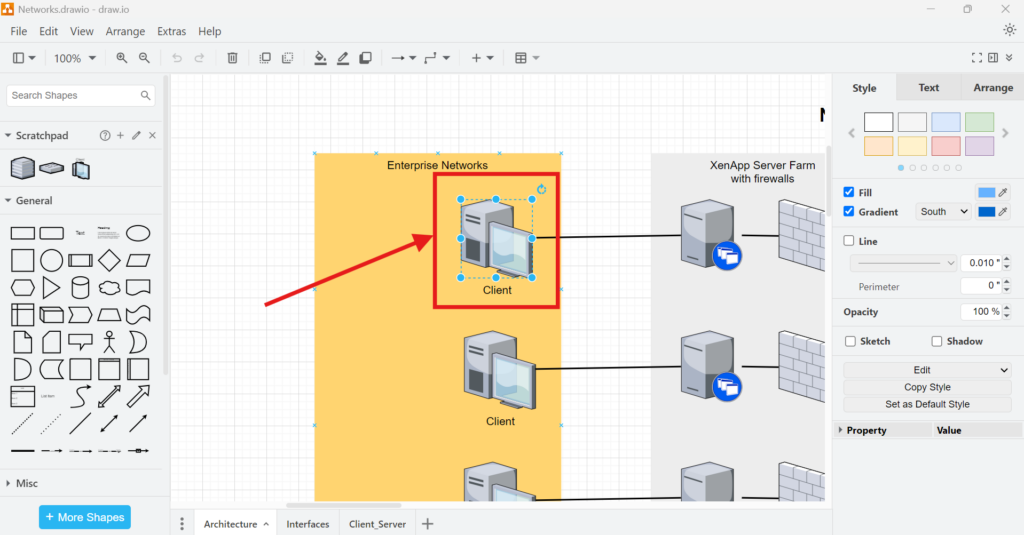
First, I select the element that I want to change.
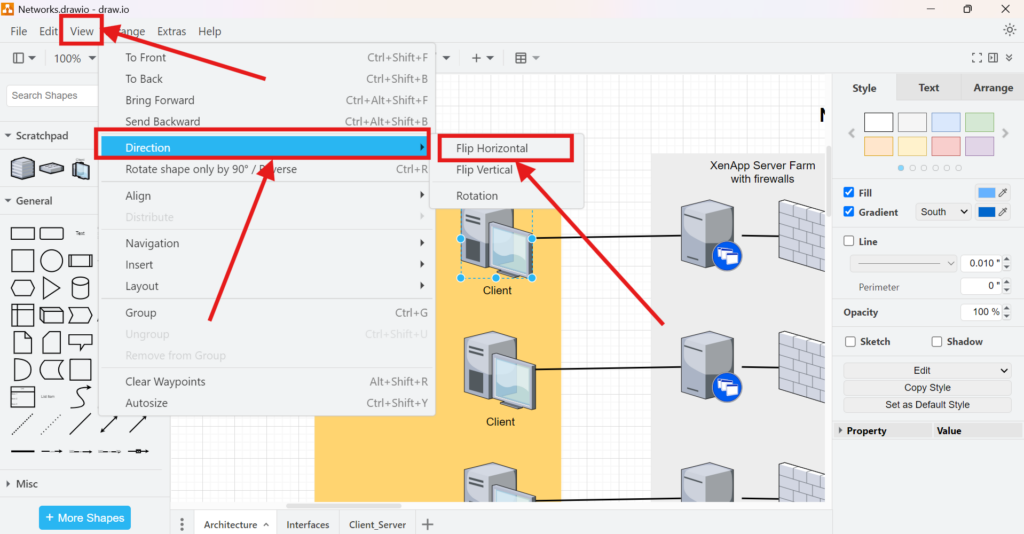
Next, I open Arrange in the top menu. Then, I select Direction and Flip Horizontal.
Alternatively, I can use the right sidebar. I open the Arrange tab and select Horizontal under Flip.
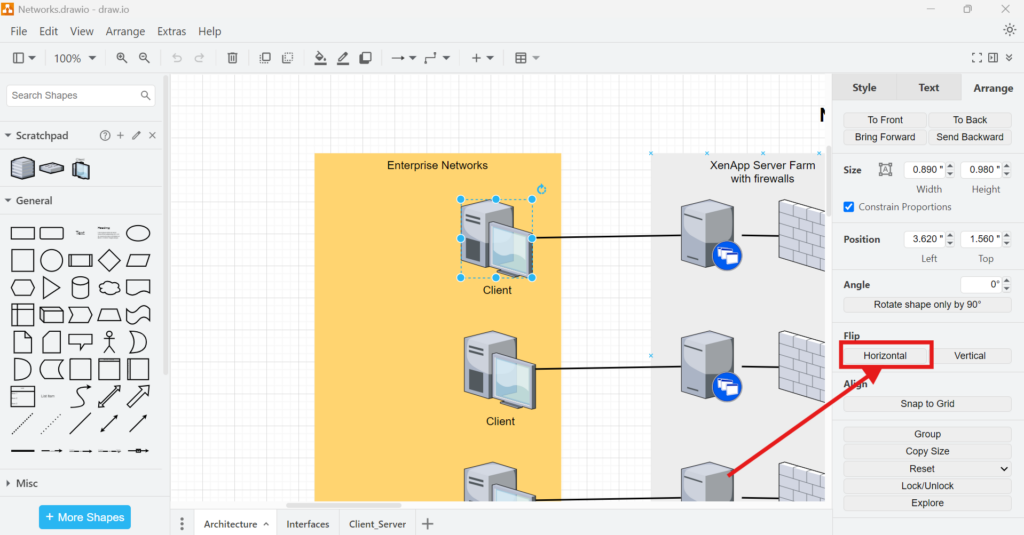
The element immediately changes its horizontal orientation.
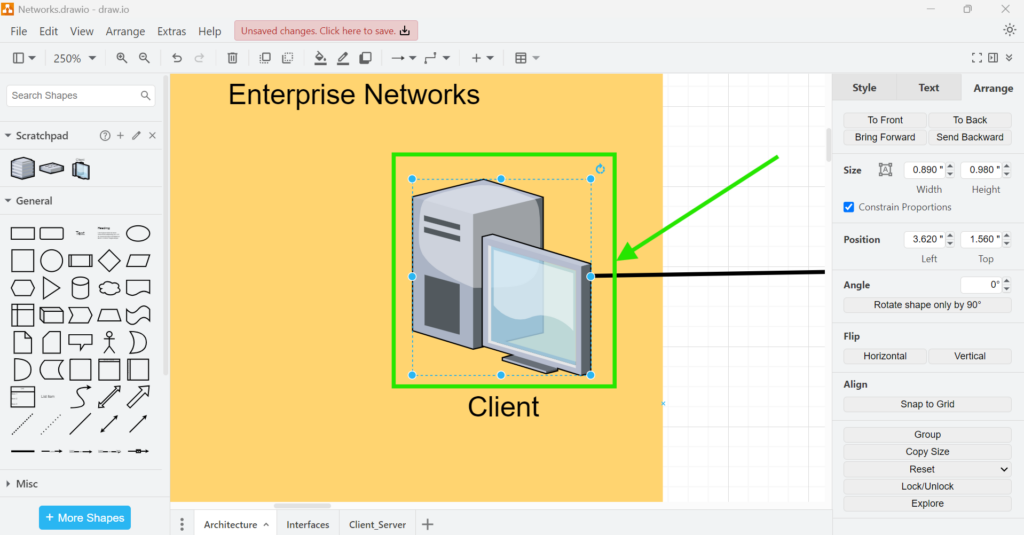
I use Flip Horizontal when I want a left-to-right mirror image without changing the element’s size or position.
Flip an Element Vertically
I use Flip Vertical when I need to reverse the element from top to bottom.
Again, I start by selecting the element.
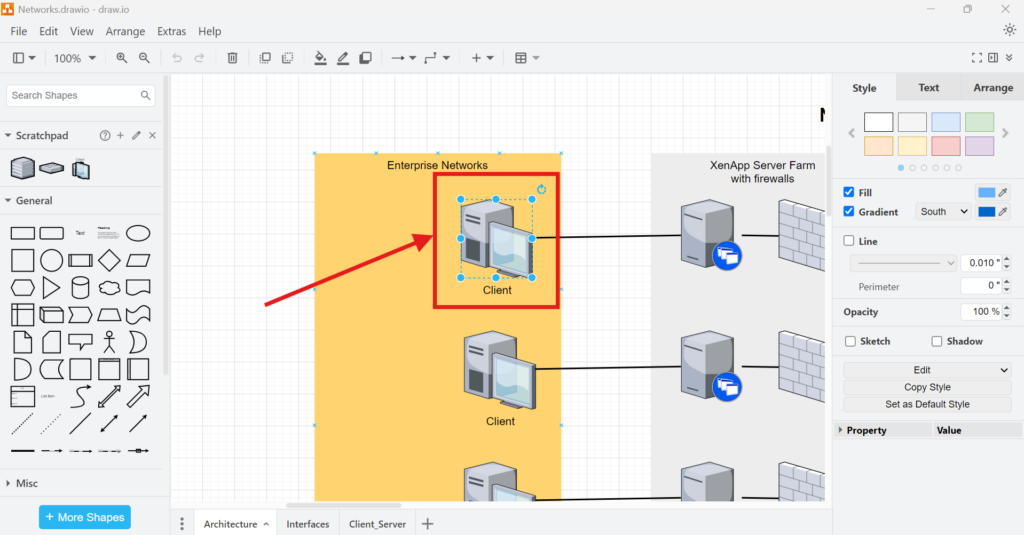
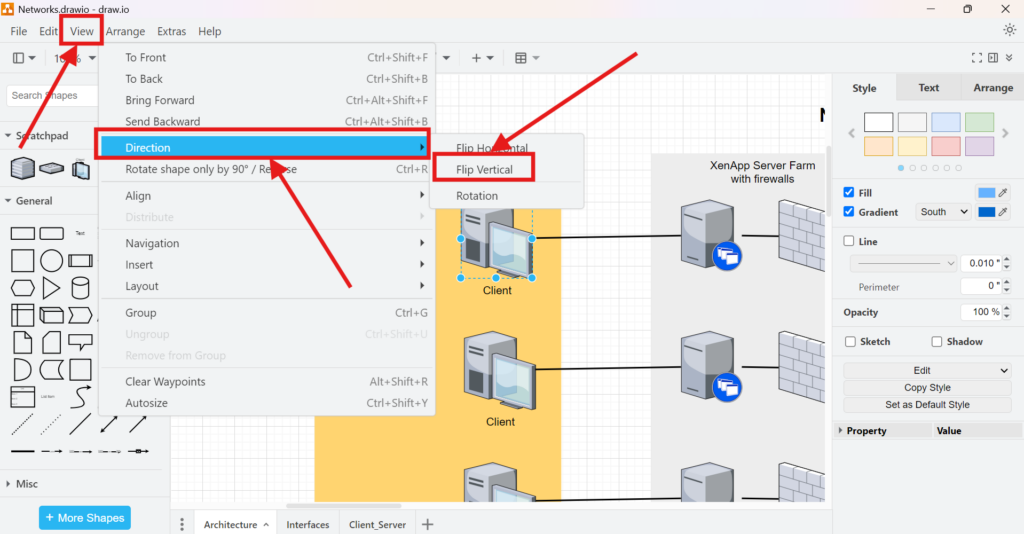
Then, I open Arrange, select Direction, and choose Flip Vertical.
Alternatively, navigate to the right sidebar and the “Arrange” tab and click on “Flip Vertical”!
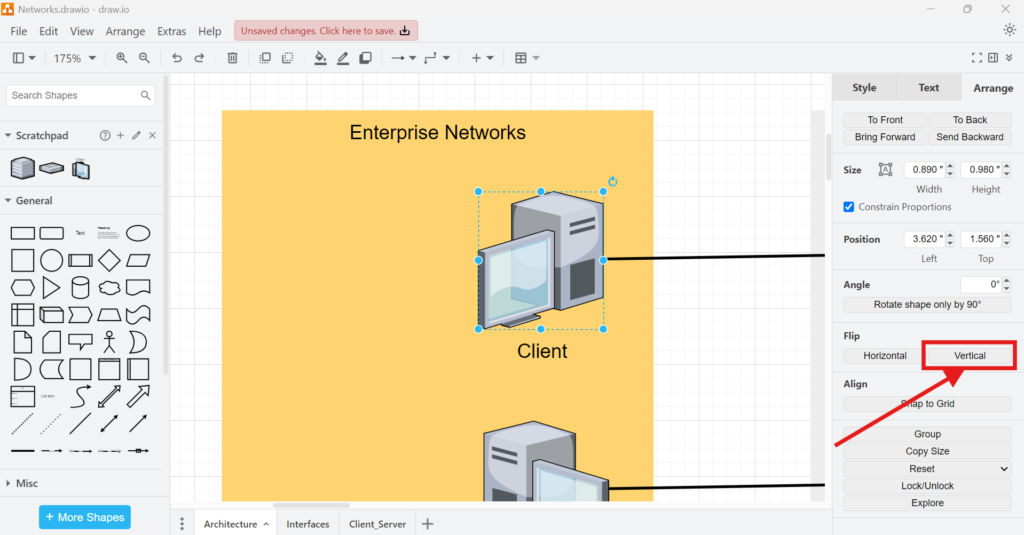
Alt text: draw.io Arrange sidebar with the Vertical flip option highlighted.
The element now appears vertically mirrored.
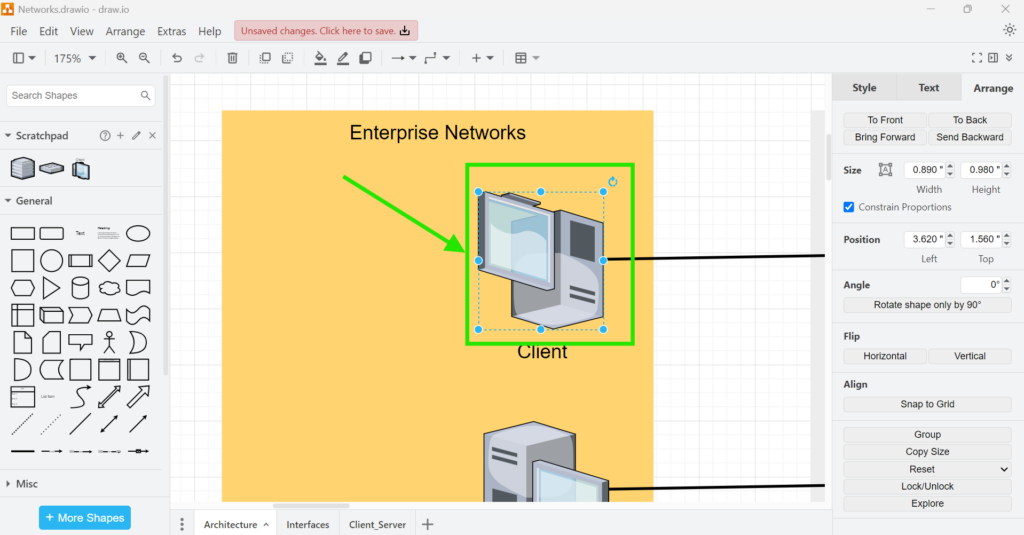
I use Flip Vertical when I need to reverse an element from top to bottom rather than from left to right.
Rotate an Element to a Specific Angle
A flip mirrors an element. However, sometimes I need more precise control. In that case, I rotate the element.
First, I select it.
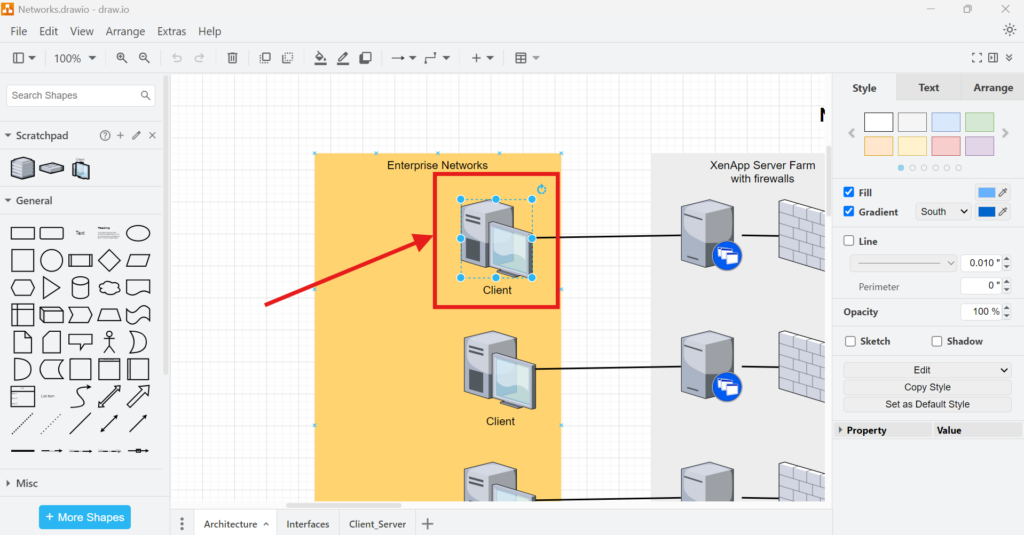
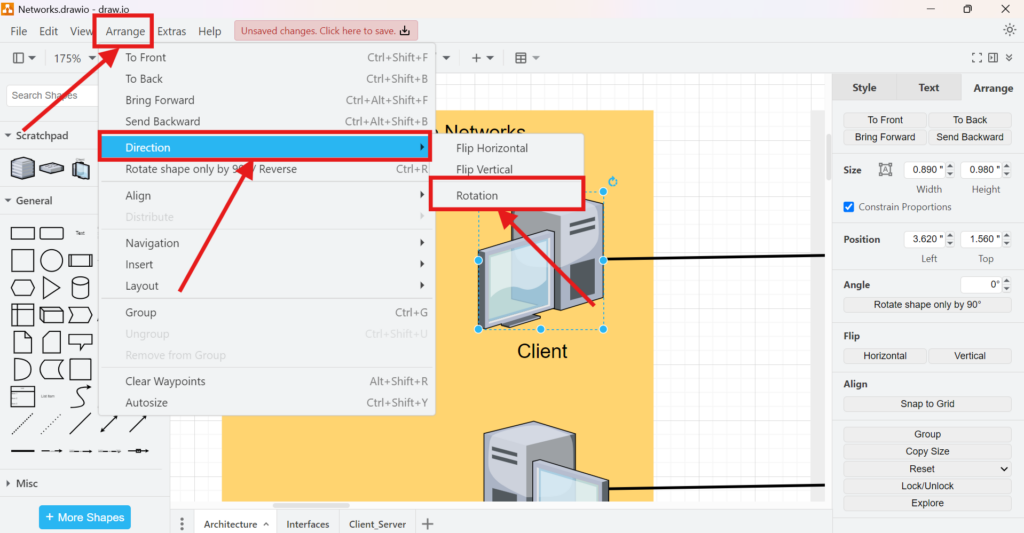
Next, I open Arrange, select Direction, and choose Rotation.
draw.io then lets me enter a rotation value between 0 and 360 degrees. For example, I can enter 113 degrees and apply the value.
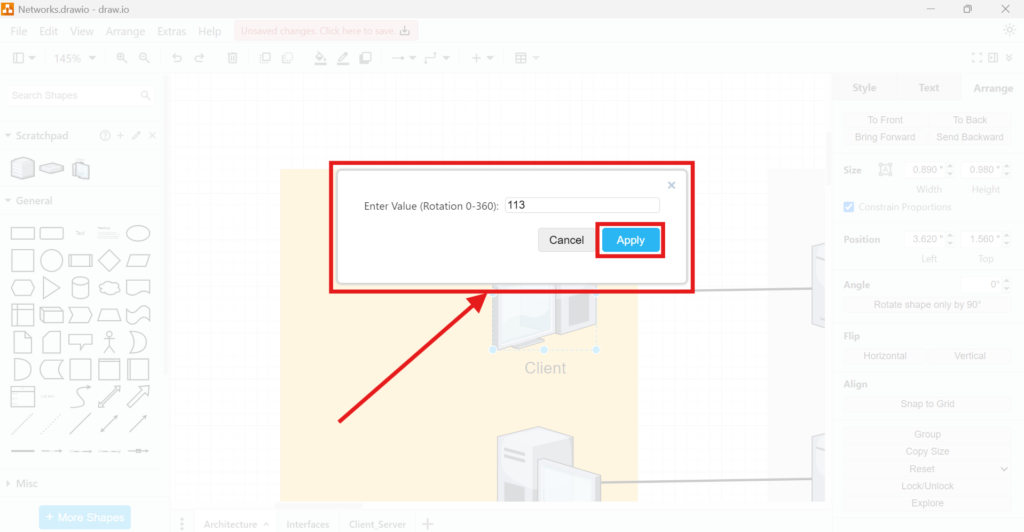
Rotation gives me precise control when horizontal or vertical flipping does not produce the direction I need.
Rotate an Element Directly
I can also rotate an element directly on the canvas. After I select the element, I drag its circular rotation handle until I reach the direction I want.
This method works well when I want to adjust the angle visually instead of entering an exact number.
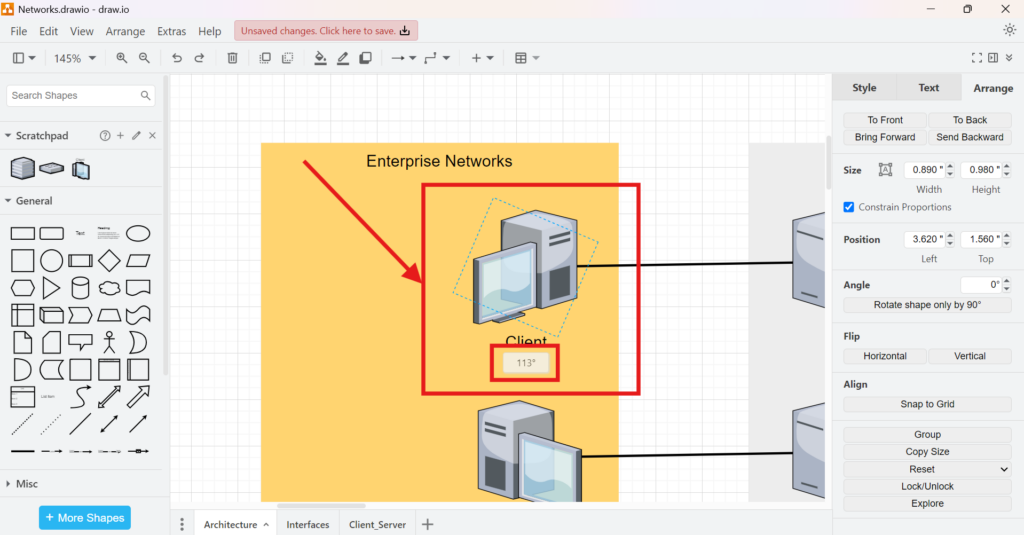
Set the Angle in the Arrange Sidebar
Finally, I can control the rotation from the Arrange sidebar. I enter the required value in the Angle field.
The sidebar also gives me a convenient option for rotating the shape in 90-degree increments.
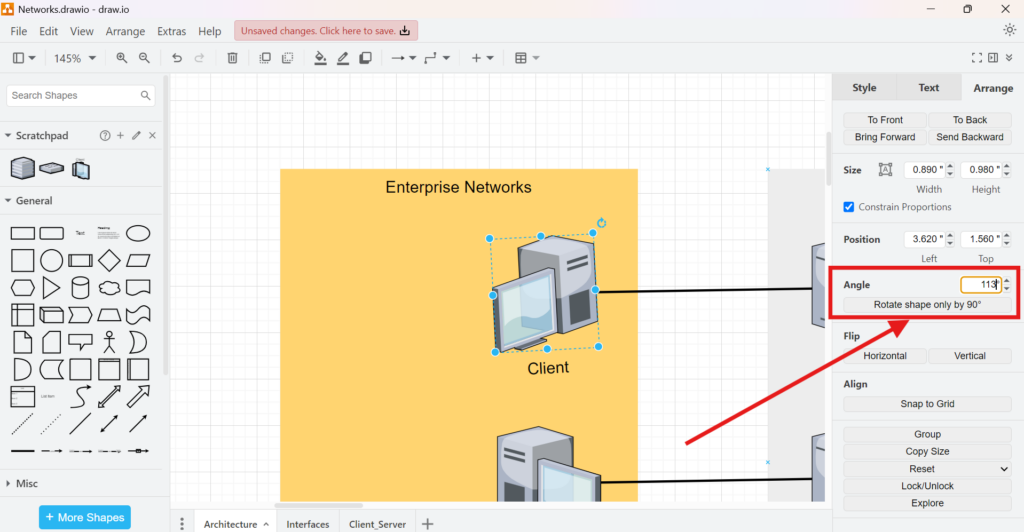
After I set the angle, draw.io displays the element in its new direction.
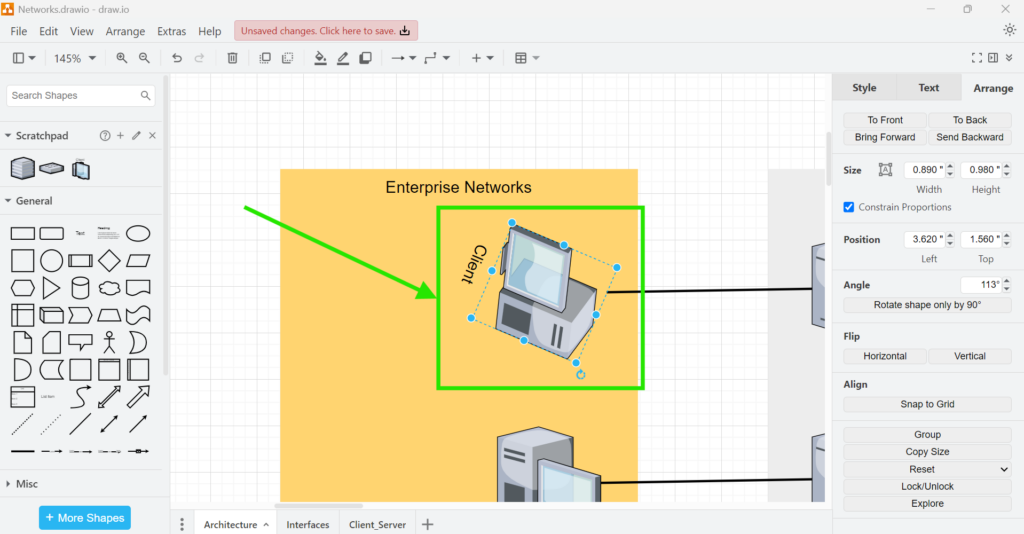
Flip or Rotate: Which Option Should I Use?
I choose the option according to the type of change I need. I use Flip Horizontal for a left-to-right mirror image. I use Flip Vertical for a top-to-bottom mirror image. However, I use Rotation when I need a specific angle.
Flipping changes the orientation of an element, while rotation changes its angle.
This distinction matters when I work with directional symbols, technical diagrams, architecture diagrams, or other layouts where orientation communicates meaning.
Conclusion
Changing the direction of an element in draw.io requires only a few steps. I can flip an element horizontally or vertically through the Arrange menu or the right sidebar. In addition, I can rotate it to an exact angle or adjust the rotation directly on the canvas.
These controls help me correct orientation quickly while keeping the existing element and diagram structure intact.