

Static diagrams can explain ideas clearly. However, connector animations add more movement and focus. In this guide, I explain How to Add and View Connector Animations in draw.io. You’ll learn how animations show flow, guide attention, and make process steps easier to follow. As a result, your diagrams can feel more dynamic and easier to understand.
Prefer watching instead of reading? Here is the quick video walkthrough:
What is draw.io
draw.io is a free diagramming tool. I use it to create flowcharts, process diagrams, and network layouts. It runs in a web browser, so I don’t need to install anything. Moreover, it saves diagrams in various formats. That flexibility makes it a top choice for my visual projects.
What Are Connector Animations in draw.io?
Connector animations add visible movement to connections between diagram elements. The connector appears to move from its source toward its target. Therefore, I can emphasize the direction of a process or information flow.
I use connector animations when movement or direction carries important meaning in my diagram.
For example, animations can support workflows, system flows, supply chains, and other directional diagrams. However, I use them selectively. Too many moving connectors can distract viewers and consume additional device resources.
How to Add and View Connector Animations in draw.io
Step 1: Select the Connector
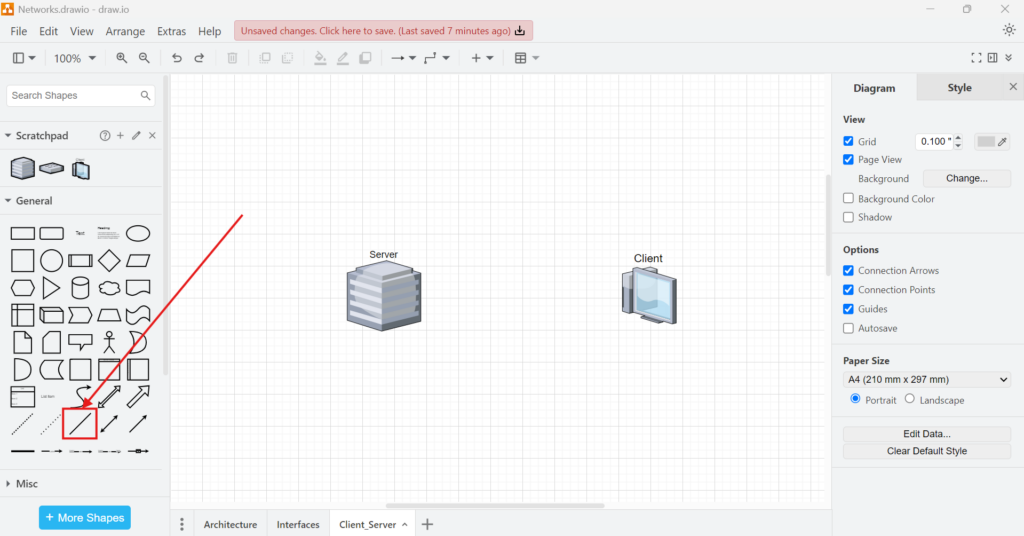
First, I select the connector that I want to animate. I can also select several connectors at once.
If I want every connector, I right-click an empty canvas area. Then, I select Select Edges.
I must select the connector before I can apply its flow animation settings.
Step 2: Connect the Elements
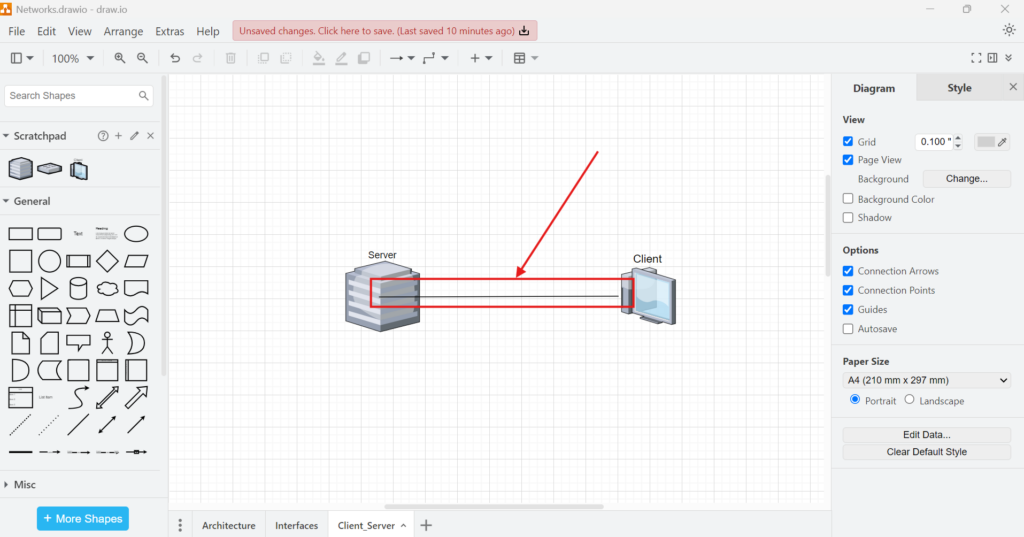
Next, I check whether the connector links the intended diagram elements. The connection should represent the direction that I want to communicate.
This point matters because the default animation moves from the connector source toward its target.
A correctly connected source and target give the animation a clear directional meaning.
Step 3: Enable Flow Animation
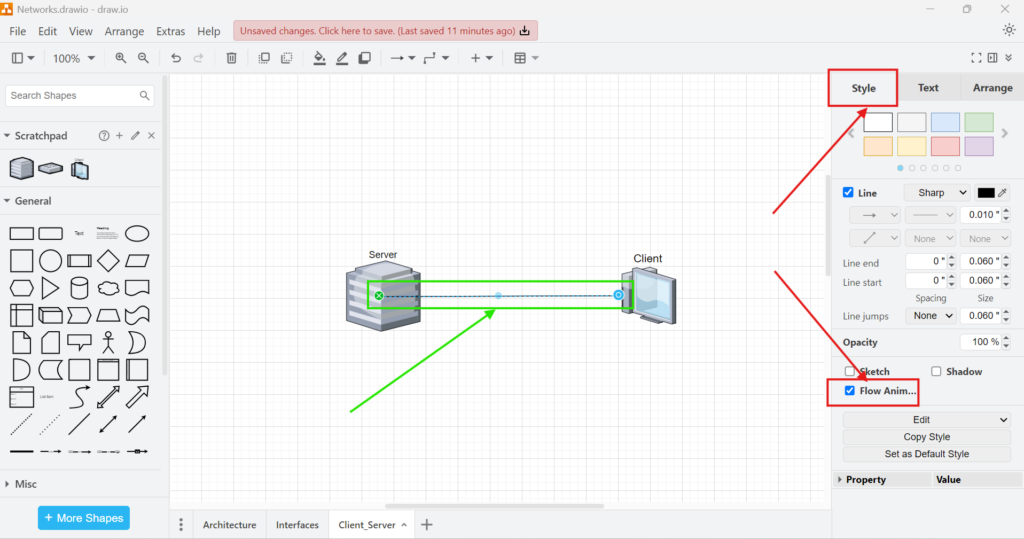
I keep the connector selected and open the Style tab in the format panel. Then, I enable Flow Animation.
The connector now uses animated movement to visualize its direction. In addition, current draw.io versions provide a Pattern setting for changing the animation pattern.
Enabling Flow Animation adds the persistent animation style directly to the selected connector.
Step 4: Activate Animations View
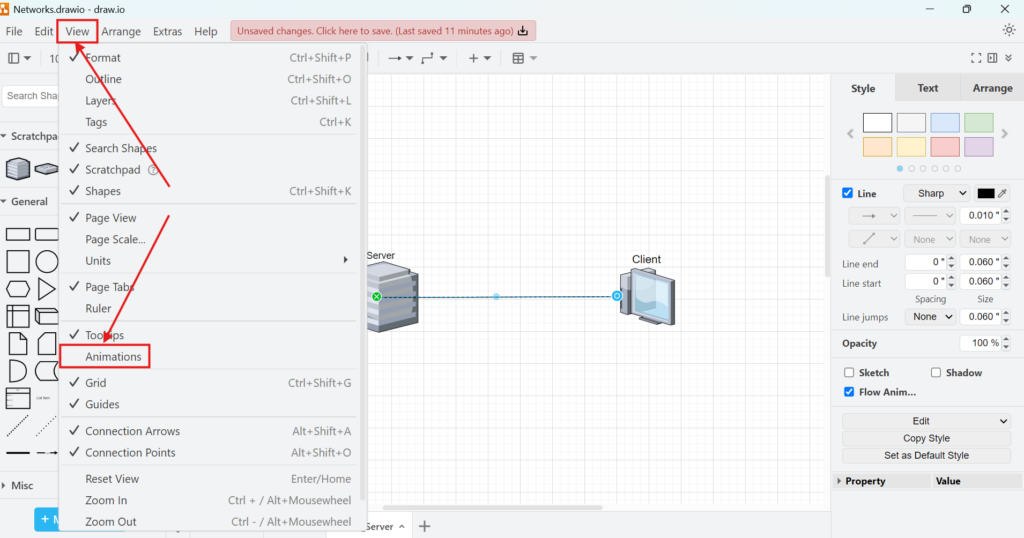
I also check whether draw.io currently displays animations in the editor.
In the Classic interface, I select View > Animations. In Simple Mode or the Sketch theme, I use the toolbar menu. Then, I select Settings > Animations.
The Animations setting controls whether I see the visual movement while working in the editor.
Turning this view off does not remove Flow Animation from the connector. Therefore, I can temporarily hide movement while editing without changing the connector style.
Step 5: See the Result
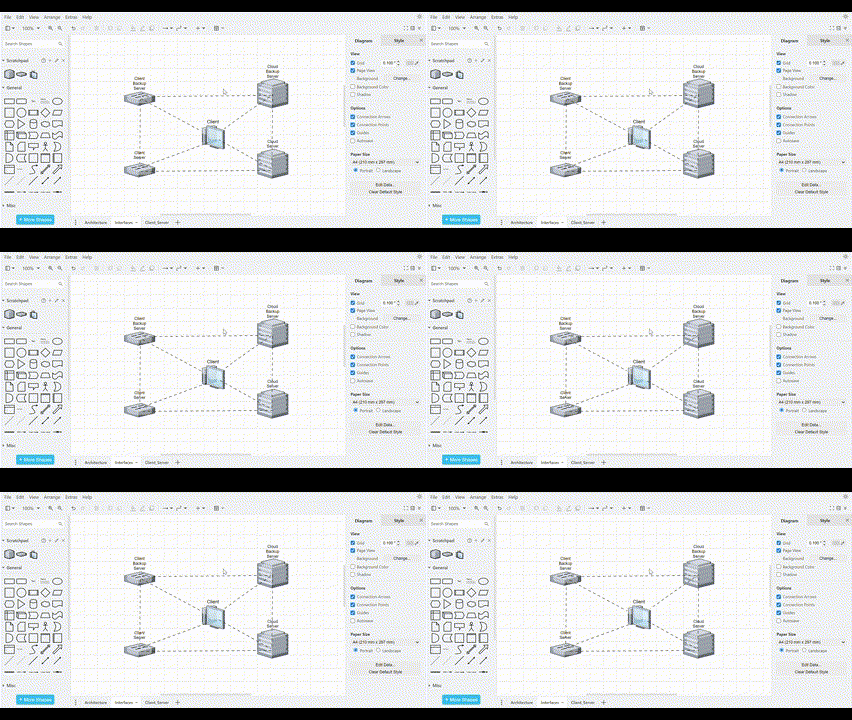
I now look at the animated connector. By default, its movement runs from the source element toward the target element.
Therefore, I can immediately check whether the animation communicates the intended direction.
The moving connector makes directional flow visible without requiring additional explanatory elements.
Showing Animated Connectors Outside draw.io
If I want to publish the animation, I need an output format that preserves movement. draw.io supports animated connectors in SVG exports. In the article How to Export a Diagram to SVG in draw.io, I’ll show you how to export from draw.io to SVG.
In addition, draw.io introduced Animated GIF export in 2026. I can select File > Export as > Animated GIF for diagrams with animated connector flows.
I use SVG or Animated GIF when the connector movement must remain visible outside the draw.io editor.
Final Thoughts
Connector animations help me communicate directional movement directly inside a diagram. First, I select and verify the connector. Then, I enable Flow Animation and make sure animations remain visible.
If necessary, I also adjust duration, timing, and direction. How to add and view connector animations in draw.io therefore combines connector styling with the editor’s animation display setting.
What’s Next?
Now that I know how to add and view connector animations in draw.io, I can improve the visual style of my diagrams next. Animations can guide attention, but styles help me create clarity, consistency, and a more professional look. In the next article, I’ll explain Mastering Styles in Draw.io. You’ll learn how styles affect shapes, lines, text, and colors. Click below to continue and make your draw.io diagrams clearer and more polished.
Create Stronger Requirements Work with Practical Tools
Requirements engineering becomes clearer when I use tools that support visual thinking, documentation, task management, and process modeling. Therefore, I use draw.io to create diagrams, Confluence to organize knowledge, Jira to manage requirements-related work, and Camunda to model business processes. Each tool helps me handle complexity in a practical way. As a result, I can connect ideas, decisions, tasks, and workflows more effectively. In the main article on Requirements Engineering Tools, I show how these tools work together and help me build a clearer requirements workflow.