
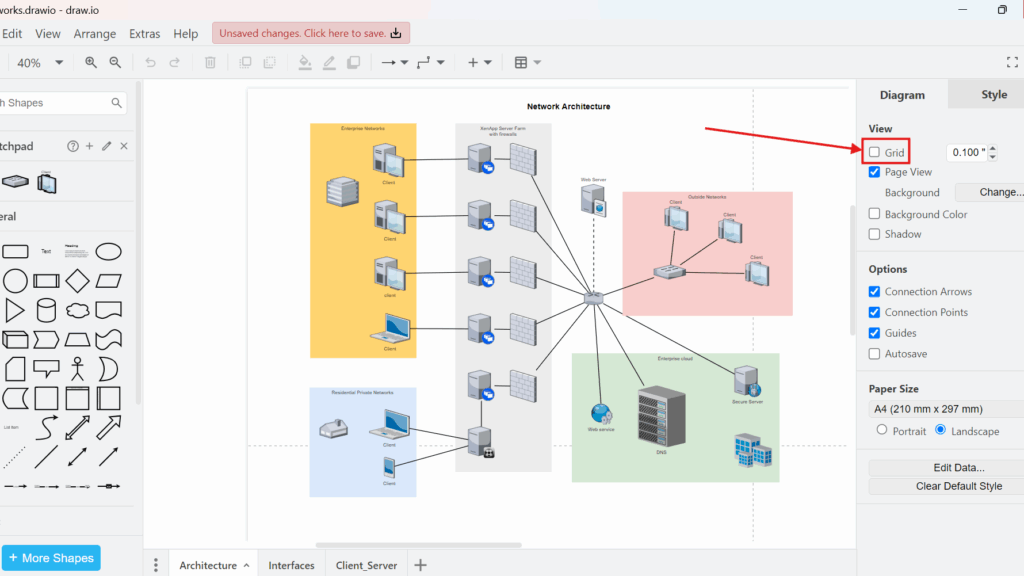
Accurate positioning makes diagrams easier to read. I often struggled with alignment until I used the grid view in draw.io. It helps me place shapes more precisely and create cleaner layouts. In this guide, I explain How to activate the grid view in draw.io so you can align objects faster and design diagrams with more confidence.
Quick Answer
I usually activate the grid through the draw.io Diagram panel:
- I click an empty area of the drawing canvas.
- I open the Diagram tab in the panel on the right.
- I select Grid under View.
- I check the canvas for evenly spaced grid lines.
Alternatively, I select View and then Grid from the menu. On Windows and Linux, I can also press Ctrl+Shift+G.
The Diagram panel gives me the clearest and most reliable way to control the grid.
What the Grid Does
The grid displays a regular pattern of horizontal and vertical lines across the drawing canvas. I use these lines as visual reference points. In addition, draw.io snaps nearby shapes and connectors to the grid when I move them.
Consequently, the grid helps me maintain:
- Consistent distances between shapes
- Straight rows and columns
- Predictable connector positions
- Balanced diagram structures
- Repeatable placement increments
However, the grid does not become part of the diagram itself. Instead, it supports my work inside the editor.
By default, draw.io omits the editor grid from printouts and exported images.
I can include it through certain export settings. However, I leave it out when I want a clean final diagram.
Method 1: Activate the Grid in the Diagram Panel
I prefer this method because the Diagram panel also contains the grid size and color controls.
First, I click an empty area of the canvas. This action clears my current selection. The panel on the right then shows settings for the complete diagram instead of settings for one object.
Next, I find the View section in the Diagram tab. I then locate the Grid checkbox.
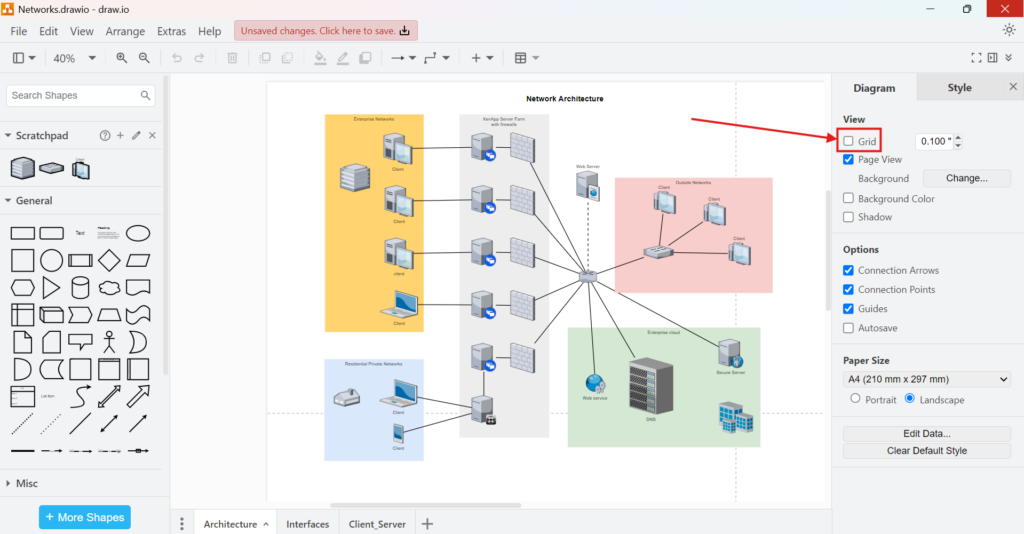
Finally, I select Grid. The canvas updates immediately. I do not need to restart the editor or reload the diagram.

When I see the grid lines and a selected Grid checkbox, I know that the grid is active.
I clear the checkbox when I want to hide the grid again. Therefore, the same control activates and deactivates the feature.
Method 2: Activate the Grid Through the View Menu
In the Classic editor theme, I can also activate the grid from the main menu.
First, I open View. Next, I select Grid. A checkmark beside the command indicates that draw.io currently displays the grid.

The exact appearance of the menu depends on my selected editor theme. For example, Simple, Minimal, Sketch, Atlas, and Classic arrange some controls differently. Nevertheless, I can always use the Grid setting in the Diagram panel when I cannot find the menu command.
Method 3: Use the Keyboard Shortcut
When I work with the keyboard, I press Ctrl+Shift+G to toggle the grid on Windows or Linux.
The shortcut works as a toggle. Therefore, the first press shows the grid, while the next press hides it.
I use the shortcut only when the editor has focus. Otherwise, the browser, operating system, or another application may intercept the key combination. If that happens, I use the Diagram panel instead.
Change the Grid Size
After I activate the grid, I can adjust its spacing.
First, I click an empty area of the canvas. Next, I open the Diagram tab. I then change the value beside Grid.
A smaller value creates tighter grid intervals. By contrast, a larger value creates wider intervals. The displayed unit can depend on my diagram settings. For example, draw.io may show points, inches, or millimeters.
I choose the spacing according to the diagram:
- I use a smaller interval for compact interface models.
- I use a medium interval for flowcharts and process diagrams.
- I use a larger interval for architecture overviews and presentation graphics.
However, I avoid a grid that creates unnecessary visual noise. I only need enough detail to support accurate placement.
Change the Grid Color
I can also change the grid color from the Diagram panel. I select the color control beside the grid value. Then, I choose a color from the palette or enter a specific color value.
I prefer a grid with clear but restrained contrast. A very dark grid competes with the diagram. Conversely, a very light grid becomes difficult to see.
Therefore, I choose a color that remains visible without drawing attention away from the shapes and connectors.
Move an Object Without Snapping
Sometimes, I need to position one object between grid points. I do not need to disable the entire grid for this task.
Instead, I hold Alt while I move the shape or connector. This action temporarily bypasses grid snapping and alignment guides. When I release Alt, draw.io restores the normal snapping behavior.
If I only need one precise adjustment, I hold Alt while I move the object.
In addition, I can select a grid-aligned shape and press Shift with an arrow key. Draw.io then moves the shape by one grid increment in the chosen direction.
Grid, Guides, and Page View
I treat the grid, guides, and page view as separate features.
The grid creates a regular coordinate pattern across the canvas. Guides appear when I move an object near another object or the center of a page. They help me align edges, centers, and spacing. Meanwhile, Page View shows the boundaries of printable pages.
These features can appear at the same time. Therefore, page boundaries or colored alignment lines do not indicate a problem with the grid.
I use the grid for regular placement, guides for relative alignment, and Page View for page boundaries.
If I want a continuous grid without visible page divisions, I disable Page View while leaving Grid selected.
Troubleshooting
I Cannot See the Diagram Tab
I first click an empty area of the canvas. If I have selected a shape or connector, the panel displays settings for that object instead.
If the complete panel is hidden, I show it through View and Format Panel. Alternatively, I press Ctrl+Shift+P.
The Grid Checkbox Is Selected, but I Cannot See the Grid
I first zoom in. At a low zoom level, fine grid lines can become difficult to distinguish.
Next, I check the grid color. A grid color that closely matches the canvas can make the lines appear invisible.
Finally, I increase the grid interval. Very small intervals may merge visually at some zoom levels.
The Shortcut Does Not Work
I click the drawing canvas and try again. The editor must have keyboard focus.
If the shortcut still fails, I use the Grid checkbox. Browser settings, operating-system shortcuts, integrations, and embedded versions of draw.io can affect keyboard commands.
Shapes Do Not Snap as Expected
I confirm that Grid remains selected. I also release Alt because holding Alt temporarily disables snapping.
In addition, I watch for page-center guides. A shape near the center of a page may snap to a center guide instead of the nearest grid point.
The Grid Appears in an Export
I inspect the export options. Some export dialogs contain a separate Grid option. If I select that option, draw.io includes the grid in the exported file.
Therefore, I clear the export Grid option when I want the final image or document to show only the diagram.
Frequently Asked Questions
Is the grid active by default?
The answer depends on my editor theme, saved preferences, and draw.io environment. Standard diagram themes often show the grid. However, whiteboard-oriented themes may hide it to create a cleaner canvas.
Does the grid change my diagram?
No. The grid changes how I view and position elements in the editor. It does not add shapes, connectors, or background lines to the diagram.
Does hiding the grid remove my alignment?
Hiding the grid does not move existing objects. However, clearing the Grid checkbox also disables normal grid snapping. I can still use guides, rulers, and alignment commands.
Can I use the grid with an infinite canvas?
Yes. I can disable Page View and keep Grid active. As a result, the grid extends across the continuous drawing canvas without page boundaries.
Should I always use the grid?
No. I use it when consistent spacing matters. However, I may hide it during presentations, free-form brainstorming, or visual reviews. I can restore it whenever I continue editing.
Conclusion
I activate the grid in draw.io through the Diagram panel, the View menu, or Ctrl+Shift+G. I then adjust its size and color when the default settings do not fit my diagram.
For individual exceptions, I hold Alt and move the object without snapping. In addition, I use guides for relative alignment and Page View for print boundaries.
A well-configured grid helps me create orderly diagrams without becoming part of the finished design.
Requirements Engineering Tools: Build a Connected Toolchain
The right tools help me turn ideas into clear, traceable, and actionable requirements. In my overview of Requirements Engineering Tools, I explain how draw.io supports visual modeling, Confluence structures shared knowledge, Jira connects requirements with delivery, and Camunda brings processes to life. Discover how these tools complement each other and where each one fits in a professional requirements workflow.
What’s Next?
Now that I know how to activate the grid view in draw.io, I can align diagram elements more precisely. However, guides give me even more control when I place shapes and connectors. In the next article, I’ll explain How to Activate and Use Guide in draw.io. You’ll learn how guides support cleaner layouts, better alignment, and more structured diagram design. Click below to continue and use guides in draw.io with more confidence.