
Learning to create a jira issue helps me manage project work with more structure. In this guide, I show the process step by step. You will learn how to report bugs, track tasks, and describe work clearly. As a result, your team can stay organized, improve visibility, and keep projects moving forward with more control.
What I Use a Jira Issue For
I use Jira issues to represent work that a team needs to understand, assign, and track.
Depending on the project, an issue can represent a task, bug, story, or another type of work. Therefore, the issue type should match the purpose of the item.
A useful Jira issue makes the work clear enough that another team member can understand what needs to happen and why.
Step 1: Select the Correct Project
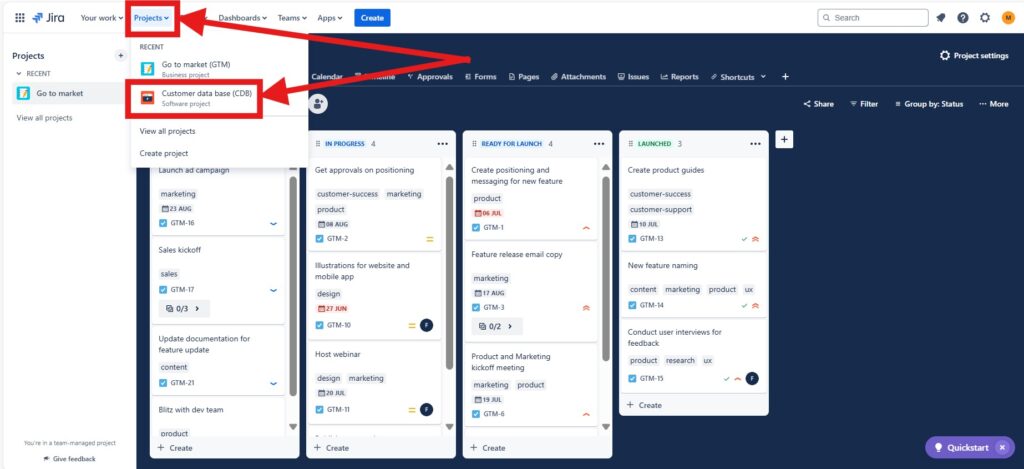
First, I open the Jira project where the new issue belongs.
I use the Projects menu to select the relevant project. This matters because the project determines the board, workflows, issue types, and other settings available to the issue.
Step 2: Open the Project Board
Next, I open the project board.
The board gives me an overview of existing work and its current status. Therefore, I can check whether the new issue already exists or relates to another item.
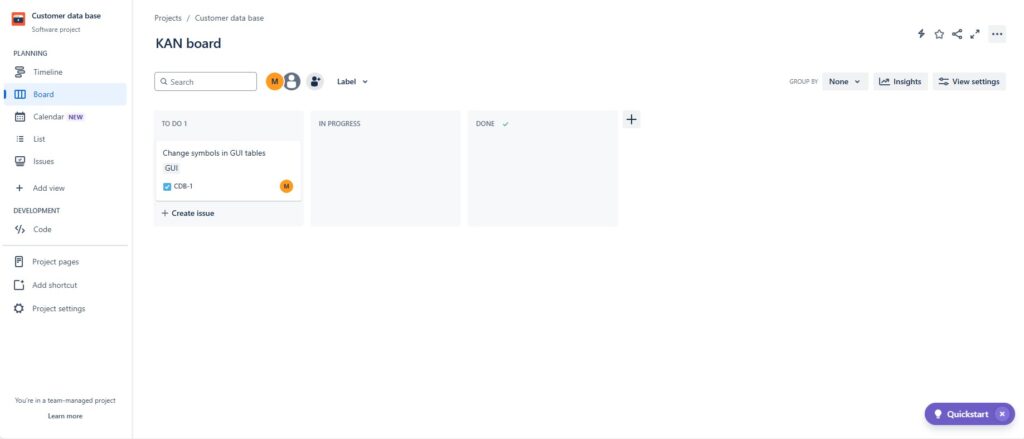
I check the existing project work before creating a new issue so that I avoid unnecessary duplication.
Step 3: Select Create
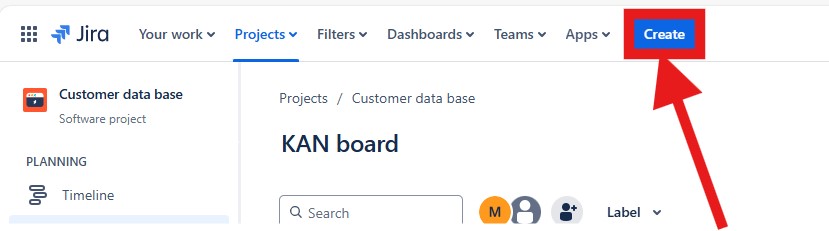
Then I select Create in the Jira navigation.
This opens the issue creation dialog.
Step 4: Define the Basic Issue Information
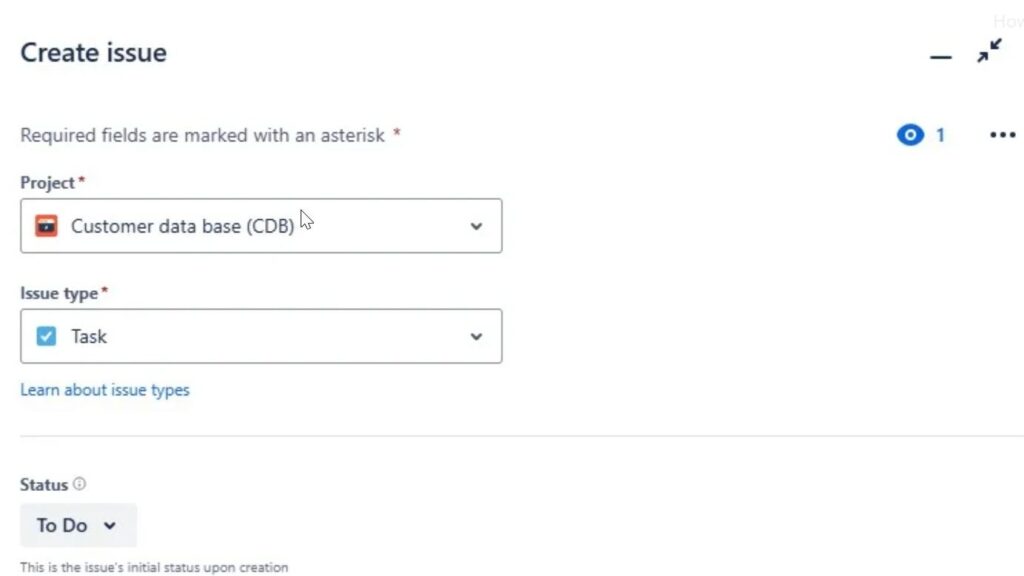
First, I check the project and issue type.
Then I add a concise summary and, where applicable, the initial status.
The summary should describe the work clearly. For example, “Create attribute name” gives more useful information than a vague title such as “Database task.”
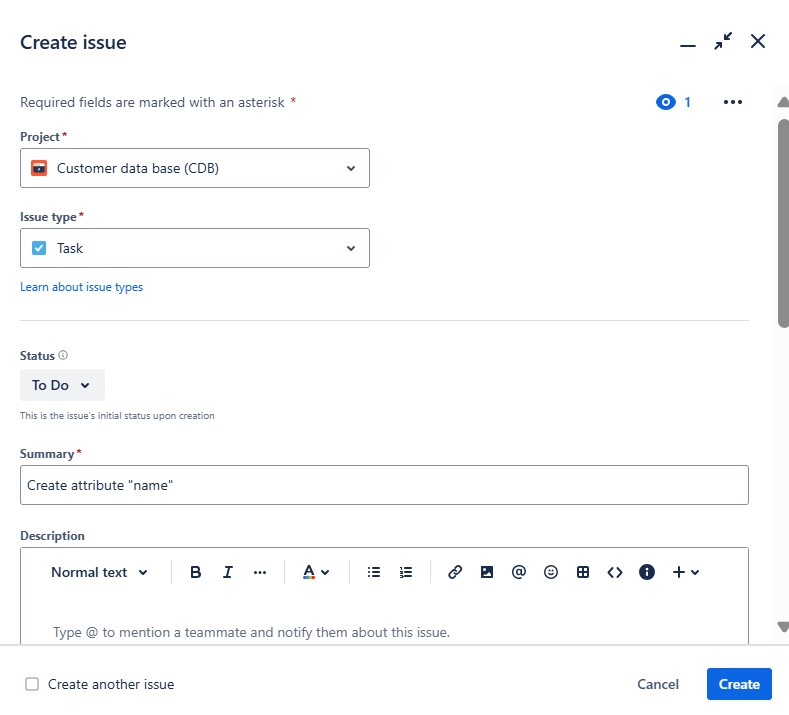
The summary should identify the work without requiring readers to open the full issue first.
Step 5: Add Context and Responsibility
Next, I add the information needed to understand and organize the work.
Depending on the Jira configuration, this can include:
- description,
- assignee,
- labels,
- parent,
- reporter,
- and other project-specific fields.
I use the description to explain the task, relevant context, expected result, or important constraints.
Labels help me classify related work. A parent relationship can place the issue within a larger work structure.
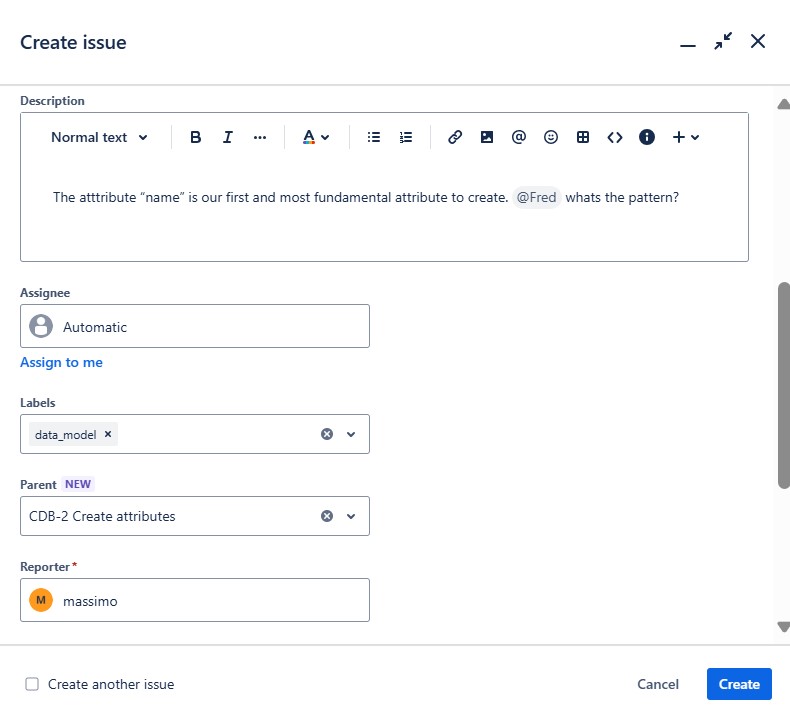
I add enough context to make the issue actionable, but I avoid filling fields that add no practical value.
Step 6: Add Attachments and Issue Relationships
If the work depends on other issues, I can link them.
For example, Jira can represent relationships such as one issue blocking another. I can also attach relevant files or screenshots where they help explain the work.
In addition, I can flag an issue when it has an impediment.
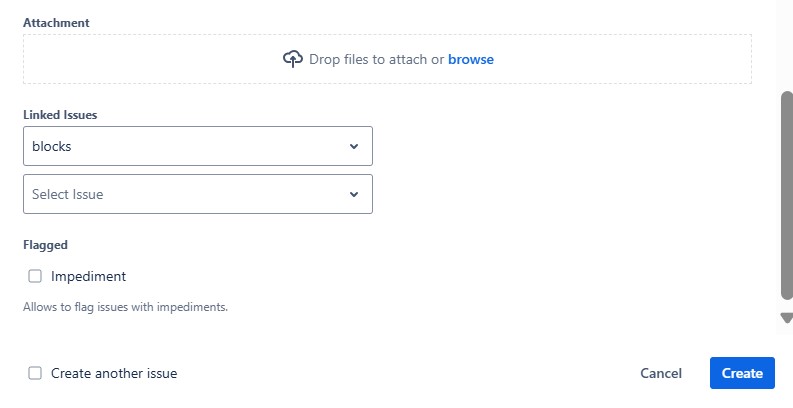
Issue relationships become especially useful in larger projects because they make dependencies visible.
Step 7: Create the Issue
Once I have entered the necessary information, I review the issue.
Then I select Create.
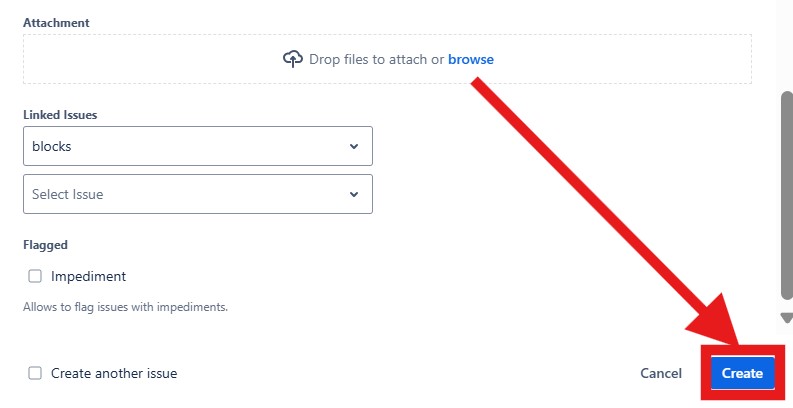
I review the key fields before creation because clear information at the start reduces clarification work later.
Step 8: Review the Created Issue
Finally, I open the new issue and check the result.
I confirm the summary, description, status, labels, parent relationship, and other relevant fields.
Jira also gives me a place to add comments, review history, and update the issue as work progresses.
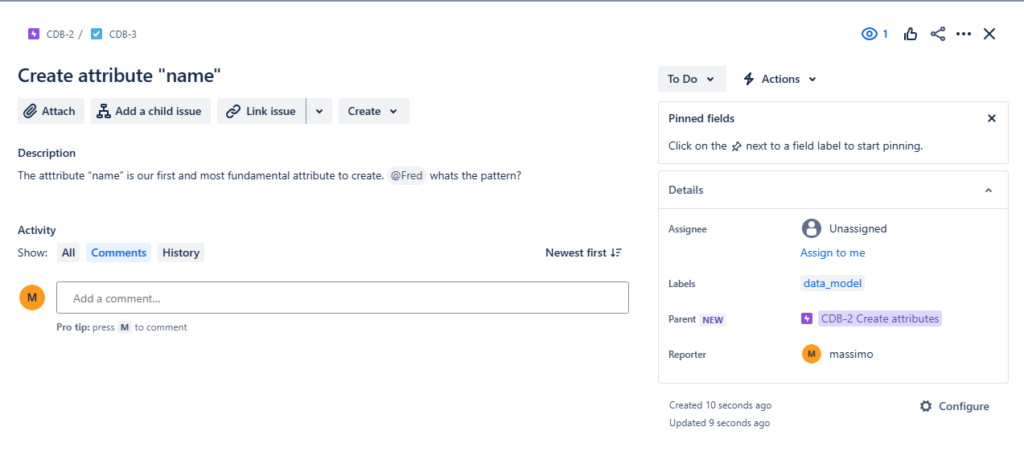
From this point, I can track the issue through its workflow and update it when the work changes.
What Makes a Good Jira Issue
I keep Jira issues useful by focusing on clarity and context.
The issue should explain:
- what needs to happen,
- why the work matters,
- who is responsible,
- how it relates to other work,
- and which information is necessary to complete it.
However, I do not turn every issue into a long document. If extensive requirements, models, or decision histories exist elsewhere, I link them instead of duplicating them.
A good Jira issue contains enough information to support action while staying focused on the work it represents.
Conclusion
To create a Jira issue, I select the correct project, open the creation dialog, define the work, add relevant context and relationships, and then create the issue.
Afterwards, I review it and keep it current as the work progresses.
A well-structured Jira issue connects a clear piece of work with the context, responsibility, and relationships needed to manage it effectively.
What’s Next?!
Now that I know how to create a Jira issue, I want to work faster inside Jira. Therefore, the next step is How to Use Shortcuts in Jira to Boost Your Productivity.
In that article, I explain how Jira shortcuts help me move through common actions with less effort. You will learn how shortcuts save time, reduce repeated clicks, and make daily project work smoother. In addition, you will see how small navigation improvements can make Jira feel easier and more efficient.
Click the next article to discover how Jira shortcuts can speed up your workflow and help you manage project work more confidently.
Requirements Engineering Tools: Create a Strong Foundation for Better Projects
Requirements engineering works best when I connect ideas, documentation, tasks, and processes clearly. Therefore, I use draw.io to visualize concepts, Confluence to structure knowledge, Jira to manage work, and Camunda to model business processes. Together, these tools help me move from early requirements to practical project execution.
In the main article on Requirements Engineering Tools, I show how this toolset improves communication, traceability, collaboration, and delivery. Click through to discover how draw.io, Confluence, Jira, and Camunda can support your requirements engineering workflow.