
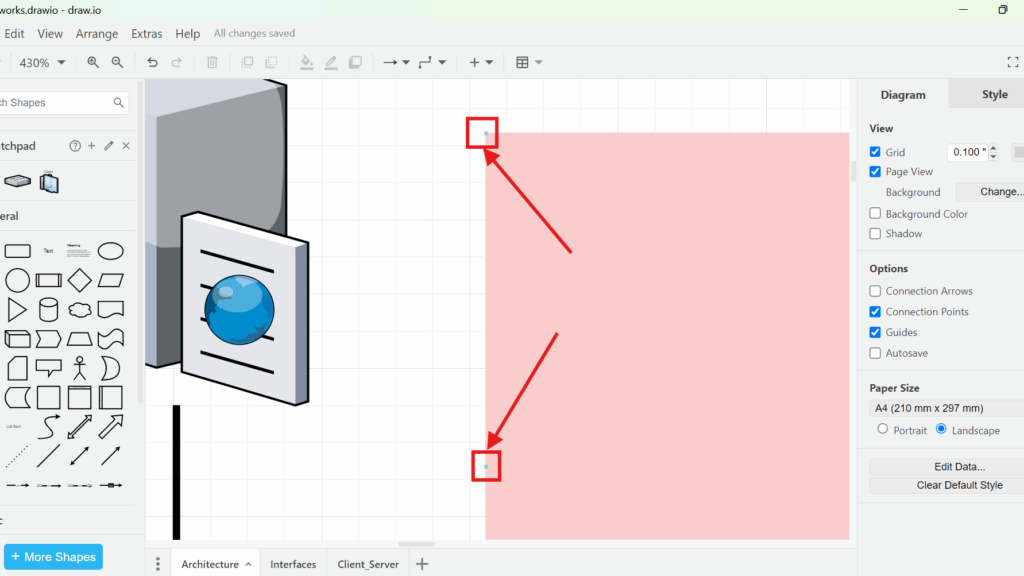
Connections can make or break a diagram. When I first used draw.io, my lines often felt messy and hard to control. Then I learned how Connection Arrows and Points in draw.io work. They help me attach shapes clearly, move elements safely, and show relationships with more precision. In this post, I show how these tools improve diagram structure and speed up my workflow.
Connection Arrows and Connection Points: What Is the Difference?
Connection arrows and connection points in draw.io solve related problems, but they serve different purposes.
Connection arrows appear around a shape and give me a quick way to start a new connector. Therefore, I mainly use them when I want to connect shapes without selecting another connector tool first.
Connection points define positions where a connector can attach to a shape. Consequently, they give me more control over the exact location of a connection.
I use connection arrows for fast connector creation and connection points for precise connector placement.
This distinction becomes especially useful in network diagrams, process models, architecture diagrams, and other diagrams with many connections.
How I Enable Connection Arrows in draw.io
I can activate connection arrows from the View menu.
First, I open View in the main menu. Then, I select Connection Arrows. I can also use the keyboard shortcut Alt + Shift + A.
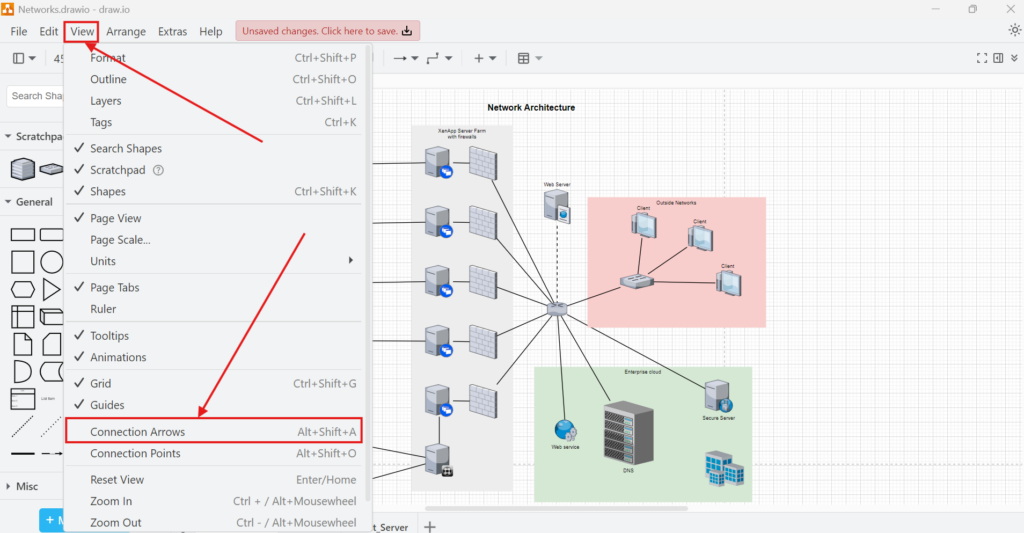
The check mark beside the option shows that connection arrows are active.
Alternatively, I can control the same setting from the Diagram panel on the right side of the editor. Under Options, I activate Connection Arrows.
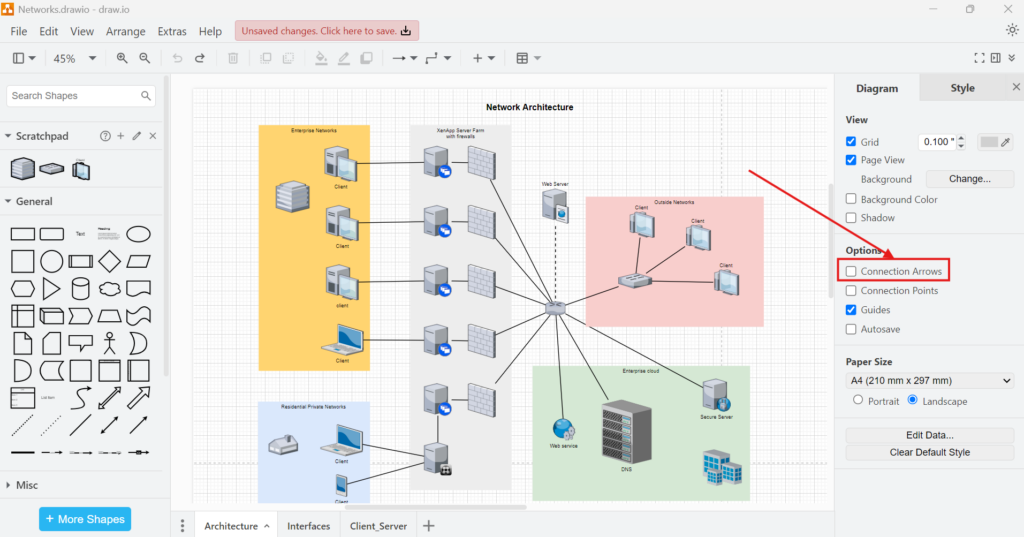
Both controls change the same feature. Therefore, I choose whichever method fits my workflow.
How I Use Connection Arrows
Once I activate the feature, draw.io displays small directional arrows when I work with suitable shapes.

I can use one of these arrows to start a connector. I then move the connector toward another shape and complete the connection.
This approach is useful when I build a diagram step by step. For example, I can add a server, create another component, and immediately connect the two without switching repeatedly between tools.
Connection arrows reduce the number of actions I need when I create new relationships between shapes.
However, speed is not always my main concern. In dense diagrams, I often need more control over the exact attachment position. In that case, I use connection points.
How I Enable Connection Points in draw.io
I activate connection points in a similar way.
First, I open View. Then, I select Connection Points. The keyboard shortcut shown in draw.io is Alt + Shift + O.
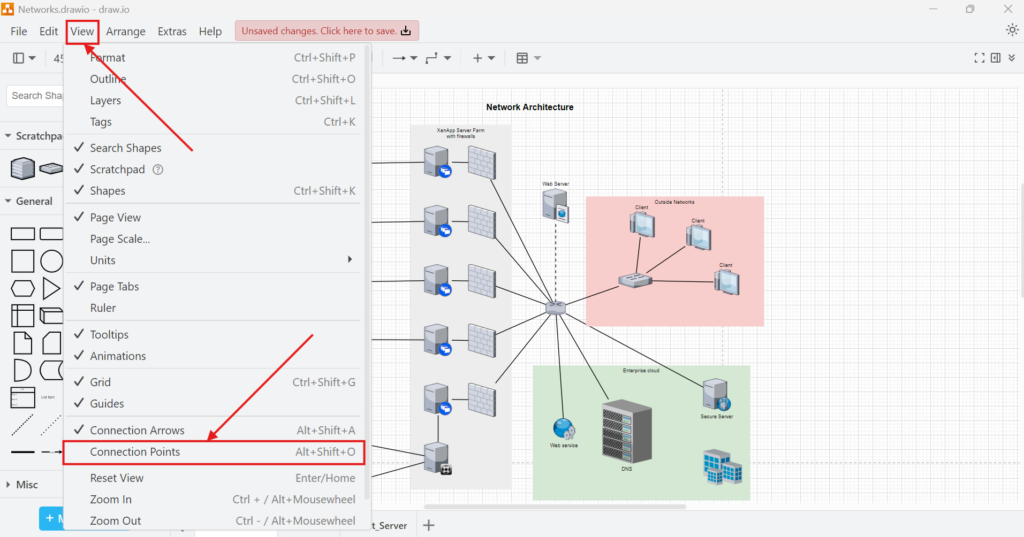
This shortcut differs from the shortcut for connection arrows. Therefore, I keep the two commands separate:
- Connection Arrows: Alt + Shift + A
- Connection Points: Alt + Shift + O
I can also activate connection points from the Diagram panel. Under Options, I select Connection Points.

Again, the menu and sidebar control the same setting.
What Connection Points Show Me
When connection points are active, draw.io can display attachment positions along the edge of a shape.

These points become especially useful when several connectors meet the same object. Instead of letting all lines attach wherever draw.io determines a suitable position, I can target a particular point.
For example, I may want incoming connections on the left side and outgoing connections on the right side. Likewise, I may want connectors distributed across a large container instead of concentrated in one location.
As a result, the diagram becomes easier to read.
Connection points help me control where a connector meets a shape instead of only controlling which shape it connects to.
The next image shows individual connection points more clearly.
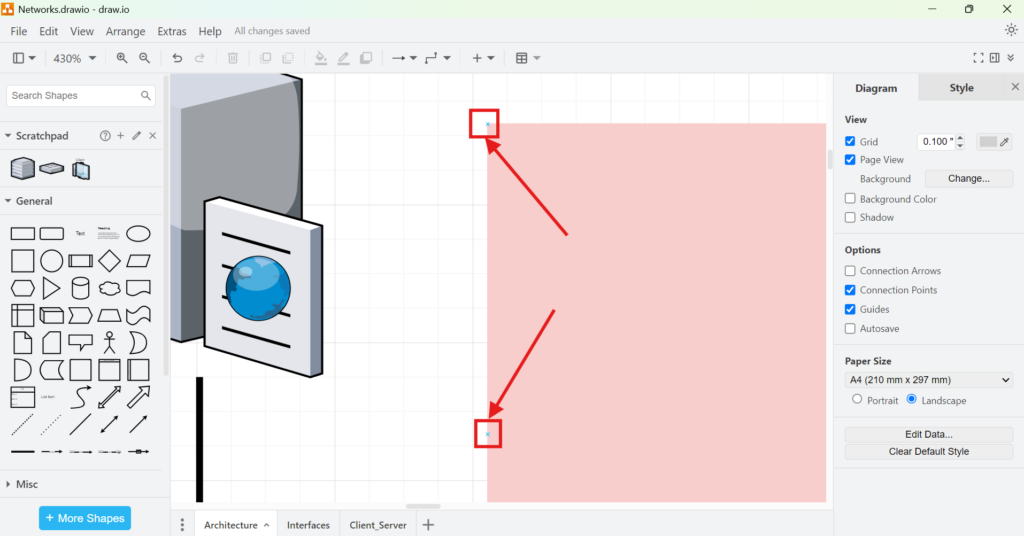
At normal zoom levels, these points can appear very small. Therefore, zooming in can help when I need to create a precise connection.
Fixed Placement Matters in Complex Diagrams
The difference between connecting to a shape and choosing a specific connection point may seem minor in a simple diagram. However, the difference becomes important as a diagram grows.
Suppose several systems connect to one central component. If every connector enters the component at nearly the same position, the lines can overlap. The relationship may still be technically correct, but the diagram becomes difficult to interpret.
Instead, I can distribute the connectors across suitable points on the shape. Consequently, I create visual separation without changing the underlying relationships.
This is particularly helpful when I work with:
- network architectures
- system context diagrams
- process flows
- UML-style diagrams
- infrastructure diagrams
- diagrams with containers or grouped areas
In each case, connector placement communicates structure as well as relationships.
When I Use Connection Arrows
I mainly keep connection arrows enabled when I create the basic structure of a diagram.
They work well when I add one element after another and want to connect them immediately. Therefore, they support a fast modeling workflow.
For example, when I create a simple sequence such as Client → Web Server → Application Server → Database, I can create the shapes and connect them directly.
I do not need precise connection positions at this stage. Instead, I focus on defining the relationships.
When I Use Connection Points
I use connection points when I refine the diagram.
At this stage, I already know which elements connect. However, I may need to improve how the connectors enter and leave each shape.
For example, several servers may connect to the same network device. In that situation, carefully placed connections can prevent unnecessary crossings and make the topology easier to understand.
Therefore, I treat connection points as a layout and communication tool, not merely as a technical drawing feature.
A good connection should show the correct relationship and make that relationship visually easy to follow.
I Often Use Both Features Together
Connection arrows and connection points are not competing features.
Instead, I often use them during different stages of the same diagram.
First, I use connection arrows to build relationships quickly. Then, I use connection points to refine important connector positions.
This workflow gives me both speed and control.
For small diagrams, I may never need the second step. However, for larger diagrams, precise connector placement often improves readability significantly.
What I Check When Connections Look Wrong
If a connector behaves differently from what I expect, I first check whether Connection Arrows and Connection Points are enabled.
Next, I zoom in. Small attachment points can be difficult to see at lower zoom levels.
Then, I check where the connector actually terminates. A line may appear visually close to a specific point while attaching somewhere else on the shape.
Finally, I reconsider the layout itself. Connection points can improve routing, but they cannot repair an overcrowded diagram. Sometimes I need to increase the distance between shapes or move a component before adjusting its connectors.
Therefore, I use connection controls together with good diagram structure.
Connection Arrows or Connection Points?
The choice is simple.
If I want to create a connection quickly, I use connection arrows.
If I want to control where that connection attaches, I use connection points.
If I want both speed and precision, I enable both.
Connection arrows help me create relationships faster, while connection points help me present those relationships more clearly.
For simple diagrams, the difference may have little impact. However, in larger diagrams, these controls help me reduce overlapping lines, improve connector routing, and keep the visual structure understandable as the model evolves.
What’s Next?
Now that I know how Connection Arrows and Points in draw.io improve diagram structure, I can make flows even easier to follow. Static connectors show relationships clearly. However, connector animations can guide the viewer through a process step by step. In the next article, I’ll explain How to Add and View Connector Animations in draw.io. You’ll learn how animations work and how they can make complex diagrams more understandable. Click below to continue and bring more movement into your draw.io diagrams.
Turn Requirements Work into a Clear Tool Workflow
Requirements engineering becomes more effective when I use tools that support thinking, documentation, tracking, and modeling. Therefore, I use draw.io to create visual models, Confluence to structure knowledge, Jira to manage requirements-related work, and Camunda to model business processes. Each tool helps me reduce complexity in a different way. As a result, I can connect ideas, decisions, tasks, and workflows more clearly. In the main article on Requirements Engineering Tools, I show how these tools work together and help me build a stronger requirements engineering workflow.