
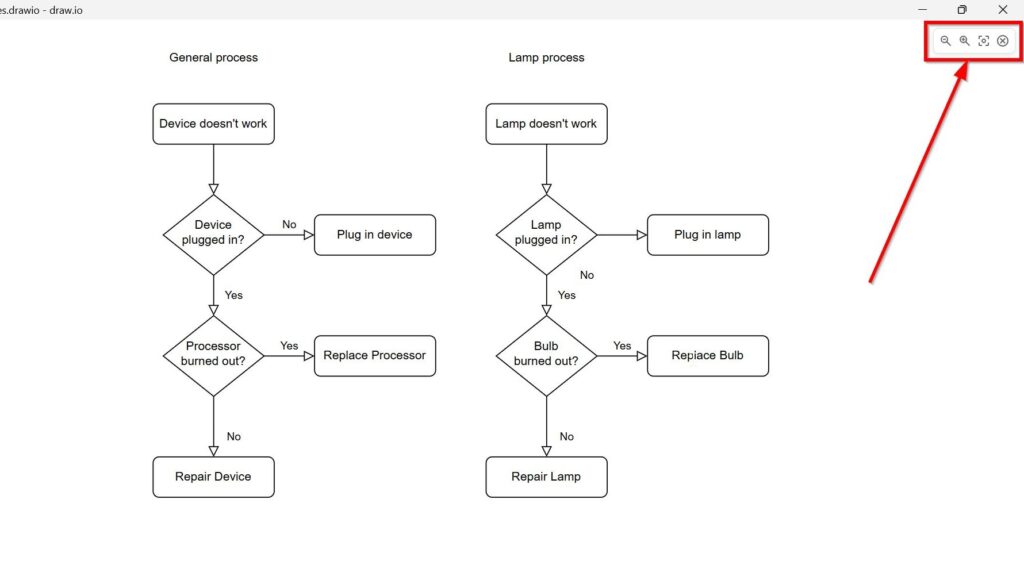
I use draw.io to turn ideas into clear diagrams. However, the editor view can distract during a presentation. Menus, panels, and toolbars help me while I work. But they can also pull attention away from the final diagram. Therefore, I use presentation mode in draw.io. It gives me a cleaner view. As a result, I can present my diagram clearly and guide my audience through each part step by step.
If you would prefer to watch a video on this topic, click here:
What is draw.io
draw.io, also known as diagrams.net, is a free diagramming tool. I use it to create flowcharts, process models, UML diagrams, network diagrams, and many other visual models.
It works with simple drag-and-drop features. First, I add shapes. Then, I connect them with arrows. After that, I add labels and structure the diagram. Because of this, draw.io helps me turn complex ideas into clear visual explanations.
How to Activate the Presentation Mode in draw.io
How to Activate the Presentation Mode in draw.io is useful when I want to show a diagram without the editor controls around it. The mode keeps the diagram in focus and gives me simple tools for zooming, full-screen viewing, and leaving the presentation. Therefore, I use it for meetings, workshops, reviews, and tutorials. In this guide, I show how I activate presentation mode and explain the available controls, so I can present both the complete diagram and important details clearly.
Why I Activate Presentation Mode in draw.io
I use presentation mode when I want my audience to focus on the diagram instead of the editor.
For example, I can first show the complete process. Then, I can zoom into one activity or connection. Afterwards, I can return to the wider view.
Presentation mode helps me explain a diagram without unnecessary interface elements distracting the audience.
How to Activate Presentation Mode in draw.io
I start with the diagram open in the draw.io editor.
Step 1: Open the File Menu
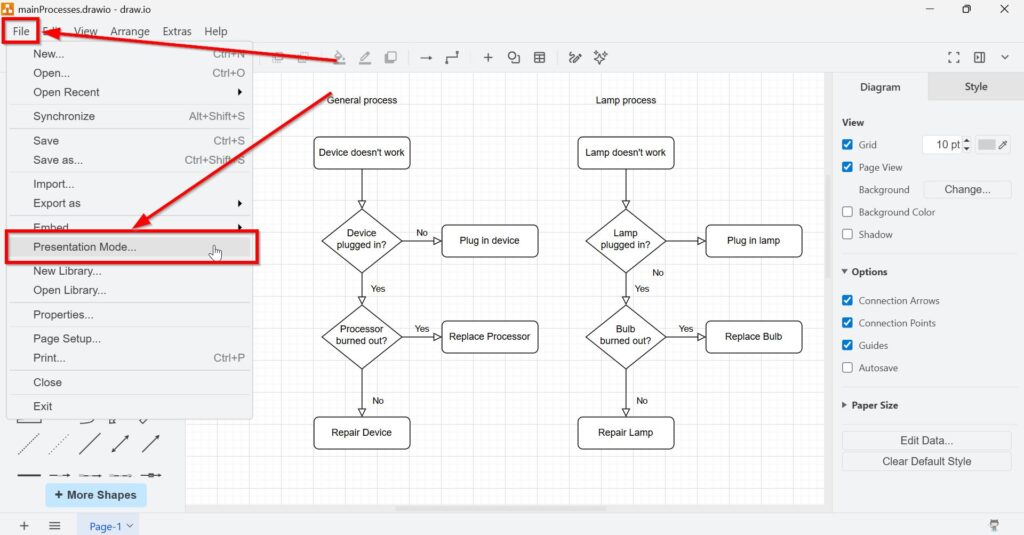
First, I select File from the top menu.
Step 2: Select Presentation Mode
Next, I click Presentation Mode.
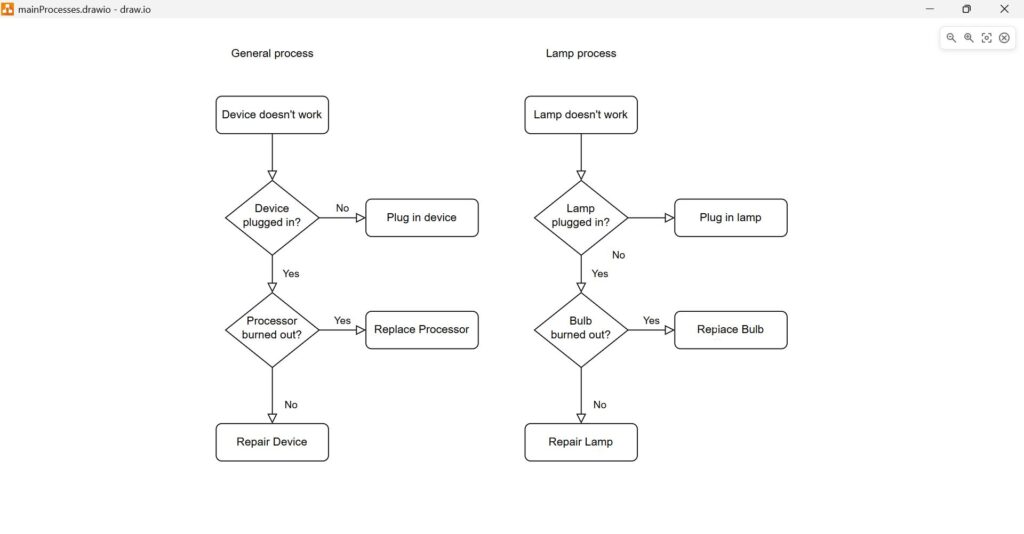
Draw.io then opens the diagram in the presentation view.
The diagram becomes the main focus while the normal editing interface disappears from view.
Step 3: Use the Presentation Mode Controls
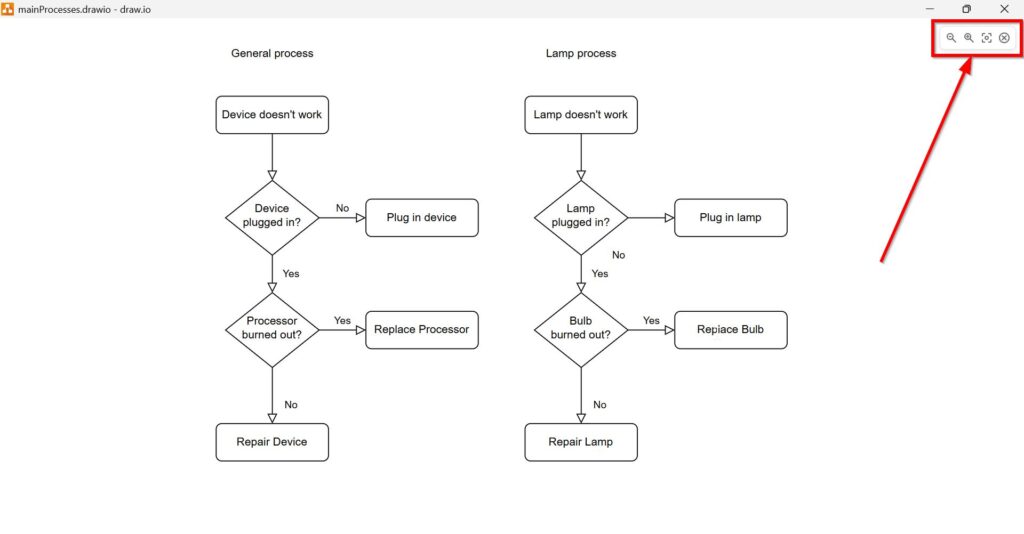
In presentation mode, I use the controls in the upper-right corner.
Zoom Out
I use the minus magnifier to zoom out.
Therefore, I can show more of the diagram and explain the overall context.
Zoom In
I use the plus magnifier to zoom in.
This helps when I want to discuss a specific activity, label, gateway, or connection.
Full Screen
I switch to full-screen mode when I want to remove additional browser or window distractions.
This works especially well in meetings, workshops, and recorded tutorials.
Exit
I use the X to leave presentation mode.
Afterwards, I return to the normal draw.io editor and can continue editing the diagram.
When I Use Presentation Mode
I use the mode for process reviews, stakeholder meetings, workshops, training, and tutorials.
During a process review, for example, I first show the complete flow. Next, I zoom into important decisions or handoffs.
If someone requests a change, I exit the presentation and update the diagram in the editor.
Moreover, presentation mode works well for screen recordings because the audience sees less interface clutter.
I use presentation mode whenever I want to explain the model rather than edit it.
Final Thoughts
To activate presentation mode in draw.io, I open File and select Presentation Mode.
I can then zoom in, zoom out, switch to full screen, and return to the editor when necessary.
Presentation mode gives me a simple way to present draw.io diagrams clearly while keeping attention on the content.
What’s Next?
Now that I know how presentation mode in draw.io helps me show diagrams more clearly, I can move back into practical modeling. Presenting diagrams matters, but creating meaningful models matters just as much. In the next article, I’ll explain Model UML Classes in draw.io. You’ll learn how UML classes help describe system structures, objects, and relationships in a clear visual way. Click below to continue and model UML classes in draw.io step by step.
Build a Stronger Workflow with Requirements Engineering Tools
Requirements engineering becomes clearer when I use tools that support visual thinking, documentation, coordination, and process modeling. Therefore, I use draw.io to create diagrams, Confluence to structure knowledge, Jira to manage requirements-related work, and Camunda to model business processes. Each tool helps me handle a different part of the workflow. As a result, I can connect ideas, decisions, tasks, and processes more effectively. In the main article on Requirements Engineering Tools, I show how these tools work together and help me build a stronger requirements engineering process.