
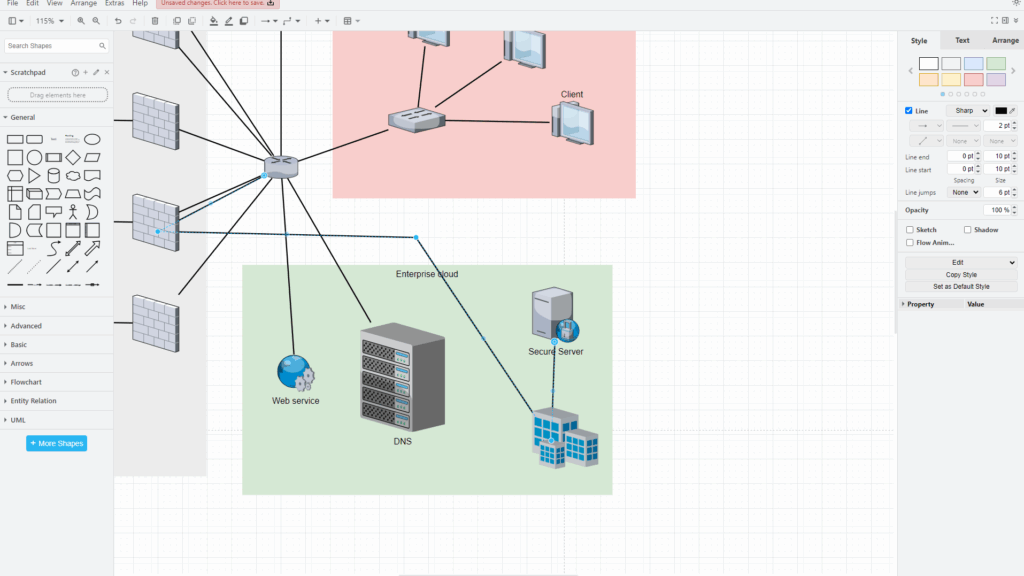
Have you ever struggled to align connectors perfectly in a flowchart? I know I have. When diagrams get complex, lines crisscross, and clarity fades. Fortunately, draw.io offers a powerful feature called waypoints. With waypoints, I can precisely control how connectors flow between elements. Let’s explore why this feature is a game changer and how to use it step by step.
What Are Waypoints in draw.io?
Waypoints are control points on a connector in draw.io. I use them to determine where the connector changes direction between its start and end points.
For example, a connector may cross another line or pass through an important part of my diagram. Instead of moving the connected elements, I can change only the connector path.
Waypoints let me improve the visual route of a connector without changing the relationship that the connector represents.
Therefore, they are especially useful in complex process, system, and architecture diagrams.
Why I Use Waypoints
Automatic connector routing works well in many situations. However, it cannot always create the clearest path.
For example, several connectors may cross in the same area. A connector may also run across a label or close to an unrelated element. In these cases, I use waypoints to guide the line through a clearer route.
My goal is not to create complicated connector paths. I use waypoints only when they make the diagram easier to understand.
How to Use Waypoints in draw.io
1. Select the Connector
First, I click the connector that I want to adjust. draw.io then displays its control points.
One of these points appears along the connector. I can select and move it to change the connector path.
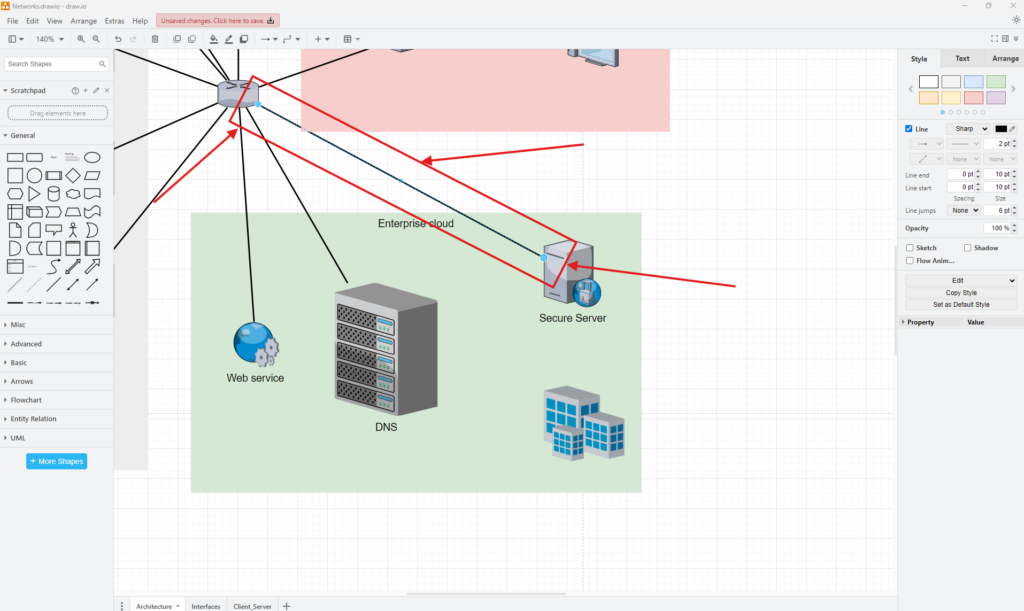
2. Move the Existing Waypoint
Next, I drag the control point to another position.
As I move it, draw.io changes the connector path. Therefore, I can create a bend and guide the connector around other elements.
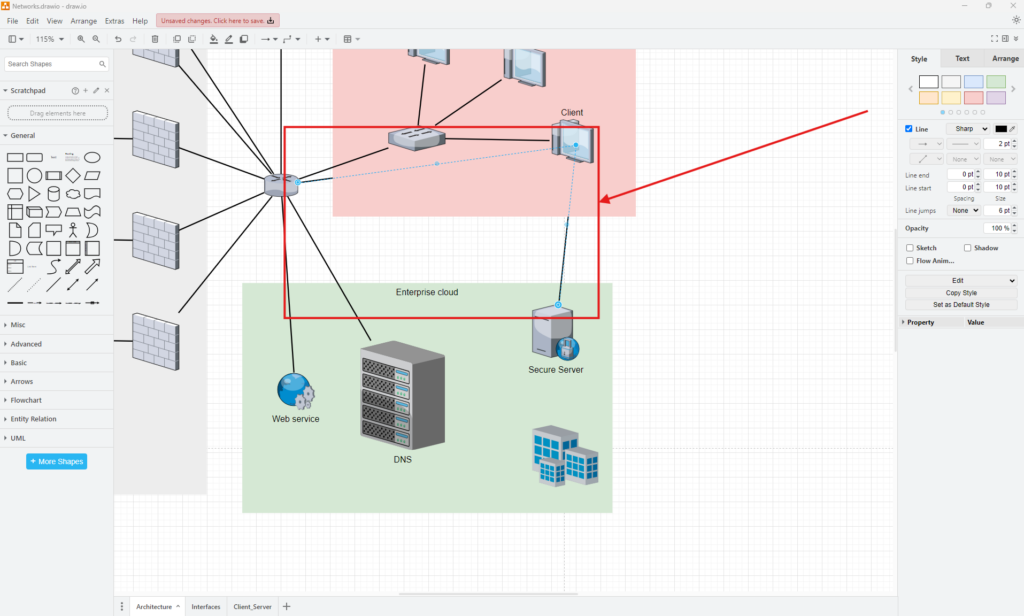
This simple adjustment is often enough. However, more complex routes may require additional waypoints.
3. Add Another Waypoint
To add another waypoint, I first select the connector. Then, I right-click it and choose Add Waypoint from the context menu.

draw.io adds another control point to the connector. I can now move this point independently.
Additional waypoints give me more control over where the connector changes direction.
4. Adjust the Additional Control Points
After adding a waypoint, I select the connector again. I can now see the additional points along its path.
Then, I drag these points into the required positions.
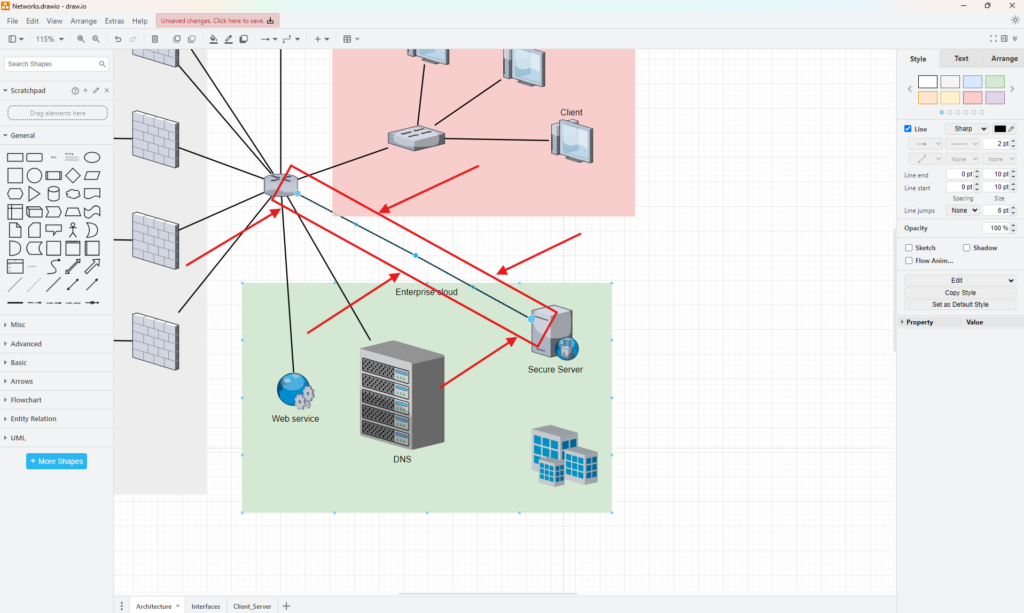
For example, I can move a connector away from a nearby object. I can also create a more deliberate route through an otherwise crowded section of the diagram.
5. Route a Connector Around Other Elements
Sometimes, I need more than one additional waypoint. For example, I may want the connector to pass around another shape instead of crossing it.
In that case, I add the required waypoints and position them one after another.

This gives me precise control over the path.
However, I avoid unnecessary bends. Every additional turn makes the connector slightly harder to follow.
I therefore use as few waypoints as possible while still creating a clear route.
6. Review the Connector Path
After positioning the waypoints, I review the complete connector.
I check whether the line crosses other connectors, runs through shapes, or passes too close to unrelated elements. If necessary, I move the waypoints again.

This step matters because technically correct routing does not automatically produce a readable diagram.
Therefore, I focus on clarity rather than geometric perfection.
How to Clear Waypoints in draw.io
Sometimes, manual routing no longer helps. I may also want to return to the original connector layout and start again.
In that case, I select the connector and use Arrange > Clear Waypoints. Alternatively, I can use the keyboard shortcut Alt+Shift+R.

Clearing the waypoints removes the manual routing information.
As a result, draw.io can return the connector toward its original alignment.
Clearing waypoints gives me a quick way to discard an unsuccessful route instead of manually undoing every adjustment.
When I Use Waypoints
I mainly use waypoints when a connector:
- crosses another important connector;
- passes through a shape;
- overlaps a label;
- runs too close to an unrelated element;
- takes an unnecessarily confusing route.
However, I do not manually route every connector.
Automatic routing usually creates simpler diagrams and requires less maintenance. Moreover, excessive manual routing can become difficult to manage when I later move shapes.
Therefore, I first let draw.io handle the connector automatically. I add waypoints only when the automatic path reduces readability.
Final Thoughts
Waypoints in draw.io give me direct control over connector paths. I can move an existing control point, add further waypoints, route a connector around other elements, and clear the waypoints when I want to start again.
At the same time, I keep the routing simple. Too many bends can create the same visual clutter that I wanted to remove.
A good connector makes the relationship easy to follow without drawing unnecessary attention to its own path.