
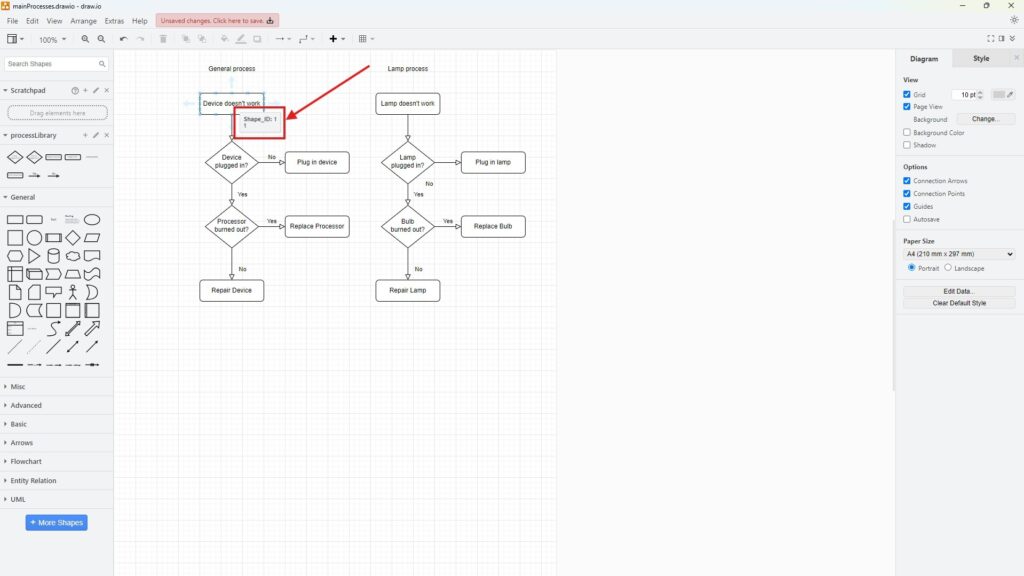
Metadata in draw.io helps me add useful details behind shapes and connectors. I use it to store custom properties, explain diagram elements, and manage complex projects more clearly. In this post, I show how metadata works, why it matters, and how it can improve documentation through a practical business case.
What is Draw.io?
draw.io is a versatile diagramming tool. It helps create flowcharts, process maps, and organizational charts. I’ve used it for mapping IT workflows, project designs, and more. Its simplicity hides a powerful feature: metadata. Metadata allows you to attach extra information to shapes and connectors. This capability makes diagrams more informative and interactive.
When you hover over a shape or connector, metadata usually appears as a tooltip. For example, if you’re documenting a software process, you can include metadata like “Step Owner” or “Completion Deadline.” This helps viewers quickly understand key details without cluttering the visual layout.
Editing Metadata in draw.io
Metadata lets me attach additional information to a specific shape or connector. I can define my own property names and assign values to them. For example, I can store an owner, a status, a priority, or an internal reference number.
I use metadata when information belongs to an element but does not need to appear as visible text on the diagram.
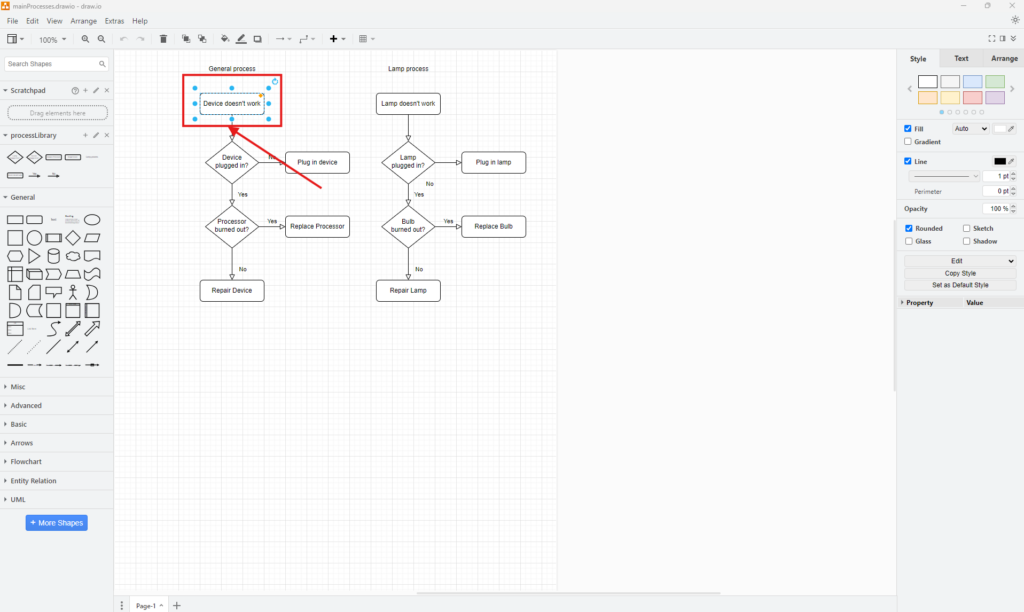
Step 1: Select the Shape or Connector
First, I select the shape or connector whose metadata I want to edit. This step determines which diagram element receives the additional data.
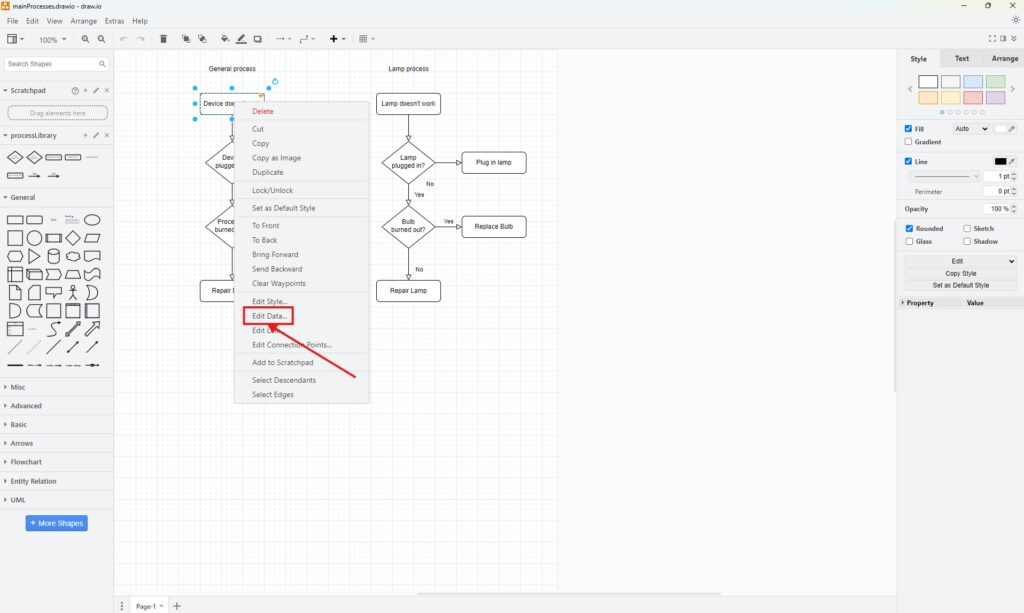
Next, I right-click the selected element. Then, I select Edit and click Edit Data.
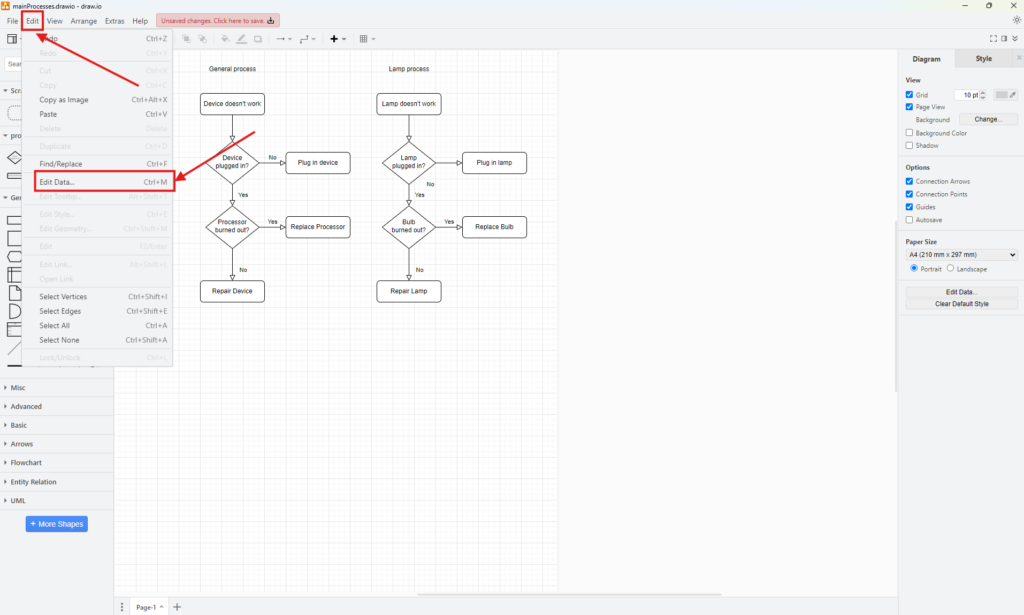
Alternatively, I can select Edit and then Edit Data from the editor menu. I can also use the keyboard shortcut Ctrl+M on Windows or Cmd+M on macOS.
All of these methods open the metadata for the selected shape or connector.
Step 2: Add a Property
The Edit Data dialog shows the metadata that belongs to the selected element. Property names appear on the left. Their corresponding values appear on the right.
To add new metadata, I enter a property name in the Enter Property Name field. Then, I click Add Property.
For example, I can add a custom property called Shape_ID.
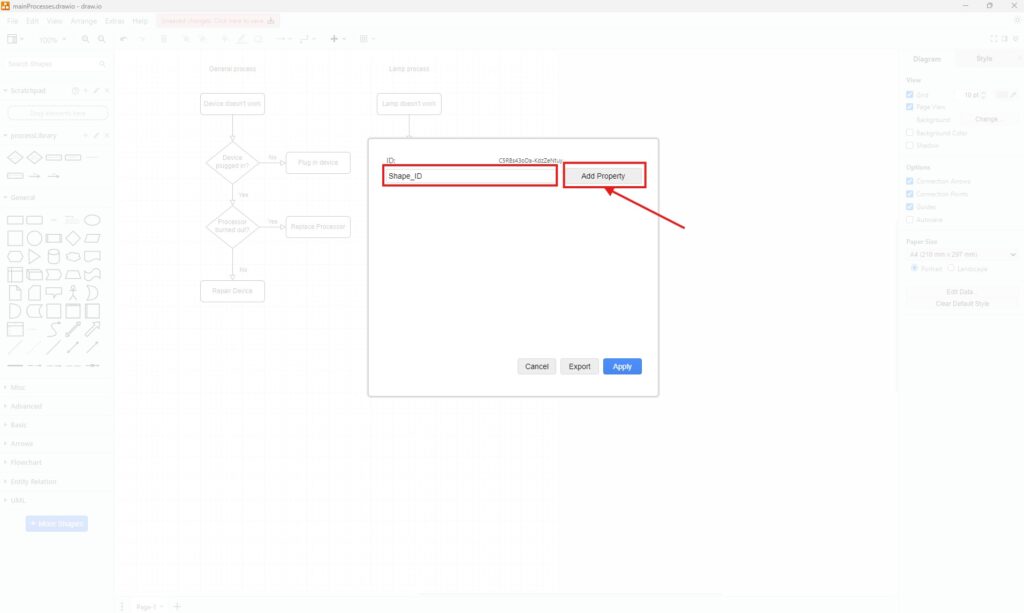
However, I need to distinguish this custom property from the built-in ID in draw.io. Every shape and connector already has its own unique ID.
A custom property called Shape_ID does not replace the built-in draw.io element ID.
After I add the property, I enter its value. In this example, I enter 1 as the value for Shape_ID.
Then, I click Apply to save the change.
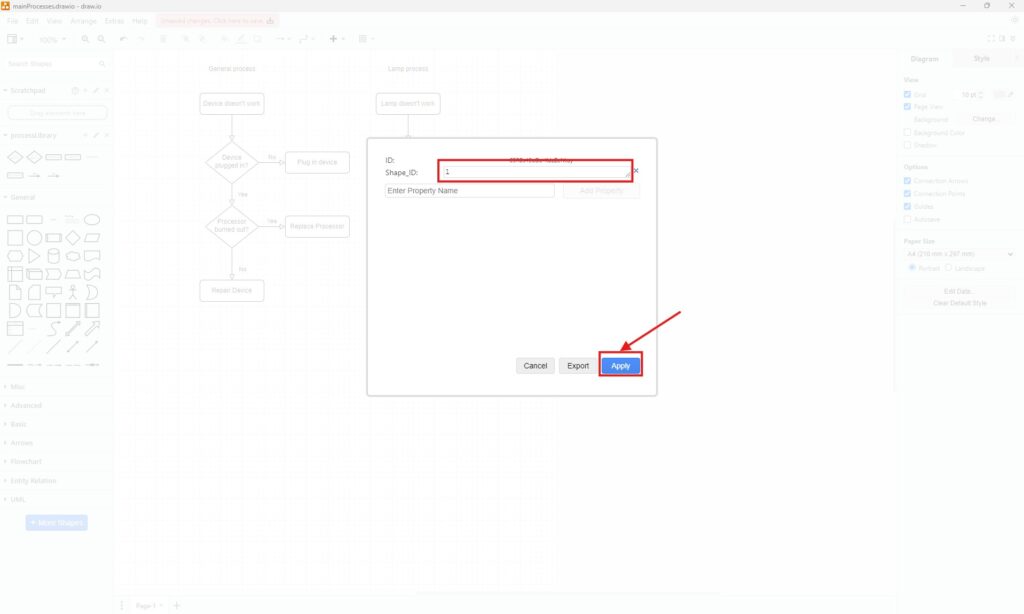
I can add several properties to the same element. For example, I can use properties such as Owner, Priority, Status, System, or Process_ID.
However, I keep my property names consistent. This makes the metadata easier to understand and maintain across a larger diagram.
Step 3: Verify the Metadata
After I click Apply, I return to the diagram.
Next, I move the pointer over the shape or connector. By default, draw.io displays the custom metadata in a tooltip.
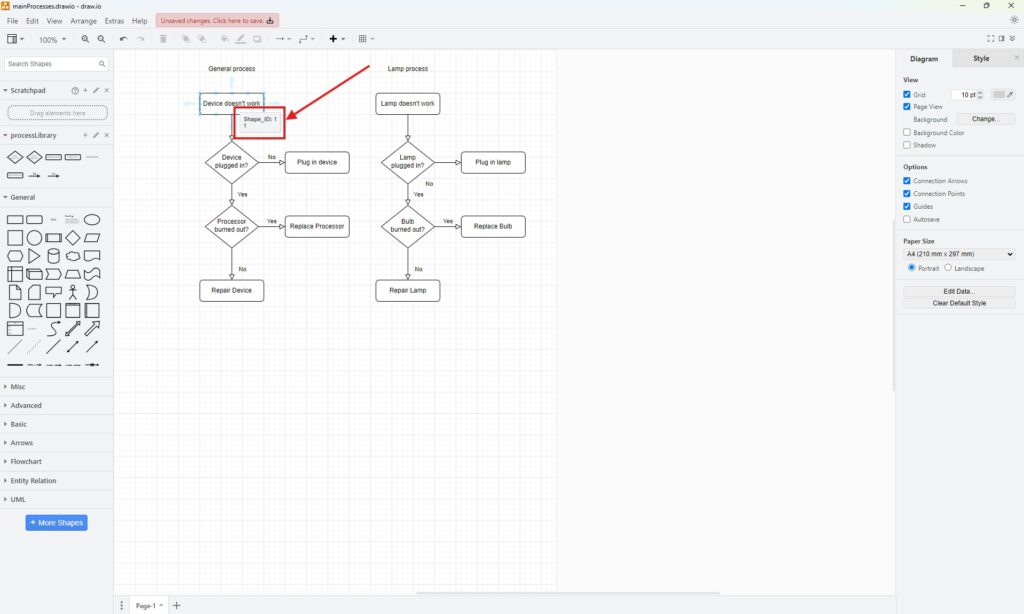
Therefore, I can quickly confirm that draw.io stored the property and its value correctly.
There is one important exception. If I define a dedicated tooltip property for the element, draw.io displays that tooltip instead of the other custom metadata when I hover over the element.
If the expected metadata does not appear when I hover over a shape, I first check whether the shape already contains a custom tooltip property.
How to Edit Existing Metadata in draw.io
To change existing metadata, I select the relevant shape or connector again. Then, I open Edit Data.
Next, I find the property that I want to update. I replace its current value with the new value. Finally, I click Apply.
Therefore, I do not need to delete and recreate a property when only its value changes.
How to Delete Metadata in draw.io
I can also remove a custom property.
First, I open Edit Data for the relevant element. Next, I click the cross next to the property that I want to remove. Then, I click Apply.
Deleting a custom property removes that metadata from the selected shape or connector.
Metadata and Shape Properties Are Different
I distinguish metadata from the visual properties of a shape.
Shape properties control characteristics of the diagram element. Metadata adds descriptive or structured information to that element.
For example, I can store a process owner or status as metadata without adding another visible label to the diagram. As a result, I can keep the visual model clear while still storing additional information with its elements.
Finding Elements by Their Metadata
Metadata becomes especially useful in larger diagrams. draw.io can search both labels and metadata.
Therefore, I use clear and consistent property names. For example, I use the same property name for Owner across all relevant shapes instead of alternating between Owner, Responsible Person, and Process Owner without a clear reason.
Consistent metadata creates a predictable structure that makes complex diagrams easier to search, understand, and maintain.
Conclusion
I manage metadata in draw.io through the Edit Data dialog. First, I select a shape or connector. Then, I add or edit custom properties and their values. Finally, I click Apply and verify the stored data.
Metadata allows me to add structured information without filling the diagram with additional visible text. Therefore, it is especially useful when I create diagrams that also serve as structured documentation.
What’s Next?
Now that I know how metadata in draw.io adds useful information behind shapes and connectors, I can make diagrams even easier to understand. However, not every explanation should appear directly on the canvas. That is where tooltips help. In the next article, I’ll explain How to Edit Tooltip in draw.io: A Simple Guide. You’ll learn how tooltips add helpful context, reduce visual clutter, and make diagram elements easier to explain. Click below to continue and improve your draw.io diagrams with clear tooltips.
Use Tools That Strengthen Requirements Engineering
Requirements engineering becomes clearer when I use tools that support visual thinking, documentation, task management, and process modeling. Therefore, I use draw.io to create diagrams, Confluence to organize knowledge, Jira to manage requirements-related work, and Camunda to model business processes. Each tool helps me turn complex information into a clearer structure. As a result, I can connect ideas, decisions, tasks, and workflows more effectively. In the main article on Requirements Engineering Tools, I show how these tools work together and help me build a stronger requirements engineering workflow.