Creating diagrams can feel overwhelming. But with draw.io (opens new tab), it’s incredibly simple and intuitive. In this article, I’ll walk you through the exact steps how to create a diagram using templates in draw.io. Whether you’re starting fresh or accessing templates through the menu, you’ll master it in no time.
What is draw.io?
Draw.io is a powerful, free diagramming tool. It allows you to create flowcharts, network diagrams, org charts, and more. It’s user-friendly and doesn’t require any advanced design skills. One of its best features is its extensive library of templates. These templates save time and help you create professional diagrams effortlessly.
Creating a Template Diagram When You Start draw.io
Starting with a template is one of the easiest ways to get started in draw.io. Here’s how:
1. Step: Open draw.io: Launch the draw.io application on your device. Wait for it to load completely.
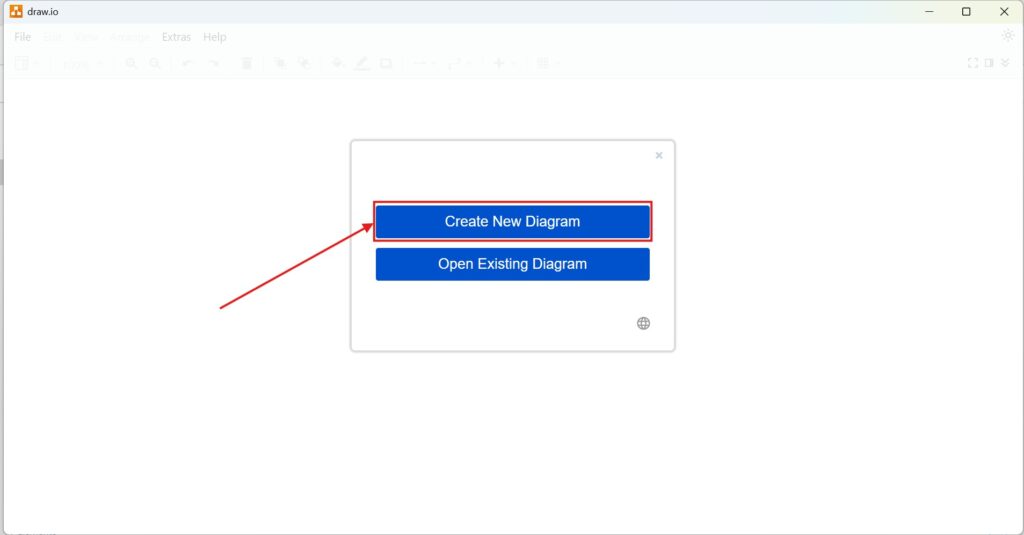
2. Step: Choose “Create New Diagram”: When the program loads, you’ll see two options: “Create New Diagram” and “Open Existing Diagram.” Click on “Create New Diagram.”
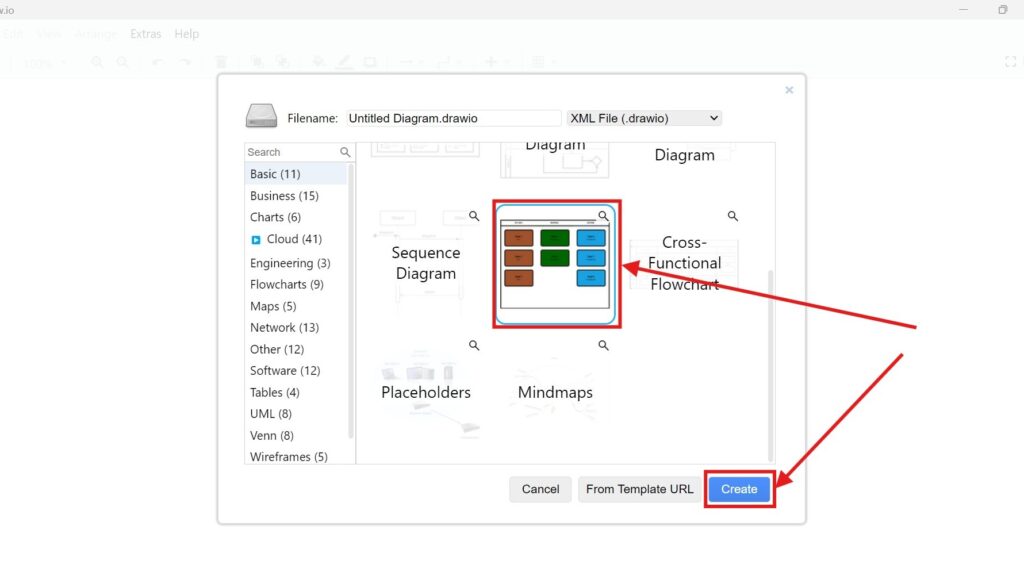
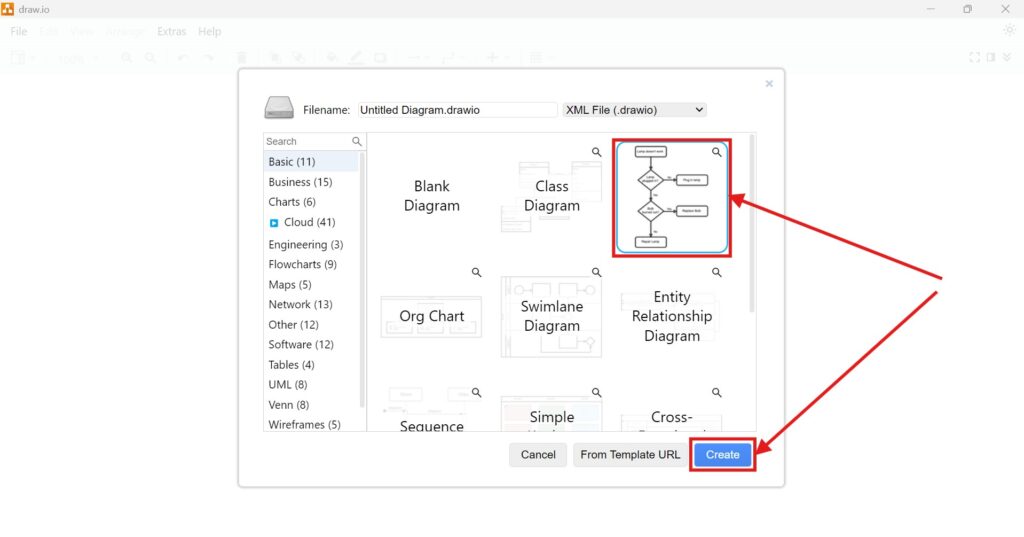
3. Step: Select a Template: You’ll be presented with a gallery of templates. For example, let’s say you’re working on a flowchart. Select the “Flowchart” template and click “Create” at the bottom left.
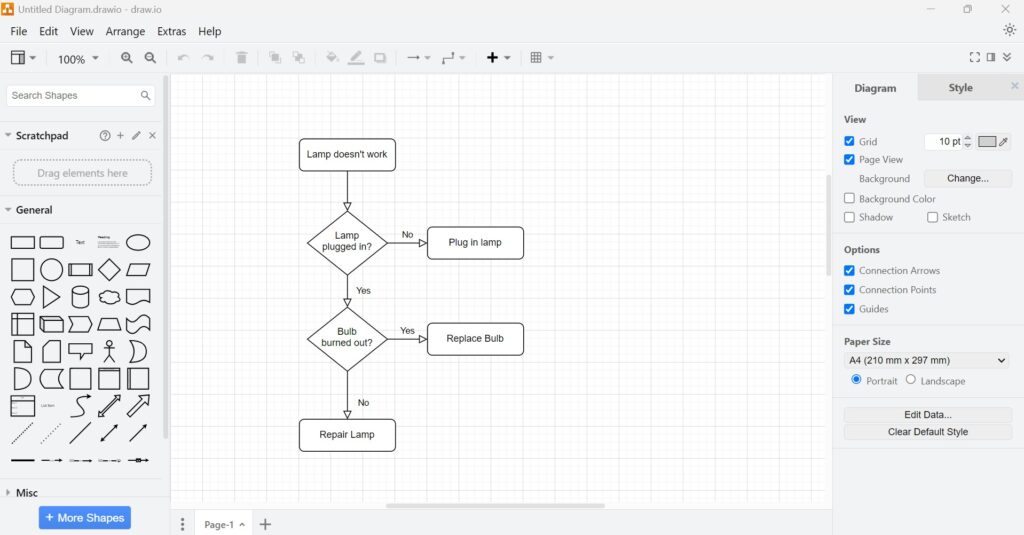
4. Step: Navigate to the Main Interface: Once you’ve selected your template, the program will take you to its main graphical user interface (GUI). Here, you can start editing your diagram immediately.
Example: Imagine creating an organizational chart. You open draw.io, select the “Org Chart” template, and within seconds, you’re ready to customize it with employee names and roles.
Creating a Diagram Using the Menu
Sometimes, you may already be working in draw.io and decide to create another diagram. The menu option is perfect for this. Follow these steps:
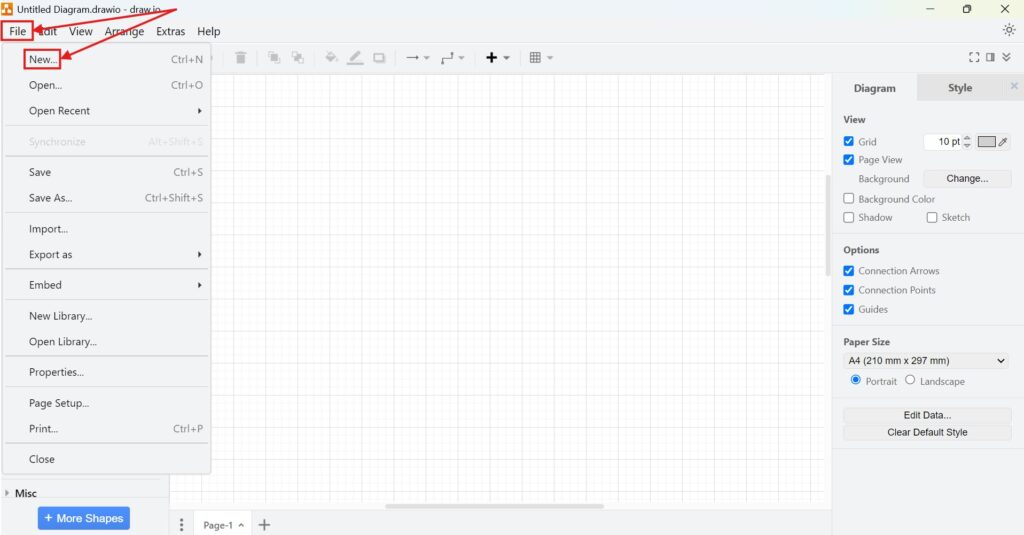
1. Step: Access the Menu: While in the main GUI, go to the top-left corner and click on “File.”
2. Step: Select “New”: In the dropdown menu, choose “New.” This action will bring you to the template gallery.
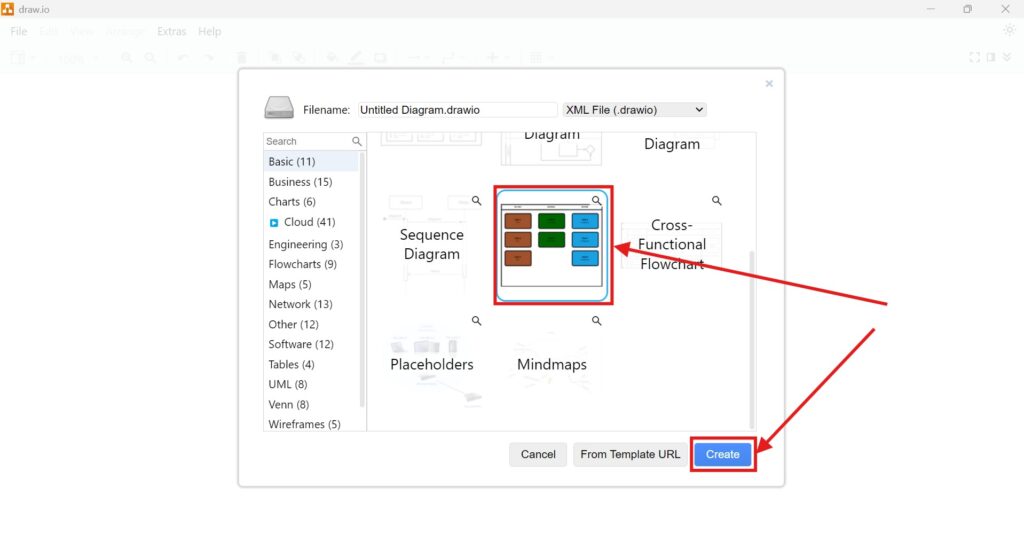
3. Step: Choose a Template: Like before, pick a template from the gallery. For example, let’s select the “Simple Kanban Board” template. Click on “Create.”
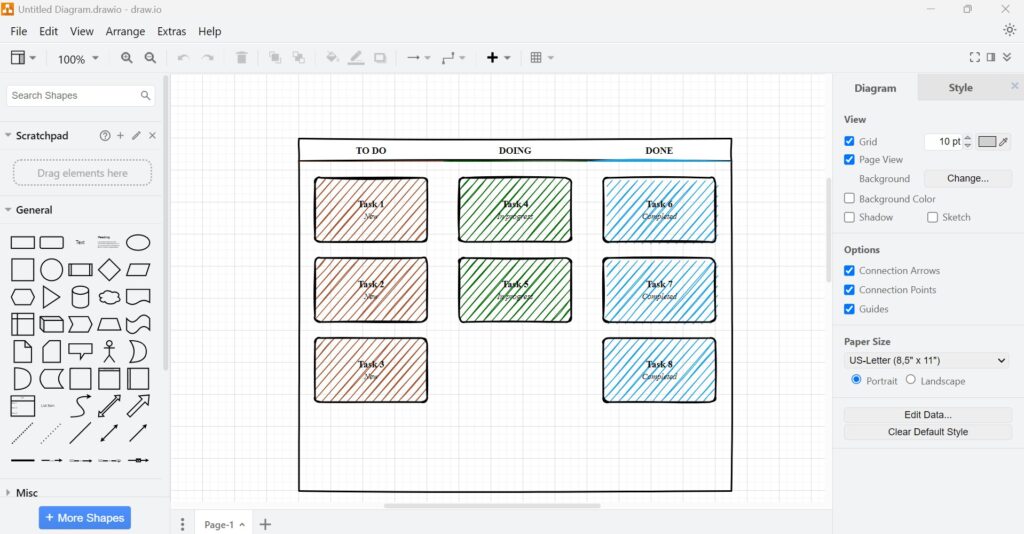
4. Step: Return to the GUI: Your chosen template will load, and you’ll be back in the main GUI, ready to build your diagram.
Example: Suppose you’re tasked with mapping a network infrastructure. Using the menu, you quickly select the “Network Diagram” template and begin plotting servers, routers, and connections.
Business Case: Streamlining Onboarding Processes
Let’s put this into context. Imagine you’re a manager tasked with onboarding new employees. You need an organized, visual representation of the onboarding process.
- Open draw.io.
- Choose the “Process Flowchart” template.
- Customize the template to include steps like orientation, training sessions, and departmental introductions.
Within minutes, you’ve created a polished, easy-to-understand diagram. You can share it with your team to ensure everyone is aligned.
Final Thoughts
Creating diagrams in draw.io is a breeze when you leverage its templates. Whether you’re starting from scratch or accessing templates through the menu, the process is straightforward. With templates, you save time, reduce complexity, and produce professional results every time. Ready to create your next diagram? Dive into draw.io and explore its powerful features today.

